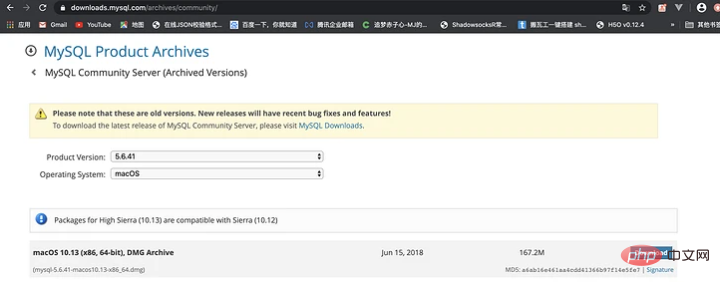
Download-Adresse: https://downloads.mysql.com/archives/community/
Baidu-Netzwerkfestplatten-Download: Link: https://pan.baidu.com/s/1nceFzJKK7_dJh2gUAtVgWw Passwort: qm5z

Installation
Doppelklicken Sie auf die heruntergeladene DMG-Datei. Das PKG-Popup-Fenster wird angezeigt. Doppelklicken Sie dann auf das PKG-Symbol, um die Installationsoberfläche aufzurufen. Fahren Sie auf der Installationsoberfläche bis zum Ende fort Die Installation ist erfolgreich.
Umgebungsvariablen
Der erste Schritt besteht darin, in das Stammverzeichnis im Terminal zu wechseln und die Datei ./.bash_profile zu bearbeiten
➜  ~ cd ~
➜  ~ vim ./.bash_profile
Der zweite Schritt besteht darin, die VIM-Bearbeitungsumgebung aufzurufen. Drücken Sie i, um in den Einfügemodus zu gelangen. Geben Sie
export PATH=$PATH:/usr/local/mysql/bin
export PATH=$PATH:/usr/local/mysql/support-files
Der dritte Schritt ein. Drücken Sie Esc, um den Einfügemodus zu verlassen. Geben Sie Folgendes ein: wq, um die Konfigurationsdatei zu speichern.
:wq
Geben Sie im vierten Schritt den folgenden Befehl in die Terminalschnittstelle ein, damit die Änderung der Konfigurationsdatei wirksam wird , und prüfen Sie, ob die Umgebungsvariablen erfolgreich gesetzt wurden MYSQL-Dienst
➜  ~ echo $PATH
/usr/local/bin:/usr/bin:/bin:/usr/sbin:/sbin
➜  ~ source ~/.bash_profile
➜  ~ echo $PATH
/usr/local/bin:/usr/bin:/bin:/usr/sbin:/sbin:/usr/local/mysql/bin:/usr/local/mysql/support-files
➜  ~
Starten
Der erste Schritt besteht darin,
➜  ~ sudo mysql.server status
Password:
 ERROR! MySQL is not running
Schritt 2: Starten Sie den MYSQL-Dienst. Geben Sie nach erfolgreichem Start weiterhin
➜  ~ sudo mysql.server start
Starting MySQL
.Logging to '/usr/local/mysql/data/mj.local.err'.
 SUCCESS!
➜  ~ sudo mysql.server stop
Shutting down MySQL
. SUCCESS!
Initialisierungseinstellungen
Legen Sie das Anfangskennwort fest, führen Sie nach Eingabe der MySQL-Datenbank die folgende Anweisung aus und setzen Sie das Kennwort des aktuellen Root-Benutzers auf root➜ ~ sudo mysql.server restart ERROR! MySQL server PID file could not be found! Starting MySQL . SUCCESS!
➜  ~ sudo mysql.server start
Starting MySQL
.Logging to '/usr/local/mysql/data/mj.local.err'.
 SUCCESS!
Konfiguration
Enter/ usr/local/mysql/support-files Verzeichnis, es gibt eine Datei my-default.cnf
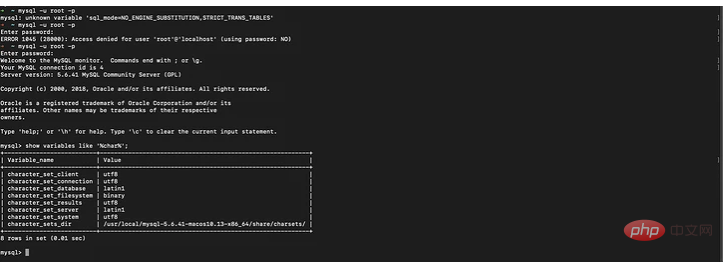
➜ ~ mysql -u root -p
Nach dem Login kopieren
Kopieren Sie die Datei my-default.cnf im Verzeichnis auf den Desktop und benennen Sie sie in my um .cnf,Enter password:
Welcome to the MySQL monitor. Commands end with ; or \g.
Your MySQL connection id is 1
Server version: 5.6.41 MySQL Community Server (GPL)
Copyright (c) 2000, 2018, Oracle and/or its affiliates. All rights reserved.
Oracle is a registered trademark of Oracle Corporation and/or its
affiliates. Other names may be trademarks of their respective
owners.
Type 'help;' or '\h' for help. Type '\c' to clear the current input statement.
mysql>
Nach dem Login kopieren
Ersetzen Sie den Inhalt durch den folgenden Inhalt
➜ ~ mysql -u root -p
Enter password:
Welcome to the MySQL monitor.  Commands end with ; or \g.
Your MySQL connection id is 1
Server version: 5.6.41 MySQL Community Server (GPL)

Copyright (c) 2000, 2018, Oracle and/or its affiliates. All rights reserved.

Oracle is a registered trademark of Oracle Corporation and/or its
affiliates. Other names may be trademarks of their respective
owners.

Type 'help;' or '\h' for help. Type '\c' to clear the current input statement.

mysql>
➜  ~ mysql -u root -p
Enter password:
Welcome to the MySQL monitor.  Commands end with ; or \g.
Your MySQL connection id is 2
Server version: 5.6.41 MySQL Community Server (GPL)

Copyright (c) 2000, 2018, Oracle and/or its affiliates. All rights reserved.

Oracle is a registered trademark of Oracle Corporation and/or its
affiliates. Other names may be trademarks of their respective
owners.

Type 'help;' or '\h' for help. Type '\c' to clear the current input statement.

mysql> set password = password('root');
Query OK, 0 rows affected (0.01 sec)

mysql>/etc und starten Sie MYSQL neu
mysql> exit
Bye
➜  ~
vor dem Befehl hinzufügen, um das Änderungsergebnis zu erkennen
/usr/local/mysql/support-files目录,里面有个文件my-default.cnf
➜  ~ cd /usr/local/mysql/support-files
➜  support-files ll
total 64
-rwxr-xr-x  1 root  wheel   1.1K  6 15  2018 binary-configure
-rw-r--r--  1 root  wheel   773B  6 15  2018 magic
-rw-r--r--  1 root  wheel   1.1K  6 15  2018 my-default.cnf
-rwxr-xr-x  1 root  wheel   894B  6 15  2018 mysql-log-rotate
-rwxr-xr-x  1 root  wheel    10K  6 15  2018 mysql.server
-rwxr-xr-x  1 root  wheel   1.0K  6 15  2018 mysqld_multi.server
➜  support-files
将目录下的my-default.cnf文件复制到桌面上,改名为my.cnf,
➜  support-files ll
total 64
-rwxr-xr-x  1 root  wheel   1.1K  6 15  2018 binary-configure
-rw-r--r--  1 root  wheel   773B  6 15  2018 magic
-rw-r--r--  1 root  wheel   1.1K  6 15  2018 my-default.cnf
-rwxr-xr-x  1 root  wheel   894B  6 15  2018 mysql-log-rotate
-rwxr-xr-x  1 root  wheel    10K  6 15  2018 mysql.server
-rwxr-xr-x  1 root  wheel   1.0K  6 15  2018 mysqld_multi.server
➜  support-files cp my-default.cnf /Users/a1/Desktop/my.cnf
将内容替换为下面的内容
[mysqld]
default-storage-engine=INNODB
character-set-server=utf8
port = 3306

[client]
default-character-set=utf8
将修改后的my.cnf文件复制到/etc
➜  /etc cp /Users/a1/Desktop/my.cnf ./
cp: ./my.cnf: Permission denied
➜  /etc sudo cp /Users/a1/Desktop/my.cnf ./
Password:
➜  /etc ll
total 1064
......
-rw-------   1 root  wheel   7.3K  2 29 14:10 master.passwd
-rw-r--r--   1 root  wheel   1.2K  5 17 17:24 my.cnf
-rw-r--r--   1 root  wheel    11B  2 29 14:43 nanorc
-rw-r--r--   1 root  wheel    53B  2 29 14:09 networks
......
➜  /etc
An diesem Punkt können Sie die Datenbank gerne nutzen! ! !

MySQL-Video-Tutorial
“


