So verwenden Sie das Python-GUI-Layout-Tool Tkinter
Grafische Benutzeroberfläche (GUI)
Die grafische Benutzeroberfläche (GUI) ist nichts anderes als eine Desktop-Anwendung, die uns bei der Interaktion mit dem Computer hilft.
Eine GUI-Anwendung wie ein Texteditor kann erstellen, lesen, aktualisieren und verschiedene Dateitypen löschen
Apps wie Sudoku, Schach und Solitaire sind Spielversionen von GUI-Programmen
Es gibt auch GUI-Anwendungen wie Google Chrome, Firefox und Microsoft Edge. Sie werden zum Surfen im Internet verwendet
Dies sind einige verschiedene Arten von GUI-Anwendungen, die wir täglich auf Computern verwenden. Tatsächlich können wir über Tkinter auch einfache ähnliche Anwendungen erstellen. Heute geben wir eine Einführung in die GUI. Eine sehr einfache und schöne GUI-Anwendung wird erstellt
Python Bibliothek zum Erstellen von GUI
Python verfügt über eine große Anzahl von Bibliotheken von Drittanbietern. Für GUI-Bibliotheken gibt es hauptsächlich die folgenden:
- Kivy
- Python QT
- wxPython
- Tkinter
-
Tkinter-Grundlagen. Das Bild unten zeigt, wie die Anwendung tatsächlich in Tkinter ausgeführt wird Wir importieren zuerst das Tkinter-Modell, dann erstellen wir das Hauptfenster, in diesem Fenster führen wir Vorgänge aus und zeigen alle visuellen Effekte an, als nächstes fügen wir Widgets hinzu und schließlich betreten wir die Hauptereignisschleife
Hier gibt es zwei wichtige Schlüsselwörter
Widgets
- Die Ereignisschleife weist den Code grundsätzlich an, das Fenster so lange anzuzeigen, bis wir es manuell schließen. Dies ist die Endlosschleife, die im Hintergrund läuft. Bei Widgets werden wir sie untersuchen Später separat
- Das folgende Codebeispiel wird Ihnen ein tieferes Verständnis vermittelnWir importieren das Tkinter-Paket und definieren ein Fenster, und dann können wir einen Fenstertitel ändern, wann immer die Anwendung geöffnet wird. Der Titel wird auf dem Titel angezeigt tab
import tkinter
window = tkinter.Tk()
# to rename the title of the window window.title("GUI")
# pack is used to show the object in the window
label = tkinter.Label(window, text = "Hello World!").pack()
window.mainloop()
Nach dem Login kopieren
Tkinter Widgets
Also am Ende: Was sind Widgets
?Widgets ähneln Elementen in HTML, wir können in Tkinter verschiedene Arten von Widgets für verschiedene Arten von Elementen finden.
Sehen wir uns eine kurze Einführung all dieser Widgets in Tkinter an.
Canvas – Canvas wird zum Zeichnen verwendet Formen in der GUI
Button – Button wird zum Platzieren von Schaltflächen in Tkinter verwendet 
- Checkbutton – Checkbutton wird zum Erstellen von Kontrollkästchen in Anwendungen verwendet
- Entry – Eintrag wird zum Erstellen von Eingabefeldern in der GUI verwendet
- Frame – Frame wird als Container in Tkinter verwendet.
- Label – Label wird zum Erstellen einzeiliger Widgets wie Text, Bilder usw. verwendet GUI
- Sehen wir uns die Verwendung der einzelnen Widgets einzeln an
l1 = Label(window, text="萝卜大杂烩!", font=("ArialBold", 50))
l1.grid(column=0, row=0)
Nach dem Login kopieren Es gibt auch eine Funktionsgeometrie, die im Wesentlichen dazu dient, die Fenstergröße zu ändern und gemäß unseren Anforderungen einzustellen.
el1 = Label(window, text="萝卜大杂烩!", font=("ArialBold", 50)) window.geometry('350x200')Nach dem Login kopierenIn diesem Fall stellen wir sie auf 350 Pixel breit und 200 Pixel hoch ein. Weiter ist die Schaltfläche
Schaltfläche
Schaltflächen sind Beschriftungen sehr ähnlich. Wir erstellen eine Variable und verwenden die Widgets-Syntax, um zu definieren, was die Schaltfläche ausdrücken möchte.
window.geometry('350x200')
bt = Button(window, text="Enter")
 Wir definieren eine Funktion namens „clicked“, die eine Textnachricht anzeigen kann, und fügen der Schaltfläche einen Parameter namens „command“ hinzu Definition für Call-Click-Ereignis

Entry
它用于在 GUI 中创建输入字段以接收文本输入
txt = Entry(window, width=10)
txt.grid(column=1, row=0)
def clicked():
    res = "Welcome to " + txt.get()
    l1.configure(text=res)
bt = Button(window, text="Enter", bg="orange", fg="red", command=clicked)在这里,我们使用 Tkinter Entry 类创建一个文本框,grid 定义我们希望窗口小部件位于何处
同时 clicked 函数接收 Entry 的文本信息

Combobox
这是一个带有某些选项的下拉菜单
from tkinter.ttk import *
combo = Combobox(window)
combo['values']= (1, 2, 3, 4, 5, "Text")
combo.current(3)
combo.grid(column=0, row=0)

这样一个下拉菜单就完成了
Checkbutton
复选按钮是非常常用的组件
chk_state = BooleanVar()
chk_state.set (True)
chk = Checkbutton(window, text="Select", var=chk_state)
chk.grid(column=4, row=0)
我们首先创建一个 booleanvar 类型的变量,这是一个 Tkinter 变量
默认情况下,我们将设置状态保持为 true,这代表按钮已经被选中 接下来,我们将 chk_state 传递给 checkbutton 类来为我们设置检查状态

Radio Button
单选按钮也是非常常用的
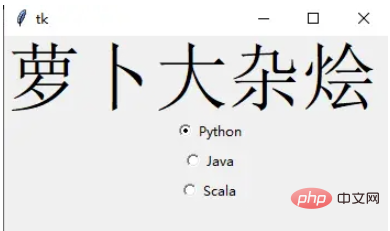
rad1 = Radiobutton(window, text=Python', value=1)
rad2 = Radiobutton(window, text=Java', value=2)
rad3 = Radiobutton(window, text=Scala', value=3)
rad1.grid(column=0, row=0)
rad2.grid(column=1, row=0)
rad3.grid(column=2, row=0)
在这里,我们使用了不同的参数值,1,2和3,如果它们相同,则会导致冲突并出现错误
它们的文本数据是可以相同,在这里,我们使用了 Python、Java 和 Scala
Scrolled Text
滚动文本组件
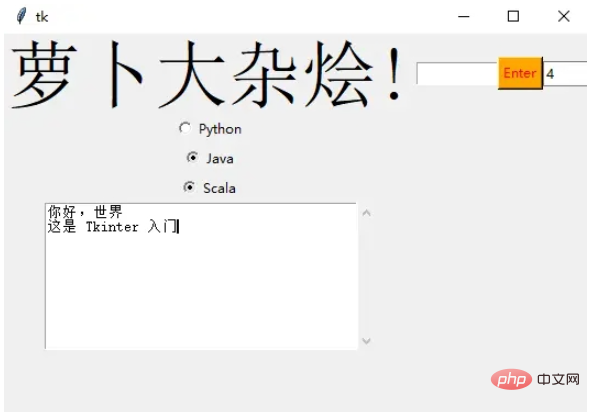
scro_txt = scrolledtext.ScrolledText(window, width=40,height=10)
scro_txt.grid(column=0, row=4)
我们指定了窗口的高和宽,否则默认会填充整个 Windiws 窗口
Message Box
消息组件可以方便的弹出提醒消息
def clicked():
    messagebox.showinfo('Message title', 'Message content')
btn = Button(window,text=‘ENTER', command=clicked)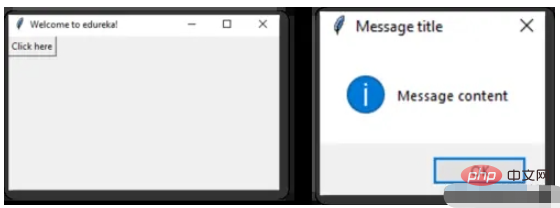
SpinBox
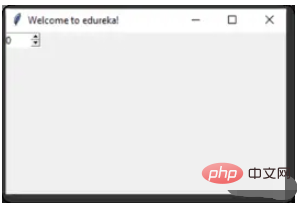
Spinbox 也是一个常见的组件,有两个选项卡,存在向上和向下滚动选项卡
pin = Spinbox(window, from_=0, to=100, width=5)
有 3 个参数——from、to 和 width
From – 告诉我们范围的开始和默认值
to – 给我们范围的上限阈值
width 基本上是将 widget 的大小设置为5个字符的空格
Geometry
Tkinter 中的所有 Widgets 都会有一些位置信息,这些度量使得我们可以组织 Widgets 及其父框架、窗口等
Tkinter 具有以下三个布局方式
pack():- 它在块中组织 Widgets,这意味着它占据了整个可用宽度,这是在窗口中显示 Widgets 的标准方法
grid():- 它以类似表格的结构组织 Widgets
place():- 它将 Widgets 放置在我们想要的特定位置
组织布局
为了在窗口中安排布局,我们将使用 Frame 类
Frame -- 在窗口中创建分区,我们可以根据需要使用 pack() 方法的侧面参数对齐框架
Button -- 在窗口中创建一个按钮,需要传递几个参数,如文本(按钮的值)、fg(文本的颜色)、bg(背景颜色)
在下面的代码中,我们使用 window、top_frame、bottom_frame 来布局
import tkinter
window = tkinter.Tk()
window.title("GUI")
# creating 2 frames TOP and BOTTOM
top_frame = tkinter.Frame(window).pack()
bottom_frame = tkinter.Frame(window).pack(side = "bottom")
# now, create some widgets in the top_frame and bottom_frame
btn1 = tkinter.Button(top_frame, text = "Button1", fg = "red").pack()# 'fg - foreground' is used to color the contents
btn2 = tkinter.Button(top_frame, text = "Button2", fg = "green").pack()# 'text' is used to write the text on the Button
btn3 = tkinter.Button(bottom_frame, text = "Button2", fg = "purple").pack(side = "left")# 'side' is used to align the widgets
btn4 = tkinter.Button(bottom_frame, text = "Button2", fg = "orange").pack(side = "left")
window.mainloop()
再来看一个登录的小栗子
import tkinter
window = tkinter.Tk()
window.title("GUI")
# creating 2 text labels and input labels
tkinter.Label(window, text = "Username").grid(row = 0) # this is placed in 0 0
# 'Entry' is used to display the input-field
tkinter.Entry(window).grid(row = 0, column = 1) # this is placed in 0 1
tkinter.Label(window, text = "Password").grid(row = 1) # this is placed in 1 0
tkinter.Entry(window).grid(row = 1, column = 1) # this is placed in 1 1
# 'Checkbutton' is used to create the check buttons
tkinter.Checkbutton(window, text = "Keep Me Logged In").grid(columnspan = 2) # 'columnspan' tells to take the width of 2 columns
# you can also use 'rowspan' in the similar manner
window.mainloop()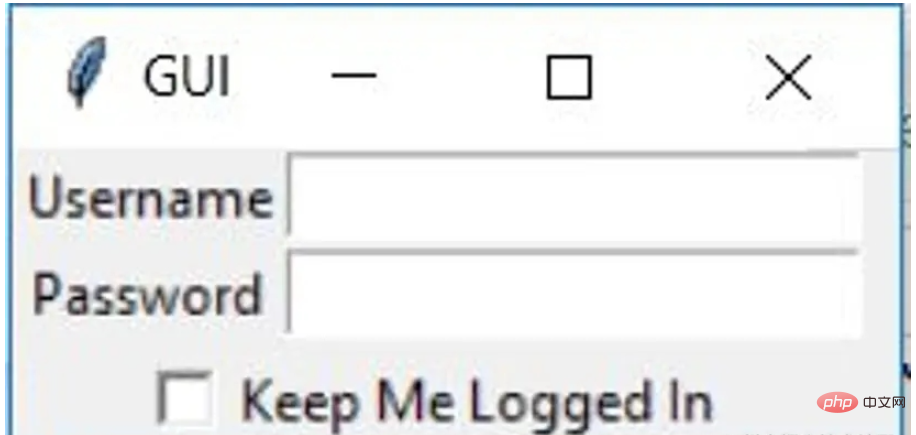
下面我们来了解 binding 函数
binding 函数
每当事件发生时调用函数就是绑定函数
在下面的示例中,当单击按钮时,它会调用一个名为 say_hi 的函数。 函数 say_hi 会创建一个带有文本 Hi 的新标签
import tkinter
window = tkinter.Tk()
window.title("GUI")
# creating a function called say_hi()
def say_hi():
    tkinter.Label(window, text = "Hi").pack()
tkinter.Button(window, text = "Click Me!", command = say_hi).pack() # 'command' is executed when you click the button
# in this above case we're calling the function 'say_hi'.
window.mainloop()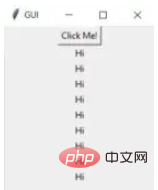
另一种绑定函数的方法是使用事件,事件类似于鼠标移动、鼠标悬停、单击和滚动等等
import tkinter
window = tkinter.Tk()
window.title("GUI")
# creating a function with an arguments 'event'
def say_hi(event): # you can rename 'event' to anything you want
    tkinter.Label(window, text = "Hi").pack()
btn = tkinter.Button(window, text = "Click Me!")
btn.bind("Button-1", say_hi) # 'bind' takes 2 parameters 1st is 'event' 2nd is 'function'
btn.pack()
window.mainloop()单击事件有 3 种不同的类型,分别是 leftClick、middleClick 和 rightClick
下面的代码将使用对于的文本创建一个新标签
import tkinter
window = tkinter.Tk()
window.title("GUI")
#creating 3 different functions for 3 events
def left_click(event):
    tkinter.Label(window, text = "Left Click!").pack()
def middle_click(event):
    tkinter.Label(window, text = "Middle Click!").pack()
def right_click(event):
    tkinter.Label(window, text = "Right Click!").pack()
window.bind("Button-1", left_click)
window.bind("Button-2", middle_click)
window.bind("Button-3", right_click)
window.mainloop()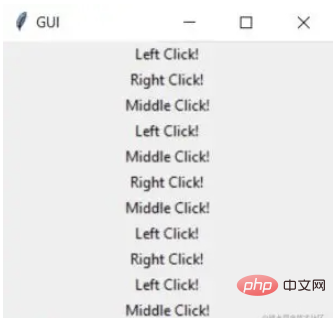
Images 和 Icons
我们可以使用 PhotoImage 方法添加图像和图标
import tkinter
window = tkinter.Tk()
window.title("GUI")
# taking image from the directory and storing the source in a variable
icon = tkinter.PhotoImage(file = "4.PNG")
# displaying the picture using a 'Label' by passing the 'picture' variriable to 'image' parameter
label = tkinter.Label(window, image = icon)
label.pack()
window.mainloop()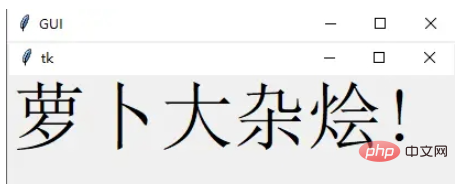
好了,进步的 Tkinter 知识我们都梳理完毕了,下面就完成一个简单的实战项目吧
计算器 APP
首先初始化页面
window = Tk()
window.geometry("350x380")
window.resizable(0, 0)  # this prevents from resizing the window
window.title("小小计算器")接下来定义输入数字框
input_text = StringVar()
input_frame = Frame(window, width=312, height=50, bd=0, highlightbackground="black", highlightcolor="black",
                    highlightthickness=1)
input_frame.pack(side=TOP)
input_field = Entry(input_frame, font=('arial', 18, 'bold'), textvariable=input_text, width=50, bg="#eee", bd=0,
                    justify=RIGHT)
input_field.grid(row=0, column=0)
input_field.pack(ipady=10)然后定义按钮方法,我们以清除按钮和除法按钮为例
clear = Button(btns_frame, text="C", fg="black", width=32, height=3, bd=0, bg="#eee", cursor="hand2",
               command=lambda: btn_clear()).grid(row=0, column=0, columnspan=3, padx=1, pady=1)
divide = Button(btns_frame, text="/", fg="black", width=10, height=3, bd=0, bg="#eee", cursor="hand2",
command=lambda: btn_click("/")).grid(row=0, column=3, padx=1, pady=1)最后就是计算equal逻辑
equals = Button(btns_frame, text="=", fg="black", width=10, height=3, bd=0, bg="#eee", cursor="hand2",
               command=lambda: btn_equal()).grid(row=4, column=3, padx=1, pady=1)
def btn_equal():
   global expression
   result = str(eval(expression))
   input_text.set(result)
expression = ""Das obige ist der detaillierte Inhalt vonSo verwenden Sie das Python-GUI-Layout-Tool Tkinter. Für weitere Informationen folgen Sie bitte anderen verwandten Artikeln auf der PHP chinesischen Website!

Heiße KI -Werkzeuge

Undresser.AI Undress
KI-gestützte App zum Erstellen realistischer Aktfotos

AI Clothes Remover
Online-KI-Tool zum Entfernen von Kleidung aus Fotos.

Undress AI Tool
Ausziehbilder kostenlos

Clothoff.io
KI-Kleiderentferner

AI Hentai Generator
Erstellen Sie kostenlos Ai Hentai.

Heißer Artikel

Heiße Werkzeuge

Notepad++7.3.1
Einfach zu bedienender und kostenloser Code-Editor

SublimeText3 chinesische Version
Chinesische Version, sehr einfach zu bedienen

Senden Sie Studio 13.0.1
Leistungsstarke integrierte PHP-Entwicklungsumgebung

Dreamweaver CS6
Visuelle Webentwicklungstools

SublimeText3 Mac-Version
Codebearbeitungssoftware auf Gottesniveau (SublimeText3)

Heiße Themen
 1377
1377
 52
52
 Muss MySQL bezahlen?
Apr 08, 2025 pm 05:36 PM
MySQL hat eine kostenlose Community -Version und eine kostenpflichtige Enterprise -Version. Die Community -Version kann kostenlos verwendet und geändert werden, die Unterstützung ist jedoch begrenzt und für Anwendungen mit geringen Stabilitätsanforderungen und starken technischen Funktionen geeignet. Die Enterprise Edition bietet umfassende kommerzielle Unterstützung für Anwendungen, die eine stabile, zuverlässige Hochleistungsdatenbank erfordern und bereit sind, Unterstützung zu bezahlen. Zu den Faktoren, die bei der Auswahl einer Version berücksichtigt werden, gehören Kritikalität, Budgetierung und technische Fähigkeiten von Anwendungen. Es gibt keine perfekte Option, nur die am besten geeignete Option, und Sie müssen die spezifische Situation sorgfältig auswählen.
 Hadidb: Eine leichte, horizontal skalierbare Datenbank in Python
Apr 08, 2025 pm 06:12 PM
Hadidb: Eine leichte, hochrangige skalierbare Python-Datenbank Hadidb (HadIDB) ist eine leichte Datenbank in Python mit einem hohen Maß an Skalierbarkeit. Installieren Sie HadIDB mithilfe der PIP -Installation: PipinstallHadIDB -Benutzerverwaltung erstellen Benutzer: createUser (), um einen neuen Benutzer zu erstellen. Die Authentication () -Methode authentifiziert die Identität des Benutzers. fromHadidb.operationImportUseruser_obj = user ("admin", "admin") user_obj.
 Navicat -Methode zum Anzeigen von MongoDB -Datenbankkennwort
Apr 08, 2025 pm 09:39 PM
Es ist unmöglich, das MongoDB -Passwort direkt über Navicat anzuzeigen, da es als Hash -Werte gespeichert ist. So rufen Sie verlorene Passwörter ab: 1. Passwörter zurücksetzen; 2. Überprüfen Sie die Konfigurationsdateien (können Hash -Werte enthalten). 3. Überprüfen Sie Codes (May Hardcode -Passwörter).
 Kann sich MySQL Workbench mit Mariadb verbinden?
Apr 08, 2025 pm 02:33 PM
MySQL Workbench kann eine Verbindung zu MariADB herstellen, vorausgesetzt, die Konfiguration ist korrekt. Wählen Sie zuerst "Mariadb" als Anschlusstyp. Stellen Sie in der Verbindungskonfiguration Host, Port, Benutzer, Kennwort und Datenbank korrekt ein. Überprüfen Sie beim Testen der Verbindung, ob der Mariadb -Dienst gestartet wird, ob der Benutzername und das Passwort korrekt sind, ob die Portnummer korrekt ist, ob die Firewall Verbindungen zulässt und ob die Datenbank vorhanden ist. Verwenden Sie in fortschrittlicher Verwendung die Verbindungspooling -Technologie, um die Leistung zu optimieren. Zu den häufigen Fehlern gehören unzureichende Berechtigungen, Probleme mit Netzwerkverbindung usw. Bei Debugging -Fehlern, sorgfältige Analyse von Fehlerinformationen und verwenden Sie Debugging -Tools. Optimierung der Netzwerkkonfiguration kann die Leistung verbessern
 Braucht MySQL das Internet?
Apr 08, 2025 pm 02:18 PM
MySQL kann ohne Netzwerkverbindungen für die grundlegende Datenspeicherung und -verwaltung ausgeführt werden. Für die Interaktion mit anderen Systemen, Remotezugriff oder Verwendung erweiterte Funktionen wie Replikation und Clustering ist jedoch eine Netzwerkverbindung erforderlich. Darüber hinaus sind Sicherheitsmaßnahmen (wie Firewalls), Leistungsoptimierung (Wählen Sie die richtige Netzwerkverbindung) und die Datensicherung für die Verbindung zum Internet von entscheidender Bedeutung.
 So lösen Sie MySQL können keine Verbindung zum lokalen Host herstellen
Apr 08, 2025 pm 02:24 PM
Die MySQL -Verbindung kann auf die folgenden Gründe liegen: MySQL -Dienst wird nicht gestartet, die Firewall fängt die Verbindung ab, die Portnummer ist falsch, der Benutzername oder das Kennwort ist falsch, die Höradresse in my.cnf ist nicht ordnungsgemäß konfiguriert usw. Die Schritte zur Fehlerbehebung umfassen: 1. Überprüfen Sie, ob der MySQL -Dienst ausgeführt wird. 2. Passen Sie die Firewall -Einstellungen an, damit MySQL Port 3306 anhören kann. 3. Bestätigen Sie, dass die Portnummer mit der tatsächlichen Portnummer übereinstimmt. 4. Überprüfen Sie, ob der Benutzername und das Passwort korrekt sind. 5. Stellen Sie sicher, dass die Einstellungen für die Bindungsadresse in my.cnf korrekt sind.
 Wie optimieren Sie die MySQL-Leistung für Hochlastanwendungen?
Apr 08, 2025 pm 06:03 PM
Die MySQL-Datenbankleistung Optimierungshandbuch In ressourcenintensiven Anwendungen spielt die MySQL-Datenbank eine entscheidende Rolle und ist für die Verwaltung massiver Transaktionen verantwortlich. Mit der Erweiterung der Anwendung werden jedoch die Datenbankleistung Engpässe häufig zu einer Einschränkung. In diesem Artikel werden eine Reihe effektiver Strategien zur Leistungsoptimierung von MySQL -Leistung untersucht, um sicherzustellen, dass Ihre Anwendung unter hohen Lasten effizient und reaktionsschnell bleibt. Wir werden tatsächliche Fälle kombinieren, um eingehende Schlüsseltechnologien wie Indexierung, Abfrageoptimierung, Datenbankdesign und Caching zu erklären. 1. Das Design der Datenbankarchitektur und die optimierte Datenbankarchitektur sind der Eckpfeiler der MySQL -Leistungsoptimierung. Hier sind einige Kernprinzipien: Die Auswahl des richtigen Datentyps und die Auswahl des kleinsten Datentyps, der den Anforderungen entspricht, kann nicht nur Speicherplatz speichern, sondern auch die Datenverarbeitungsgeschwindigkeit verbessern.
 Wie man AWS -Kleber mit Amazon Athena verwendet
Apr 09, 2025 pm 03:09 PM
Als Datenprofi müssen Sie große Datenmengen aus verschiedenen Quellen verarbeiten. Dies kann Herausforderungen für das Datenmanagement und die Analyse darstellen. Glücklicherweise können zwei AWS -Dienste helfen: AWS -Kleber und Amazon Athena.


