
本教程重点是介绍火焰鞭子的制作方法。大致过程:先用路径工具做出鞭子的形状,然后用通道,滤镜等做出纹理,高光,暗调等。最后再加上颜色即可。
最终效果
1、打开下图所示的素材图片。
2、打开“路径”调板,选择路径并将其转换为选区。
3、隐藏路径,打开“通道”调板,新建“Alpha 1”通道,为选区填充白色。
4、复制“Alpha 1”通道,将选区羽化并调整选区位置填充黑色。

5、载入“Alpha 1 副本”通道选区,切换至“图层”调板新建图层并填充白色。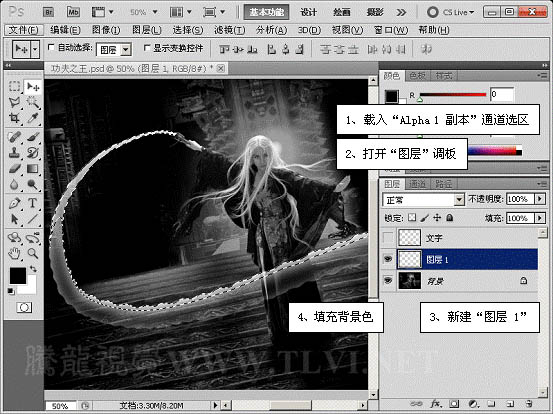
6、执行“文件”→“新建”命令,新建文档。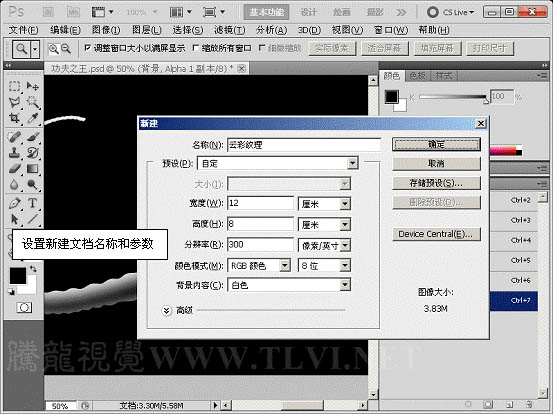
7、执行“滤镜”→“渲染”→“云彩”命令,完毕后将该文档保存。
8、切换至“功夫之王”文档中,复制“Alpha 1 副本”通道,载入“Alpha 1”通道选区,执行“滤镜”→“扭曲”→“玻璃”命令。

9、载入“Alpha 1 副本 2”通道选区,切换至“图层”调板新建图层并填充白色。
10、切换至“通道”调板,选择“Alpha 1 副本”通道,将其复制并颜色反相。
11、执行“图像”→“调整”→“色阶”命令。
12、载入“Alpha 1 副本 3”通道选区,切换至“图层”调板新建图层并填充黑色。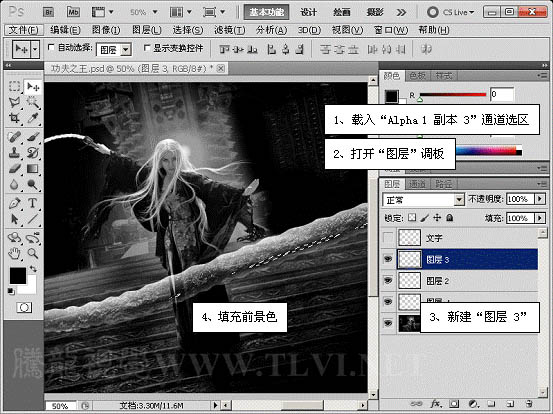
13、参照以上制作方法,继续绘制图像。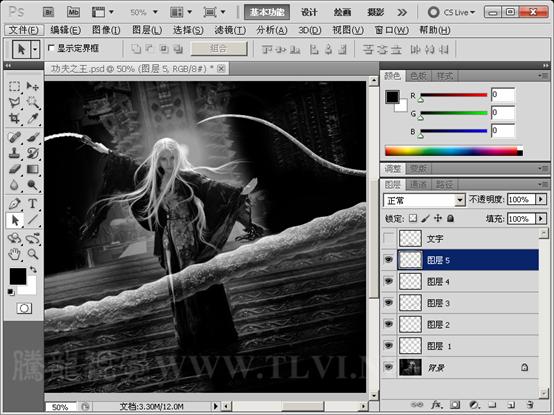
14、在“图层”调板中将所制作的图像合并图层。
15、在“图层”调板中创建“渐变映射”调整图层,设置其参数选项。

16、使用“画笔”工具在“渐变映射”图层的蒙版中人物脸部区域进行涂抹,使其明度降低。
17、使用“模糊”工具,对“图层 5”图像局部进行模糊处理。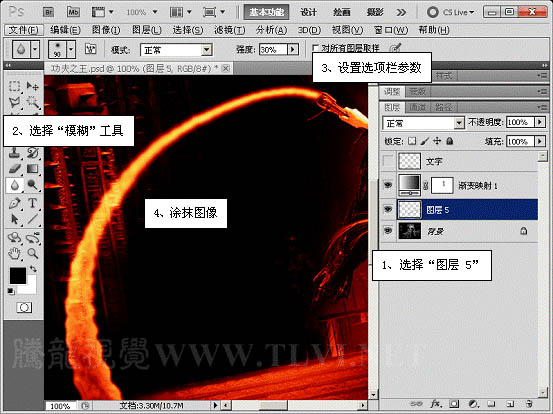

18、最后将“文字”图层显示,完成最终效果。
 Der Unterschied zwischen Gateway und Router
 So stellen Sie aus dem Papierkorb geleerte Dateien wieder her
 So beheben Sie, dass libcurl.dll auf Ihrem Computer fehlt
 Exif-Informationen löschen
 WLAN zeigt keinen Zugang zum Internet an
 Mein Computer kann es nicht durch Doppelklick öffnen.
 So stellen Sie Freunde wieder her, nachdem Sie auf TikTok blockiert wurden
 Einführung in den Javascript-Spezialeffektcode


