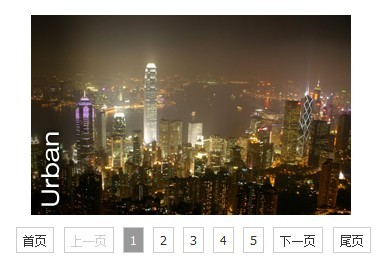
Zuerst das Rendering:

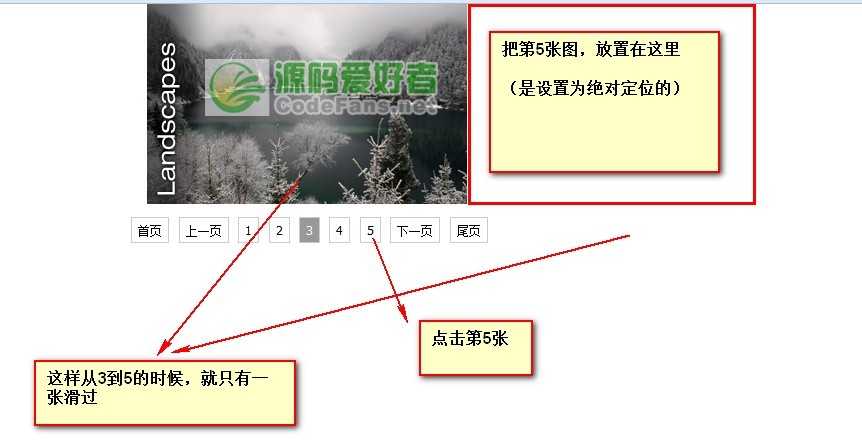
[Verarbeitung] Das Bild-Scroll-Karussell hier wurde leicht überarbeitet: Wenn Sie auf Seite 1 auf Seite 5 klicken, scrollt das Bild einzeln statt 2-3-4 -5 (Diese Art des mehrfachen Scrollens wird Ihnen helfen schwindelig);
Die Implementierungsmethode ist:

Der Rest besteht darin, den Quellcode zu teilen:
-------css-
.gy-slide-scroll {
Position: relativ;
Breite: 320 Pixel;
Höhe: 200px;
Überlauf: versteckt;
übrig: 50 %;
margin-left: -160px;
}
.gy-slide-scroll ul{
Position: absolut;
links: 0;
oben: 0;
}
.gy-slide-btn {
margin-top: 10px;
text-align: center;
Polsterung: 5px 0;
}
.gy-slide-btn span,.gy-slide-btn i {
Rand links: 5px;
Schriftstil: normal;
Schriftart: 12px/1 tahoma,arial,"Hiragino Sans GB",5b8b4f53;
Cursor: Zeiger;
Rand: 1 Pixel durchgehend #ccc;
Polsterung: 4px 6px;
}
.gy-slide-btn .gy-slide-cur {
Hintergrundfarbe: #999;
Farbe: #fff;
}
.gy-slide-btn .gy-slide-no{
Farbe: #ccc;
Cursor: Standard;
}
----------HTML---------------------
-------------JS--------------
/*----Gebrauchsanweisung
Die Struktur muss konsistent sein; bei mehrmaligem Aufruf einfach der äußersten Ebene unterschiedliche IDs oder Klassennamen zuweisen
*/
/*----Parameter
@ wrap [String] Der Klassenname oder die ID des äußeren Elements
@ auto [Boolean] Wenn nicht festgelegt, wird die Wiedergabe standardmäßig nicht automatisch ausgeführt. Wenn sie auf „true“ festgelegt ist, erfolgt die automatische Wiedergabe
@speed [Number] Bilder alle paar Sekunden wechseln, der Standardwert ist 4 Sekunden
*/
Funktion Gy_slider(opt){
This.wrap = $(opt.wrap);
This.scroll = this.wrap.find('.gy-slide-scroll ul');
This.li = this.scroll.find('li');
This.btn_num = this.wrap.find('.gy-slide-btn span');
This.btn_home = this.wrap.find('.gy-slide-home');
This.btn_end = this.wrap.find('.gy-slide-end');
This.btn_prev = this.wrap.find('.gy-slide-prev');
This.btn_next = this.wrap.find('.gy-slide-next');
This.index = 0; //Index
This.refer = 0;
This.ctrl = true;
This.len = this.li.length;
This.move_w = this.scroll.parent().width();
This.auto = opt.auto == true?true:false;
This.speed = opt.speed ||. 4;
This.init();
}
Gy_slider.prototype = {
imgShow:function(i,callback){
var _that = this,
_w = 0;
switch(true){
case i
case i==this.refer: return;break;
default:_w = this.move_w;
}
This.refer = i;
This.li.eq(i).css({'position':'absolute','left':_w 'px','top':0});
This.scroll.stop(true,true).animate({'left':-_w 'px'},function(){
_that.scroll.css({'left':0});
_that.li.attr('style','').eq(i).css({'position':'absolute','left':0,'top':0});
If(typeof callback == 'function'){
callback();
}
});
This.btn_num.removeClass("gy-slide-cur").eq(i).addClass("gy-slide-cur");
},
isStrg:function(n){
This.btn_prev.add(this.btn_next).removeClass("gy-slide-no");
If(n==0){
This.btn_prev.addClass("gy-slide-no");
}else if(n==(this.len-1)){
This.btn_next.addClass("gy-slide-no");
}
},
btnClick:function(){
var _that = this;
//Seitenzahlenverarbeitung
This.btn_num.click(function(){
If(_that.btn_num.index($(this))==_that.index) return;
If(!_that.ctrl) return;
_that.ctrl = false;
_that.index = _that.btn_num.index($(this));
_that.isCtrl(_that.index);
_that.imgShow(_that.index,function(){
_that.ctrl = true;
});
});
//Startseite
this.btn_home.click(function(){
_that.index = 0;
_that.isCtrl(_that.index);
_that.imgShow(_that.index);
});
//尾页
this.btn_end.click(function(){
_that.index = _that.len - 1;
_that.isCtrl(_that.index);
_that.imgShow(_that.index);
});
//上一页
this.btn_prev.click(function(){
if($(this).hasClass("gy-slide-no")) return;
if(!_that.ctrl) return;
_that.ctrl = false;
_that.index--;
_that.isCtrl(_that.index);
_that.imgShow(_that.index,function(){
_that.ctrl = true;
});
});
//下一页
this.btn_next.click(function(){
if($(this).hasClass("gy-slide-no")) return;
if(!_that.ctrl) return;
_that.ctrl = false;
_that.index ;
_that.isCtrl(_that.index);
_that.imgShow(_that.index,function(){
_that.ctrl = true;
});
});
},
autoPlay:function(){
var _that = this;
if(this.timer) clearInterval(this.timer);
this.timer = setInterval(function(){
_that.index ;
if(_that.index==_that.len){
_that.index = 0;
}
_that.isCtrl(_that.index);
_that.imgShow(_that.index);
},this.speed*1000);
},
init:function(){
var _that = this;
this.btnClick();
if(this.auto){
this.autoPlay();
this.wrap.hover(function(){
clearInterval(_that.timer);
},function(){
_that.autoPlay();
});
}
}
}
Der Code ist sehr prägnant, aber der Effekt ist sehr gut und sehr praktisch. Freunde können ihn nach der Verschönerung in ihren eigenen Projekten verwenden.


 Was sind die JQuery-Plug-Ins?
 So bedienen Sie JSON mit JQuery
 So löschen Sie Elemente in JQuery
 Verwendung der jQuery-Methode hover()
 jquery implementiert die Paging-Methode
 Was ist ein verstecktes Element in jquery?
 Was wird in jquery hervorgehoben?
 Was tun, wenn das Desktopsymbol des Computers nicht geöffnet werden kann?
 Was ist die Mikrocontroller-Programmiersoftware?


