This time I will bring you a detailed explanation of the use of angular's scopel instruction. What are the precautions for using angular's scopel instruction? The following is a practical case, let's take a look.
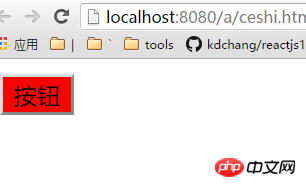
Let’s create a custom directive
<!DOCTYPE html><html lang="en"><head>
<meta charset="UTF-8">
<title>Document</title>
<style>
.primary{ background: red;
} </style></head><body ng-app="myApp">
<div ng-controller="mainCtrl">
<my-btn></my-btn>
</div>
<script src="node_modules/angular/angular.min.js"></script>
<script>
var myApp = angular.module('myApp',[]);
myApp.controller('mainCtrl',['$scope',function($scope){
$scope.myClass = 'primary';
}]);
myApp.directive('myBtn',function(){ return {
template:'<input type="button" value="按钮" class="{{myClass}}">'
}
}); </script></body></html>
<!DOCTYPE html><html lang="en"><head>
<meta charset="UTF-8">
<title>Document</title>
<style>
.primary{ background: red;
} </style></head><body ng-app="myApp">
<div ng-controller="mainCtrl">
<my-btn></my-btn>
<my-btn></my-btn>
<my-btn></my-btn>
<my-btn></my-btn>
</div>
<script src="node_modules/angular/angular.min.js"></script>
<script>
var myApp = angular.module('myApp',[]);
myApp.controller('mainCtrl',['$scope',function($scope){
$scope.myClass = 'primary';
}]);
myApp.directive('myBtn',function(){ return {
template:'<input type="button" value="按钮" class="{{myClass}}">'
}
}); </script></body></html> ##One idea is to put these custom command buttons in different controllers, and then pass different values through the $scope context in the controller:
<!DOCTYPE html><html><head>
<meta charset="UTF-8">
<title>Document</title>
<style>
.primary{ background: red;
} .success{ background: green;
} .default{ background: gray;
} </style></head><body ng-app="myApp">
<div ng-controller="aCtrl">
<my-btn></my-btn>
</div>
<div ng-controller="bCtrl">
<my-btn></my-btn>
</div>
<div ng-controller="cCtrl">
<my-btn></my-btn>
</div>
<script src="node_modules/angular/angular.min.js"></script>
<script>
var myApp = angular.module('myApp',[]);
myApp.controller('aCtrl',['$scope',function($scope){
$scope.myClass = 'primary';
}]);
myApp.controller('bCtrl',['$scope',function($scope){
$scope.myClass = 'success';
}]);
myApp.controller('cCtrl',['$scope',function($scope){
$scope.myClass = 'default';
}]);
myApp.directive('myBtn',function(){ return {
template:'<input type="button" value="按钮" class="{{myClass}}">'
}
}); </script></body></html> It’s too troublesome to write like this, so our angular provides a configuration item called scope for our custom instructions, so we can write it like this:
<!DOCTYPE html><html lang="en"><head>
<meta charset="UTF-8">
<title>Document</title>
<style>
.primary{ background: red;
} .success{ background: green;
} .default{ background: gray;
} </style></head><body ng-app="myApp">
<div ng-controller="Controller">
<my-btn b="className1"></my-btn>
<my-btn b="className2"></my-btn>
<my-btn b="className3"></my-btn>
</div>
<script ></script>
<script>
var myApp = angular.module('myApp',[]);
myApp
.controller('Controller', ['$scope', function($scope) {
$scope.className1 = 'primary';
$scope.className2 = 'success';
$scope.className3 = 'default';
}])
.directive('myBtn',function(){ return {
scope:{
a:'=b'
},
template:'<input type="button" value="按钮" class="{{a}}">'
}
}); </script></body></html>To understand the above, just pay attention to two points:
The a in the independent scope here represents the model a in the template
=b represents that Angular needs to find the view. The attribute b of the current directive
The value of attribute b needs to be found in the external scope
If you want to bind the name of the model in the directive scope and the attributes when used externally The names are the same and can be written as follows:
<!DOCTYPE html><html lang="en"><head>
<meta charset="UTF-8">
<title>Document</title>
<style>
.primary{ background: red;
} .success{ background: green;
} .default{ background: gray;
} </style></head><body ng-app="myApp">
<div ng-controller="Controller">
<my-btn a="className1"></my-btn>
<my-btn a="className2"></my-btn>
<my-btn a="className3"></my-btn>
</div>
<script src="node_modules/angular/angular.min.js"></script>
<script>
var myApp = angular.module('myApp',[]);
myApp
.controller('Controller', ['$scope', function($scope) {
$scope.className1 = 'primary';
$scope.className2 = 'success';
$scope.className3 = 'default';
}])
.directive('myBtn',function(){ return {
scope:{
a:'='
},
template:'<input type="button" value="按钮" class="{{a}}">'
}
}); </script></body></html>Of course, the = sign above is two-way data binding:
<!DOCTYPE html><html lang="en"><head>
<meta charset="UTF-8">
<title>Document</title>
<style>
.primary{ background: red;
} .success{ background: green;
} .default{ background: gray;
} </style></head><body ng-app="myApp">
<div ng-controller="Controller">
<my-btn a="abc"></my-btn>
</div>
<script src="node_modules/angular/angular.min.js"></script>
<script>
var myApp = angular.module('myApp',[]);
myApp
.controller('Controller', ['$scope', function($scope) {
$scope.abc = '我是初始内容';
}])
.directive('myBtn',function(){ return {
scope:{
a:'='
},
template:'<input type="text" ng-model="a"><span>{{a}}</span>'
}
}); </script></body></html>If you only want one-way data communication, you can use the @ symbol:
<!DOCTYPE html><html lang="en"><head>
<meta charset="UTF-8">
<title>Document</title>
<style>
.primary{ background: red;
} .success{ background: red;
} .default{ background: red;
} </style></head><body ng-app="myApp">
<div ng-controller="Controller">
<my-btn a="primary"></my-btn>
</div>
<script src="node_modules/angular/angular.min.js"></script>
<script>
var myApp = angular.module('myApp',[]);
myApp
.controller('Controller', ['$scope', function($scope) {
$scope.mm = 'primary';
}])
.directive('myBtn',function(){ return {
scope:{
a:'@'
},
template:'<input type="button" value="按钮" class="{{a}}">'
}
}); </script></body></html>If you want to use ng-class, you can do it:
<!DOCTYPE html><html lang="en"><head>
<meta charset="UTF-8">
<title>Document</title>
<style>
.primary{ background: red;
} .success{ background: red;
} .default{ background: red;
} </style></head><body ng-app="myApp">
<div ng-controller="Controller">
<my-btn a="primary"></my-btn>
</div>
<script src="node_modules/angular/angular.min.js"></script>
<script>
var myApp = angular.module('myApp',[]);
myApp
.controller('Controller', ['$scope', function($scope) {
$scope.mm = true;
}])
.directive('myBtn',function(){ return {
scope:{
a:'@'
},
template:'<input type="button" value="按钮" ng-class="{primary:a}">'
}
}); </script></body></html>Finally, there is a scope that can be set to refer to the external scope method
<!DOCTYPE html><html lang="en"><head>
<meta charset="UTF-8">
<title>Document</title>
<style>
.primary{ background: red;
} .success{ background: red;
} .default{ background: red;
} </style></head><body ng-app="myApp">
<div ng-controller="Controller">
<my-btn fn2="fn()"></my-btn>
</div>
<script src="node_modules/angular/angular.min.js"></script>
<script>
var myApp = angular.module('myApp',[]);
myApp
.controller('Controller', ['$scope', function($scope) {
$scope.fn = function(){
alert(11);
}
}])
.directive('myBtn',function(){ return {
scope:{
fn1:'&fn2'
},
template:'<input type="button" value="按钮" ng-click="fn1()">'
}
}); </script></body></html>I believe you have read the case in this article You have mastered the method. For more exciting information, please pay attention to other related articles on the php Chinese website!
Recommended reading:
Detailed explanation of the use of Angular MaterialWhat are the naming rules for id selectors in cssUnpopular method of centering elements horizontally and verticallyThe above is the detailed content of Detailed explanation of the use of angular's scopel directive. For more information, please follow other related articles on the PHP Chinese website!


