Home > Web Front-end > JS Tutorial > node.js Ajax implementation of obtaining data returned by HTTP server_node.js

node.js Ajax implementation of obtaining data returned by HTTP server_node.js

WBOY
Release: 2016-05-16 16:30:12
Original
2441 people have browsed it

Let’s look at a code example of obtaining data returned by an HTTP server through an AJAX request in an HTML5 page. Since we specify the server port as 1337 and will run the HTML5 page from the website with port 80, this is a For this kind of cross-domain operation, you need to add the Access_Control_Allow_Origin field in the HTTP response header, and specify the parameter as the domain name port number that is allowed to request data from the server (when the port number is omitted, any port under the domain name is allowed to request data from the server),

Static page: index.html (Note: It must be placed in a server environment. If it is a win7 system, you can enable the IIS service and pass the page to run the page directly.)

Copy code The code is as follows:


ajax request in node (html5 page)


dsdf


node code:

Copy code The code is as follows:

var http=require("http");
var server=http.createServer(function(req,res){
If(req.url!=="/favicon.ico"){
res.writeHead(200,{"Content-Type":"text/plain","Access-Control-Allow-Origin":"http://localhost"});
          res.write("Hello!");
}
res.end();
});
server.listen(1337,"localhost",function(){
console.log("Start monitoring...");
});

First start the service: node server.js

Start static page:

Click the button "Get Data"
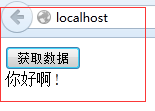
If you feel that it is too troublesome to configure the server environment, you can take advantage of the editor to do it.

For example, I am using webstrom 8.0;

When I launch the page, this path is displayed in the browser:

The port is 63342. At this time, our team will make some modifications to the code:

node’s server.js code:

Copy code The code is as follows:

var http=require("http");
var server=http.createServer(function(req,res){
If(req.url!=="/favicon.ico"){
res.writeHead(200,{"Content-Type":"text/plain","Access-Control-Allow-Origin":"http://localhost:63342"});
​​​​ //res.setHeader();
          res.write("Hello!");
}
res.end();
});
server.listen(1337,"localhost",function(){
console.log("Start monitoring...");
});

Modified the value of "Access-Control-Allow-Origin".

Re-run the demo and you will find that the same effect is achieved

You can also set the response header individually through res.seetHeader.

You can change the above res.writeHead() to res.setHeader();

Copy code The code is as follows:

var http=require("http");
var server=http.createServer(function(req,res){
If(req.url!=="/favicon.ico"){
//res.writeHead(200,{"Content-Type":"text/plain","Access-Control-Allow-Origin":"http://localhost:63342"});
res.setHeader("Content-Type","text/plain");
res.setHeader("Access-Control-Allow-Origin","http://localhost:63342");
          res.write("Hello!");
}
res.end();
});
server.listen(1337,"localhost",function(){
console.log("Start monitoring...");
});

Careful students may have discovered that when using the setHeader method, a status code is missing, such as 200. So how do we set the status code when we use res.setHeader? I will talk about the code later

Date when ajax returns on the server side:
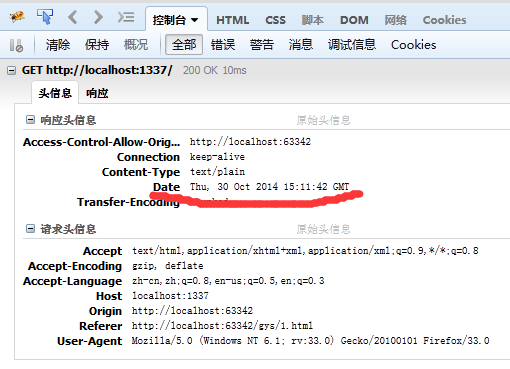
We can delete this field when the server returns.

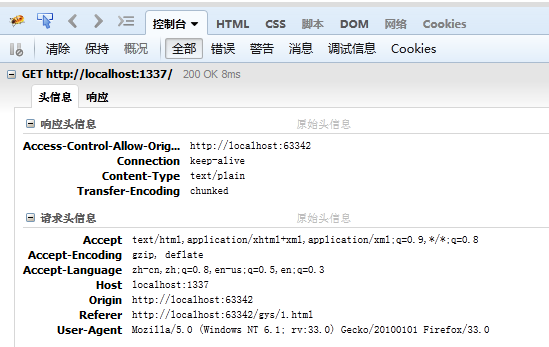
Set res.sendData=false;
Copy code The code is as follows:

var http=require("http");
var server=http.createServer(function(req,res){
If(req.url!=="/favicon.ico"){
//res.writeHead(200,{"Content-Type":"text/plain","Access-Control-Allow-Origin":"http://localhost:63342"});
          res.statusCode=200;
          res.sendDate=false;
res.setHeader("Content-Type","text/plain");
res.setHeader("Access-Control-Allow-Origin","http://localhost:63342");
          res.write("Hello!");
}
res.end();
});
server.listen(1337,"localhost",function(){
console.log("Start monitoring...");
});

The status code is set and the date information is also blocked.

res.getHeader(name) gets the response header information we set

res.removeHeader(name); Delete our header information. It must be called before sending data in our write method.

The res.headersSent attribute is a Boolean value. When the response header has been sent, the attribute value is true; when the response header has not been sent, the attribute value is false.

server.js code:

Copy code The code is as follows:

var http=require("http");
var server=http.createServer(function(req,res){
If(req.url!=="/favicon.ico"){
If(res.headersSent)
console.log("Response header has been sent");
        else
console.log("Response header not sent");
res.writeHead(200,{"Content-Type":"text/plain","Access-Control-Allow-Origin":"http://localhost:63342"});
If(res.headersSent)
console.log("Response header has been sent");
        else
console.log("Response header not sent");           res.write("Hello!");
}
res.end();
});
server.listen(1337,"localhost",function(){
console.log("Start monitoring...");
});

Run the demo to see the results:

The res.write() method sends data to the client. In fact, it also has a return value.

When the amount of data sent to the client is relatively small or the network speed is fast, node always sends the data directly to the kernel cache of the operating system, and then retrieves the data from the kernel cache and sends it to the other party. At this time write will return true.

When the network speed is slow or the amount of data is large, the http server will not necessarily send the data to the client immediately. The node will cache the data in the memory and save the data in the memory if the other party can accept the data. The data is sent to the other party through the kernel of the operating system. At this time, write returns false.
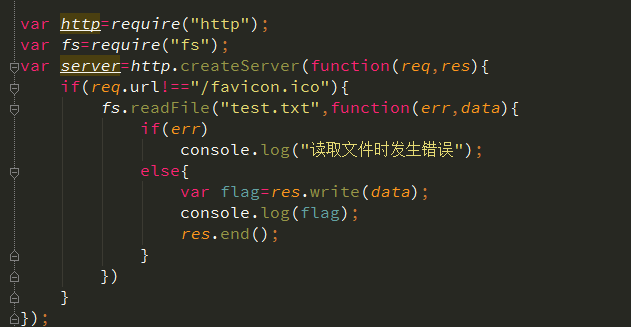
You can set the content of test.txt to test the results.

A simple node ajax effect is achieved. Isn’t it very simple? Of course, if we want to create more complex functions, we still need further study, and we will update it slowly in the future.

Related labels:
source:php.cn
Statement of this Website
The content of this article is voluntarily contributed by netizens, and the copyright belongs to the original author. This site does not assume corresponding legal responsibility. If you find any content suspected of plagiarism or infringement, please contact admin@php.cn
Popular Tutorials
More>
Latest Downloads
More>
Web Effects
Website Source Code
Website Materials
Front End Template