

/dev/sr0光驱挂载引起的CPUio_wait升高一“血案”

定期巡检发现一个怪异的问题,/dev/sr0光驱挂载引起的CPU io_wait升高,请看截图: 650) this.width=650;" src="http://www.68idc.cn/help/uploads/allimg/151111/120A25318-0.jpg" title="1.png" alt="wKioL1YMDx3iziR2AAgERYtqlLg500.jpg" /> 快接近凌晨了
定期巡检发现一个怪异的问题,/dev/sr0光驱挂载引起的CPU io_wait升高,请看截图:

快接近凌晨了,这时候已经没啥业务了,可以看到CPU的us使用率已经是0,但CPU第12个核出现了100.0%wa,load负载是1.0,太诡异了。
立即用iotop命令查看,哪个进程占用IO过高,发现了挂载光驱引起的真凶,请看截图:

可以明显的看到/dev/sr0光驱占用大量IO操作。
查看系统日志,发现了错误信息:

再次确定了是/dev/sr0挂载光驱引起的CPU IO_WAIT升高。
立即放出大招,kill掉:

再次观察Cacti监控图:

CPU负载已经下降了,从图中来看非常明显。

Hot AI Tools

Undresser.AI Undress
AI-powered app for creating realistic nude photos

AI Clothes Remover
Online AI tool for removing clothes from photos.

Undress AI Tool
Undress images for free

Clothoff.io
AI clothes remover

AI Hentai Generator
Generate AI Hentai for free.

Hot Article
Hot Tools

Notepad++7.3.1
Easy-to-use and free code editor

SublimeText3 Chinese version
Chinese version, very easy to use

Zend Studio 13.0.1
Powerful PHP integrated development environment

Dreamweaver CS6
Visual web development tools

SublimeText3 Mac version
God-level code editing software (SublimeText3)
Hot Topics


 Solution to win10 snmp installation failure error code 0x8024402C
Feb 13, 2024 am 08:30 AM
Solution to win10 snmp installation failure error code 0x8024402C
Feb 13, 2024 am 08:30 AM
The snmp protocol is a simple network management protocol. This protocol can support the network management system and is used to monitor whether the devices connected to the network have any situation that causes management concern. However, many users have recently reported that the win10 installation of snmp failed with the error code 0x8024402C. what to do? Users can start Powershell as an administrator to set up. Let this site carefully introduce to users the solution to the error code 0x8024402C when installing snmp in win10. Solution to win10 snmp installation failure error code 0x8024402C 1. Start Powershell as administrator 1. The first step is to run the win10 system
![You don't have permission to mount the file [FIXED]](https://img.php.cn/upload/article/000/000/164/170824952191099.jpg?x-oss-process=image/resize,m_fill,h_207,w_330) You don't have permission to mount the file [FIXED]
Feb 18, 2024 pm 05:45 PM
You don't have permission to mount the file [FIXED]
Feb 18, 2024 pm 05:45 PM
If you encounter permission errors when mounting an ISO image, this article may help. The error message is as follows: The file cannot be loaded. You do not have permission to load the file. Fortunately, you can fix it by following some simple suggestions. Why can't my ISO file be mounted? The ISO file may be corrupted or incomplete, which may cause mounting issues. Other causes include file corruption, storage media failure, or download errors. The ISO file is sparse. Interruption from security software. The disk image is not initialized. Sorry, there was a problem loading the file. The disc image file is corrupted. Fix the error that you do not have permission to mount the file. If you receive the Unable to mount file when trying to mount an ISO image, you No permission to mount file error, please follow these suggestions: Check the file
 Detailed tutorial on installing Carla on Ubuntu 20.04 system.
Feb 19, 2024 pm 08:20 PM
Detailed tutorial on installing Carla on Ubuntu 20.04 system.
Feb 19, 2024 pm 08:20 PM
Carla is an open source autonomous driving simulation platform designed for developing and testing autonomous driving algorithms. The following is a detailed tutorial for installing Carla on Ubuntu20.04 system: Install dependencies: Open a terminal window and run the following command to install Carla’s dependencies: sudoaptupdatesudoaptinstall-ybuild-essentialclang-10llvm-10python3-pippython3-devlibpng-devlibjpeg-devlibtiff5-devlibopenexr -devlibhdf5-devlibsquish-de
 How to mount the optical drive in Linux system?
Jan 11, 2024 pm 05:09 PM
How to mount the optical drive in Linux system?
Jan 11, 2024 pm 05:09 PM
How to mount an optical drive in Linux if you want to mount it? Let’s take a look at the detailed tutorial below. 1. First create a normal directory. 2. Next, find the optical drive hardware device. 3. Finally, connect the normal directory with the CD-ROM drive.
 Solution to the automatic ejection of the optical drive in Windows 7 computers
Mar 26, 2024 pm 04:36 PM
Solution to the automatic ejection of the optical drive in Windows 7 computers
Mar 26, 2024 pm 04:36 PM
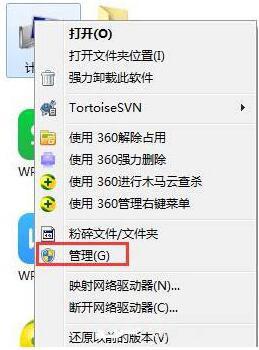
1. Move the mouse to the computer, and then right-click to select the management item, as shown in the figure: 2. After opening the computer management item, we see the function options on the left, click to select the Services and Applications item, such as As shown in the figure: 3. Next, we need to select the service item on the right and double-click to open it, as shown in the figure: 4. After opening the service item, we need to find the service item ShellHardwareDetection, as shown in the figure: 5. Move the mouse to On the service item, then right-click and select Properties, as shown in the figure: 6. After opening the properties, change the startup type to Disabled, then click Apply - OK, save, and it is OK, as shown in the figure: win7 optical drive automatically The pop-up solution is shared here in detail for users. More
 fstab(File System Table)
Feb 19, 2024 pm 06:30 PM
fstab(File System Table)
Feb 19, 2024 pm 06:30 PM
fstab (FileSystemTable) is a configuration file in the Linux system, used to define the rules for mounting file systems when the system starts. The fstab file is located in the /etc directory and can be created manually or modified by an editor. Each line specifies a file system to be mounted. Each line has six fields, and their meanings are as follows: The file system device file or UUID can be used to specify the device of the file system to be mounted. The UUID is a unique identifier. The UUID of the device can be obtained through the blkid command. 2. Mount point: Specify the directory to which the file system is to be mounted, which can be an absolute path (such as /mnt/data) or a relative path (such as ../data). 3. File system class
 What is the difference between sleep and wait methods in Java?
May 06, 2023 am 09:52 AM
What is the difference between sleep and wait methods in Java?
May 06, 2023 am 09:52 AM
1. The fundamental difference between sleep and wait methods: sleep is a method in the Thread class and will not enter the running state immediately. wait is a method in the Object class. Once an object calls the wait method, notify() and notifyAll must be used. () method wakes up the process to release the synchronization lock: sleep will release the cpu, but sleep will not release the synchronization lock resources, and wait will release the synchronization lock resource usage range: sleep can be used anywhere, but wait can only be used in the synchronized synchronization method Or use exception handling in the code block: sleep needs to catch exceptions, but wait does not need to catch exceptions 2. wa
 Detailed tutorial on hard disk mounting in Ubuntu system.
Feb 18, 2024 pm 05:39 PM
Detailed tutorial on hard disk mounting in Ubuntu system.
Feb 18, 2024 pm 05:39 PM
To mount a hard drive in an Ubuntu system, you can follow the detailed tutorial below: Check the hard drive: Insert the hard drive to be mounted and make sure the system can correctly identify it. You can view the list of connected hard disks using the following command: sudofdisk -l Make sure you find the hard disk device you want to mount (for example, /dev/sdb). Create a mount point: In Ubuntu systems, the hard disk is usually mounted to a directory. Execute the following command to create the mount point directory: sudomkdir/mnt/mydisk This will create a directory named "mydisk" in the /mnt directory as a mount point. Mount the hard disk: Execute the following command to mount the hard disk to the mount point: sudomoun
