

IHttpHandler的妙用(2):防盗链!我的资源只有我的用户才能下

昨天粗略讲了一下IHttpHandler接口的作用和动态给图片添加水印的处理,如果对这些不太清除的朋友,建议看看这篇《IHttpHandler的妙用(1):给图片添加水
昨天粗略讲了一下IHttpHandler接口的作用和动态给图片添加水印的处理,如果对这些不太清除的朋友,建议看看这篇《IHttpHandler的妙用(1):给图片添加水印》:http://blog.csdn.net/zhoufoxcn/archive/2008/01/10/2033530.aspx
昨天也提到了IHttpHandler接口主要有一个IsReusable属性和一个ProcessRequest方法,利用这个方法我们可以处理很多事情的,昨天我们利用了这个方法给图片动态添加了水印,今天我再来展示另一种用法。
大家查看一个msdn,可以看到它的声明如下:
Visual Basic(声明)
Sub ProcessRequest ( _
context As HttpContext _
)
Visual Basic(用法)
Dim instance As IHttpHandler
Dim context As HttpContext
instance.ProcessRequest(context)
C#
void ProcessRequest (
HttpContext context
)
注意这个HttpContext对象,它提供对用于为 HTTP 请求提供服务的内部服务器对象(如 Request、Response、Session 和 Server)的引用。
有了它我们就方便多了,因为我们的下载资源一般都会有一个下载介绍(假设为details.aspx?id=***),用户查看介绍之后,如果愿意下载,就会点击下载链接,这个链接也是一个页面(假设为download.aspx?id=***),我们就可以得出结论,只要是用户通过我们的网站下载这些资源,那么在下载资源之前访问那个页面(简称前导页,下同)一定是details.aspx,因此我们就可以得出结论只要是下载之前的前导页不是details.aspx这个页面,那个这个下载请求一定是别的网站盗链(其实还可以放宽一点,在下载之前的前导页一定是本站的页面,也还可以要求更紧一点,下载之前访问的页面的id值一定要与下载的id值一致,这就看大家的实际要求了)!
有了这个推论之后,我们就可以动手写代码了:
using System;
using System.IO;
using System.Web;
///
/// 说明:DownloadHandler是一个防盗链的类,它可以防止本站资源被别的网站盗用
/// 作者:周公
/// 日期:2008-1-11
/// 首发地址:http://blog.csdn.net/zhoufoxcn
///
public class DownloadHandler:IHttpHandler
{
public DownloadHandler()
{
//
// TODO: 在此处添加构造函数逻辑
//
}
#region IHttpHandler 成员
///
/// 指示IHttpHandler 实例是否可再次使用
///
public bool IsReusable
{
get { return true; }
}
///
/// 处理请求的方法
///
/// 它提供对用于为 HTTP 请求提供服务的内部服务器对象(如 Request、Response、Session 和 Server)的引用。
public void ProcessRequest(HttpContext context)
{
Uri referrerUri = context.Request.UrlReferrer;//获取下载之前访问的那个页面的uri
Uri currentUri = context.Request.Url;
if (referrerUri == null)//没有前导页,直接访问下载页
{
//输出提示,可以根据自身要求完善此处代码
context.Response.Write("请不要盗链本站资源,请从首页访问。首页");
return;
}
#region 判断前导页是否位于本站可以用此段代码
//if (referrerUri.Host == currentUri.Host)//前导页和当前请求页位于同一个主机
//{
// //用户是通过正常路径访问的,向用户提供下载文件
// //实际情况是根据id从数据库找到文件的物理路径,然后输出
// //为了简单代码,仅仅演示流程,这里我直接输出了文件
// //周公注。2008-1-11
// //获取请求的物理文件路径
// WriteFile(context);
//}
//else
//{
// //输出提示,可以根据自身要求完善此处代码
// context.Response.Write("请不要盗链本站资源,请从首页访问。首页");
//}
#endregion
#region 判断前导页是否是我们的介绍页面
string referrerPage = referrerUri.LocalPath.Substring(referrerUri.LocalPath.LastIndexOf('/')+1);
if (referrerPage == "Details.aspx")//如果前导页是我们的介绍页面
{
//用户是通过正常路径访问的,向用户提供下载文件
//实际情况是根据id从数据库找到文件的物理路径,然后输出
//为了简单代码,仅仅演示流程,这里我直接输出了文件
//周公注。2008-1-11
//获取请求的物理文件路径
WriteFile(context);
}
else
{
//输出提示,可以根据自身要求完善此处代码
context.Response.Write("请不要盗链本站资源,请从首页访问。首页");
}
#endregion
}
private void WriteFile(HttpContext context)
{
//用户是通过正常路径访问的,向用户提供下载文件
//实际情况是根据id从数据库找到文件的物理路径,然后输出
//为了简单代码,仅仅演示流程,这里我直接输出了文件
//周公注。2008-1-11
//获取请求的物理文件路径
string path = context.Request.PhysicalPath;
//注意这里rar文件的ContentType是application/octet-stream
//不同格式文件的contentType有可能不同
context.Response.ContentType = "application/octet-stream";
context.Response.WriteFile(path);
}
#endregion
}
xml version="1.0"?>
configuration>
appSettings>
add key="WaterMark" value="http://blog.csdn.net/zhoufoxcn"/>
add key="Font-Size" value="72"/>
appSettings>
connectionStrings/>
system.web>
compilation debug="true"/>
authentication mode="Windows"/>
httpHandlers>
add path="UploadImages/*.jpg" verb="*" type="ImageHandler"/>
add path="*.zip" verb="*" type="DownloadHandler"/>
add path="*.rar" verb="*" type="DownloadHandler"/>
add path="*.iso" verb="*" type="DownloadHandler"/>
httpHandlers>
system.web>
configuration>
@ Page Language="C#" AutoEventWireup="true" CodeFile="Details.aspx.cs" Inherits="Details" %>
DOCTYPE html PUBLIC "-//W3C//DTD XHTML 1.0 Transitional//EN" "http://www.w3.org/TR/xhtml1/DTD/xhtml1-transitional.dtd">
html xmlns="http://www.w3.org/1999/xhtml" >
head runat="server">
title>无标题页title>
head>
body>
form id="form1" runat="server">
div>
a href="Download.aspx?id=1">下载a>
div>
form>
body>
html>
using System;
using System.Data;
using System.Configuration;
using System.Collections;
using System.Web;
using System.Web.Security;
using System.Web.UI;
using System.Web.UI.WebControls;
using System.Web.UI.WebControls.WebParts;
using System.Web.UI.HtmlControls;
public partial class Download : System.Web.UI.Page
{
protected void Page_Load(object sender, EventArgs e)
{
if (!Page.IsPostBack)
{
CheckUser();
//实际情况是根据id从数据库找到文件的物理路径,然后输出
//为了简单代码,仅仅演示流程,这里我直接输出了文件
//周公注。2008-1-11
//首发地址:http://blog.csdn.net/zhoufoxcn
Response.Redirect("download/demo.rar");//这里就会交给DownloadHanddler处理了
}
}
//检查用户登录等信息
private void CheckUser()
{
//仅仅演示,具体代码根据具体要求编写
//比如用户没有登录如何处理,用户没有下载权限如何处理等
return;
}
}
正常流程截图:
(一)先打开介绍页面:
(二)点击下载链接进入下载页面:
此时出现文件保存对话框,情况正常。
再看盗链情况(非正常情况):
(一)打开首页(非前导页,跳过这一步也没有关系)
(二)直接访问下载页面或者直接访问下载文件的实际url地址:
此时出现了我们自定义的错误提示,甚至地址栏上都出现了该文件的物理地址,可是就是没有办法下载,此时就算是利用迅雷等下载软件,下载到的也是一个无效的文件,如图:
这样就达到我们的目地了,不是通过正常途径来下载是没有办法下载到他需要的文件的。
顺便说一下,写作本文时我是边编写代码边测试的(本博客原创的代码都是如此,测试通过之后方才发表,所以一般不会有什么问题,如果你学习的过程中发现有任何错误,请仔细检查你的代码,因为各人本地环境不同,出错原因各异,恕本人不一一指出你代码的错误之处)。

Hot AI Tools

Undresser.AI Undress
AI-powered app for creating realistic nude photos

AI Clothes Remover
Online AI tool for removing clothes from photos.

Undress AI Tool
Undress images for free

Clothoff.io
AI clothes remover

Video Face Swap
Swap faces in any video effortlessly with our completely free AI face swap tool!

Hot Article
Hot Tools

Notepad++7.3.1
Easy-to-use and free code editor

SublimeText3 Chinese version
Chinese version, very easy to use

Zend Studio 13.0.1
Powerful PHP integrated development environment

Dreamweaver CS6
Visual web development tools

SublimeText3 Mac version
God-level code editing software (SublimeText3)
Hot Topics
 1386
1386
 52
52

 How to use Xiaohongshu account to find users? Can I find my mobile phone number?
Mar 22, 2024 am 08:40 AM
How to use Xiaohongshu account to find users? Can I find my mobile phone number?
Mar 22, 2024 am 08:40 AM
With the rapid development of social media, Xiaohongshu has become one of the most popular social platforms. Users can create a Xiaohongshu account to show their personal identity and communicate and interact with other users. If you need to find a user’s Xiaohongshu number, you can follow these simple steps. 1. How to use Xiaohongshu account to find users? 1. Open the Xiaohongshu APP, click the "Discover" button in the lower right corner, and then select the "Notes" option. 2. In the note list, find the note posted by the user you want to find. Click to enter the note details page. 3. On the note details page, click the "Follow" button below the user's avatar to enter the user's personal homepage. 4. In the upper right corner of the user's personal homepage, click the three-dot button and select "Personal Information"
 Local users and groups are missing on Windows 11: How to add it
Sep 22, 2023 am 08:41 AM
Local users and groups are missing on Windows 11: How to add it
Sep 22, 2023 am 08:41 AM
The Local Users and Groups utility is built into Computer Management and can be accessed from the console or independently. However, some users find that local users and groups are missing in Windows 11. For some people who have access to it, the message suggests that this snap-in may not work with this version of Windows 10. To manage user accounts for this computer, use the User Accounts tool in Control Panel. The issue has been reported in previous iterations of Windows 10 and is usually caused by issues or oversights on the user's side. Why are local users and groups missing in Windows 11? You are running Windows Home edition, local users and groups are available on Professional edition and above. Activity
 Log in to Ubuntu as superuser
Mar 20, 2024 am 10:55 AM
Log in to Ubuntu as superuser
Mar 20, 2024 am 10:55 AM
In Ubuntu systems, the root user is usually disabled. To activate the root user, you can use the passwd command to set a password and then use the su- command to log in as root. The root user is a user with unrestricted system administrative rights. He has permissions to access and modify files, user management, software installation and removal, and system configuration changes. There are obvious differences between the root user and ordinary users. The root user has the highest authority and broader control rights in the system. The root user can execute important system commands and edit system files, which ordinary users cannot do. In this guide, I'll explore the Ubuntu root user, how to log in as root, and how it differs from a normal user. Notice
 Explore Windows 11 guide: How to access user folders on your old hard drive
Sep 27, 2023 am 10:17 AM
Explore Windows 11 guide: How to access user folders on your old hard drive
Sep 27, 2023 am 10:17 AM
Certain folders are not always accessible due to permissions, and in today’s guide we will show you how to access user folders on your old hard drive on Windows 11. The process is simple but can take a while, sometimes even hours, depending on the size of the drive, so be extra patient and follow the instructions in this guide closely. Why can't I access my user folders on my old hard drive? User folders are owned by another computer, so you cannot modify them. You don't have any permissions on the folder other than ownership. How to open user files on old hard drive? 1. Take ownership of the folder and change permissions Find the old user directory, right-click on it and select Properties. Navigate to "An
 Tutorial: How to delete a normal user account in Ubuntu system?
Jan 02, 2024 pm 12:34 PM
Tutorial: How to delete a normal user account in Ubuntu system?
Jan 02, 2024 pm 12:34 PM
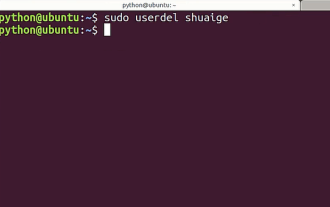
Many users have been added to the Ubuntu system. I want to delete the users that are no longer in use. How to delete them? Let’s take a look at the detailed tutorial below. 1. Open the terminal command line and use the userdel command to delete the specified user. Be sure to add the sudo permission command, as shown in the figure below. 2. When deleting, be sure to be in the administrator directory. Ordinary users do not have this permission. , as shown in the figure below 3. After the delete command is executed, how to judge whether it has been truly deleted? Next we use the cat command to open the passwd file, as shown in the figure below 4. We see that the deleted user information is no longer in the passwd file, which proves that the user has been deleted, as shown in the figure below 5. Then we enter the home file
 What is sudo and why is it important?
Feb 21, 2024 pm 07:01 PM
What is sudo and why is it important?
Feb 21, 2024 pm 07:01 PM
sudo (superuser execution) is a key command in Linux and Unix systems that allows ordinary users to run specific commands with root privileges. The function of sudo is mainly reflected in the following aspects: Providing permission control: sudo achieves strict control over system resources and sensitive operations by authorizing users to temporarily obtain superuser permissions. Ordinary users can only obtain temporary privileges through sudo when needed, and do not need to log in as superuser all the time. Improved security: By using sudo, you can avoid using the root account during routine operations. Using the root account for all operations may lead to unexpected system damage, as any mistaken or careless operation will have full permissions. and
 Windows 11 KB5031455 fails to install, causing other issues for some users
Nov 01, 2023 am 08:17 AM
Windows 11 KB5031455 fails to install, causing other issues for some users
Nov 01, 2023 am 08:17 AM
Microsoft began rolling out KB2 to the public as an optional update for Windows 503145511H22 or later. This is the first update to enable Windows 11 Moment 4 features by default, including Windows Copilot in supported areas, preview support for items in the Start menu, ungrouping of the taskbar, and more. Additionally, it fixes several Windows 11 bugs, including potential performance issues that caused memory leaks. But ironically, the optional update for September 2023 will be a disaster for users trying to install the update, or even for those who have already installed it. Many users will not install this Wi
 Win11 new version of drawing: remove background with one click to realize cutout function
Sep 15, 2023 pm 10:53 PM
Win11 new version of drawing: remove background with one click to realize cutout function
Sep 15, 2023 pm 10:53 PM
Microsoft invites WindowsInsider project members in the Canary and Dev channels to test and experience the new Paint application. The latest version number is 11.2306.30.0. The most noteworthy new feature of this version update is the one-click cutout function. Users only need to click once to automatically eliminate the background and highlight the main body of the picture, making it easier for users to perform subsequent operations. The whole step is very simple. The user imports the picture in the new layout application, and then clicks the "removebackground" button on the toolbar to delete the background in the picture. The user can also use a rectangle to select the area to remove the background.
