

Win7环境下VS2010旗舰版安装Cocos2d-x-2.1.3

本文是基于http://blog.csdn.net/luohai859/article/details/10152893博客的基础上完成,对该作者表示感谢!本文主要目的是做笔记。 1、首先,安装VS2010,下载Cocos2d-x,本文选择的是Cocos2d-x-2.1.3。 VS2010中文破解版:http://pan.baidu.com/disk/home
本文是基于http://blog.csdn.net/luohai859/article/details/10152893博客的基础上完成,对该作者表示感谢!本文主要目的是做笔记。
1、首先,安装VS2010,下载Cocos2d-x,本文选择的是Cocos2d-x-2.1.3。
VS2010中文破解版:http://pan.baidu.com/disk/home
Cocos版本下载:http://www.cocos2d-x.org/download/version#Cocos2d-x
2、解压cocos2d-x-2.1.4.zip到用户选择目录,我解压目录是:C:\Users\hp\Desktop
(1)在VS2010中生成cocos2d-x2.1.3的解决方案
在解压后的目录下找到cocos2d-win32.vc2010.sln文件,如图1所示。

图1 cocos2d-x-2.1.3解压文件
双击打开该文件,出现如图2所示工程:

在工程目录下,右击,选择生成解决方案,大约5-10分钟,根据电脑配置时间有所变动。编译完成后,成功17个,失败0个,更新0个。则cocos2d-x安装已经完成一半了。
(2)安装Cocos2d-x的VC模板:Cocos2d-x-2.1.3版本以后不需要在安装,只有使用Python脚本创建Cocos2d-x项目,文章后面介绍。
在安装包cocos2d-x-2.1.3目录下找到install-templates-msvc.bat,然后找到cocos2d-x-2.1.3\template\msvc\InstallWizardForVS2010.js文件,双击如图3:

此时,如果Cocos2d-x版本低于2.1.2,则会在VS2010中新建项目中在Visual C++模板下的会找到Cocos2d-x模板,本文使用的是2.1.3,所以在新建项目中并不会出现Cocos2d-x模板,这里介绍主要是为了低版本的安装配置。高于2.1.2版本的Cocos2d-x使用Python脚本创建项目。
3、创建Cocos2d-x项目
1)由于使用Python创建项目,且要求Python版本2.7,本文使用的是Python2.7.3
Python 2.7.3的链接地址为:http://www.python.org/getit/releases/2.7.3/,我下载的版本是Windows x86 MSI Installer (2.7.3) (sig),下载后的软件名称为:python-2.7.3.msi,双击它默认安装即可。默认安装后Python 2.7.3所在路径为:C:\Python27,在C:\Python27路径下有python.exe命令解释器,project-creator.py脚本正是通过它来解释执行的。
2)将Python.exe命令解释器所在目录加到PATH环境变量中去
安装好Python2.7.3之后,将Python的python.exe所在目录追加到系统的PATH环境变量中去,使得Doc命令行能找到python解释器命令。本文的python默认安装目录为:C:\Python,那么在系统的PATH变量中最前面追加C:\Python27;如果使用其他路径,选择相应的Python2.7.3路径即可。注意使用分号隔开各个变量值。
在Win7下,右键单击计算机->属性->系统高级设置->环境变量,在系统变量里找到Path,在最前面加上C:\Python27;注意分号。

这样就把C:\Python27下的python.exe命令所在的目录加到Path中,接下来使用create_project.py脚本创建新工程。
(1)打开doc命令行,cd到C:\Users\hp\Desktop\cocos2d-2.1rc0-x-2.1.3\tools\project-creator。
(2)执行python脚本,生成HelloTest项目:python create_project.py -project HelloTest -package com.cocos2d-x.org -language cpp

当出现Have Fun!时项目创建完成,进入到C:\Users\hp\Desktop\cocos2d-2.1rc0-x-2.1.3\projects找到新创建的项目。在C:\Users\hp\Desktop\cocos2d-2.1rc0-x-2.1.3\projects\HelloTest\proj.win32下找到sln文件用VS2010打开即可看到信创建的工程,使用create_project.py脚本创建HelloWorld项目后,Box2d、chipmunk物理引擎、cocos2d库、CocosDenshion音频库、扩展的库Extensions自动被添加到HelloWorld项目中。Ctrl+F7、Ctrl+F5即可编译运行项目。
4、相关资源博客
1、CSDN博主无幻的博客:http://blog.csdn.net/akof1314/article/category/1175224
2、CSDN博主bill_man小满的专栏:
(1)cocos2d-x游戏实例:http://blog.csdn.net/column/details/cocos2d-x-game.html
笔者通过自学cocos2d-x自己写的一些游戏实例,并进行讲解,也是cocos2d-x入门的进阶篇
(2)cocos2d-x入门:http://blog.csdn.net/column/details/cocos2d-x-study.html
cocos2d-x入门学习笔记,主要介绍cocos2d-x的基本结构,并且介绍引擎自带的示例
3、CSDN博主Cocos2der的专栏:http://blog.csdn.net/yanghuiliu?viewmode=contents
cocos2d-x游戏开发:使用cocos2d-x开源引擎开发Iphone游戏。 Cocos2D是iPhone开发中一个非常有用的库,它可以让你在创建自己的iPhone游戏时节省很多的时间。它具有很多的功能,比如sprite(精灵)扶持,非常酷的图形效果,动画效果,物理库,音频引擎等等。
4、CSDN博主fylz1125的博客:http://blog.csdn.net/column/details/lerry.html
5、CSDN博主红孩儿的博客:http://blog.csdn.net/honghaier/article/category/1217322
6、博客园博主子龙山人的博客:http://www.cnblogs.com/zilongshanren/tag/cocos2d-x/
子龙山人还有很多关于Coco2d的博文:http://www.cnblogs.com/zilongshanren/tag/cocos2d/:
7、官网wiki:http://www.cocos2d-x.org/projects/cocos2d-x/wiki
8、Cocos2d-x的2.1.2版本之后创建新项目的方法:http://cocos2d-x.org/projects/cocos2d-x/wiki/How_to_create_a_multi-platform_project_in_one_command_line
9、Cocos2d-x 2.1.2以前,旧版本的Win32创建工程配置方法:Cocos2d-x Application Wizard for Visual Studio User Guide
10、Cocos2d-x 2.1.4在线参考手册:http://www.cocos2d-x.org/reference/native-cpp/index.html

Hot AI Tools

Undresser.AI Undress
AI-powered app for creating realistic nude photos

AI Clothes Remover
Online AI tool for removing clothes from photos.

Undress AI Tool
Undress images for free

Clothoff.io
AI clothes remover

AI Hentai Generator
Generate AI Hentai for free.

Hot Article
Hot Tools

Notepad++7.3.1
Easy-to-use and free code editor

SublimeText3 Chinese version
Chinese version, very easy to use

Zend Studio 13.0.1
Powerful PHP integrated development environment

Dreamweaver CS6
Visual web development tools

SublimeText3 Mac version
God-level code editing software (SublimeText3)
Hot Topics


 What should I do if the Win7 taskbar does not display the icon? How to solve the problem of the computer taskbar icon disappearing
Jun 09, 2024 pm 01:49 PM
What should I do if the Win7 taskbar does not display the icon? How to solve the problem of the computer taskbar icon disappearing
Jun 09, 2024 pm 01:49 PM
Recently, many users using Win7 system have found that the icons in the taskbar suddenly disappeared, which makes the operation very inconvenient and they do not know how to solve the problem. This article will introduce to you how to solve the problem of disappearing taskbar icons in Win7 system. Bar! Cause Analysis When encountering such a situation, there are generally two situations: one is that the taskbar on the computer does not really disappear, but is just hidden, and the other is that the taskbar does disappear. Method 1: 1. There is a situation that you need to confirm first, that is, when the mouse is placed at the bottom of the screen, the taskbar will be displayed. You can directly click the mouse on the taskbar and select "Properties". 2. In the dialog box that opens, click & on the "Hide taskbar" option.
 How to clear all desktop background images in Win7? Tips for deleting personalized background images in Win7
Jun 02, 2024 am 09:01 AM
How to clear all desktop background images in Win7? Tips for deleting personalized background images in Win7
Jun 02, 2024 am 09:01 AM
In Win7 system, many users want to delete personalized desktop background images, but do not know how to delete them. This article will show you how to delete personalized background images in Win7 system. 1. First, open the control panel interface of the Win7 system and click to enter the "Appearance and Personalization" settings; 2. Then, in the opened interface, click the "Change Desktop Background" setting; 3. Then, click below "Desktop background" option; 4. Then, select Select all, and then click Clear all. Of course, you can also use it under "Customize", right-click the theme you want to delete, and then click &q on the shortcut menu
 Where is the network discovery in Win7? Tips for enabling the network discovery function in Win7
Jun 04, 2024 am 09:02 AM
Where is the network discovery in Win7? Tips for enabling the network discovery function in Win7
Jun 04, 2024 am 09:02 AM
Many computer users know that network discovery is a network setting. This setting will affect whether the computer can find other computers and devices on the network and whether it can find the computer when other computers on the network are found. So how to enable network discovery in win7? The following computer System Home U Disk Installation will introduce you to the tutorial on how to enable network discovery in win7 system. 1. First, click the "Start Menu" icon on the desktop taskbar and choose to open the "Control Panel" interface. 2. Then, in the interface that opens, set "View by" to "Category", and then choose to enter "Network and Internet"
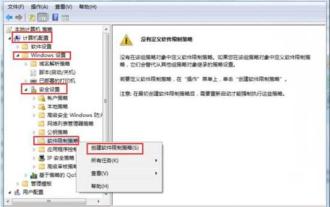 How to delete vbs virus in win7
Mar 26, 2024 pm 09:21 PM
How to delete vbs virus in win7
Mar 26, 2024 pm 09:21 PM
1. Click [Start → Run] and enter gpedit.msc. On the left side of the [Group Policy] window, click the [Computer Configuration → Windows Settings → Security Settings → Software Restriction Policy] item, and then click the [Action → Create New Policy] menu item. As shown in the picture: 2. Select [Other Rules] from the left. Right-click the blank space in the right pane and select the [New Path Rule] item in the menu. In the pop-up window, click the [Browse] button after [Path], select the wscript.exe file in the C: WindowsSystem32 folder, and set the [Security Level] to [Not Allowed]. Change C: System32, Dllcache and I386 under Windows
 How to modify boot animation in Windows 7
Mar 26, 2024 pm 08:51 PM
How to modify boot animation in Windows 7
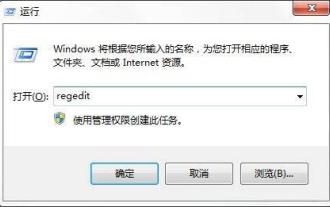
Mar 26, 2024 pm 08:51 PM
1. Press and hold the [Win+R] keys to open the run dialog box, enter [regedit] in the search box, and then confirm; as shown in the figure: 2. Open HKEY_LOCAL_MACHINESoftwareMicrosoftWindowsCurrentVersionAuthenticationLogonUIBackgroud in the opened registry editor; as shown in the figure Display: 3. Double-click [OEMBackground] and open it, change the default value [0] to [1], and then confirm to exit; as shown in the figure: 4. Rename the image backgroundDefault.jpg, (the image size cannot exceed 256k
 Introduction to how to change the startup sound of Windows 7 computer
Mar 26, 2024 pm 09:30 PM
Introduction to how to change the startup sound of Windows 7 computer
Mar 26, 2024 pm 09:30 PM
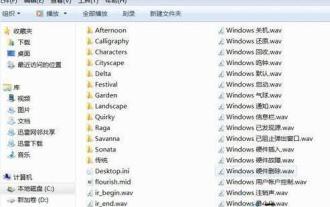
1. First copy the file you want to use as boot music to the corresponding directory of C: WindowsMedia. As shown in the figure: 2. Right-click the desktop on a single machine and select Personalize menu; as shown in the figure: 3. Select the sound option; as shown in the figure: 4. In the [Program Events] box in the [Sound] tab of the sound interface Select [Windows Login], then click [Browse]; as shown in the figure: 5. Select the music file that needs to be replaced, click Open, then click Apply and confirm to save the settings. as the picture shows:
 Detailed steps to install Go language on Win7 computer
Mar 27, 2024 pm 02:00 PM
Detailed steps to install Go language on Win7 computer
Mar 27, 2024 pm 02:00 PM
Detailed steps to install Go language on Win7 computer Go (also known as Golang) is an open source programming language developed by Google. It is simple, efficient and has excellent concurrency performance. It is suitable for the development of cloud services, network applications and back-end systems. . Installing the Go language on a Win7 computer allows you to quickly get started with the language and start writing Go programs. The following will introduce in detail the steps to install the Go language on a Win7 computer, and attach specific code examples. Step 1: Download the Go language installation package and visit the Go official website
 Solution to the problem that win7 network adapter cannot start
Mar 26, 2024 pm 09:56 PM
Solution to the problem that win7 network adapter cannot start
Mar 26, 2024 pm 09:56 PM
1. Enter the computer [Device Manager], open My Computer, right-click the mouse, select Properties at the bottom and click to enter the control panel. The first navigation on the left side of the control panel is [Device Manager]. As shown in the figure: 2. Check the [Network Adapter] status. After entering [Device Manager], search for [Network Adapter] and click to see the network cable and network card related status. As shown in the picture: 3. Update the driver software program. Usually, there may be a problem with the driver program. If the computer can be connected to the network cable, how to click [Update Driver Software Program] to update to the latest driver when connected to the computer? The problem can be solved. As shown in the figure: 4. Uninstall the wireless network card. If you do not have a network cable and the computer cannot access the Internet, select [Uninstall the wireless network card].
