About this Node app
This application contains a package.json, server.js and a .gitignore file, which are simple enough to be used at your fingertips.
.gitignore
node_modules/*
package.json
{
 "name": "docker-dev",
 "version": "0.1.0",
 "description": "Docker Dev",
 "dependencies": {
  "connect-redis": "~1.4.5",
  "express": "~3.3.3",
  "hiredis": "~0.1.15",
  "redis": "~0.8.4"
 }
}
server.js
var express = require('express'),
 app = express(),
 redis = require('redis'),
 RedisStore = require('connect-redis')(express),
 server = require('http').createServer(app);

app.configure(function() {
 app.use(express.cookieParser('keyboard-cat'));
 app.use(express.session({
  store: new RedisStore({
   host: process.env.REDIS_HOST || 'localhost',
   port: process.env.REDIS_PORT || 6379,
   db: process.env.REDIS_DB || 0
  }),
  cookie: {
   expires: false,
   maxAge: 30 * 24 * 60 * 60 * 1000
  }
 }));
});

app.get('/', function(req, res) {
 res.json({
 status: "ok"
 });
});

var port = process.env.HTTP_PORT || 3000;
server.listen(port);
console.log('Listening on port ' + port);
server.js will pull all dependencies and start a specific application. This specific application is configured to store session information in Redis and expose a request endpoint, which will return a JSON status in response Message. This is pretty standard stuff.
One thing to note is that the connection information for Redis can be overridden using environment variables - this will come in handy later when migrating from the development environment dev to the production environment prod.
Docker file
For development needs, we will let Redis and Node run in the same container. To do this, we will use a Dockerfile to configure this container.
Dockerfile
FROM dockerfile/ubuntu

MAINTAINER Abhinav Ajgaonkar <abhinav316@gmail.com>

# Install Redis
RUN  \
 apt-get -y -qq install python redis-server

# Install Node
RUN  \
 cd /opt && \
 wget http://nodejs.org/dist/v0.10.28/node-v0.10.28-linux-x64.tar.gz && \
 tar -xzf node-v0.10.28-linux-x64.tar.gz && \
 mv node-v0.10.28-linux-x64 node && \
 cd /usr/local/bin && \
 ln -s /opt/node/bin/* . && \
 rm -f /opt/node-v0.10.28-linux-x64.tar.gz

# Set the working directory
WORKDIR  /src

CMD ["/bin/bash"]
Let’s understand it line by line,
FROM dockerfile/ubuntu
This time tells docker to use the dockerfile/ubuntu image provided by Docker Inc. as the base image for building.
RUN
apt-get -y -qq install python redis-server
The base image contains absolutely nothing - so we need to use apt-get to get everything we need to get the application running. This installs python and redis-server. The Redis server is required because we will be storing session information Stored into it, and the necessity of python is the C extension required by npm that can be built as a Redis node module.
RUN \
 cd /opt && \
 wget http://nodejs.org/dist/v0.10.28/node-v0.10.28-linux-x64.tar.gz && \
 tar -xzf node-v0.10.28-linux-x64.tar.gz && \
 mv node-v0.10.28-linux-x64 node && \
 cd /usr/local/bin && \
 ln -s /opt/node/bin/* . && \
 rm -f /opt/node-v0.10.28-linux-x64.tar.gz
This will download and extract the 64-bit NodeJS binaries.
WORKDIR /src
This sentence will tell docker that once the container has been started, before executing the thing specified by the CMD attribute, do a cd /src.
CMD ["/bin/bash"]
As a final step, run /bin/bash.
Build and run the container
Now that the docker file is written, let’s build a Docker image.
docker build -t sqldump/docker-dev:0.1 .
Once the image is built, we can run a container using the following statement:
docker run -i -t --rm \
      -p 3000:3000 \
      -v `pwd`:/src \
      sqldump/docker-dev:0.1
Let’s take a look at what happens in the docker run command.
-i will start the container in interactive mode (versus -d in detached mode). This means that once the interactive session ends, the container will exit.
-t will allocate a pseudo-tty.
--rm will remove the container and its file system on exit.
-p 3000:3000 will forward port 3000 on the host to port 3000 on the container.
-v `pwd`:/src
This sentence will mount the current working directory to /src in the container on the host (for example, our project file). We will mount the current directory as a volume instead of using the ADD command in the Dockerfile, so we Any changes made in the text editor are immediately visible in the container.
sqldump/docker-dev:0.1 is the name and version of the docker image to run – this is the same name and version we used to build the docker image.
Since the Dockerfile specifies CMD ["/bin/bash"], as soon as the container is started, we will log in to a bash shell environment. If the docker run command is executed successfully, it will look like the following:

Start development
Now that the container is running, before we start writing code, we will need to sort out some standard, non-docker related things. First, use the following statement to start the redis server in the container:
service redis-server start
Then, install the project dependencies and nodemon. Nodemon will observe the changes in the project file and restart the server when appropriate.
npm install
npm install -g nodemon
Finally, start the server using the following command:
nodemon server.js
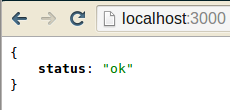
Now, if you navigate to http://localhost:3000 in your browser, you should see something like this:

Let us add another endpoint to Server.js to simulate the development process:
app.get('/hello/:name', function(req, res) {
 res.json({
  hello: req.params.name
 });
});
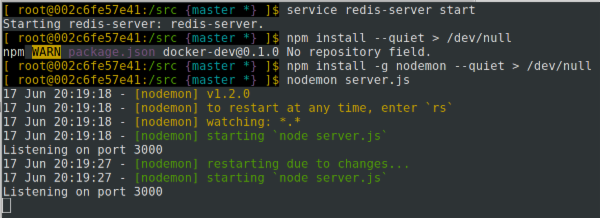
You will see that nodemon has detected the changes you made and restarted the server:

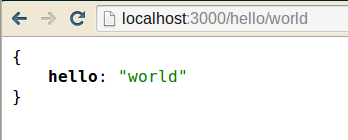
Now, if you navigate your browser to http://localhost:3000/hello/world, you will see the following response:

Production environment
The current state of the container is far from being released as a product. The data in redis will no longer remain persistent across container restarts. For example, if you restart the container, all session data will be wiped out. The same thing happens when you destroy the container and start a new one, which is obviously not what you want. I will talk about this issue in the second part of the productization content.
 The difference between k8s and docker
 what is nodejs
 Nodejs implements crawler
 What are the methods for docker to enter the container?
 What should I do if the docker container cannot access the external network?
 What is the use of docker image?
 How to unlock the password lock on your Apple phone if you forget it
 How to modify file name in linux
 How to implement h5 to slide up and load the next page on the web side


