

NAT DHCP和内部端口映射www和telnet服务

拓扑图如下: 650) this.width=650;" alt="" src="http://cdn.verydemo.com/upload/2013_05_27/13696041010960.jpg" border="0" /> 路由器R0作为设备内网路由器出口 R1为外网路由器 路由器R0的配置如下: hostname Router ! ! ! ! ip dhcp excluded-address
拓扑图如下:

路由器R0作为设备内网路由器出口 R1为外网路由器
路由器R0的配置如下:
hostname Router
!
!
!
!
ip dhcp excluded-address 192.168.100.1 192.168.100.10
!
ip dhcp pool zxf
network 192.168.100.0 255.255.255.0
default-router 192.168.100.1
!
!
!
!
!
!
!
!
!
!
!
!
!
interface FastEthernet0/0
ip address 192.168.100.1 255.255.255.0
ip nat inside
duplex auto
speed auto
!
interface FastEthernet0/1
ip address 200.200.200.2 255.255.255.252
ip nat outside
duplex auto
speed auto
!
interface Vlan1
no ip address
shutdown
!
router ospf 100
log-adjacency-changes
network 0.0.0.0 255.255.255.255 area 0
!
ip nat pool hello 200.200.200.2 200.200.200.2 netmask 255.255.255.252
ip nat inside source list 1 pool hello overload
ip nat inside source static tcp 192.168.100.3 23 200.200.200.2 23
ip nat inside source static tcp 192.168.100.11 80 200.200.200.2 8080
ip nat inside source static tcp 192.168.100.4 80 200.200.200.2 9999
ip classless
ip route 0.0.0.0 0.0.0.0 200.200.200.1
!
!
access-list 1 permit 192.168.100.0 0.0.0.255
!
!
!
!
!
line con 0
line vty 0 4
login
!
!
路由器R1配置如下:
interface FastEthernet0/0
ip address 200.200.200.1 255.255.255.252
duplex auto
speed auto
!
interface FastEthernet0/1
ip address 100.100.100.100 255.255.255.0
duplex auto
speed auto
!
interface Vlan1
no ip address
shutdown
!
router ospf 100
log-adjacency-changes
network 0.0.0.0 255.255.255.255 area 0
!
ip classless
!!!!!!!!!!!!!!
详细配置见附件:
shanliren

Hot AI Tools

Undresser.AI Undress
AI-powered app for creating realistic nude photos

AI Clothes Remover
Online AI tool for removing clothes from photos.

Undress AI Tool
Undress images for free

Clothoff.io
AI clothes remover

AI Hentai Generator
Generate AI Hentai for free.

Hot Article
Hot Tools

Notepad++7.3.1
Easy-to-use and free code editor

SublimeText3 Chinese version
Chinese version, very easy to use

Zend Studio 13.0.1
Powerful PHP integrated development environment

Dreamweaver CS6
Visual web development tools

SublimeText3 Mac version
God-level code editing software (SublimeText3)
Hot Topics
 1378
1378
 52
52

![Telnet in Windows 11 Complete Tutorial [Installation/Enablement and Troubleshooting]](https://img.php.cn/upload/article/000/000/164/168476253791019.jpg?x-oss-process=image/resize,m_fill,h_207,w_330) Telnet in Windows 11 Complete Tutorial [Installation/Enablement and Troubleshooting]
May 22, 2023 pm 09:35 PM
Telnet in Windows 11 Complete Tutorial [Installation/Enablement and Troubleshooting]
May 22, 2023 pm 09:35 PM
<p>Telnet is the abbreviation of "Terminal Network". It is a protocol that users can use to connect one computer to a local computer. </p><p>Here, the local computer refers to the device that initiates the connection, and the computer connected to the local computer is called the remote computer. </p><p>Telnet runs on a client/server principal, and although it is outdated, it is still used by many people in 2022. Many people have already switched to Windows 11 operating system, which is the latest operating system offered by Microsoft. &
 Win10 Ethernet Enable DHCP Repair Method Guide
Dec 30, 2023 pm 02:23 PM
Win10 Ethernet Enable DHCP Repair Method Guide
Dec 30, 2023 pm 02:23 PM
What happens when Windows 10 Ethernet prompts that dhcp is not enabled? Recently, some users have encountered such a problem when using computers. In order to help everyone use the network better, the editor will share the solution to the problem that Windows 10 Ethernet prompts that dhcp is not enabled. How to fix dhcp not enabled on win10 Ethernet: 1. First press the shortcut key "win+r", and then click run. 2. Then enter services.msc and press Enter. 3. Then you can find the "DHCPClient" service and double-click it to open it. 4. Finally, change the activation type to automatic and the service status to started, then press OK to save the settings and restart the local connection.
 NAT Boost vs. Qos for games; which one is better?
Feb 19, 2024 pm 07:00 PM
NAT Boost vs. Qos for games; which one is better?
Feb 19, 2024 pm 07:00 PM
In today's situation where almost all games are online, it is not advisable to ignore the optimization of home network. Almost all routers are equipped with NATBoost and QoS features designed to enhance users' gaming experience. This article will explore the definition, advantages and disadvantages of NATBoost and QoS. NATBoost vs. Qos for games; which one is better? NATBoost, also known as Network Address Translation Boost, is a feature built into routers that improves their performance. It's especially important for gaming because it helps reduce network latency, which is the time it takes for data to be transferred between the gaming device and the server. By optimizing the data processing method within the router, NATBoost achieves faster data processing speed and lower latency, thus changing the
![Soundbar detected as monitor screen on Windows PC [Fix]](https://img.php.cn/upload/article/000/465/014/170835733166289.jpg?x-oss-process=image/resize,m_fill,h_207,w_330) Soundbar detected as monitor screen on Windows PC [Fix]
Feb 19, 2024 pm 11:42 PM
Soundbar detected as monitor screen on Windows PC [Fix]
Feb 19, 2024 pm 11:42 PM
On Windows PCs, some users have discovered that the Soundbar is recognized as a monitor when connected to the HDMI port. This may cause some confusion, but the solution is not the only one. How to Connect a Soundbar to a PC via HDMI Most soundbars use HDMI, optical, or 3.5mm audio connections. If your soundbar only supports HDMI connections, it must be connected to an HDMI port labeled HDMIARC. Many TVs or monitors are usually equipped with multiple HDMI ports, one of which should support the ARC protocol that complies with the HDMI standard. In other words, HDMI is an interface used to transmit audio and video. If the device does not have an HDMI port, consider using a monitor.
 Teach you how to enable telnet service in win11
Dec 27, 2023 am 10:23 AM
Teach you how to enable telnet service in win11
Dec 27, 2023 am 10:23 AM
When we perform remote connection operations, we may need to enable the telnet service before we can continue. However, after updating the system, many people cannot find how to enable the win11 telnet service. In fact, just add the program service. How to open the win11telnet service: 1. First, we open the "Start Menu" at the bottom, as shown in the figure. 2. Then open the "Settings" 3. Then enter the "Application" settings on the left. 4. Then open "Optional Features" in the upper right corner. 5. After opening, scroll down to the bottom and open "More Windows Features". 6. Then find "Telnet Client", check it and click "OK". 7. Finally wait. After the system has completed the changes, you can start the telnet service.
 How to configure DHCP server on RHEL 9
Jun 08, 2023 pm 07:02 PM
How to configure DHCP server on RHEL 9
Jun 08, 2023 pm 07:02 PM
DHCP is an acronym for Dynamic Host Configuration Protocol, a network protocol that automatically assigns IP addresses to client systems in a computer network. It allocates clients from the DHCP pool or the IP address range specified in its configuration. While you can manually assign static IPs to client systems, a DHCP server simplifies the process and dynamically assigns IP addresses to client systems on the network. In this article, we will demonstrate how to install and configure a DHCP server on RHEL9/RockyLinux9. Prerequisite: Pre-installed RHEL9 or RockyLinux9 with sudo management permissions
 How to use telnet command
Nov 06, 2023 pm 02:58 PM
How to use telnet command
Nov 06, 2023 pm 02:58 PM
Telnet command usage: 1. Open the command line interface; 2. Enter the telnet command, followed by the IP address or domain name of the target host to be connected; 3. Press the Enter key, and telnet will try to establish a connection with the target host; 4. If the connection is successful, you will see a welcome message or login prompt; 5. Enter the user name and password to log in to the target host; 6. After successful login, you can perform various commands and operations just like operating on the local computer; 7. After completing the operation, you can use specific commands to exit the telnet session.
 How to solve the problem that DHCP is not enabled in the local connection. Recommended solutions to the problem that the computer cannot access the Internet and prompts that the DHCP service is not enabled.
Mar 13, 2024 pm 12:07 PM
How to solve the problem that DHCP is not enabled in the local connection. Recommended solutions to the problem that the computer cannot access the Internet and prompts that the DHCP service is not enabled.
Mar 13, 2024 pm 12:07 PM
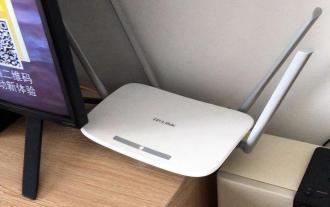
When many users use computers to connect to Ethernet, they will see the prompt "DHCP is not enabled" and don't know what to do. This is because the DHCP function is not enabled on the router. This article teaches you how to solve this problem. 1. Check the login information. To solve the problem of "DHCP is not enabled on the Ethernet", you need to log in to the router first. When logging in to a router, you usually need to obtain the router's gateway, username, and password information. This information is usually marked on the back of the router. The IP of the router is the so-called gateway address. The default gateway address of some routers is 192.168.1.1 or 192.168.0.1. The login account generally defaults to admin and the password is admin or 123456. 2. Log in to router management
