
 Web Front-end
HTML Tutorial
TinyEditor is a simple and easy-to-use html WYSIWYG editor_HTML/Xhtml_webpage production
Web Front-end
HTML Tutorial
TinyEditor is a simple and easy-to-use html WYSIWYG editor_HTML/Xhtml_webpage production
TinyEditor is a simple and easy-to-use html WYSIWYG editor_HTML/Xhtml_webpage production

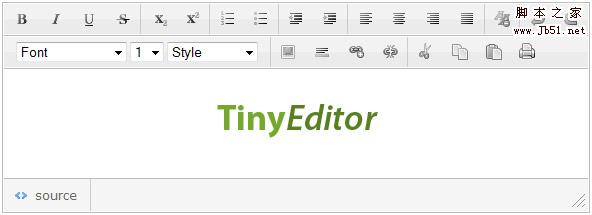
A few days ago I introduced you to a domestic xhtml editor. The TinyEditor is a simple and easy-to-use html WYSIWYG editor_HTML/Xhtml_webpage production I want to recommend to you today is a well-known foreign web design blog leigeber.comA simple and easy-to-use HTML WYSIWYG editor just released.
TinyEditor is a simple and easy-to-use html WYSIWYG editor_HTML/Xhtml_webpage production has the following features
- It is written in Javascript and does not depend on other libraries
- This is a lightweight editor, the file to be called is only 8kb
- It can handle most HTML formatting needs, and the built-in functions make the generated markup as concise as possible
- The small icons used in the editor use CSS Sprite technology to reduce http connections
- Tested and passed in mainstream browsers
- Can be used in personal or commercial projects under the creative commons license
Here’s how to use it:
- Reference the js files and css files provided by TinyEditor is a simple and easy-to-use html WYSIWYG editor_HTML/Xhtml_webpage production in the web page file
- Add the tags required by the editor in the web page file, which is actually a textarea, as follows
<span style="COLOR: #009900"><<span style="FONT-WEIGHT: bold; COLOR: #000000">textarea</span> <span style="COLOR: #000066">id</span><span style="COLOR: #66cc66">=</span><span style="COLOR: #ff0000">"input"</span> <span style="COLOR: #000066">style</span><span style="COLOR: #66cc66">=</span><span style="COLOR: #ff0000">"width:400px; height:200px"</span>><<span style="COLOR: #66cc66">/</span><span style="FONT-WEIGHT: bold; COLOR: #000000">textarea</span>></span>
Copy after loginNote that the length and width defined in the textarea are the size of the editor.
- Initialize the editor through scripts and configure various parameters, as follows:
<span style="FONT-WEIGHT: bold; COLOR: #003366">new</span> TINY.<span style="COLOR: #660066">editor</span>.<span style="COLOR: #660066">edit</span><span style="COLOR: #009900">(</span><span style="COLOR: #3366cc">'editor'</span><span style="COLOR: #339933">,</span><span style="COLOR: #009900">{</span>
	id<span style="COLOR: #339933">:</span><span style="COLOR: #3366cc">'input'</span><span style="COLOR: #339933">,</span>
<span style="COLOR: #006600; FONT-STYLE: italic">// (必须)上面第二步中定义的textarea的id</span>
	width<span style="COLOR: #339933">:</span><span style="COLOR: #cc0000">584</span><span style="COLOR: #339933">,</span>
<span style="COLOR: #006600; FONT-STYLE: italic">// (选填) 编辑器宽度</span>
	height<span style="COLOR: #339933">:</span><span style="COLOR: #cc0000">175</span><span style="COLOR: #339933">,</span>
 <span style="COLOR: #006600; FONT-STYLE: italic">// (选填) 编辑器高度</span>
	cssclass<span style="COLOR: #339933">:</span><span style="COLOR: #3366cc">'te'</span><span style="COLOR: #339933">,</span>
 <span style="COLOR: #006600; FONT-STYLE: italic">// (选填) 编辑器的class,用来通过css控制样式</span>
	controlclass<span style="COLOR: #339933">:</span><span style="COLOR: #3366cc">'tecontrol'</span><span style="COLOR: #339933">,</span>
 <span style="COLOR: #006600; FONT-STYLE: italic">// (选填) 编辑器上按钮的class</span>
	rowclass<span style="COLOR: #339933">:</span><span style="COLOR: #3366cc">'teheader'</span><span style="COLOR: #339933">,</span>
 <span style="COLOR: #006600; FONT-STYLE: italic">// (选填) 编辑器按钮行的class</span>
	dividerclass<span style="COLOR: #339933">:</span><span style="COLOR: #3366cc">'tedivider'</span><span style="COLOR: #339933">,</span>
<span style="COLOR: #006600; FONT-STYLE: italic">// (选填) 编辑器按钮间分割线的样式</span>
	controls<span style="COLOR: #339933">:</span><span style="COLOR: #009900">[</span><span style="COLOR: #3366cc">'bold'</span><span style="COLOR: #339933">,</span> <span style="COLOR: #3366cc">'italic'</span><span style="COLOR: #339933">,</span> <span style="COLOR: #3366cc">'underline'</span><span style="COLOR: #339933">,</span> <span style="COLOR: #3366cc">'strikethrough'</span><span style="COLOR: #339933">,</span> <span style="COLOR: #3366cc">'|'</span><span style="COLOR: #339933">,</span> <span style="COLOR: #3366cc">'subscript'</span><span style="COLOR: #339933">,</span> <span style="COLOR: #3366cc">'superscript'</span><span style="COLOR: #339933">,</span> <span style="COLOR: #3366cc">'|'</span><span style="COLOR: #339933">,</span> <span style="COLOR: #3366cc">'orderedlist'</span><span style="COLOR: #339933">,</span> <span style="COLOR: #3366cc">'unorderedlist'</span><span style="COLOR: #339933">,</span> <span style="COLOR: #3366cc">'|'</span> <span style="COLOR: #339933">,</span><span style="COLOR: #3366cc">'outdent'</span> <span style="COLOR: #339933">,</span><span style="COLOR: #3366cc">'indent'</span><span style="COLOR: #339933">,</span> <span style="COLOR: #3366cc">'|'</span><span style="COLOR: #339933">,</span> <span style="COLOR: #3366cc">'leftalign'</span><span style="COLOR: #339933">,</span> <span style="COLOR: #3366cc">'centeralign'</span><span style="COLOR: #339933">,</span> <span style="COLOR: #3366cc">'rightalign'</span><span style="COLOR: #339933">,</span> <span style="COLOR: #3366cc">'blockjustify'</span><span style="COLOR: #339933">,</span> <span style="COLOR: #3366cc">'|'</span><span style="COLOR: #339933">,</span> <span style="COLOR: #3366cc">'unformat'</span><span style="COLOR: #339933">,</span> <span style="COLOR: #3366cc">'|'</span><span style="COLOR: #339933">,</span> <span style="COLOR: #3366cc">'undo'</span><span style="COLOR: #339933">,</span> <span style="COLOR: #3366cc">'redo'</span><span style="COLOR: #339933">,</span> <span style="COLOR: #3366cc">'n'</span><span style="COLOR: #339933">,</span> <span style="COLOR: #3366cc">'font'</span><span style="COLOR: #339933">,</span> <span style="COLOR: #3366cc">'size'</span><span style="COLOR: #339933">,</span> <span style="COLOR: #3366cc">'style'</span><span style="COLOR: #339933">,</span> <span style="COLOR: #3366cc">'|'</span><span style="COLOR: #339933">,</span> <span style="COLOR: #3366cc">'image'</span><span style="COLOR: #339933">,</span> <span style="COLOR: #3366cc">'hr'</span><span style="COLOR: #339933">,</span> <span style="COLOR: #3366cc">'link'</span><span style="COLOR: #339933">,</span> <span style="COLOR: #3366cc">'unlink'</span><span style="COLOR: #339933">,</span> <span style="COLOR: #3366cc">'|'</span><span style="COLOR: #339933">,</span> <span style="COLOR: #3366cc">'cut'</span><span style="COLOR: #339933">,</span> <span style="COLOR: #3366cc">'copy'</span><span style="COLOR: #339933">,</span> <span style="COLOR: #3366cc">'paste'</span><span style="COLOR: #339933">,</span> <span style="COLOR: #3366cc">'print'</span><span style="COLOR: #009900">]</span><span style="COLOR: #339933">,</span>
 <span style="COLOR: #006600; FONT-STYLE: italic">// (必须) 要根据需要在编辑器上添加按钮控件, 其中'|'代表功能按钮间的竖分割线,'n'代表按钮行间的分割线</span>
	footer<span style="COLOR: #339933">:</span><span style="FONT-WEIGHT: bold; COLOR: #003366">true</span><span style="COLOR: #339933">,</span>
<span style="COLOR: #006600; FONT-STYLE: italic">// (选填) 是否显示编辑器底部</span>
	fonts<span style="COLOR: #339933">:</span><span style="COLOR: #009900">[</span><span style="COLOR: #3366cc">'Verdana'</span><span style="COLOR: #339933">,</span><span style="COLOR: #3366cc">'Arial'</span><span style="COLOR: #339933">,</span><span style="COLOR: #3366cc">'Georgia'</span><span style="COLOR: #339933">,</span><span style="COLOR: #3366cc">'Trebuchet MS'</span><span style="COLOR: #009900">]</span><span style="COLOR: #339933">,</span>
<span style="COLOR: #006600; FONT-STYLE: italic">// (选填) 编辑器中可选择的字体</span>
	xhtml<span style="COLOR: #339933">:</span><span style="FONT-WEIGHT: bold; COLOR: #003366">true</span><span style="COLOR: #339933">,</span>
<span style="COLOR: #006600; FONT-STYLE: italic">// (选填) 编辑器生成xhtml还是html标记</span>
	cssfile<span style="COLOR: #339933">:</span><span style="COLOR: #3366cc">'style.css'</span><span style="COLOR: #339933">,</span>
<span style="COLOR: #006600; FONT-STYLE: italic">// (选填) 要为编辑器附加的外部css文件</span>
	content<span style="COLOR: #339933">:</span><span style="COLOR: #3366cc">'starting content'</span><span style="COLOR: #339933">,</span>
<span style="COLOR: #006600; FONT-STYLE: italic">// (选填) 设置编辑器编辑区域中的初始内容</span>
	css<span style="COLOR: #339933">:</span><span style="COLOR: #3366cc">'body{background-color:#ccc}'</span><span style="COLOR: #339933">,</span>
 <span style="COLOR: #006600; FONT-STYLE: italic">// (选填) 设置编辑器编辑区域背景</span>
	bodyid<span style="COLOR: #339933">:</span><span style="COLOR: #3366cc">'editor'</span><span style="COLOR: #339933">,</span>
<span style="COLOR: #006600; FONT-STYLE: italic">// (选填) 设置编辑区域ID</span>
	footerclass<span style="COLOR: #339933">:</span><span style="COLOR: #3366cc">'tefooter'</span><span style="COLOR: #339933">,</span>
<span style="COLOR: #006600; FONT-STYLE: italic">// (选填) 设置编辑器底部class</span>
	toggle<span style="COLOR: #339933">:</span><span style="COLOR: #009900">{</span>text<span style="COLOR: #339933">:</span><span style="COLOR: #3366cc">'源代码'</span><span style="COLOR: #339933">,</span>activetext<span style="COLOR: #339933">:</span><span style="COLOR: #3366cc">'可视化'</span><span style="COLOR: #339933">,</span>cssclass<span style="COLOR: #339933">:</span><span style="COLOR: #3366cc">'toggle'</span><span style="COLOR: #009900">}</span><span style="COLOR: #339933">,</span>
 <span style="COLOR: #006600; FONT-STYLE: italic">// (选填) 设置源代码浏览切换文字,及切换按钮的class</span>
	resize<span style="COLOR: #339933">:</span><span style="COLOR: #009900">{</span>cssclass<span style="COLOR: #339933">:</span><span style="COLOR: #3366cc">'resize'</span><span style="COLOR: #009900">}</span>
<span style="COLOR: #006600; FONT-STYLE: italic">// (选填) 设置编辑器大小调整按钮的class</span>
<span style="COLOR: #009900">}</span><span style="COLOR: #009900">)</span><span style="COLOR: #339933">;</span>
Copy after loginIt can be said that it is highly configurable, and the configuration items are relatively clear.
In the actual application of TinyEditor is a simple and easy-to-use html WYSIWYG editor_HTML/Xhtml_webpage production, it should be noted that before submitting the editor content, the instance.post() function must be called to ensure that the latest visual content in the editing area is converted into marked text.
View example: http://sandbox.leigeber.com/tinyeditor/
Download: TinyEditor is a simple and easy-to-use html WYSIWYG editor_HTML/Xhtml_webpage production source code and sample files

Hot AI Tools

Undresser.AI Undress
AI-powered app for creating realistic nude photos

AI Clothes Remover
Online AI tool for removing clothes from photos.

Undress AI Tool
Undress images for free

Clothoff.io
AI clothes remover

AI Hentai Generator
Generate AI Hentai for free.

Hot Article
Hot Tools

Notepad++7.3.1
Easy-to-use and free code editor

SublimeText3 Chinese version
Chinese version, very easy to use

Zend Studio 13.0.1
Powerful PHP integrated development environment

Dreamweaver CS6
Visual web development tools

SublimeText3 Mac version
God-level code editing software (SublimeText3)
Hot Topics
 1379
1379
 52
52

 How to achieve wave effect with pure CSS3? (code example)
Jun 28, 2022 pm 01:39 PM
How to achieve wave effect with pure CSS3? (code example)
Jun 28, 2022 pm 01:39 PM
How to achieve wave effect with pure CSS3? This article will introduce to you how to use SVG and CSS animation to create wave effects. I hope it will be helpful to you!
 Use CSS skillfully to realize various strange-shaped buttons (with code)
Jul 19, 2022 am 11:28 AM
Use CSS skillfully to realize various strange-shaped buttons (with code)
Jul 19, 2022 am 11:28 AM
This article will show you how to use CSS to easily realize various weird-shaped buttons that appear frequently. I hope it will be helpful to you!
 How to hide elements in css without taking up space
Jun 01, 2022 pm 07:15 PM
How to hide elements in css without taking up space
Jun 01, 2022 pm 07:15 PM
Two methods: 1. Using the display attribute, just add the "display:none;" style to the element. 2. Use the position and top attributes to set the absolute positioning of the element to hide the element. Just add the "position:absolute;top:-9999px;" style to the element.
 How to implement lace borders in css3
Sep 16, 2022 pm 07:11 PM
How to implement lace borders in css3
Sep 16, 2022 pm 07:11 PM
In CSS, you can use the border-image attribute to achieve a lace border. The border-image attribute can use images to create borders, that is, add a background image to the border. You only need to specify the background image as a lace style; the syntax "border-image: url (image path) offsets the image border width inward. Whether outset is repeated;".
 It turns out that text carousel and image carousel can also be realized using pure CSS!
Jun 10, 2022 pm 01:00 PM
It turns out that text carousel and image carousel can also be realized using pure CSS!
Jun 10, 2022 pm 01:00 PM
How to create text carousel and image carousel? The first thing everyone thinks of is whether to use js. In fact, text carousel and image carousel can also be realized using pure CSS. Let’s take a look at the implementation method. I hope it will be helpful to everyone!
 How to enlarge the image by clicking the mouse in css3
Apr 25, 2022 pm 04:52 PM
How to enlarge the image by clicking the mouse in css3
Apr 25, 2022 pm 04:52 PM
Implementation method: 1. Use the ":active" selector to select the state of the mouse click on the picture; 2. Use the transform attribute and scale() function to achieve the picture magnification effect, the syntax "img:active {transform: scale(x-axis magnification, y Axis magnification);}".
 How to set animation rotation speed in css3
Apr 28, 2022 pm 04:32 PM
How to set animation rotation speed in css3
Apr 28, 2022 pm 04:32 PM
In CSS3, you can use the "animation-timing-function" attribute to set the animation rotation speed. This attribute is used to specify how the animation will complete a cycle and set the speed curve of the animation. The syntax is "element {animation-timing-function: speed attribute value;}".
 Does css3 animation effect have deformation?
Apr 28, 2022 pm 02:20 PM
Does css3 animation effect have deformation?
Apr 28, 2022 pm 02:20 PM
The animation effect in css3 has deformation; you can use "animation: animation attribute @keyframes ..{..{transform: transformation attribute}}" to achieve deformation animation effect. The animation attribute is used to set the animation style, and the transform attribute is used to set the deformation style. .
