

深入理解openstack网络架构(2)

https://blogs.oracle.com/ronen/entry/diving_into_openstack_network_architecture1 在这些use case中,我们会了解整个网络配置和他们如何一起运行。use case如下: 创建网络——我们创建网络时,发生了什么。如何创建多个隔离的网络。 创建虚拟机——一旦
https://blogs.oracle.com/ronen/entry/diving_into_openstack_network_architecture1
在这些use case中,我们会了解整个网络配置和他们如何一起运行。use case如下:
- 创建网络——我们创建网络时,发生了什么。如何创建多个隔离的网络。
- 创建虚拟机——一旦我们有了网络,我们可以创建虚拟机并将其接入网络。
- 虚拟机的DHCP请求——opensack可以自动为虚拟机配置IP。通过openstack neutron控制的DHCP服务完成。我们来了解这个服务如何运行,DHCP请求和回应是什么样子的?
这篇文章中,我们会展示网络连接的原理,我们会了解网络包如何从A到B。我们先了解已经完成的网络配置是什么样子的?然后我们讨论这些网络配置是如何以及何时创建的?我个人认为,通过例子和具体实践看到真实的网络接口如何工作以及如何将他们连接起来是非常有价值的。然后,一切真相大白,我们知道网络连接如何工作,在后边的文章中,我将进一步解释neutron如何配置这些组件,从而提供这样的网络连接能力。
我推荐在你自己的环境上尝试这些例子或者使用Oracle Openstack Tech Preview。完全理解这些网络场景,对我们调查openstack环境中的网络问题非常有帮助。
Use case #1: Create Network
创建network的操作非常简单。我们可以使用GUI或者命令行完成。openstack的网络仅供创建该网络的租户使用。当然如果这个网络是“shared”,它也可以被其他所有租户使用。一个网络可以有多个subnets,但是为了演示目的和简单,我们仅为每一个network创建一个subnet。通过命令行创建network:
# neutron net-create net1

Created a new network:

+---------------------------+--------------------------------------+

| Field                     | Value                                |

+---------------------------+--------------------------------------+

| admin_state_up            | True                                 |

| id                        | 5f833617-6179-4797-b7c0-7d420d84040c |

| name                      | net1                                 |

| provider:network_type     | vlan                                 |

| provider:physical_network | default                              |

| provider:segmentation_id  | 1000                                 |

| shared                    | False                                |

| status                    | ACTIVE                               |

| subnets                   |                                      |

| tenant_id                 | 9796e5145ee546508939cd49ad59d51f     |

+---------------------------+--------------------------------------+
# neutron subnet-create net1 10.10.10.0/24

Created a new subnet:

+------------------+------------------------------------------------+

| Field            | Value                                          |

+------------------+------------------------------------------------+

| allocation_pools | {"start": "10.10.10.2", "end": "10.10.10.254"} |

| cidr             | 10.10.10.0/24                                  |

| dns_nameservers  |                                                |

| enable_dhcp      | True                                           |

| gateway_ip       | 10.10.10.1                                     |

| host_routes      |                                                |

| id               | 2d7a0a58-0674-439a-ad23-d6471aaae9bc           |

| ip_version       | 4                                              |

| name             |                                                |

| network_id       | 5f833617-6179-4797-b7c0-7d420d84040c           |

| tenant_id        | 9796e5145ee546508939cd49ad59d51f               |

+------------------+------------------------------------------------+现在我们有了一个network和subnet,网络拓扑像这样:

现在让我们深入看下到底发生了什么?在控制节点,我们一个新的namespace被创建:
# ip netns list

qdhcp-5f833617-6179-4797-b7c0-7d420d84040c
这个namespace的名字是qdhcp- (参见上边),让我们深入namespace中看看有什么?
# ip netns exec qdhcp-5f833617-6179-4797-b7c0-7d420d84040c ip addr

1: lo:  mtu 65536 qdisc noqueue state UNKNOWN

    link/loopback 00:00:00:00:00:00 brd 00:00:00:00:00:00

    inet 127.0.0.1/8 scope host lo

    inet6 ::1/128 scope host

       valid_lft forever preferred_lft forever

12: tap26c9b807-7c:  mtu 1500 qdisc noqueue state UNKNOWN

    link/ether fa:16:3e:1d:5c:81 brd ff:ff:ff:ff:ff:ff

    inet 10.10.10.3/24 brd 10.10.10.255 scope global tap26c9b807-7c

    inet6 fe80::f816:3eff:fe1d:5c81/64 scope link

valid_lft forever preferred_lft forever我们发下在namespace下有两个网络接口,一个是loop设备,另一个叫“tap26c9b807-7c”。这个接口设置了IP地址10.10.10.3,他会接收dhcp请求(后边会讲)。接下来我们来跟踪下“tap26c9b807-7c”的网络连接性。我们从OVS上看下这个接口所连接的OVS网桥"br-int"。
# ovs-vsctl show
8a069c7c-ea05-4375-93e2-b9fc9e4b3ca1
    Bridge "br-eth2"
        Port "br-eth2"
            Interface "br-eth2"
                type: internal
        Port "eth2"
            Interface "eth2"
        Port "phy-br-eth2"
            Interface "phy-br-eth2"
    Bridge br-ex
        Port br-ex
            Interface br-ex
                type: internal
    Bridge br-int
        Port "int-br-eth2"
            Interface "int-br-eth2"
        Port "tap26c9b807-7c"
            tag: 1
            Interface "tap26c9b807-7c"
                type: internal
        Port br-int
            Interface br-int
                type: internal
ovs_version: "1.11.0"# ethtool -S int-br-eth2
NIC statistics:
peer_ifindex: 10
.
.
#ip link
.
.
10: phy-br-eth2: mtu 1500 qdisc pfifo_fast state UP qlen 1000
.
.注意“phy-br-eth2”连接到网桥"br-eth2",这个网桥的一个网口是物理网卡eth2。这意味着我们创建的网络创建了一个连接到了物理网卡eth2的namespace。eth2所在的虚拟机网络会连接所有的虚拟机的。
关于网络隔离:
#  ovs-ofctl dump-flows br-eth2
NXST_FLOW reply (xid=0x4):
 cookie=0x0, duration=18669.401s, table=0, n_packets=857, n_bytes=163350, idle_age=25, priority=4,in_port=2,dl_vlan=1 actions=mod_vlan_vid:1000,NORMAL
 cookie=0x0, duration=165108.226s, table=0, n_packets=14, n_bytes=1000, idle_age=5343, hard_age=65534, priority=2,in_port=2 actions=drop
 cookie=0x0, duration=165109.813s, table=0, n_packets=1671, n_bytes=213304, idle_age=25, hard_age=65534, priority=1 actions=NORMAL
#  ovs-ofctl dump-flows br-int
NXST_FLOW reply (xid=0x4):
 cookie=0x0, duration=18690.876s, table=0, n_packets=1610, n_bytes=210752, idle_age=1, priority=3,in_port=1,dl_vlan=1000 actions=mod_vlan_vid:1,NORMAL
 cookie=0x0, duration=165130.01s, table=0, n_packets=75, n_bytes=3686, idle_age=4212, hard_age=65534, priority=2,in_port=1 actions=drop
 cookie=0x0, duration=165131.96s, table=0, n_packets=863, n_bytes=160727, idle_age=1, hard_age=65534, priority=1 actions=NORMAL
Use case #2: Launch a VM
从Horizon或者命令行创建并启动一个虚拟机,下图是从Horzion创建的例子:
挂载网络并启动虚拟机:
一旦虚拟机启动并运行,我们发下nova支持给虚拟机绑定IP:
# nova list
+--------------------------------------+--------------+--------+------------+-------------+-----------------+
| ID                                   | Name         | Status | Task State | Power State | Networks        |
+--------------------------------------+--------------+--------+------------+-------------+-----------------+
| 3707ac87-4f5d-4349-b7ed-3a673f55e5e1 | Oracle Linux | ACTIVE | None       | Running     | net1=10.10.10.2 |
+--------------------------------------+--------------+--------+------------+-------------+-----------------+
nova list命令显示虚拟机在运行中,并被分配了IP 10.10.10.2。我们通过虚拟机定义文件,查看下虚拟机与虚拟机网络之间的连接性。虚拟机的配置文件在目录/var/lib/nova/instances//下可以找到。通过查看虚拟机定义文件,libvirt.xml,我们可以看到虚拟机连接到网络接口“tap53903a95-82”,这个网络接口连接到了Linux网桥 “qbr53903a95-82”:
<interface type="bridge">
      <mac address="fa:16:3e:fe:c7:87"></mac>
      <source bridge="qbr53903a95-82"></source>
      <target dev="tap53903a95-82"></target>
</interface>通过brctl查看网桥信息如下:
# brctl show
bridge name     bridge id               STP enabled     interfaces
qbr53903a95-82          8000.7e7f3282b836       no              qvb53903a95-82
tap53903a95-82网桥有两个网络接口,一个连接到虚拟机(“tap53903a95-82 “),另一个( “qvb53903a95-82”)连接到OVS网桥”br-int"。
 # ovs-vsctl show
83c42f80-77e9-46c8-8560-7697d76de51c
    Bridge "br-eth2"
        Port "br-eth2"
            Interface "br-eth2"
                type: internal
        Port "eth2"
            Interface "eth2"
        Port "phy-br-eth2"
            Interface "phy-br-eth2"
    Bridge br-int
        Port br-int
            Interface br-int
                type: internal
        Port "int-br-eth2"
            Interface "int-br-eth2"
        Port "qvb53903a95-82"
            tag: 3
            Interface "qvb53903a95-82"
ovs_version: "1.11.0"VM -> tap53903a95-82 (virtual interface) -> qbr53903a95-82 (Linux bridge) -> qvb53903a95-82 (interface connected from Linux bridge to OVS bridge br-int) -> int-br-eth2 (veth one end) -> phy-br-eth2 (veth the other end) -> eth2 physical interface.
与虚拟机相连的Linux bridage主要用于基于Iptables的安全组设置。安全组用于对虚拟机的网络隔离进行增强,由于iptables不能用于OVS网桥,因此我们使用了Linux网桥。后边我们会看到Linux网桥的规则设置。
Use case #3: Serving a DHCP request coming from the virtual machine
namespace与虚拟机之间连通,并且可以互相ping通,对于定位问题非常有用。我们可以从虚拟机ping通namespace,可以使用tcpdump或其他工具定位网络中断问题。
为了响应虚拟机的dhcp请求,Neutron使用了”dnsmasq“的Linux工具,这个工具是一个轻量的DNS、DHCP服务,更多的信息请查看(http://www.thekelleys.org.uk/dnsmasq/docs/dnsmasq-man.html)。我们可以在控制节点通过PS命令看到:
dnsmasq --no-hosts --no-resolv --strict-order --bind-interfaces --interface=tap26c9b807-7c --except-interface=lo --pid-file=/var/lib/neutron/dhcp/5f833617-6179-4797-b7c0-7d420d84040c/pid --dhcp-hostsfile=/var/lib/neutron/dhcp/5f833617-6179-4797-b7c0-7d420d84040c/host --dhcp-optsfile=/var/lib/neutron/dhcp/5f833617-6179-4797-b7c0-7d420d84040c/opts --leasefile-ro --dhcp-range=tag0,10.10.10.0,static,120s --dhcp-lease-max=256 --conf-file= --domain=openstacklocal
DHCP服务在namespace中连接到了一个tap接口(“--interface=tap26c9b807-7c”),从hosts文件我们可以看到:
# cat  /var/lib/neutron/dhcp/5f833617-6179-4797-b7c0-7d420d84040c/host
fa:16:3e:fe:c7:87,host-10-10-10-2.openstacklocal,10.10.10.2
之前的console输出可以看到虚拟机MAC为fa:16:3e:fe:c7:87 。这个mac地址与IP 10.10.10.2 关联,当包含该MAC的DHCP请求到达,dnsmasq返回10.10.10.2。在这个初始过程(可以重启网络服务触发)中从namespace中看,可以看到如下的DHCP请求:
# ip netns exec qdhcp-5f833617-6179-4797-b7c0-7d420d84040c tcpdump -n
19:27:12.191280 IP 0.0.0.0.bootpc > 255.255.255.255.bootps: BOOTP/DHCP, Request from fa:16:3e:fe:c7:87, length 310
19:27:12.191666 IP 10.10.10.3.bootps > 10.10.10.2.bootpc: BOOTP/DHCP, Reply, length 325
总之,DHCP服务由dnsmasq提供,这个服务由Neutron配置,监听在DHCP namespace中的网络接口上。Neutron还配置dnsmasq中的MAC/IP映射关系,所以当DHCP请求时会受到分配给它的IP。
总结
本文,我们基于之前讲解的各种网络组件,分析了三种use case下网络如何连通的。这些use cases对了解整个网络栈以及了解虚拟机/计算节点/DHCP namespace直接如何连通很有帮助。
根据我们的分析,我们确信启动虚拟机、虚拟机发出DHCP请求、虚拟机收到正确的IP后这个网络按照我们预想的工作。我们看到一个包经过一长串路径最终到达目的地,如果这一切成功,意味着这些组件功能正常。

Hot AI Tools

Undresser.AI Undress
AI-powered app for creating realistic nude photos

AI Clothes Remover
Online AI tool for removing clothes from photos.

Undress AI Tool
Undress images for free

Clothoff.io
AI clothes remover

AI Hentai Generator
Generate AI Hentai for free.

Hot Article
Hot Tools

Notepad++7.3.1
Easy-to-use and free code editor

SublimeText3 Chinese version
Chinese version, very easy to use

Zend Studio 13.0.1
Powerful PHP integrated development environment

Dreamweaver CS6
Visual web development tools

SublimeText3 Mac version
God-level code editing software (SublimeText3)
Hot Topics


![WLAN expansion module has stopped [fix]](https://img.php.cn/upload/article/000/465/014/170832352052603.gif?x-oss-process=image/resize,m_fill,h_207,w_330) WLAN expansion module has stopped [fix]
Feb 19, 2024 pm 02:18 PM
WLAN expansion module has stopped [fix]
Feb 19, 2024 pm 02:18 PM
If there is a problem with the WLAN expansion module on your Windows computer, it may cause you to be disconnected from the Internet. This situation is often frustrating, but fortunately, this article provides some simple suggestions that can help you solve this problem and get your wireless connection working properly again. Fix WLAN Extensibility Module Has Stopped If the WLAN Extensibility Module has stopped working on your Windows computer, follow these suggestions to fix it: Run the Network and Internet Troubleshooter to disable and re-enable wireless network connections Restart the WLAN Autoconfiguration Service Modify Power Options Modify Advanced Power Settings Reinstall Network Adapter Driver Run Some Network Commands Now, let’s look at it in detail
 What should I do if the earth is displayed in the lower right corner of Windows 10 when I cannot access the Internet? Various solutions to the problem that the Earth cannot access the Internet in Win10
Feb 29, 2024 am 09:52 AM
What should I do if the earth is displayed in the lower right corner of Windows 10 when I cannot access the Internet? Various solutions to the problem that the Earth cannot access the Internet in Win10
Feb 29, 2024 am 09:52 AM
This article will introduce the solution to the problem that the globe symbol is displayed on the Win10 system network but cannot access the Internet. The article will provide detailed steps to help readers solve the problem of Win10 network showing that the earth cannot access the Internet. Method 1: Restart directly. First check whether the network cable is not plugged in properly and whether the broadband is in arrears. The router or optical modem may be stuck. In this case, you need to restart the router or optical modem. If there are no important things being done on the computer, you can restart the computer directly. Most minor problems can be quickly solved by restarting the computer. If it is determined that the broadband is not in arrears and the network is normal, that is another matter. Method 2: 1. Press the [Win] key, or click [Start Menu] in the lower left corner. In the menu item that opens, click the gear icon above the power button. This is [Settings].
 Check network connection: lol cannot connect to the server
Feb 19, 2024 pm 12:10 PM
Check network connection: lol cannot connect to the server
Feb 19, 2024 pm 12:10 PM
LOL cannot connect to the server, please check the network. In recent years, online games have become a daily entertainment activity for many people. Among them, League of Legends (LOL) is a very popular multiplayer online game, attracting the participation and interest of hundreds of millions of players. However, sometimes when we play LOL, we will encounter the error message "Unable to connect to the server, please check the network", which undoubtedly brings some trouble to players. Next, we will discuss the causes and solutions of this error. First of all, the problem that LOL cannot connect to the server may be
 What's going on when the network can't connect to the wifi?
Apr 03, 2024 pm 12:11 PM
What's going on when the network can't connect to the wifi?
Apr 03, 2024 pm 12:11 PM
1. Check the wifi password: Make sure the wifi password you entered is correct and pay attention to case sensitivity. 2. Confirm whether the wifi is working properly: Check whether the wifi router is running normally. You can connect other devices to the same router to determine whether the problem lies with the device. 3. Restart the device and router: Sometimes, there is a malfunction or network problem with the device or router, and restarting the device and router may solve the problem. 4. Check the device settings: Make sure the wireless function of the device is turned on and the wifi function is not disabled.
 Windows 11 Folder Sharing Guide: Easily Share Your Files and Data
Mar 13, 2024 am 11:49 AM
Windows 11 Folder Sharing Guide: Easily Share Your Files and Data
Mar 13, 2024 am 11:49 AM
In daily life and work, we often need to share files and folders between different devices. Windows 11 system provides convenient built-in folder sharing functions, allowing us to easily and safely share the content we need with others within the same network while protecting the privacy of personal files. This feature makes file sharing simple and efficient without worrying about leaking private information. Through the folder sharing function of Windows 11 system, we can cooperate, communicate and collaborate more conveniently, improving work efficiency and life convenience. In order to successfully configure a shared folder, we first need to meet the following conditions: All devices (participating in sharing) are connected to the same network. Enable Network Discovery and configure sharing. Know the target device
 What is the architecture and working principle of Spring Data JPA?
Apr 17, 2024 pm 02:48 PM
What is the architecture and working principle of Spring Data JPA?
Apr 17, 2024 pm 02:48 PM
SpringDataJPA is based on the JPA architecture and interacts with the database through mapping, ORM and transaction management. Its repository provides CRUD operations, and derived queries simplify database access. Additionally, it uses lazy loading to only retrieve data when necessary, thus improving performance.
 1.3ms takes 1.3ms! Tsinghua's latest open source mobile neural network architecture RepViT
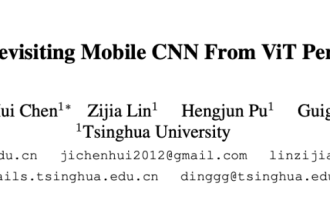
Mar 11, 2024 pm 12:07 PM
1.3ms takes 1.3ms! Tsinghua's latest open source mobile neural network architecture RepViT
Mar 11, 2024 pm 12:07 PM
Paper address: https://arxiv.org/abs/2307.09283 Code address: https://github.com/THU-MIG/RepViTRepViT performs well in the mobile ViT architecture and shows significant advantages. Next, we explore the contributions of this study. It is mentioned in the article that lightweight ViTs generally perform better than lightweight CNNs on visual tasks, mainly due to their multi-head self-attention module (MSHA) that allows the model to learn global representations. However, the architectural differences between lightweight ViTs and lightweight CNNs have not been fully studied. In this study, the authors integrated lightweight ViTs into the effective
 Dragon Lizard System Operation and Maintenance Alliance: How Kindling-OriginX integrates DeepFlow's data to enhance the explanation of network faults
Feb 22, 2024 pm 02:16 PM
Dragon Lizard System Operation and Maintenance Alliance: How Kindling-OriginX integrates DeepFlow's data to enhance the explanation of network faults
Feb 22, 2024 pm 02:16 PM
Editor's note: In 2023, the Dragon Lizard Community officially established the System Operation and Maintenance Alliance, which consists of the Academy of Information and Communications Technology, Alibaba Cloud, ZTE, Fudan University, Tsinghua University, Zhejiang University, Yunguan Qiuhao, Chengyun Digital, Yunshan Network, and Inspur Information, China Unicom Software and China Unicom Software Institute and other 12 units co-sponsored the initiative. This article is reproduced from Yun Guan Qiu Hao and introduces Kindling-OriginX, a member of the System Operation and Maintenance Alliance, to automatically generate interpretable fault root cause reports by combining DeepFlow's complete network data capabilities. DeepFlow is an open source project that leverages eBPF technology to provide high observability for complex cloud infrastructure and cloud native applications. Through eBPF technology, DeepFlow collects fine link tracking data, network
