

Qt之2D绘图

Qt中提供了强大的2D绘图系统,可以使用相同的API在屏幕和绘图设备上进行绘制,主要基于QPainter、QPaintDevice和QPaintEngine这3个类。其中,QPainter类用来执行绘图操作;QPaintDevice类提供绘图设备(绘图设备类QPaintDevice是所有可以绘制的对象的基类,它
Qt中提供了强大的2D绘图系统,可以使用相同的API在屏幕和绘图设备上进行绘制,主要基于QPainter、QPaintDevice和QPaintEngine这3个类。其中,QPainter类用来执行绘图操作;QPaintDevice类提供绘图设备(绘图设备类QPaintDevice是所有可以绘制的对象的基类,它的子类主要有QWidget、QPixmap、QPicture、QImage和QPrinter),是一个二维空间的抽象,可以使用QPainter在其上进行绘制;QPaintEngine类提供了一些接口,可以用于QPainter在不同的设备上进行绘制。
绘图系统中由QPainter来完成具体的绘制操作,提供了大量高度优化的函数来完成GUI编程所需要的大部分绘制工作。QPainter可以在继承自QPaintDevice类的任何对象上进行绘制操作。重点:QPainter一般在一个部件重绘(Paint Event)的处理函数paintEvent()中绘制;首先要创建QPainter对象,再进行图形的绘制,最后销毁QPainter对象。
QPainter提供的常用图形绘制函数

实例代码如下:
#include "widget.h"
#include "ui_widget.h"
#include <qpainter>

Widget::Widget(QWidget *parent) :
    QWidget(parent),
    ui(new Ui::Widget)
{
    ui->setupUi(this);
}

Widget::~Widget()
{
    delete ui;
}

void Widget::paintEvent(QPaintEvent *event)
{
    QPainter painter(this);
    //绘制线条
    painter.drawLine(QPoint(0, 0), QPoint(100, 100));

    //创建画笔
    QPen pen(Qt::green, 5, Qt::DotLine, Qt::RoundCap, Qt::RoundJoin);
    //使用画笔
    painter.setPen(pen);
    QRectF rectangle(70.0, 40.0, 80.0, 60.0);
    int startAngle = 30 * 16;
    int spanAngle = 120 * 16;
    //绘制圆弧
    painter.drawArc(rectangle, startAngle, spanAngle);

    //重新设置画笔
    pen.setWidth(1);
    pen.setStyle(Qt::SolidLine);
    painter.setPen(pen);
    //绘制一个矩形
    painter.drawRect(160, 20, 50, 40);
    //创建画刷
    QBrush brush(QColor(0, 0, 255), Qt::Dense4Pattern);
    //使用画刷
    painter.setBrush(brush);
    //绘制椭圆
    painter.drawEllipse(220, 20, 50, 50);
    //设置纹理
    brush.setTexture(QPixmap("../yafeilinux.png"));
    //重新使用画刷
    painter.setBrush(brush);
    //定义四个点
    static const QPointF points[4] = {
        QPointF(270.0, 80.0),
        QPointF(290.0, 10.0),
        QPointF(350.0, 30.0),
        QPointF(390.0, 70.0)
    };
    //使用四个点绘制多边形
    painter.drawPolygon(points, 4);

    //使用画刷填充一个矩形区域
    painter.fillRect(QRect(10, 100, 150, 20), QBrush(Qt::darkYellow));
    //擦除一个矩形区域的内容
    painter.eraseRect(QRect(50, 0, 50, 120));

    //线性渐变
    QLinearGradient linearGradient(QPointF(40, 190), QPointF(70, 190));
    //插入颜色
    linearGradient.setColorAt(0, Qt::yellow);
    linearGradient.setColorAt(0.5, Qt::red);
    linearGradient.setColorAt(1, Qt::green);
    //指定渐变区域以外的区域的扩散方式
    linearGradient.setSpread(QGradient::RepeatSpread);
    //使用渐变作为画刷
    painter.setBrush(linearGradient);
    painter.drawRect(10, 170, 90, 40);

    //辐射渐变
    QRadialGradient radialGradient(QPointF(200, 190), 50, QPointF(275, 200));
    radialGradient.setColorAt(0, QColor(255, 255, 100, 150));
    radialGradient.setColorAt(1, QColor(0, 0, 0, 50));
    painter.setBrush(radialGradient);
    painter.drawEllipse(QPointF(200, 190), 50, 50);

    //锥形渐变
    QConicalGradient conicalGradient(QPointF(350, 190), 60);
    conicalGradient.setColorAt(0.2, Qt::cyan);
    conicalGradient.setColorAt(0.9, Qt::black);
    painter.setBrush(conicalGradient);
    painter.drawEllipse(QPointF(350, 190), 50, 50);

    //画笔使用线性渐变来绘制直线和文字
    painter.setPen(QPen(linearGradient,2));
    painter.drawLine(0, 280, 100, 280);
    painter.drawText(150, 280,  tr("helloQt!"));
}</qpainter>
渐变填充:在Qt中,QGradient类就是用来和QBrush一起制定渐变填充的。
1、线性渐变在开始点和结束点之间插入颜色;
2、辐射渐变在焦点和环绕它的圆环间插入颜色;
3、锥形渐变在圆心周围插入颜色;
这3钟渐变分别由QGradient的3个子类来表示:QLinearQradient表示线性渐变、QRadialGradient表示辐射渐变和QConicalGradient表示锥形渐变。
抗锯齿渲染
QPainter进行绘制时可以使用QPainter::setRenderHint()函数渲染提示来指定是否要使用坑锯齿功能,其功能主要是对图像的边缘进行平滑处理,使其看起来更加柔和流畅。
坐标变换
QPainter的逻辑坐标与绘图设备(绘图设备的默认坐标系统中原点是(0, 0))的物理坐标之间的映射由QPainter的变换矩阵、视口和窗口处理,逻辑坐标和物理坐标默认是一致的。绘图时可以使用QPainter::scale()函数缩放坐标系统;使用QPainter::rotate()函数顺时针旋转坐标系统;使用QPainter::translate()函数平移坐标系统;使用QPainter::shear()围绕原点来扭曲坐标系统。
1、基本变换
坐标系统的2D变换由QTransform类实现,而且QTransform类对象可以存储多个变换操作,当同样的变换要多次使用时,建议使用QTransform类对象。坐标系统的变换是通过变换矩阵实现的,可以在平面上变换一个点到另一个点。进行所有变换操作的变换矩阵都可以使用QPainter::worldTransform()函数获得,如果要设置一个变换矩阵,可以使用QPainter::setWorldTransform()函数,这两个函数也可以分别使QPainter::transform()和QPainter::setTransform()函数来替代。
在进行变换操作时,可能需要多次改变坐标系统再恢复,这样就显得很乱,而且很容易出现操作错误。这时可以使用QPainter::save()函数来保存QPainter的变换矩阵,它会把变换矩阵保存到一个内部栈中,然后在需要恢复变换矩阵时再使用QPainter::restore()函数将其弹出。
2、窗口——视口转换
使用QPainter绘制时会使用到逻辑坐标,然后再转换为绘图设备的物理坐标。逻辑坐标到物理坐标的映射由QPainter的worldTransform()函数、QPainter的viewport()以及window()函数进行处理。其中,视口表示物理坐标下制定的一个任意矩形,而窗口表示逻辑坐标下的相同矩形。默认的,逻辑坐标和屋里坐标是重合的,都相当于绘图设备上的矩形。一个很好的办法是让视口和窗口维持相同的宽高比来防止变形:
    int side = qMin(width(), height());
    int x = (width() / 2);
    int y = (height() / 2);
    //设置窗口—视口转换
painter.setViewport(x, y, side, side);窗口——视口转换仅仅是线性变换,不会执行裁剪操作,这就意味着如果绘制范围超出了当前设置的窗口,那么仍然会使用相同的线性代数方法将绘制变换到视口上。
#include "widget.h"
#include "ui_widget.h"
#include <qpainter>

Widget::Widget(QWidget *parent) :
    QWidget(parent),
    ui(new Ui::Widget)
{
    ui->setupUi(this);
}

Widget::~Widget()
{
    delete ui;
}

void Widget::paintEvent(QPaintEvent *event)
{
    QPainter painter(this);
    //填充界面背景为白色
    painter.fillRect(rect(), Qt::white);
    painter.setPen(QPen(Qt::red, 11));
    //绘制一条线段
    painter.drawLine(QPoint(5, 6), QPoint(100, 99));
    //将坐标系统进行平移,使(200, 150)点作为原点
    painter.translate(200, 150);
    //开启抗锯齿
    painter.setRenderHint(QPainter::Antialiasing);
    //重新绘制相同的线段
    painter.drawLine(QPoint(5, 6), QPoint(100, 99));

    //保存painter的状态
    painter.save();
    //将坐标系统旋转90度
    painter.rotate(90);
    painter.setPen(Qt::cyan);
    //重新绘制相同的线段
    painter.drawLine(QPoint(5, 6), QPoint(100, 99));
    //恢复painter的状态
    painter.restore();

    painter.setBrush(Qt::darkGreen);
    //绘制一个矩形
    painter.drawRect(-50, -50, 100, 50);
    painter.save();
    //将坐标系统进行缩放
    painter.scale(0.5, 0.4);
    painter.setBrush(Qt::yellow);
    //重新绘制相同的矩形
    painter.drawRect(-50, -50, 100, 50);
    painter.restore();

    painter.setPen(Qt::blue);
    painter.setBrush(Qt::darkYellow);
    //绘制一个椭圆
    painter.drawEllipse(QRect(60, -100, 50, 50));
    //将坐标系统进行扭曲
    painter.shear(1.5, -0.7);
    painter.setBrush(Qt::darkGray);
    //重新绘制相同的椭圆
    painter.drawEllipse(QRect(60, -100, 50, 50));
}</qpainter>#include "widget.h"
#include "ui_widget.h"
#include <qpainter>
#include <qtooltip>
#include <qmouseevent>
#include <qtimer>
Widget::Widget(QWidget *parent) :
QWidget(parent),
ui(new Ui::Widget)
{
ui->setupUi(this);
setMouseTracking(true);
QTimer *timer = new QTimer(this);
connect(timer, SIGNAL(timeout()), this, SLOT(update()));
timer->start(1000);
angle = 0;
}
Widget::~Widget()
{
delete ui;
}
void Widget::paintEvent(QPaintEvent *event)
{
angle += 10;
if(angle == 360)
angle = 0;
int side = qMin(width(), height());
QPainter painter(this);
painter.setRenderHint(QPainter::Antialiasing);
QTransform transform;
transform.translate(width()/2, height()/2);
transform.scale(side/300.0, side/300.0);
transform.rotate(angle);
painter.setWorldTransform(transform);
painter.drawEllipse(-120, -120, 240, 240);
painter.drawLine(0, 0, 100, 0);
}
void Widget::mouseMoveEvent(QMouseEvent *event)
{
QString pos = QString("%1,%2").arg(event->pos().x()).arg(event->pos().y());
QToolTip::showText(event->globalPos(), pos, this);
}</qtimer></qmouseevent></qtooltip></qpainter>

Hot AI Tools

Undresser.AI Undress
AI-powered app for creating realistic nude photos

AI Clothes Remover
Online AI tool for removing clothes from photos.

Undress AI Tool
Undress images for free

Clothoff.io
AI clothes remover

AI Hentai Generator
Generate AI Hentai for free.

Hot Article
Hot Tools

Notepad++7.3.1
Easy-to-use and free code editor

SublimeText3 Chinese version
Chinese version, very easy to use

Zend Studio 13.0.1
Powerful PHP integrated development environment

Dreamweaver CS6
Visual web development tools

SublimeText3 Mac version
God-level code editing software (SublimeText3)
Hot Topics


 CUDA's universal matrix multiplication: from entry to proficiency!
Mar 25, 2024 pm 12:30 PM
CUDA's universal matrix multiplication: from entry to proficiency!
Mar 25, 2024 pm 12:30 PM
General Matrix Multiplication (GEMM) is a vital part of many applications and algorithms, and is also one of the important indicators for evaluating computer hardware performance. In-depth research and optimization of the implementation of GEMM can help us better understand high-performance computing and the relationship between software and hardware systems. In computer science, effective optimization of GEMM can increase computing speed and save resources, which is crucial to improving the overall performance of a computer system. An in-depth understanding of the working principle and optimization method of GEMM will help us better utilize the potential of modern computing hardware and provide more efficient solutions for various complex computing tasks. By optimizing the performance of GEMM
 Huawei's Qiankun ADS3.0 intelligent driving system will be launched in August and will be launched on Xiangjie S9 for the first time
Jul 30, 2024 pm 02:17 PM
Huawei's Qiankun ADS3.0 intelligent driving system will be launched in August and will be launched on Xiangjie S9 for the first time
Jul 30, 2024 pm 02:17 PM
On July 29, at the roll-off ceremony of AITO Wenjie's 400,000th new car, Yu Chengdong, Huawei's Managing Director, Chairman of Terminal BG, and Chairman of Smart Car Solutions BU, attended and delivered a speech and announced that Wenjie series models will be launched this year In August, Huawei Qiankun ADS 3.0 version was launched, and it is planned to successively push upgrades from August to September. The Xiangjie S9, which will be released on August 6, will debut Huawei’s ADS3.0 intelligent driving system. With the assistance of lidar, Huawei Qiankun ADS3.0 version will greatly improve its intelligent driving capabilities, have end-to-end integrated capabilities, and adopt a new end-to-end architecture of GOD (general obstacle identification)/PDP (predictive decision-making and control) , providing the NCA function of smart driving from parking space to parking space, and upgrading CAS3.0
 How to adjust the color when the screen turns black and white. Detailed introduction: How to exit black and white mode on your mobile phone.
Mar 21, 2024 pm 01:12 PM
How to adjust the color when the screen turns black and white. Detailed introduction: How to exit black and white mode on your mobile phone.
Mar 21, 2024 pm 01:12 PM
When many friends are using their mobile phones, they suddenly find that the operation interface of the mobile phone has turned into "black and white" color. They don't know what causes it or how to solve it. This article uses Android mobile phones as an example to teach you how to make it work. The color of the mobile phone's operating interface returns to normal. 1. Set up the interface of the mobile phone and find the "gear-shaped" icon in the operation interface. As shown below: Click this icon to enter the phone’s settings interface. 2. Options The operating interface of the mobile phone has changed to black and white, which is related to the "Display" setting of the mobile phone. After entering the settings interface of the mobile phone, find the "Display and Theme" option in the drop-down menu, as shown below: Then click "Display and Theme" option to enter the details page. 3. After changing the screen color and entering the "Display and Theme" option, find the "
 iPhone screenshots not working: How to fix it
May 03, 2024 pm 09:16 PM
iPhone screenshots not working: How to fix it
May 03, 2024 pm 09:16 PM
Screenshot feature not working on your iPhone? Taking a screenshot is very easy as you just need to hold down the Volume Up button and the Power button at the same time to grab your phone screen. However, there are other ways to capture frames on the device. Fix 1 – Using Assistive Touch Take a screenshot using the Assistive Touch feature. Step 1 – Go to your phone settings. Step 2 – Next, tap to open Accessibility settings. Step 3 – Open Touch settings. Step 4 – Next, open the Assistive Touch settings. Step 5 – Turn on Assistive Touch on your phone. Step 6 – Open “Customize Top Menu” to access it. Step 7 – Now you just need to link any of these functions to your screen capture. So click on the first
 Apple reveals iPhone 16 may have a larger display
Mar 22, 2024 pm 06:41 PM
Apple reveals iPhone 16 may have a larger display
Mar 22, 2024 pm 06:41 PM
Although it will be a long time before the release of the iPhone 16 series, there have been constant revelations about the appearance and configuration. According to Korean media SisaJournal, Apple plans to introduce new ultra-narrow bezel technology in the upcoming iPhone 16 series of mobile phones. The technology involves rolling internal copper wires into a more compact structure to reduce the bezel width of the phone's bottom display, allowing for a larger display. This innovative move aims to enhance the user experience, allowing users to enjoy a wider field of view and a more immersive entertainment experience. Apple has always been committed to continuously improving its product design and technology to bring more advanced functions and performance to users. The launch of the iPhone 16 series of mobile phones will further consolidate Apple’s leadership in smart phones. According to @SnapaDigital, Apple’s new
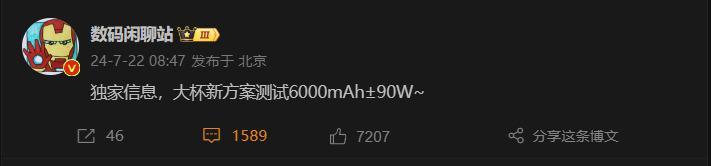 6000 mAh silicon negative battery! Xiaomi 15Pro upgrade leaked again
Jul 24, 2024 pm 12:45 PM
6000 mAh silicon negative battery! Xiaomi 15Pro upgrade leaked again
Jul 24, 2024 pm 12:45 PM
According to news on July 23, blogger Digital Chat Station broke the news that the battery capacity of Xiaomi 15 Pro has been increased to 6000mAh and supports 90W wired flash charging. This will be the Pro model with the largest battery in Xiaomi’s digital series. Digital Chat Station previously revealed that the battery of Xiaomi 15Pro has ultra-high energy density and the silicon content is much higher than that of competing products. After silicon-based batteries are tested on a large scale in 2023, second-generation silicon anode batteries have been identified as the future development direction of the industry. This year will usher in the peak of direct competition. 1. The theoretical gram capacity of silicon can reach 4200mAh/g, which is more than 10 times the gram capacity of graphite (the theoretical gram capacity of graphite is 372mAh/g). For the negative electrode, the capacity when the lithium ion insertion amount reaches the maximum is the theoretical gram capacity, which means that under the same weight
 How to use NetEase Mailbox Master
Mar 27, 2024 pm 05:32 PM
How to use NetEase Mailbox Master
Mar 27, 2024 pm 05:32 PM
NetEase Mailbox, as an email address widely used by Chinese netizens, has always won the trust of users with its stable and efficient services. NetEase Mailbox Master is an email software specially created for mobile phone users. It greatly simplifies the process of sending and receiving emails and makes our email processing more convenient. So how to use NetEase Mailbox Master, and what specific functions it has. Below, the editor of this site will give you a detailed introduction, hoping to help you! First, you can search and download the NetEase Mailbox Master app in the mobile app store. Search for "NetEase Mailbox Master" in App Store or Baidu Mobile Assistant, and then follow the prompts to install it. After the download and installation is completed, we open the NetEase email account and log in. The login interface is as shown below
 How to use Baidu Netdisk app
Mar 27, 2024 pm 06:46 PM
How to use Baidu Netdisk app
Mar 27, 2024 pm 06:46 PM
Cloud storage has become an indispensable part of our daily life and work nowadays. As one of the leading cloud storage services in China, Baidu Netdisk has won the favor of a large number of users with its powerful storage functions, efficient transmission speed and convenient operation experience. And whether you want to back up important files, share information, watch videos online, or listen to music, Baidu Cloud Disk can meet your needs. However, many users may not understand the specific use method of Baidu Netdisk app, so this tutorial will introduce in detail how to use Baidu Netdisk app. Users who are still confused can follow this article to learn more. ! How to use Baidu Cloud Network Disk: 1. Installation First, when downloading and installing Baidu Cloud software, please select the custom installation option.
