

Markup Language - List_HTML/Xhtml_Web Page Production

Standardized Design Solutions - Markup Language and Style Manual
Web Standards Solutions
The Markup and Style Handbook
Part 1: Get Down With Markup
Let’s start with markup syntax
Chapter 1 Checklist
Checklists can be found on almost every page on the web.
A list of hyperlinks; a list of shopping cart items; a list of your favorite movies...even a navigation list for the entire website. It may seem to some people that building a list is arbitrary, but what we are going to explore is exactly how There are advantages and disadvantages to several common methods of creating lists and collections. Later, we will list a few examples of how to embellish a common list with their advantages and disadvantages.
Let’s go shopping
Initially, I planned to use a laundry list as an example for this chapter, but I soon realized that I had no idea what items should be included in such a list. , so...for the sake of examples, let’s use food as an example!
Let’s imagine that you need to put a food list on your website. You may be confused as to why you should put a food list on your website. Well, this may be off topic. We just need to Just a reason to start thinking about lists...
On the page, let's say we want the list to look like... well, like a list — a long vertical list with each item on its own line:
Apples
Spaghetti
Green Beans
Milk
Looks very simple, doesn’t it? Similar to many aspects of page design and development, we can achieve the same (or similar) effect through many different methods .As with all examples later in this book, I will use eXtensilble
Show all examples from a HyperText Markup Language (XHTML) perspective — and make sure that the chosen methods use correct markup syntax, as per World Wild
Various standards developed by the Web Consortium (W3C).
We can easily add a
Tags are done, or you can use various list item tags to complete the job. Now let’s look at 3 completely different methods and the characteristics of each method.
Question Time
Which of the following methods is best for building a grocery list?
Method A: Use
Line break
Apples
Spaghetti
Green Beans
Milk
Method A is indeed a widely used method, and may be used by millions of pages. In fact I'm sure all of us are guilty of using this method once in a while, right? We want each item in the list to be on its own line and include a newline tag (in this case using xhtml-compliant Standard self-closing tag
) will generate a line break after each item. This is all its effects. It seems to be quite useful.
But what if we want to add a different style to this food list than other page elements? For example: if we want the color of all links in the list to be red instead of the default blue What should we do if we want to change the color, or want to change the font size? Really we can't do anything, we are limited by the font style (if it is set) for the entire html document. At the same time, if Without any tags surrounding the list, we can't create a unique css rule for the list.
Wrap
If we add a line like "Five Foot Loaf of Anthony's Italian" to the list
"Bread". Depending on the position of this list on the page, if there is insufficient horizontal space or the viewer's browser window is narrow, items that are too long will run the risk of being folded to the next line.
At the same time, we also need to consider that users with poor vision may change the default font size to increase readability. We believe that items can be easily arranged in narrow columns as shown in Figure 1-1, but Most likely it will be like
Figure 1 - 2 In this way, line breaks occur in unexpected places. When readers increase the font size, the design style will completely change.

Hmm... Now, I think I should buy bread, but in pictures 1-2, the two lines of words on the bread are really confusing.
When using a small screen device such as a mobile phone or PDA to read long lines, similar line wrapping problems will show its ugly face. Hardcore technology enthusiasts may carry around a Palm to record shopping lists.
Pilot (rather than paper and pen in the traditional sense) was wandering around the supermarket when he ended up looking for something called "Anthony's Italian" on the shelves.
Here I want to make a point in essence - using method A does not take into account the variables that designers cannot control when reading web pages.
Method B: Biting dots
Most mature browsers will add a dot symbol to the left of the list item when parsing the
- and the other parent tag of
- is the
- (ordered list), which will be discussed more later.
- open!
Use
tag to simulate the correct display effect of an unordered list with word wrapping, but in fact we have a better way.
It has always been very important to develop the habit of writing correct tag syntax. By writing tag syntax correctly, we will not have to worry about problems caused by no closing tags or incorrect nested elements in the future. If anyone reads These source codes can also enable them to have a deeper understanding of the effects that the source code wants to achieve.
Remember to make good use of online detection tools to check the URI you submit or the document you upload. In the end, you will feel that it is worth it.
Method C: Close
- Apples
- Spaghetti
- Green Beans
- Milk
- tag because
- is a block-level element, so it can be removed from use
tag, so that each item occupies its own line, but we missed its outer structure and lacked an element that means "this group of items is a list!"
From a semantic point of view This issue is also very important — A list is a group of items that belong together, so we should add such tags to them. In addition, using the correct list tag can clearly tell the browser, software or display device "This group of items is a list!", which is a semantic tag. The meaning is to structure the content according to the categories to which they belong.
Block-level and inline: HTML elements can be divided into two types: block-level and inline. Block-level elements will start on a new line and end with a line break, while inline elements will be displayed on the same line as other inline elements. Block-level elements can include other block-level elements. and inline elements, and inline elements cannot contain block-level elements.
Block-level elements include:,-
,
The appearance of the dot symbol can indeed help solve the line wrapping problem to a certain extent. Each food item will have a small dot symbol on the left. If an item is too long to wrap, there should be no small dot symbol next to it. It is obvious that this is not a new project, but method B still has the problem of unexpected results: it does not meet the standards.
Please check it
According to W3C’s XHTML 1.0 specification, all tags must be closed at the end — It would be a shame if we continued to use the above example and left all
Method C is closer to the perfect solution, but it still fails miserably, and the reason is still very obvious: it still does not meet the standard markup grammar.
We have closed the - open!

Hot AI Tools

Undresser.AI Undress
AI-powered app for creating realistic nude photos

AI Clothes Remover
Online AI tool for removing clothes from photos.

Undress AI Tool
Undress images for free

Clothoff.io
AI clothes remover

Video Face Swap
Swap faces in any video effortlessly with our completely free AI face swap tool!

Hot Article
Hot Tools

Notepad++7.3.1
Easy-to-use and free code editor

SublimeText3 Chinese version
Chinese version, very easy to use

Zend Studio 13.0.1
Powerful PHP integrated development environment

Dreamweaver CS6
Visual web development tools

SublimeText3 Mac version
God-level code editing software (SublimeText3)
Hot Topics
 1386
1386
 52
52

 How to write a novel in the Tomato Free Novel app. Share the tutorial on how to write a novel in Tomato Novel.
Mar 28, 2024 pm 12:50 PM
How to write a novel in the Tomato Free Novel app. Share the tutorial on how to write a novel in Tomato Novel.
Mar 28, 2024 pm 12:50 PM
Tomato Novel is a very popular novel reading software. We often have new novels and comics to read in Tomato Novel. Every novel and comic is very interesting. Many friends also want to write novels. Earn pocket money and edit the content of the novel you want to write into text. So how do we write the novel in it? My friends don’t know, so let’s go to this site together. Let’s take some time to look at an introduction to how to write a novel. Share the Tomato novel tutorial on how to write a novel. 1. First open the Tomato free novel app on your mobile phone and click on Personal Center - Writer Center. 2. Jump to the Tomato Writer Assistant page - click on Create a new book at the end of the novel.
 How to recover deleted contacts on WeChat (simple tutorial tells you how to recover deleted contacts)
May 01, 2024 pm 12:01 PM
How to recover deleted contacts on WeChat (simple tutorial tells you how to recover deleted contacts)
May 01, 2024 pm 12:01 PM
Unfortunately, people often delete certain contacts accidentally for some reasons. WeChat is a widely used social software. To help users solve this problem, this article will introduce how to retrieve deleted contacts in a simple way. 1. Understand the WeChat contact deletion mechanism. This provides us with the possibility to retrieve deleted contacts. The contact deletion mechanism in WeChat removes them from the address book, but does not delete them completely. 2. Use WeChat’s built-in “Contact Book Recovery” function. WeChat provides “Contact Book Recovery” to save time and energy. Users can quickly retrieve previously deleted contacts through this function. 3. Enter the WeChat settings page and click the lower right corner, open the WeChat application "Me" and click the settings icon in the upper right corner to enter the settings page.
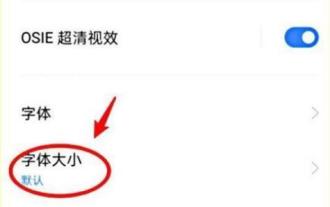 How to set font size on mobile phone (easily adjust font size on mobile phone)
May 07, 2024 pm 03:34 PM
How to set font size on mobile phone (easily adjust font size on mobile phone)
May 07, 2024 pm 03:34 PM
Setting font size has become an important personalization requirement as mobile phones become an important tool in people's daily lives. In order to meet the needs of different users, this article will introduce how to improve the mobile phone use experience and adjust the font size of the mobile phone through simple operations. Why do you need to adjust the font size of your mobile phone - Adjusting the font size can make the text clearer and easier to read - Suitable for the reading needs of users of different ages - Convenient for users with poor vision to use the font size setting function of the mobile phone system - How to enter the system settings interface - In Find and enter the "Display" option in the settings interface - find the "Font Size" option and adjust it. Adjust the font size with a third-party application - download and install an application that supports font size adjustment - open the application and enter the relevant settings interface - according to the individual
 How to use NetEase Mailbox Master
Mar 27, 2024 pm 05:32 PM
How to use NetEase Mailbox Master
Mar 27, 2024 pm 05:32 PM
NetEase Mailbox, as an email address widely used by Chinese netizens, has always won the trust of users with its stable and efficient services. NetEase Mailbox Master is an email software specially created for mobile phone users. It greatly simplifies the process of sending and receiving emails and makes our email processing more convenient. So how to use NetEase Mailbox Master, and what specific functions it has. Below, the editor of this site will give you a detailed introduction, hoping to help you! First, you can search and download the NetEase Mailbox Master app in the mobile app store. Search for "NetEase Mailbox Master" in App Store or Baidu Mobile Assistant, and then follow the prompts to install it. After the download and installation is completed, we open the NetEase email account and log in. The login interface is as shown below
 How to use Baidu Netdisk app
Mar 27, 2024 pm 06:46 PM
How to use Baidu Netdisk app
Mar 27, 2024 pm 06:46 PM
Cloud storage has become an indispensable part of our daily life and work nowadays. As one of the leading cloud storage services in China, Baidu Netdisk has won the favor of a large number of users with its powerful storage functions, efficient transmission speed and convenient operation experience. And whether you want to back up important files, share information, watch videos online, or listen to music, Baidu Cloud Disk can meet your needs. However, many users may not understand the specific use method of Baidu Netdisk app, so this tutorial will introduce in detail how to use Baidu Netdisk app. Users who are still confused can follow this article to learn more. ! How to use Baidu Cloud Network Disk: 1. Installation First, when downloading and installing Baidu Cloud software, please select the custom installation option.
 The secret of hatching mobile dragon eggs is revealed (step by step to teach you how to successfully hatch mobile dragon eggs)
May 04, 2024 pm 06:01 PM
The secret of hatching mobile dragon eggs is revealed (step by step to teach you how to successfully hatch mobile dragon eggs)
May 04, 2024 pm 06:01 PM
Mobile games have become an integral part of people's lives with the development of technology. It has attracted the attention of many players with its cute dragon egg image and interesting hatching process, and one of the games that has attracted much attention is the mobile version of Dragon Egg. To help players better cultivate and grow their own dragons in the game, this article will introduce to you how to hatch dragon eggs in the mobile version. 1. Choose the appropriate type of dragon egg. Players need to carefully choose the type of dragon egg that they like and suit themselves, based on the different types of dragon egg attributes and abilities provided in the game. 2. Upgrade the level of the incubation machine. Players need to improve the level of the incubation machine by completing tasks and collecting props. The level of the incubation machine determines the hatching speed and hatching success rate. 3. Collect the resources required for hatching. Players need to be in the game
 BTCC tutorial: How to bind and use MetaMask wallet on BTCC exchange?
Apr 26, 2024 am 09:40 AM
BTCC tutorial: How to bind and use MetaMask wallet on BTCC exchange?
Apr 26, 2024 am 09:40 AM
MetaMask (also called Little Fox Wallet in Chinese) is a free and well-received encryption wallet software. Currently, BTCC supports binding to the MetaMask wallet. After binding, you can use the MetaMask wallet to quickly log in, store value, buy coins, etc., and you can also get 20 USDT trial bonus for the first time binding. In the BTCCMetaMask wallet tutorial, we will introduce in detail how to register and use MetaMask, and how to bind and use the Little Fox wallet in BTCC. What is MetaMask wallet? With over 30 million users, MetaMask Little Fox Wallet is one of the most popular cryptocurrency wallets today. It is free to use and can be installed on the network as an extension
 Quickly master: How to open two WeChat accounts on Huawei mobile phones revealed!
Mar 23, 2024 am 10:42 AM
Quickly master: How to open two WeChat accounts on Huawei mobile phones revealed!
Mar 23, 2024 am 10:42 AM
In today's society, mobile phones have become an indispensable part of our lives. As an important tool for our daily communication, work, and life, WeChat is often used. However, it may be necessary to separate two WeChat accounts when handling different transactions, which requires the mobile phone to support logging in to two WeChat accounts at the same time. As a well-known domestic brand, Huawei mobile phones are used by many people. So what is the method to open two WeChat accounts on Huawei mobile phones? Let’s reveal the secret of this method. First of all, you need to use two WeChat accounts at the same time on your Huawei mobile phone. The easiest way is to
