

重新配置或卸载 11gR2 Grid Infrastructure

Oracle 11g R2 Grid Infrastructure 的安装与配置较之前的版本提供了更多的灵活性。在Grid Infrastructure安装完毕前执行root.sh经常容易出现错误,并且需要修复该错误才能得以继续。在这个版本中我们可以直接通过执行脚本rootcrs.pl来重新配置Grid Infrastr
Oracle 11g R2 Grid Infrastructure 的安装与配置较之前的版本提供了更多的灵活性。在Grid Infrastructure安装完毕前执行root.sh经常容易出现错误,并且需要修复该错误才能得以继续。在这个版本中我们可以直接通过执行脚本rootcrs.pl来重新配置Grid Infrastructure而无需先卸载Grid Infrastructure,然后修复故障后进行再次安装。下面描述了rootcrs.pl的用法以及使用deinstall彻底卸载Grid Infrastructure。
1、rootcrs.pl命令介绍
[python] view plaincopyprint?
- #命令位置:$GRID_HOME/crs/install
- #命令说明:
- # 该命令主要是用于对crs进行维护与管理,包括patch,upgrade,downgrade,deconfig等等
- # perldoc rootcrs.pl执行这个命令获得完整的介绍
- [root@linux1 install]# ./rootcrs.pl -h
- Unknown option: h
- Usage:
- rootcrs.pl [-verbose] [-upgrade | -patch] [-hahome
] - [-paramfile
] - [-deconfig | -downgrade] [-force] [-lastnode]
- [-downgrade] [-oldcrshome
] [-version ] - [-unlock [-crshome
]] - Options:
- -verbose Run this script in verbose mode
- -upgrade Oracle HA is being upgraded from previous version
- -patch Oracle HA is being upgraded to a patch version
- -hahome Complete path of Oracle Clusterware home
- -paramfile Complete path of file specifying HA parameter values
- -lastnode Force the node this is executing on to be considered the
- last node of the install and perform actions associated
- with configurig the last node
- -downgrade Downgrade the clusterware
- -version For use with downgrade; special handling is required if
- downgrading to 9i. This is the old crs version in the format
- A.B.C.D.E (e.g 11.1.0.6.0).
- -deconfig Remove Oracle Clusterware to allow it to be uninstalled or reinstalled.
- -force Force the executon of steps in delete that cannot be verified
- to be safe
- -unlock Unlock CRS home
- -crshome Complete path of crs home. Use with unlock option.
- -oldcrshome For use with downgrade. Complete path of the old crs home.
- If neither -upgrade nor -patch is supplied, a new install is performed
- To see the full manpage for this program, execute:
- perldoc rootcrs.pl
#对于执行root.sh失败时,我们可以通过该命令以-deconfig 参数来清除crs的配置信息,然后根据log修复故障或使用patch之后再重新执行root.sh
#对于该命令的patch,upgrade,downgrade用法再此不作详细介绍
2、重新配置Grid Infrastructure及ASM
[python] view plaincopyprint?
- #重新配置Grid Infrastructure并不会移除已经复制的二进制文件,仅仅是回复到配置crs之前的状态,下面是其步骤
- a、使用root用户登录,并执行下面的命令(所有节点,但最后一个节点除外)
- # perl $GRID_HOME/crs/install/rootcrs.pl -verbose -deconfig -force
- b、同样使用root用户在最后一个节点执行下面的命令。该命令将清空ocr 配置和voting disk
- # perl $GRID_HOME/crs/install/rootcrs.pl -verbose -deconfig -force -lastnode
- c、如果使用了ASM磁盘,继续下面的操作以使得ASM重新作为候选磁盘(清空所有的ASM磁盘组)
- # dd if=/dev/zero of=/dev/sdb1 bs=1024 count=100
- # /etc/init.d/oracleasm deletedisk DATA /dev/sdb1
- # /etc/init.d/oracleasm createdisk DATA /dev/sdb1
- #Author : Robinson
- #Blog : http://blog.csdn.net/robinson_0612
3、彻底删除Grid Infrastructure
[python] view plaincopyprint?
- #11g R2 Grid Infrastructure也提供了彻底卸载的功能,deinstall该命令取代了使用OUI方式来清除clusterware以及ASM,回复到安装grid之前的环境。
- #该命令将停止集群,移除二进制文件及其相关的所有配置信息。
- #命令位置:$GRID_HOME/deinstall
- #下面是该命令操作的具体事例,操作期间,需要提供一些交互信息,以及在新的session以root身份清除一些/tmp下的文件
- [root@linux1 bin]# ./crsctl check crs
- CRS-4638: Oracle High Availability Services is online
- CRS-4537: Cluster Ready Services is online
- CRS-4529: Cluster Synchronization Services is online
- CRS-4533: Event Manager is online
- [root@linux1 bin]# cd ../deinstall/
- [root@linux1 deinstall]# pwd
- /u01/app/11.2.0/grid/deinstall
- [root@linux1 deinstall]# ./deinstall
- You must not be logged in as root to run ./deinstall.
- Log in as Oracle user and rerun ./deinstall.
- [root@linux1 deinstall]# su grid
- [grid@linux1 deinstall]$ ./deinstall
- Checking for required files and bootstrapping ...
- Please wait ...
- Location of logs /tmp/deinstall2013-07-16_05-54-03-PM/logs/
- ############ ORACLE DEINSTALL & DECONFIG TOOL START ############
- ######################## CHECK OPERATION START ########################
- Install check configuration START
- Checking for existence of the Oracle home location /u01/app/11.2.0/grid
- Oracle Home type selected for de-install is: CRS
- Oracle Base selected for de-install is: /u01/app/grid
- Checking for existence of central inventory location /u01/app/oraInventory
- Checking for existence of the Oracle Grid Infrastructure home /u01/app/11.2.0/grid
- The following nodes are part of this cluster: linux1,linux2
- Install check configuration END
- Traces log file: /tmp/deinstall2013-07-16_05-54-03-PM/logs//crsdc.log
- Network Configuration check config START
- Network de-configuration trace file location: /tmp/deinstall2013-07-16_05-54-03-PM/logs/netdc_check207506844451155733.log
- Network Configuration check config END
- Asm Check Configuration START
- ASM de-configuration trace file location: /tmp/deinstall2013-07-16_05-54-03-PM/logs/asmcadc_check2698133635629979531.log
- ASM configuration was not detected in this Oracle home. Was ASM configured in this Oracle home (y|n) [n]: y
- Automatic Storage Management (ASM) instance is detected in this Oracle home /u01/app/11.2.0/grid.
- ASM Diagnostic Destination : /u01/app/grid
- ASM Diskgroups : +DATA
- Diskgroups will be dropped
- De-configuring ASM will drop all the diskgroups and it's contents at cleanup time. This will affect all of the databases and ACFS
- that use this ASM instance(s).
- If you want to retain the existing diskgroups or if any of the information detected is incorrect, you can modify by entering 'y'.
- Do you want to modify above information (y|n) [n]:
- ######################### CHECK OPERATION END #########################
- ####################### CHECK OPERATION SUMMARY #######################
- Oracle Grid Infrastructure Home is: /u01/app/11.2.0/grid
- The cluster node(s) on which the Oracle home exists are: (Please input nodes seperated by ",", eg: node1,node2,...)linux1,linux2
- Oracle Home selected for de-install is: /u01/app/11.2.0/grid
- Inventory Location where the Oracle home registered is: /u01/app/oraInventory
- ASM instance will be de-configured from this Oracle home
- Do you want to continue (y - yes, n - no)? [n]: y
- A log of this session will be written to: '/tmp/deinstall2013-07-16_05-54-03-PM/logs/deinstall_deconfig2013-07-16_05-54-37-PM.out'
- Any error messages from this session will be written to: '/tmp/deinstall2013-07-16_05-54-03-PM/logs/deinstall_deconfig2013-07-16_05-54-37-PM.err'
- ######################## CLEAN OPERATION START ########################
- ASM de-configuration trace file location: /tmp/deinstall2013-07-16_05-54-03-PM/logs/asmcadc_clean3319637107726750003.log
- ASM Clean Configuration START
- ASM Clean Configuration END
- Network Configuration clean config START
- Network de-configuration trace file location: /tmp/deinstall2013-07-16_05-54-03-PM/logs/netdc_clean9055263637610505743.log
- De-configuring Naming Methods configuration file on all nodes...
- Naming Methods configuration file de-configured successfully.
- De-configuring Local Net Service Names configuration file on all nodes...
- Local Net Service Names configuration file de-configured successfully.
- De-configuring Directory Usage configuration file on all nodes...
- Directory Usage configuration file de-configured successfully.
- De-configuring backup files on all nodes...
- Backup files de-configured successfully.
- The network configuration has been cleaned up successfully.
- Network Configuration clean config END
- ---------------------------------------->
- Run the following command as the root user or the administrator on node "linux2".
- /tmp/deinstall2013-07-16_05-54-03-PM/perl/bin/perl -I/tmp/deinstall2013-07-16_05-54-03-PM/perl/lib
- -I/tmp/deinstall2013-07-16_05-54-03-PM/crs/install /tmp/deinstall2013-07-16_05-54-03-PM/crs/install/rootcrs.pl -force
- -delete -paramfile /tmp/deinstall2013-07-16_05-54-03-PM/response/deinstall_Ora11g_gridinfrahome1.rsp
- Run the following command as the root user or the administrator on node "linux1".
- /tmp/deinstall2013-07-16_05-54-03-PM/perl/bin/perl -I/tmp/deinstall2013-07-16_05-54-03-PM/perl/lib
- -I/tmp/deinstall2013-07-16_05-54-03-PM/crs/install /tmp/deinstall2013-07-16_05-54-03-PM/crs/install/rootcrs.pl -force
- -delete -paramfile /tmp/deinstall2013-07-16_05-54-03-PM/response/deinstall_Ora11g_gridinfrahome1.rsp -lastnode
- Press Enter after you finish running the above commands
- Oracle Universal Installer clean START
- Detach Oracle home '/u01/app/11.2.0/grid' from the central inventory on the local node : Done
- Delete directory '/u01/app/11.2.0/grid' on the local node : Done
- Delete directory '/u01/app/oraInventory' on the local node : Done
- Delete directory '/u01/app/grid' on the local node : Done
- Detach Oracle home '/u01/app/11.2.0/grid' from the central inventory on the remote nodes 'linux2' : Done
- Delete directory '/u01/app/11.2.0/grid' on the remote nodes 'linux2' : Done
- Delete directory '/u01/app/oraInventory' on the remote nodes 'linux2' : Done
- Delete directory '/u01/app/grid' on the remote nodes 'linux2' : Done
- Oracle Universal Installer cleanup was successful.
- Oracle Universal Installer clean END
- Oracle install clean START
- Clean install operation removing temporary directory '/tmp/install' on node 'linux1'
- Clean install operation removing temporary directory '/tmp/install' on node 'linux2'
- Oracle install clean END
- ######################### CLEAN OPERATION END #########################
- ####################### CLEAN OPERATION SUMMARY #######################
- ASM instance was de-configured successfully from the Oracle home
- Oracle Clusterware is stopped and successfully de-configured on node "linux2"
- Oracle Clusterware is stopped and successfully de-configured on node "linux1"
- Oracle Clusterware is stopped and de-configured successfully.
- Successfully detached Oracle home '/u01/app/11.2.0/grid' from the central inventory on the local node.
- Successfully deleted directory '/u01/app/11.2.0/grid' on the local node.
- Successfully deleted directory '/u01/app/oraInventory' on the local node.
- Successfully deleted directory '/u01/app/grid' on the local node.
- Successfully detached Oracle home '/u01/app/11.2.0/grid' from the central inventory on the remote nodes 'linux2'.
- Successfully deleted directory '/u01/app/11.2.0/grid' on the remote nodes 'linux2'.
- Successfully deleted directory '/u01/app/oraInventory' on the remote nodes 'linux2'.
- Successfully deleted directory '/u01/app/grid' on the remote nodes 'linux2'.
- Oracle Universal Installer cleanup was successful.
- Run 'rm -rf /etc/oraInst.loc' as root on node(s) 'linux1,linux2' at the end of the session.
- Oracle install successfully cleaned up the temporary directories.
- #######################################################################
- ############# ORACLE DEINSTALL & DECONFIG TOOL END #############

更多参考
有关Oracle RAC请参考
使用crs_setperm修改RAC资源的所有者及权限
使用crs_profile管理RAC资源配置文件
RAC 数据库的启动与关闭
再说 Oracle RAC services
Services in Oracle Database 10g
Migrate datbase from single instance to Oracle RAC
Oracle RAC 连接到指定实例
Oracle RAC 负载均衡测试(结合服务器端与客户端)
Oracle RAC 服务器端连接负载均衡(Load Balance)
Oracle RAC 客户端连接负载均衡(Load Balance)
ORACLE RAC 下非缺省端口监听配置(listener.ora tnsnames.ora)
ORACLE RAC 监听配置 (listener.ora tnsnames.ora)
配置 RAC 负载均衡与故障转移
CRS-1006 , CRS-0215 故障一例
基于Linux (RHEL 5.5) 安装Oracle 10g RAC
使用 runcluvfy 校验Oracle RAC安装环境
有关Oracle 网络配置相关基础以及概念性的问题请参考:
配置非默认端口的动态服务注册
配置sqlnet.ora限制IP访问Oracle
Oracle 监听器日志配置与管理
设置 Oracle 监听器密码(LISTENER)
配置ORACLE 客户端连接到数据库
有关基于用户管理的备份和备份恢复的概念请参考
Oracle 冷备份
Oracle 热备份
Oracle 备份恢复概念
Oracle 实例恢复
Oracle 基于用户管理恢复的处理
SYSTEM 表空间管理及备份恢复
SYSAUX表空间管理及恢复
Oracle 基于备份控制文件的恢复(unsing backup controlfile)
有关RMAN的备份恢复与管理请参考
RMAN 概述及其体系结构
RMAN 配置、监控与管理
RMAN 备份详解
RMAN 还原与恢复
RMAN catalog 的创建和使用
基于catalog 创建RMAN存储脚本
基于catalog 的RMAN 备份与恢复
RMAN 备份路径困惑
使用RMAN实现异机备份恢复(WIN平台)
使用RMAN迁移文件系统数据库到ASM
linux 下RMAN备份shell脚本
使用RMAN迁移数据库到异机
有关ORACLE体系结构请参考
Oracle 表空间与数据文件
Oracle 密码文件
Oracle 参数文件
Oracle 联机重做日志文件(ONLINE LOG FILE)
Oracle 控制文件(CONTROLFILE)
Oracle 归档日志
Oracle 回滚(ROLLBACK)和撤销(UNDO)
Oracle 数据库实例启动关闭过程
Oracle 10g SGA 的自动化管理
Oracle 实例和Oracle数据库(Oracle体系结构)

Hot AI Tools

Undresser.AI Undress
AI-powered app for creating realistic nude photos

AI Clothes Remover
Online AI tool for removing clothes from photos.

Undress AI Tool
Undress images for free

Clothoff.io
AI clothes remover

AI Hentai Generator
Generate AI Hentai for free.

Hot Article
Hot Tools

Notepad++7.3.1
Easy-to-use and free code editor

SublimeText3 Chinese version
Chinese version, very easy to use

Zend Studio 13.0.1
Powerful PHP integrated development environment

Dreamweaver CS6
Visual web development tools

SublimeText3 Mac version
God-level code editing software (SublimeText3)
Hot Topics
 1378
1378
 52
52

 How to uninstall wps document
Mar 20, 2024 pm 02:01 PM
How to uninstall wps document
Mar 20, 2024 pm 02:01 PM
How to uninstall WPS documents: Go to the control panel and find wpsoffic to uninstall WPS. WPS has the most favorite office functions of working people. Commonly used documents, forms, presentations and other functions can be used directly, which can provide a lot of work efficiency. But many friends don’t know how to uninstall wps files, so how to uninstall wps files? Let me explain it to you below. Uninstallation is the process of removing program files, folders, and related data from a computer to free up disk space and remove software from the system. In addition, uninstallation involves deleting the device driver and related registry information from the hard disk and then removing the device from the computer's physical device. The following are the steps to uninstall WPS documents, which are suitable for uninstalling any software.
 Complete steps to uninstall 360 Browser
Feb 25, 2024 pm 04:51 PM
Complete steps to uninstall 360 Browser
Feb 25, 2024 pm 04:51 PM
How to uninstall 360 Browser Cleanly With the rapid development and popularity of the Internet, browsers have become one of the indispensable tools in people's daily lives. There are many browsers on the market to choose from, such as Chrome, Firefox, Edge, etc. However, 360 Browser, as a popular browser in China, is also used by many users. However, in some cases, users may need to uninstall 360 Browser, either because they no longer use it or want to try another browser. In this article we will provide a simple and dry
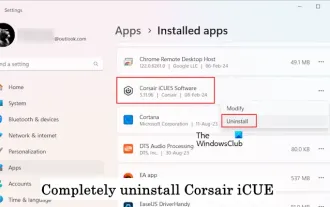 How to completely uninstall Corsair Icue on Windows 11/10
Mar 04, 2024 am 10:22 AM
How to completely uninstall Corsair Icue on Windows 11/10
Mar 04, 2024 am 10:22 AM
CorsairIcue software provides users with several features such as RGB lighting control, performance monitoring such as fan control, etc. Sometimes, the CorsairIcue software doesn't work properly. In this case we have to completely uninstall it and reinstall it. In this article, we will show you how to completely uninstall CorsairIcue on Windows 11/10. How to Completely Uninstall CorsairIcue on Windows 11/10 The following instructions will guide you on how to uninstall CorsairIcue on Windows 11/10. Uninstall CorsairICue via settings or control panel Remove all related services Remove registry keys Remove remaining files Below,
 The working principle and configuration method of GDM in Linux system
Mar 01, 2024 pm 06:36 PM
The working principle and configuration method of GDM in Linux system
Mar 01, 2024 pm 06:36 PM
Title: The working principle and configuration method of GDM in Linux systems In Linux operating systems, GDM (GNOMEDisplayManager) is a common display manager used to control graphical user interface (GUI) login and user session management. This article will introduce the working principle and configuration method of GDM, as well as provide specific code examples. 1. Working principle of GDM GDM is the display manager in the GNOME desktop environment. It is responsible for starting the X server and providing the login interface. The user enters
 How to uninstall Quark Network Disk? How to completely uninstall Quark Network Disk
Mar 14, 2024 am 08:52 AM
How to uninstall Quark Network Disk? How to completely uninstall Quark Network Disk
Mar 14, 2024 am 08:52 AM
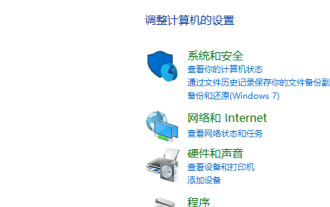
There are many easy-to-use network disk software on the market, such as Baidu Cloud Disk, Quark Cloud Disk, Alibaba Cloud Disk, etc. Some users have transferred the resources in Quark Network Disk to another disk and want to uninstall Quark Network Disk but find that they cannot uninstall. What is going on? This tutorial will show you how to completely uninstall Quark Network Disk. How to uninstall Quark Network Disk? 1. First open the control panel. 2. Then select “Uninstall a program”. 3. Finally, right-click and select "Uninstall" to uninstall cleanly. PS: After uninstalling, you can also use the software to scan again to see if there is any remaining garbage.
 How to uninstall openiv
Feb 23, 2024 am 09:09 AM
How to uninstall openiv
Feb 23, 2024 am 09:09 AM
With the popularity of computers and the development of software, we often need to add or uninstall some software to meet our needs. One of the software installation and uninstallation requirements is OpenIV. OpenIV is a tool for modifying and managing Grand Theft Auto (GTA) games. However, we may get confused when we no longer need OpenIV or need to uninstall it. This article will introduce you how to uninstall OpenIV. First, we need to understand how OpenIV is installed. usually
 Understand Linux Bashrc: functions, configuration and usage
Mar 20, 2024 pm 03:30 PM
Understand Linux Bashrc: functions, configuration and usage
Mar 20, 2024 pm 03:30 PM
Understanding Linux Bashrc: Function, Configuration and Usage In Linux systems, Bashrc (BourneAgainShellruncommands) is a very important configuration file, which contains various commands and settings that are automatically run when the system starts. The Bashrc file is usually located in the user's home directory and is a hidden file. Its function is to customize the Bashshell environment for the user. 1. Bashrc function setting environment
 The latest solution to the problem that Office is not cleanly uninstalled and cannot be reinstalled
Mar 13, 2024 pm 04:31 PM
The latest solution to the problem that Office is not cleanly uninstalled and cannot be reinstalled
Mar 13, 2024 pm 04:31 PM
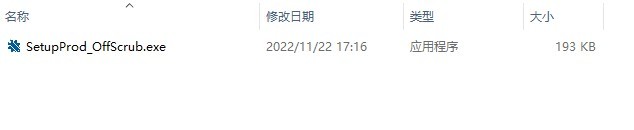
Nowadays, computers on the market will have Office software installed by default. However, some users find that the version is not easy to use. If they want to uninstall and reinstall the commonly used Office version, they are prompted that the uninstallation failed and cannot be installed. This is because the system’s own Office cannot be uninstalled. clean, causing a version conflict during installation. Let’s take a look at how to solve the problem that Office is not cleanly uninstalled and cannot be reinstalled. Method 1: Use the official office uninstall tool 1. Download the [Microsoft official office uninstall tool] to support automatic uninstallation of Office 2007~2019 series and Microsoft 365 and other software. 2. After running [SetupProd_OffScrub.exe], it will automatically
