

Linux CentOS安装配置MySQL数据库

没什么好说的,直接正面刚吧。
安装mysql数据库
a)下载mysql源安装包:wget http://dev.mysql.com/get/mysql57-community-release-el7-8.noarch.rpm
b)安装mysql源:yum localinstall mysql57-community-release-el7-8.noarch.rpm
若结尾出现complete!,则说明MySQL源安装完成
c)检测是否安装完成:yum repolist enabled | grep "mysql.*-community.*"

d)安装mysql:yum install mysql-community-server
若结尾出现Complete!, 则MySQL安装完成
e)设置开启启动mysql服务:systemctl enable mysqld
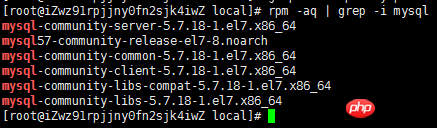
f)查看安装的mysql版本:rpm -aq | grep -i mysql
g)启动MySQL服务:systemctl restart mysqld
h)查看MySQL初始密码:grep 'A temporary password' /var/log/mysqld.log

i)更改MySQL密码:mysqladmin -u root -p'旧密码' password '新密码'

这里更改密码出了问题,更改失败,这是因为密码太过简单的原因。有两个接解决方法:
方法一:把密码设置复杂点(这是最直接的方法)
方法二:关闭mysql密码强度验证(validate_password)
编辑配置文件:vim /etc/my.cnf, 增加这么一行validate_password=off
编辑后重启mysql服务:systemctl restart mysqld
j)设置mysql能够远程访问:
登录进MySQL:mysql -uroot -p密码
增加一个用户给予访问权限:grant all privileges on *.* to 'root'@'ip地址' identified by '密码' with grant option; //可将ip改为%%,表示开启所有的

刷新权限:flush privileges;
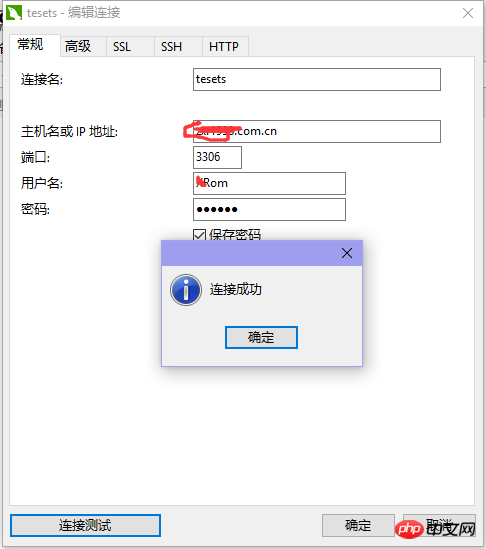
OK,我本地连接试下。
好了,到这里就结束了,祝大家别出BUG。
更多相关教程请访问 MySQL视频教程

Hot AI Tools

Undresser.AI Undress
AI-powered app for creating realistic nude photos

AI Clothes Remover
Online AI tool for removing clothes from photos.

Undress AI Tool
Undress images for free

Clothoff.io
AI clothes remover

AI Hentai Generator
Generate AI Hentai for free.

Hot Article
Hot Tools

Notepad++7.3.1
Easy-to-use and free code editor

SublimeText3 Chinese version
Chinese version, very easy to use

Zend Studio 13.0.1
Powerful PHP integrated development environment

Dreamweaver CS6
Visual web development tools

SublimeText3 Mac version
God-level code editing software (SublimeText3)
Hot Topics


 PHP's big data structure processing skills
May 08, 2024 am 10:24 AM
PHP's big data structure processing skills
May 08, 2024 am 10:24 AM
Big data structure processing skills: Chunking: Break down the data set and process it in chunks to reduce memory consumption. Generator: Generate data items one by one without loading the entire data set, suitable for unlimited data sets. Streaming: Read files or query results line by line, suitable for large files or remote data. External storage: For very large data sets, store the data in a database or NoSQL.
 How to optimize MySQL query performance in PHP?
Jun 03, 2024 pm 08:11 PM
How to optimize MySQL query performance in PHP?
Jun 03, 2024 pm 08:11 PM
MySQL query performance can be optimized by building indexes that reduce lookup time from linear complexity to logarithmic complexity. Use PreparedStatements to prevent SQL injection and improve query performance. Limit query results and reduce the amount of data processed by the server. Optimize join queries, including using appropriate join types, creating indexes, and considering using subqueries. Analyze queries to identify bottlenecks; use caching to reduce database load; optimize PHP code to minimize overhead.
 How to use MySQL backup and restore in PHP?
Jun 03, 2024 pm 12:19 PM
How to use MySQL backup and restore in PHP?
Jun 03, 2024 pm 12:19 PM
Backing up and restoring a MySQL database in PHP can be achieved by following these steps: Back up the database: Use the mysqldump command to dump the database into a SQL file. Restore database: Use the mysql command to restore the database from SQL files.
 How to insert data into a MySQL table using PHP?
Jun 02, 2024 pm 02:26 PM
How to insert data into a MySQL table using PHP?
Jun 02, 2024 pm 02:26 PM
How to insert data into MySQL table? Connect to the database: Use mysqli to establish a connection to the database. Prepare the SQL query: Write an INSERT statement to specify the columns and values to be inserted. Execute query: Use the query() method to execute the insertion query. If successful, a confirmation message will be output.
 How to fix mysql_native_password not loaded errors on MySQL 8.4
Dec 09, 2024 am 11:42 AM
How to fix mysql_native_password not loaded errors on MySQL 8.4
Dec 09, 2024 am 11:42 AM
One of the major changes introduced in MySQL 8.4 (the latest LTS release as of 2024) is that the "MySQL Native Password" plugin is no longer enabled by default. Further, MySQL 9.0 removes this plugin completely. This change affects PHP and other app
 How to use MySQL stored procedures in PHP?
Jun 02, 2024 pm 02:13 PM
How to use MySQL stored procedures in PHP?
Jun 02, 2024 pm 02:13 PM
To use MySQL stored procedures in PHP: Use PDO or the MySQLi extension to connect to a MySQL database. Prepare the statement to call the stored procedure. Execute the stored procedure. Process the result set (if the stored procedure returns results). Close the database connection.
 How to create a MySQL table using PHP?
Jun 04, 2024 pm 01:57 PM
How to create a MySQL table using PHP?
Jun 04, 2024 pm 01:57 PM
Creating a MySQL table using PHP requires the following steps: Connect to the database. Create the database if it does not exist. Select a database. Create table. Execute the query. Close the connection.
 The difference between oracle database and mysql
May 10, 2024 am 01:54 AM
The difference between oracle database and mysql
May 10, 2024 am 01:54 AM
Oracle database and MySQL are both databases based on the relational model, but Oracle is superior in terms of compatibility, scalability, data types and security; while MySQL focuses on speed and flexibility and is more suitable for small to medium-sized data sets. . ① Oracle provides a wide range of data types, ② provides advanced security features, ③ is suitable for enterprise-level applications; ① MySQL supports NoSQL data types, ② has fewer security measures, and ③ is suitable for small to medium-sized applications.
