 Web Front-end
 JS Tutorial
 HTML page pops up a centered and draggable custom window layer_jquery
HTML page pops up a centered and draggable custom window layer_jquery
The principle of using DIV pop-up windows to dynamically display content: first use CSS and HTML to hide the content in the pop-up window, and then use JavaScript (JQuery in this tutorial) to dynamically display them. This effect can not only make full use of the limited layout space, but also improve the user experience; more importantly, it does not affect the SEO effect (because it actually exists on the page, but is initially invisible)
1. Define a div in the html page and implement the content we need to display in the div.
 Website login
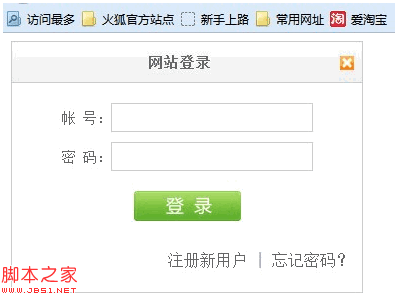
A picture is worth a thousand words. Let’s take a look at the screenshot of this DIV pop-up window:

2. The CSS style I used
#login {
width:350px;
height:250px;
border:1px solid #ccc;
position:absolute;
display:block;
z-index:9999;
background:#fff;
}
#login h2 {
height:40px;
line-height:40px ;
text-align:center;
font-size:14px;
letter-spacing:1px;
color:#666;
background:url(images/login_header.png) repeat -x;
margin:0;
padding:0;
border-bottom:1px solid #ccc;
cursor:move;
}
#login h2 img {
float:right;
position:relative;
top:14px;
right:8px;
cursor:pointer;
}
#login div.info {
padding :10px 0 5px 0;
text-align:center;
color:maroon;
}
#login div.user, #login div.pass {
font-size:14px;
color:#666;
padding:5px 0;
text-align:center;
}
#login input.text {
width:200px;
height: 25px;
border:1px solid #ccc;
background:#fff;
font-size:14px;
}
#login .button {
text-align:center;
padding:15px 0;
}
#login input.submit {
width:107px;
height:30px;
background:url(images/login_button.png) no- repeat;
border:none;
cursor:pointer;
}
#login .other {
text-align:right;
padding:15px 10px;
color: #666;
}
The main thing to note here is the definition of div style. Because it needs to be displayed in the center, we use absolute positioning position:absolute; secondly, because it is a pop-up layer, the div must be at the end Peripheral, so the z-index is usually set very large. Here we set it to z-index:9999; another point is that the div itself is hidden and needs to be set to display:none, but here we need to see the effect directly, so we directly let It displays using display:block;
3. We need to center it for display, so first we must get the height and width of the browser. If there is a horizontal or vertical offset of the scroll bar, we also need to get that The length is calculated to obtain the browser position of the div.
$(document).ready(function()
{
jQuery.fn.extend({
center:function(width,height)
{
return $(this).css("left", ($(window).width( )-width)/2 $(window).scrollLeft()).
css("top", ($(window).height()-height)/2 $(window).scrollTop()).
css("width",width).
css("height",height);
}
});
});
By clicking The button makes it display
$(".login"). click(function ()
{
$("#login").show().center(350,250);//Show login box
});
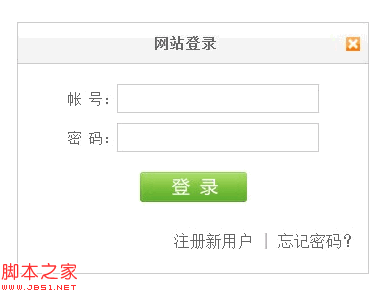
Rendering

4. Able to drag the pop-up box
Code implementation
$(document).ready(function()
{
jQuery.fn.extend({
//Drag and drop Function
drag:function(){
var $tar = $(this);
return $(this).mousedown(function(e){
if(e.target.tagName == "H2"){
var diffX = e.clientX - $tar.offset().left;
var diffY = e.clientY - $tar.offset().top;
$(document) .mousemove(function(e){
var left = e.clientX - diffX;
var top = e.clientY - diffY;
if (left < 0){
left = 0;
}
else if (left <= $(window).scrollLeft()){
left = $(window).scrollLeft();
}
else if (left > ; $(window).width() $(window).scrollLeft() - $tar.width()){
left = $(window).width() $(window).scrollLeft() -$tar .width();
}
if (top < 0){
top = 0;
}
else if (top <= $(window).scrollTop()) {
top = $(window).scrollTop();
}
else if (top > $(window).height() $(window).scrollTop() - $tar.height( )){
top = $(window).height() $(window).scrollTop() - $tar.height();
}
$tar.css("left",left ' px').css("top",top 'px');
});
}
$(document).mouseup(function(){
$(this).unbind( "mousemove");
$(this).unbind("mouseup")
});
});
}
});
});
Here we only focus on the H2 element in the div content that can be clicked and dragged. If the global div is needed, it can be modified. The drag and drop principle: when the mouse is pressed on the specified element, the The coordinates of the mouse point are calculated and the picture is moved to the corresponding position. Once the mouse click is cancelled, the corresponding press event is also cancelled, and the page remains static.
Call the drag method
$( "#login").drag();
Now we can click on the title bar of the pop-up box and drag it in the browser at will.

Hot AI Tools

Undresser.AI Undress
AI-powered app for creating realistic nude photos

AI Clothes Remover
Online AI tool for removing clothes from photos.

Undress AI Tool
Undress images for free

Clothoff.io
AI clothes remover

Video Face Swap
Swap faces in any video effortlessly with our completely free AI face swap tool!

Hot Article

Hot Tools

Notepad++7.3.1
Easy-to-use and free code editor

SublimeText3 Chinese version
Chinese version, very easy to use

Zend Studio 13.0.1
Powerful PHP integrated development environment

Dreamweaver CS6
Visual web development tools

SublimeText3 Mac version
God-level code editing software (SublimeText3)

Hot Topics
 1393
1393
 52
52
 1205
1205
 24
24
![How to disable media volume control popups [permanently]](https://img.php.cn/upload/article/000/000/164/168493981948502.png?x-oss-process=image/resize,m_fill,h_207,w_330) How to disable media volume control popups [permanently]
May 24, 2023 pm 10:50 PM
How to disable media volume control popups [permanently]
May 24, 2023 pm 10:50 PM
When you use the corresponding shortcut key to fine-tune the volume level, a media volume control pop-up will appear on the screen. This can be annoying, so read on to find out different ways to permanently disable media volume control pop-ups. How to disable media volume control popup? 1. Click the Windows icon on the taskbar in Google Chrome, type chrome in the search bar at the top, and select the relevant search results to launch Google Chrome. Type or copy-paste the following into the address bar and press the key. Enterchrome://flags type media keys in the search box at the top and select Disable in the Hardware Media Key Handling drop-down list. Now exit the Google Chrome app and relaunch it. Google
 How to use Layui to implement drag-and-drop data visualization dashboard function
Oct 26, 2023 am 11:27 AM
How to use Layui to implement drag-and-drop data visualization dashboard function Introduction: Data visualization is increasingly used in modern life, and the development of dashboards is an important part of it. This article mainly introduces how to use the Layui framework to implement a drag-and-drop data visualization dashboard function, allowing users to flexibly customize their own data display modules. 1. Preparation to download the Layui framework. First, we need to download and configure the Layui framework. You can download it on Layui’s official website (https://www
 Microsoft Edge tests a new feature to tidy up its experience on Windows 11
Nov 07, 2023 pm 11:13 PM
Microsoft Edge with Fluent Design menu on Windows 11 Microsoft is adding a new feature... to tidy up one of Edge's controversial features - the sidebar, which can be docked to the right side of Windows 11 and Windows 10. Microsoft EdgeCanary is testing a new feature or popup that automatically detects unused items in the sidebar. Microsoft is adding a sidebar to Edge in November 2022, promising that the feature will improve your productivity on Windows 10, especially Wind, which Copilot doesn't come with.
 How to set WPS table centering
Mar 19, 2024 pm 09:34 PM
As the functions of WPS become more and more powerful, we encounter more and more problems about the use of functions. In WPS, we often use WPS tables. If we need to print the WPS table, in order to make the table look beautiful, we need to center the table at this time. So, the question is, how do we center the WPS table? Today I am sharing a tutorial here, I hope it can help you! Step details: 1. I will explain it through practical operations. The following is a simple table I made using a WPS table. 2. Through print preview, we can find that the WPS table is on the left by default. What if we want to center the table? 3. At this time, we need to click [Page Layout] in the [Toolbar]
 How to use Layui to implement draggable tab component functionality
Oct 26, 2023 pm 01:05 PM
How to use Layui to implement draggable tab component function Layui is a lightweight front-end UI framework that provides rich components and convenient APIs, making front-end development simpler and more efficient. Among them, the tab component is one of the commonly used functions in Layui. In actual development, we often encounter the need to drag and drop tabs to sort or drag to transpose them. This article will introduce how to use Layui to implement the draggable tab component function in the form of examples. First, we need to introduce Layui related
 How to center a div inside another div?
Sep 08, 2023 am 11:13 AM
Introduction Center alignment of divs is one of the most important aspects of front-end development. In this article, we will look at the technique of placing one div inside another div using HTML and CSS. In this tutorial we will have a parent div which should have child divs. Our task is to place the child div in the center of the parent div. Using Transform translation and position syntax this is not a very popular way to center align one div into another div syntax left:50%;top:50%;Transform:translate(-50%,-50%);above The syntax does the following - The CSS rule "left:50%;" sets the horizontal position of the element to
 How to use Vue to implement a drag-and-drop visual editor?
Jun 25, 2023 pm 08:22 PM
Vue is a modern JavaScript framework. When implementing a visual editor, it can provide a rich set of components, instructions, life cycle hooks and other functions. It also provides some convenient APIs for the implementation of drag-and-drop interaction. In this article, we will introduce how to use Vue2.x to implement a drag-and-drop visual editor to facilitate web developers to quickly implement corresponding functions in their projects. Component structure First, we need to split the component structure of the visual editor, which usually consists of the following
 How to use Layui to implement draggable paging function
Oct 25, 2023 pm 12:46 PM
How to use Layui to implement draggable paging function Introduction: In web development, paging function is one of the very common requirements. Layui is a lightweight front-end UI framework that provides a wealth of components and functions that can greatly simplify our development work. In this article, we will introduce how to use Layui to implement drag-and-drop paging function, and provide specific code examples for reference. 1. Basic usage of Layui Before starting, you first need to understand some basic usage methods of Layui. Layui core


