

Zend Framework教程之Zend_Layout布局助手详解_php实例

本文实例讲述了Zend Framework教程之Zend_Layout布局助手。分享给大家供大家参考,具体如下:
一、作用
布局的作用和模版的作用类似。可以认为是把网站通用、公共的部分拿出来作为通用的页面框架。例如一个基本的web页面,可能页面的头和尾都是一样,不一样的可能只是内容body部分不一样,可以把公共的部分做成模版。不仅可以提高开发效率,也为后期的维护带来方便。
二、使用
这里举一个简单的例子。
首先用zend studio创建一个基本的zend framework项目:layout_demo1
结构大概如下“
├─.settings
├─application
│ ├─configs
│ ├─controllers
│ ├─models
│ └─views
│ ├─helpers
│ └─scripts
│ ├─error
│ └─index
├─docs
├─library
├─public
└─tests
├─application
│ └─controllers
└─library
1.加入layout功能:
应用配置文件/layout_demo2/application/configs/application.ini,加入如下配置
resources.frontController.controllerDirectory = APPLICATION_PATH "/controllers"
resources.frontController.params.displayExceptions = 0
resources.layout.layoutPath = APPLICATION_PATH "/layouts/scripts/"
[staging : production]
2.相应的目录和布局模版文件 /layout_demo2/application/layouts/scripts/layout.phtml
├─application
│ ├─configs
│ ├─controllers
│ ├─layouts
│ │ └─scripts
│ ├─models
│ └─views
layout.html类似如下:
<!doctype html>
<html>
<head>
<meta http-equiv="Content-Type" content="text/html;charset=utf-8">
<title>my app</title>
<body>
<div id="header">
header
</div>
<div id="content">
<?php echo $this -> layout() -> content;?>
</div>
<div id="footer">
header
</div>
</body>
</html>
这里的
<?php echo $this -> layout() -> content;?>
是比较重要的。表示此处为布局的内容,也就是会动态变化的地方。
这样,运行一下程序
www.localzend.com/layout_demo1/public/
生成的html源码如下
<!doctype html>
<html>
 <head>
  <meta http-equiv="Content-Type" content="text/html;charset=utf-8">
  <title>my app</title>
  <body>
   <div id="header">
    header
   </div>
   <div id="content">
    <style>
 a:link,
 a:visited
 {
  color: #0398CA;
 }
 span#zf-name
 {
  color: #91BE3F;
 }
 div#welcome
 {
  color: #FFFFFF;
  background-image: url(http://framework.zend.com/images/bkg_header.jpg);
  width: 600px;
  height: 400px;
  border: 2px solid #444444;
  overflow: hidden;
  text-align: center;
 }
 div#more-information
 {
  background-image: url(http://framework.zend.com/images/bkg_body-bottom.gif);
  height: 100%;
 }
</style>
<div id="welcome">
 <h1 id="Welcome-to-the-span-id-zf-name-Zend-Framework-span">Welcome to the <span id="zf-name">Zend Framework!</span></h1>
 <h3 id="This-is-your-project-s-main-page">This is your project's main page</h3>
 <div id="more-information">
  <p><img  src="/static/imghw/default1.png"  data-src="http://framework.zend.com/images/PoweredBy_ZF_4LightBG.png"  class="lazy" / alt="Zend Framework教程之Zend_Layout布局助手详解_php实例" ></p>
  <p>
   Helpful Links: <br />
   <a href="http://framework.zend.com/">Zend Framework Website</a> |
   <a href="http://framework.zend.com/manual/en/">Zend Framework Manual</a>
  </p>
 </div>
</div>   </div>
   <div id="footer">
    header
   </div>
  </body>
</html>
中间部分就是/layout_demo1/application/views/scripts/index/index.phtml的内容。
注入:可以通过zf的命令工具自动生成layout的配置和文件。
命令如下:
zf enable layout
可以参考命令行章节
三、配置
1.自定义存放位置和名称可以通过application.ini配置文件配置布局文件的存放位置以及布局文件的名称,例如:
resources.layout.layoutPath = APPLICATION_PATH "/mylayouts/scripts"
resources.layout.layout = "mylayout"
2.在action中使用layout对象
可以通过
$layout = $this->_helper->layout();
或者
$helper = $this->_helper->getHelper('Layout');
$layout = $helper->getLayoutInstance();
获取布局对象。
可以通过如下方式禁用当前action使用布局模式
$layout->disableLayout();
可以通过
$layout->setLayout('other');
来设置使用另一个布局文件
可以通过来传递赋值
$layout->assign('headertitle', 'app title');
$layout->somekey = "value"
3.其它获取layout对象的方法
(1)
$layout = Zend_Layout::getMvcInstance();
(2)
$layout = $bootstrap->getResource('Layout');
四、其它用法,实现原理
具体其它的使用方法可以参考
Zend_Layout_Controller_Action_Helper_Layout类,
Zend_Layout_Controller_Plugin_Layout类
Zend_View_Helper_Layout类
不言自明。
<?php
/** Zend_Controller_Action_Helper_Abstract */
require_once 'Zend/Controller/Action/Helper/Abstract.php';
/**
* Helper for interacting with Zend_Layout objects
*
* @uses Zend_Controller_Action_Helper_Abstract
* @category Zend
* @package Zend_Controller
* @subpackage Zend_Controller_Action
* @copyright Copyright (c) 2005-2011 Zend Technologies USA Inc. (http://www.zend.com)
* @license http://framework.zend.com/license/new-bsd New BSD License
*/
class Zend_Layout_Controller_Action_Helper_Layout extends Zend_Controller_Action_Helper_Abstract
{
/**
* @var Zend_Controller_Front
*/
protected $_frontController;
/**
* @var Zend_Layout
*/
protected $_layout;
/**
* @var bool
*/
protected $_isActionControllerSuccessful = false;
/**
* Constructor
*
* @param Zend_Layout $layout
* @return void
*/
public function __construct(Zend_Layout $layout = null)
{
if (null !== $layout) {
$this->setLayoutInstance($layout);
} else {
/**
* @see Zend_Layout
*/
require_once 'Zend/Layout.php';
$layout = Zend_Layout::getMvcInstance();
}
if (null !== $layout) {
$pluginClass = $layout->getPluginClass();
$front = $this->getFrontController();
if ($front->hasPlugin($pluginClass)) {
$plugin = $front->getPlugin($pluginClass);
$plugin->setLayoutActionHelper($this);
}
}
}
public function init()
{
$this->_isActionControllerSuccessful = false;
}
/**
* Get front controller instance
*
* @return Zend_Controller_Front
*/
public function getFrontController()
{
if (null === $this->_frontController) {
/**
* @see Zend_Controller_Front
*/
require_once 'Zend/Controller/Front.php';
$this->_frontController = Zend_Controller_Front::getInstance();
}
return $this->_frontController;
}
/**
* Get layout object
*
* @return Zend_Layout
*/
public function getLayoutInstance()
{
if (null === $this->_layout) {
/**
* @see Zend_Layout
*/
require_once 'Zend/Layout.php';
if (null === ($this->_layout = Zend_Layout::getMvcInstance())) {
$this->_layout = new Zend_Layout();
}
}
return $this->_layout;
}
/**
* Set layout object
*
* @param Zend_Layout $layout
* @return Zend_Layout_Controller_Action_Helper_Layout
*/
public function setLayoutInstance(Zend_Layout $layout)
{
$this->_layout = $layout;
return $this;
}
/**
* Mark Action Controller (according to this plugin) as Running successfully
*
* @return Zend_Layout_Controller_Action_Helper_Layout
*/
public function postDispatch()
{
$this->_isActionControllerSuccessful = true;
return $this;
}
/**
* Did the previous action successfully complete?
*
* @return bool
*/
public function isActionControllerSuccessful()
{
return $this->_isActionControllerSuccessful;
}
/**
* Strategy pattern; call object as method
*
* Returns layout object
*
* @return Zend_Layout
*/
public function direct()
{
return $this->getLayoutInstance();
}
/**
* Proxy method calls to layout object
*
* @param string $method
* @param array $args
* @return mixed
*/
public function __call($method, $args)
{
$layout = $this->getLayoutInstance();
if (method_exists($layout, $method)) {
return call_user_func_array(array($layout, $method), $args);
}
require_once 'Zend/Layout/Exception.php';
throw new Zend_Layout_Exception(sprintf("Invalid method '%s' called on layout action helper", $method));
}
}
<?php
/** Zend_Controller_Plugin_Abstract */
require_once 'Zend/Controller/Plugin/Abstract.php';
/**
* Render layouts
*
* @uses Zend_Controller_Plugin_Abstract
* @category Zend
* @package Zend_Controller
* @subpackage Plugins
* @copyright Copyright (c) 2005-2011 Zend Technologies USA Inc. (http://www.zend.com)
* @license http://framework.zend.com/license/new-bsd New BSD License
* @version $Id: Layout.php 23775 2011-03-01 17:25:24Z ralph $
*/
class Zend_Layout_Controller_Plugin_Layout extends Zend_Controller_Plugin_Abstract
{
protected $_layoutActionHelper = null;
/**
* @var Zend_Layout
*/
protected $_layout;
/**
* Constructor
*
* @param Zend_Layout $layout
* @return void
*/
public function __construct(Zend_Layout $layout = null)
{
if (null !== $layout) {
$this->setLayout($layout);
}
}
/**
* Retrieve layout object
*
* @return Zend_Layout
*/
public function getLayout()
{
return $this->_layout;
}
/**
* Set layout object
*
* @param Zend_Layout $layout
* @return Zend_Layout_Controller_Plugin_Layout
*/
public function setLayout(Zend_Layout $layout)
{
$this->_layout = $layout;
return $this;
}
/**
* Set layout action helper
*
* @param Zend_Layout_Controller_Action_Helper_Layout $layoutActionHelper
* @return Zend_Layout_Controller_Plugin_Layout
*/
public function setLayoutActionHelper(Zend_Layout_Controller_Action_Helper_Layout $layoutActionHelper)
{
$this->_layoutActionHelper = $layoutActionHelper;
return $this;
}
/**
* Retrieve layout action helper
*
* @return Zend_Layout_Controller_Action_Helper_Layout
*/
public function getLayoutActionHelper()
{
return $this->_layoutActionHelper;
}
/**
* postDispatch() plugin hook -- render layout
*
* @param Zend_Controller_Request_Abstract $request
* @return void
*/
public function postDispatch(Zend_Controller_Request_Abstract $request)
{
$layout = $this->getLayout();
$helper = $this->getLayoutActionHelper();
// Return early if forward detected
if (!$request->isDispatched()
|| $this->getResponse()->isRedirect()
|| ($layout->getMvcSuccessfulActionOnly()
&& (!empty($helper) && !$helper->isActionControllerSuccessful())))
{
return;
}
// Return early if layout has been disabled
if (!$layout->isEnabled()) {
return;
}
$response = $this->getResponse();
$content = $response->getBody(true);
$contentKey = $layout->getContentKey();
if (isset($content['default'])) {
$content[$contentKey] = $content['default'];
}
if ('default' != $contentKey) {
unset($content['default']);
}
$layout->assign($content);
$fullContent = null;
$obStartLevel = ob_get_level();
try {
$fullContent = $layout->render();
$response->setBody($fullContent);
} catch (Exception $e) {
while (ob_get_level() > $obStartLevel) {
$fullContent .= ob_get_clean();
}
$request->setParam('layoutFullContent', $fullContent);
$request->setParam('layoutContent', $layout->content);
$response->setBody(null);
throw $e;
}
}
}
<?php
/** Zend_View_Helper_Abstract.php */
require_once 'Zend/View/Helper/Abstract.php';
/**
* View helper for retrieving layout object
*
* @package Zend_View
* @subpackage Helper
* @copyright Copyright (c) 2005-2011 Zend Technologies USA Inc. (http://www.zend.com)
* @license http://framework.zend.com/license/new-bsd New BSD License
*/
class Zend_View_Helper_Layout extends Zend_View_Helper_Abstract
{
/** @var Zend_Layout */
protected $_layout;
/**
* Get layout object
*
* @return Zend_Layout
*/
public function getLayout()
{
if (null === $this->_layout) {
require_once 'Zend/Layout.php';
$this->_layout = Zend_Layout::getMvcInstance();
if (null === $this->_layout) {
// Implicitly creates layout object
$this->_layout = new Zend_Layout();
}
}
return $this->_layout;
}
/**
* Set layout object
*
* @param Zend_Layout $layout
* @return Zend_Layout_Controller_Action_Helper_Layout
*/
public function setLayout(Zend_Layout $layout)
{
$this->_layout = $layout;
return $this;
}
/**
* Return layout object
*
* Usage: $this->layout()->setLayout('alternate');
*
* @return Zend_Layout
*/
public function layout()
{
return $this->getLayout();
}
}
更多关于zend相关内容感兴趣的读者可查看本站专题:《Zend FrameWork框架入门教程》、《php优秀开发框架总结》、《Yii框架入门及常用技巧总结》、《ThinkPHP入门教程》、《php面向对象程序设计入门教程》、《php+mysql数据库操作入门教程》及《php常见数据库操作技巧汇总》
希望本文所述对大家PHP程序设计有所帮助。

Hot AI Tools

Undresser.AI Undress
AI-powered app for creating realistic nude photos

AI Clothes Remover
Online AI tool for removing clothes from photos.

Undress AI Tool
Undress images for free

Clothoff.io
AI clothes remover

Video Face Swap
Swap faces in any video effortlessly with our completely free AI face swap tool!

Hot Article
Hot Tools

Notepad++7.3.1
Easy-to-use and free code editor

SublimeText3 Chinese version
Chinese version, very easy to use

Zend Studio 13.0.1
Powerful PHP integrated development environment

Dreamweaver CS6
Visual web development tools

SublimeText3 Mac version
God-level code editing software (SublimeText3)
Hot Topics
 1387
1387
 52
52

 Windows 11: The easy way to import and export start layouts
Aug 22, 2023 am 10:13 AM
Windows 11: The easy way to import and export start layouts
Aug 22, 2023 am 10:13 AM
In Windows 11, the Start menu has been redesigned and features a simplified set of apps arranged in a grid of pages, unlike its predecessor, which had folders, apps, and apps on the Start menu. Group. You can customize the Start menu layout and import and export it to other Windows devices to personalize it to your liking. In this guide, we’ll discuss step-by-step instructions for importing Start Layout to customize the default layout on Windows 11. What is Import-StartLayout in Windows 11? Import Start Layout is a cmdlet used in Windows 10 and earlier versions to import customizations for the Start menu into
 How to save desktop icon position layout in Windows 11
Aug 23, 2023 pm 09:53 PM
How to save desktop icon position layout in Windows 11
Aug 23, 2023 pm 09:53 PM
Windows 11 brings a lot to the table in terms of user experience, but the iteration isn't entirely error-proof. Users run into issues from time to time, and changes to icon positioning are common. So how to save desktop layout in Windows 11? There are built-in and third-party solutions for this task, whether it's saving the screen resolution of the current window or the arrangement of desktop icons. This becomes even more important for users who have a bunch of icons on their desktop. Read on to learn how to save desktop icon locations in Windows 11. Why doesn't Windows 11 save icon layout positions? Here are the main reasons why Windows 11 does not save desktop icon layout: Changes to display settings: Typically, when you modify display settings, the configured customizations
![SCNotification has stopped working [5 steps to fix it]](https://img.php.cn/upload/article/000/887/227/168433050522031.png?x-oss-process=image/resize,m_fill,h_207,w_330) SCNotification has stopped working [5 steps to fix it]
May 17, 2023 pm 09:35 PM
SCNotification has stopped working [5 steps to fix it]
May 17, 2023 pm 09:35 PM
As a Windows user, you are likely to encounter SCNotification has stopped working error every time you start your computer. SCNotification.exe is a Microsoft system notification file that crashes every time you start your PC due to permission errors and network failures. This error is also known by its problematic event name. So you might not see this as SCNotification having stopped working, but as bug clr20r3. In this article, we will explore all the steps you need to take to fix SCNotification has stopped working so that it doesn’t bother you again. What is SCNotification.e
 Guide to solving misalignment of WordPress web pages
Mar 05, 2024 pm 01:12 PM
Guide to solving misalignment of WordPress web pages
Mar 05, 2024 pm 01:12 PM
Guide to solving misaligned WordPress web pages In WordPress website development, sometimes we encounter web page elements that are misaligned. This may be due to screen sizes on different devices, browser compatibility, or improper CSS style settings. To solve this misalignment, we need to carefully analyze the problem, find possible causes, and debug and repair it step by step. This article will share some common WordPress web page misalignment problems and corresponding solutions, and provide specific code examples to help develop
 How to create a responsive carousel layout using HTML and CSS
Oct 20, 2023 pm 04:24 PM
How to create a responsive carousel layout using HTML and CSS
Oct 20, 2023 pm 04:24 PM
How to create a responsive carousel layout using HTML and CSS Carousels are a common element in modern web design. It can attract the user's attention, display multiple contents or images, and switch automatically. In this article, we will introduce how to create a responsive carousel layout using HTML and CSS. First, we need to create a basic HTML structure and add the required CSS styles. The following is a simple HTML structure: <!DOCTYPEhtml&g
 Flexible application skills of position attribute in H5
Dec 27, 2023 pm 01:05 PM
Flexible application skills of position attribute in H5
Dec 27, 2023 pm 01:05 PM
How to flexibly use the position attribute in H5. In H5 development, the positioning and layout of elements are often involved. At this time, the CSS position property will come into play. The position attribute can control the positioning of elements on the page, including relative positioning, absolute positioning, fixed positioning and sticky positioning. This article will introduce in detail how to flexibly use the position attribute in H5 development.
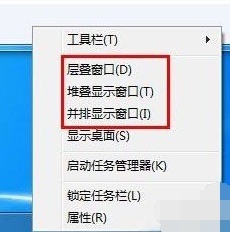 Introducing the window arrangement method in win7
Dec 26, 2023 pm 04:37 PM
Introducing the window arrangement method in win7
Dec 26, 2023 pm 04:37 PM
When we open multiple windows at the same time, win7 has the function of arranging multiple windows in different ways and then displaying them at the same time, which allows us to view the contents of each window more clearly. So how many window arrangements are there in win7? What do they look like? Let’s take a look with the editor. There are several ways to arrange Windows 7 windows: three, namely cascading windows, stacked display windows and side-by-side display windows. When we open multiple windows, we can right-click on an empty space on the taskbar. You can see three window arrangements. 1. Cascading windows: 2. Stacked display windows: 3. Display windows side by side:
 Syntax usage scenarios of contain in CSS
Feb 21, 2024 pm 02:00 PM
Syntax usage scenarios of contain in CSS
Feb 21, 2024 pm 02:00 PM
Syntax usage scenarios of contain in CSS In CSS, contain is a useful attribute that specifies whether the content of an element is independent of its external style and layout. It helps developers better control page layout and optimize performance. This article will introduce the syntax usage scenarios of the contain attribute and provide specific code examples. The syntax of the contain attribute is as follows: contain:layout|paint|size|style|'none'|'stric
