

在OEL6.1下安装ORACLE 11G R2

这次安装oracle选择的是oracle11.2.0.3版本,下载的安装包总共有7个,单独安装数据库需要使用前两个,具体安装步骤如下:1.将数据库文件复制到服务器上cpp1040453
这次安装oracle选择的是oracle 11.2.0.3版本,香港服务器租用,下载的安装包总共有7个,单独安装数据库需要使用前两个,具体安装步骤如下:
1. 将数据库文件复制到服务器上
cp p10404530_112030_Linux-x86-64_{1,2,}* /u01/
2. 解压数据库文件
unzip p10404530_112030_Linux-x86-64_1of7.zip
unzip p10404530_112030_Linux-x86-64_2of7.zip
3. 检查/etc/hosts
注意将主机名的对应信息加入hosts文件
关闭sendmail 与iptables
Chkconfig –list iptables
Chkconfig –list sendmail
service sendmail stop
service iptables stop
4. 创建用户和组
useradd oracle
passwd oracle
groupadd dba
usermod -G dba oracle
chown -R oracle:dba /u01/
chmod –R 755 /u01/
检查以下补丁是否已经安装(挂载iso文件,使用mount –o loop 路径 /mnt/iso)
binutils-2.15.92.0.2-18
compat-libstdc++-33.2.3-47.3
elfutils-libelf-0.97-5
elfutils-libelf-devel-0.97-5
glibc-2.3.9.4-2.19
glibc-common-2.3.9.4-2.19
glibc-devel-2.3.9.4-2.19
gcc-3.4.5-2
gcc-c++-3.4.5-2
libaio-devel-0.3.105-2
libaio-0.3.105-2
libgcc-3.4.5
libstdc++-3.4.5-2
libstdc++-devel-3.4.5-2
make-3.80-5
sysstat-5.0.5
unixODBC-2.2.11
unixODBC-devel-2.2.11
[root@erp1 Packages]# rpm -ivh binutils-2.20.51.0.2-5.28.el6.x86_64.rpm compat-libstdc++-33-3.2.3-69.el6.x86_64.rpm elfutils-libelf-0.152-1.el6.x86_64.rpm elfutils-libelf-devel-0.152-1.el6.x86_64.rpm glibc-common-2.12-1.47.el6.x86_64.rpm glibc-devel-2.12-1.47.el6.x86_64.rpm gcc-4.4.6-3.el6.x86_64.rpm gcc-c++-4.4.6-3.el6.x86_64.rpm libaio-devel-0.3.107-10.el6.x86_64.rpm libaio-0.3.107-10.el6.x86_64.rpm libgcc-4.4.6-3.el6.x86_64.rpm libstdc++-4.4.6-3.el6.x86_64.rpm libstdc++-devel-4.4.6-3.el6.x86_64.rpm make-3.81-19.el6.x86_64.rpm sysstat-9.0.4-18.el6.x86_64.rpm unixODBC-2.2.14-11.el6.x86_64.rpm unixODBC-devel-2.2.14-11.el6.x86_64.rpm compat-libcap1-1.10-1.x86_64.rpm compat-libstdc++-33-3.2.3-69.el6.x86_64.rpm ksh-20100621-12.el6.x86_64.rpm libaio-devel-0.3.107-10.el6.x86_64.rpm
5. 修改/etc/sysctl.conf,加入以下内容:
kernel.shmmax = 4294967295
# Controls the maximum number of shared memory segments, in pages
kernel.shmall = 2097152
kernel.shmmni = 4096
#semaphores:semmsl,semmns,semopm,semmni
kernel.sem = 250 32000 100 128
fs.file-max = 65536
net.ipv4.ip_local_port_range = 1024 65000
net.core.rmem_default = 4194304
net.core.rmem_max = 4194304
net.core.wmem_default = 262144
net.core.wmem_max = 262144
结束后,执行
/sbin/sysctl -p
6. 修改/etc/security/limits.conf,加入内容
oracle soft nproc 2047
oracle hard nproc 16384
oracle soft nofile 1024
oracle hard nofile 65536
7. 修改/etc/pam.d/login,加入内容
session required /lib/security/pam_limits.so //对64位系统这条不需要
session required pam_limits.so
8. 修改/etc/profile,加入内容
if [ $USER = "oracle" ]; then
if [ $SHELL = "/bin/ksh" ]; then
ulimit -p 16384
ulimit -n 65536
else
ulimit -u 16384 -n 65536
fi
fi
9. 使用oracle用户登录,修改.bash_profile文件
su - oracle
vi .bash_profile 加入以下内容
#DISPLAY=localhost:0.0
#export DISPLAY
export ORACLE_SID=center
export ORACLE_BASE=/u01/app/oracle
export ORACLE_HOME=/u01/app/oracle/product/11.2.0./db_1
export ORA_CRS_HOME=/u01/app/product/crs_1
export ORACLE_ADMIN=$ORACLE_BASE/admin
export ORACLE_HOME_LISTNER=$ORACLE_HOME
export LD_LIBRARY_PATH=$ORACLE_HOME/lib:$ORACLE_HOME/jlib
export JAVA_HOME=$ORACLE_HOME/jdk
export PATH=$PATH:$ORACLE_HOME/bin:/usr/bin:/usr/sbin:/usr/local/sbin:/usr/lib:$JAVA_HOME/bin:$ORA_CRS_HOME/bin:
相关参数文件的内容解释:
a) vi /etc/sysctl.conf
kernel.shmall为物理内存除以pagesize;
kernel.shmmax为物理内存的一半;
fs.file-max为512 乘以 processes (如128个process则为 65536);
net.ipv4.ip_local_port_range/net.core.rmem_default/net.core.rmem_max三个参数设置和官方文档不一样, 这是根据metalink 343431.1 最新要求更改的;
net.ipv4.tcp_rmem/net.ipv4.tcp_wmem两个参数一般情况下无需设置, 除非是在Dataguard/Streams等需很多网络传输情况下;
其它参数根据官方文档要求设置即可.
# vi /etc/sysctl.conf
kernel.shmall = 2097152
kernel.shmmax = 2147483648
kernel.shmmni = 4096
kernel.sem = 250 32000 100 128
fs.file-max = 65536
net.ipv4.ip_local_port_range = 9000 65000
net.core.rmem_default = 4194304
net.core.rmem_max = 4194304
net.core.wmem_default = 262144
net.core.wmem_max = 262144
修改以后让参数生效:
# /sbin/sysctl -p
Shmmax 是核心参数中最重要的参数之一,用于定义单个共享内存段的最大值,
shmmax 设置应该足够大,能在一个共享内存段下容纳下整个的SGA ,设置的过低可能会导致需要创建多个共享内存段,香港虚拟主机,这样可能导致系统性能的下降。
kernel.shmall 参数是控制共享内存页数。Linux 共享内存页大小为4KB, 共享内
存段的大小都是共享内存页大小的整数倍。一个共享内存段的最大大小是16G,那么需要共享内存页数是 16GB/4KB=16777216KB/4KB=4194304 (页),也就是64Bit 系统下16GB 物理内存,设置 kernel.shmall = 4194304 才符合要求(几乎是原来设置2097152 的两倍)。这时可以将shmmax 参数调整到 16G 了,同时可以修改SGA_MAX_SIZE 和SGA_TARGET 为 12G(您想设置的SGA 最大大小,当然也可以是2G~14G 等,还要协调PGA参数及OS 等其他内存使用,不能设置太满,比如16G)。
kernel.shmmni ----
shmmni 内核参数是共享内存段的最大数量(注意这个参数不是 shmmin,是
shmmni, shmmin 表示内存段最小大小 ) 。shmmni 缺省值 4096 ,一般肯定是够用了 。
在安装Oracle 之前通常需要设置kernel.sem这个参数,下面对些作简单介绍:
sem其实是semaphores的缩写,查看当前设置
[Oracle@ebsse oracle]$ cat /proc/sys/kernel/sem
250 32000 100 128
4个数据分别对应
SEMMSL SEMMNS SEMOPM SEMMNI
如当Oracle DB初始化参数文件中PROCESSES参数设置较大时,需要调整SEMAPHORES设置
SEMMSL应该设置为服务器中各个实例中最大的PROCESSES参数+10,例如,当最大的PROCESSES参数为5000时,SEMMSL应设置为5010。
SEMMNS参数应设置为SEMMSL*SEMMNI,接上例SEMMSL为5010,SEMMNS参数应为(5010*128)=641280。
SEMOPM参数应设置与SEMMSL参数相同,接上例此处应设置为5010
更改当前SEMAPHORES参数设置:
[Oracle@ebsse oracle]$ su
Password:
[root@ebsse Oracle]# echo "5010 641280 5010 128" > /proc/sys/kernel/sem
[root@ebsse Oracle]# cat /proc/sys/kernel/sem
5010 641280 5010 128
如需启动时自动应用,可在/etc/sysctl.conf增加:
kernel.sem =5010 641280 5010 128
SEMMNI 100 Defines the maximum number of semaphore sets in the entire system.

Hot AI Tools

Undresser.AI Undress
AI-powered app for creating realistic nude photos

AI Clothes Remover
Online AI tool for removing clothes from photos.

Undress AI Tool
Undress images for free

Clothoff.io
AI clothes remover

AI Hentai Generator
Generate AI Hentai for free.

Hot Article
Hot Tools

Notepad++7.3.1
Easy-to-use and free code editor

SublimeText3 Chinese version
Chinese version, very easy to use

Zend Studio 13.0.1
Powerful PHP integrated development environment

Dreamweaver CS6
Visual web development tools

SublimeText3 Mac version
God-level code editing software (SublimeText3)
Hot Topics
 1378
1378
 52
52

 Solution to the problem that Win11 system cannot install Chinese language pack
Mar 09, 2024 am 09:48 AM
Solution to the problem that Win11 system cannot install Chinese language pack
Mar 09, 2024 am 09:48 AM
Solution to the problem that Win11 system cannot install Chinese language pack With the launch of Windows 11 system, many users began to upgrade their operating system to experience new functions and interfaces. However, some users found that they were unable to install the Chinese language pack after upgrading, which troubled their experience. In this article, we will discuss the reasons why Win11 system cannot install the Chinese language pack and provide some solutions to help users solve this problem. Cause Analysis First, let us analyze the inability of Win11 system to
 Unable to install guest additions in VirtualBox
Mar 10, 2024 am 09:34 AM
Unable to install guest additions in VirtualBox
Mar 10, 2024 am 09:34 AM
You may not be able to install guest additions to a virtual machine in OracleVirtualBox. When we click on Devices>InstallGuestAdditionsCDImage, it just throws an error as shown below: VirtualBox - Error: Unable to insert virtual disc C: Programming FilesOracleVirtualBoxVBoxGuestAdditions.iso into ubuntu machine In this post we will understand what happens when you What to do when you can't install guest additions in VirtualBox. Unable to install guest additions in VirtualBox If you can't install it in Virtua
 What should I do if Baidu Netdisk is downloaded successfully but cannot be installed?
Mar 13, 2024 pm 10:22 PM
What should I do if Baidu Netdisk is downloaded successfully but cannot be installed?
Mar 13, 2024 pm 10:22 PM
If you have successfully downloaded the installation file of Baidu Netdisk, but cannot install it normally, it may be that there is an error in the integrity of the software file or there is a problem with the residual files and registry entries. Let this site take care of it for users. Let’s introduce the analysis of the problem that Baidu Netdisk is successfully downloaded but cannot be installed. Analysis of the problem that Baidu Netdisk downloaded successfully but could not be installed 1. Check the integrity of the installation file: Make sure that the downloaded installation file is complete and not damaged. You can download it again, or try to download the installation file from another trusted source. 2. Turn off anti-virus software and firewall: Some anti-virus software or firewall programs may prevent the installation program from running properly. Try disabling or exiting the anti-virus software and firewall, then re-run the installation
 How to install Android apps on Linux?
Mar 19, 2024 am 11:15 AM
How to install Android apps on Linux?
Mar 19, 2024 am 11:15 AM
Installing Android applications on Linux has always been a concern for many users. Especially for Linux users who like to use Android applications, it is very important to master how to install Android applications on Linux systems. Although running Android applications directly on Linux is not as simple as on the Android platform, by using emulators or third-party tools, we can still happily enjoy Android applications on Linux. The following will introduce how to install Android applications on Linux systems.
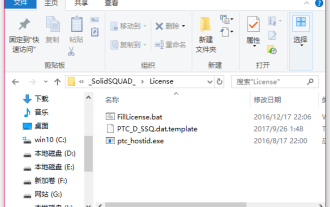 How to install creo-creo installation tutorial
Mar 04, 2024 pm 10:30 PM
How to install creo-creo installation tutorial
Mar 04, 2024 pm 10:30 PM
Many novice friends still don’t know how to install creo, so the editor below brings relevant tutorials on creo installation. Friends in need should take a look at it. I hope it can help you. 1. Open the downloaded installation package and find the License folder, as shown in the figure below: 2. Then copy it to the directory on the C drive, as shown in the figure below: 3. Double-click to enter and see if there is a license file, as shown below As shown in the picture: 4. Then copy the license file to this file, as shown in the following picture: 5. In the PROGRAMFILES file of the C drive, create a new PLC folder, as shown in the following picture: 6. Copy the license file as well Click in, as shown in the figure below: 7. Double-click the installation file of the main program. To install, check the box to install new software.
 How to install Podman on Ubuntu 24.04
Mar 22, 2024 am 11:26 AM
How to install Podman on Ubuntu 24.04
Mar 22, 2024 am 11:26 AM
If you have used Docker, you must understand daemons, containers, and their functions. A daemon is a service that runs in the background when a container is already in use in any system. Podman is a free management tool for managing and creating containers without relying on any daemon such as Docker. Therefore, it has advantages in managing containers without the need for long-term backend services. Additionally, Podman does not require root-level permissions to be used. This guide discusses in detail how to install Podman on Ubuntu24. To update the system, we first need to update the system and open the Terminal shell of Ubuntu24. During both installation and upgrade processes, we need to use the command line. a simple
 How to Install and Run the Ubuntu Notes App on Ubuntu 24.04
Mar 22, 2024 pm 04:40 PM
How to Install and Run the Ubuntu Notes App on Ubuntu 24.04
Mar 22, 2024 pm 04:40 PM
While studying in high school, some students take very clear and accurate notes, taking more notes than others in the same class. For some, note-taking is a hobby, while for others, it is a necessity when they easily forget small information about anything important. Microsoft's NTFS application is particularly useful for students who wish to save important notes beyond regular lectures. In this article, we will describe the installation of Ubuntu applications on Ubuntu24. Updating the Ubuntu System Before installing the Ubuntu installer, on Ubuntu24 we need to ensure that the newly configured system has been updated. We can use the most famous "a" in Ubuntu system
 Detailed steps to install Go language on Win7 computer
Mar 27, 2024 pm 02:00 PM
Detailed steps to install Go language on Win7 computer
Mar 27, 2024 pm 02:00 PM
Detailed steps to install Go language on Win7 computer Go (also known as Golang) is an open source programming language developed by Google. It is simple, efficient and has excellent concurrency performance. It is suitable for the development of cloud services, network applications and back-end systems. . Installing the Go language on a Win7 computer allows you to quickly get started with the language and start writing Go programs. The following will introduce in detail the steps to install the Go language on a Win7 computer, and attach specific code examples. Step 1: Download the Go language installation package and visit the Go official website
