图文详解WinPE下安装Python
Jun 10, 2016 pm 03:04 PM本文介绍了WinPE下安装Python的具体步骤,供大家参考,具体内容如下
一、下载Python Windows安装包,最新版本为3.3.0
下载地址:http://www.python.org/getit/
二、在Windows系统中安装Python,如果是WinPE 64bit应安装Python 64bit。
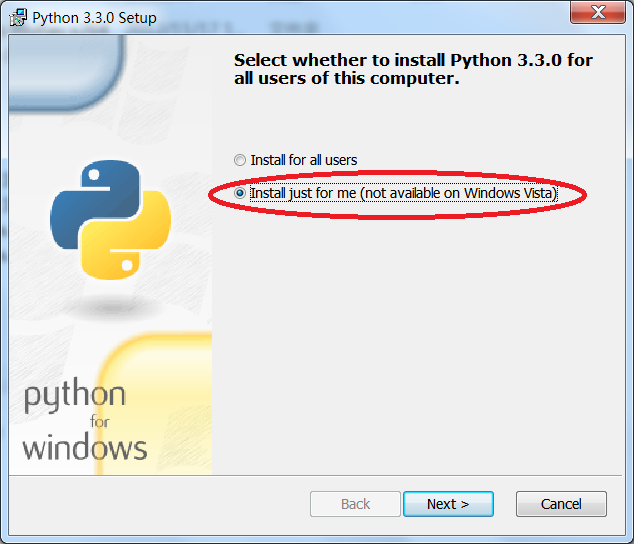
* 注意应选择"Install just for me", 其余一路点Next即可
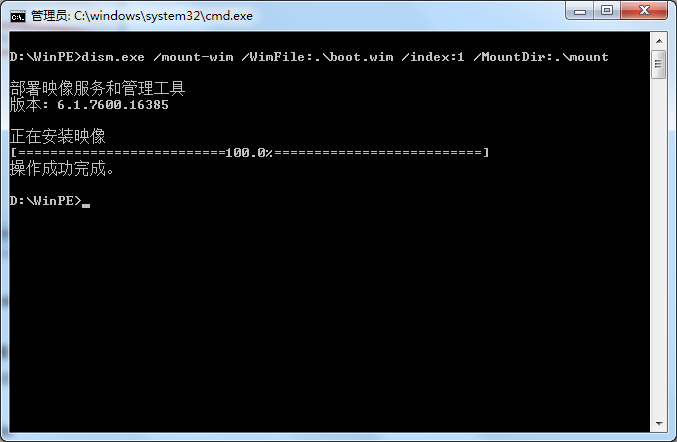
三、解压WinPE启动镜像boot.wim
dism.exe /mount-wim /WimFile:.\boot.wim /index:1 /MountDir:.\mount
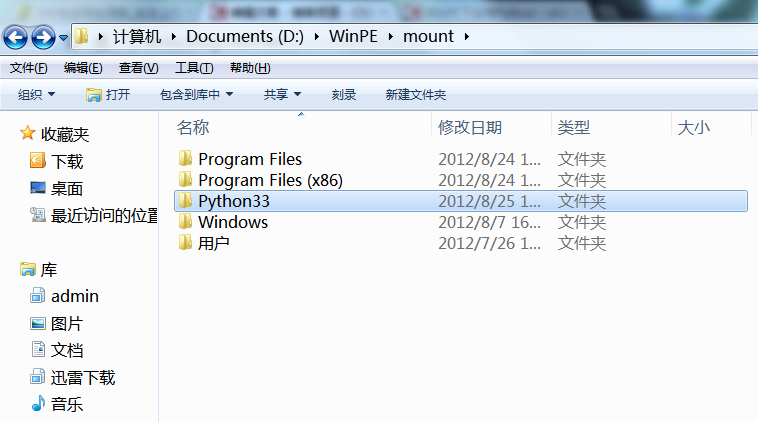
四、将安装好的Python文件拷贝至WinPE启动镜像中
如:Python3.3.0默认安装文件夹是C:\Python33,将此文件夹拷贝至WinPE启动镜像的根目录
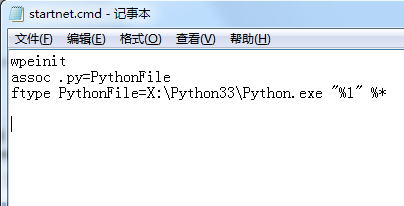
五、在Windows\system32\startnet.cmd中加入如下命令:
关联Python文件扩展名:assoc .py=PythonFile
指定调用Python文件使用命令:ftype PythonFile=X:\Python33\Python.exe "%1" %*
* 注意%1要用""括起来,否则带空格的路径无法执行
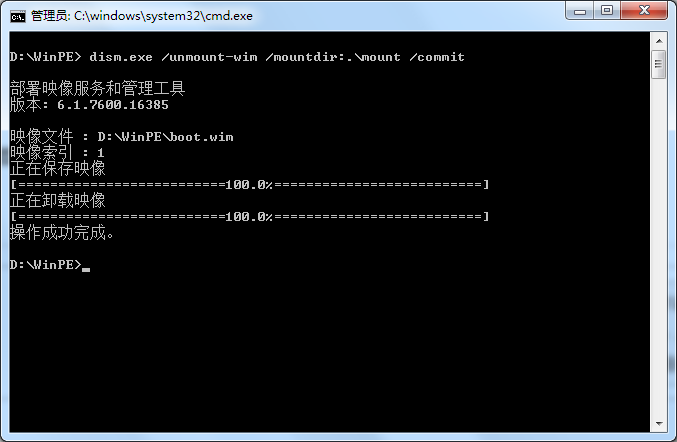
六、封装WinPE启动镜像
dism.exe /unmount-wim /mountdir:.\mount /commit
七、启动WinPE,验证Python脚本能否执行
以上就是本文的全部内容,希望对大家的学习有所帮助。

Hot Article

Hot tools Tags

Hot Article

Hot Article Tags

Notepad++7.3.1
Easy-to-use and free code editor

SublimeText3 Chinese version
Chinese version, very easy to use

Zend Studio 13.0.1
Powerful PHP integrated development environment

Dreamweaver CS6
Visual web development tools

SublimeText3 Mac version
God-level code editing software (SublimeText3)

Hot Topics
 What are the advantages and disadvantages of templating?
May 08, 2024 pm 03:51 PM
What are the advantages and disadvantages of templating?
 Google AI announces Gemini 1.5 Pro and Gemma 2 for developers
Jul 01, 2024 am 07:22 AM
Google AI announces Gemini 1.5 Pro and Gemma 2 for developers
 For only $250, Hugging Face's technical director teaches you how to fine-tune Llama 3 step by step
May 06, 2024 pm 03:52 PM
For only $250, Hugging Face's technical director teaches you how to fine-tune Llama 3 step by step
 Share several .NET open source AI and LLM related project frameworks
May 06, 2024 pm 04:43 PM
Share several .NET open source AI and LLM related project frameworks
 A complete guide to golang function debugging and analysis
May 06, 2024 pm 02:00 PM
A complete guide to golang function debugging and analysis


