

How to assemble the server? How to assemble a computer?

How to assemble a server or computer? As a beginner in the computer field, you will have such questions when facing the complex assembly process. PHP editor Xigua will provide you with a step-by-step guide covering every aspect from hardware selection to assembly and configuration. Read this article to learn the secrets of server and PC building and learn how to build one that meets your specific needs and budget!

How to assemble the server?
1 Method 2 of assembling the server First, clarify the required hardware configuration, including processor, memory, hard disk, network card, etc. Choose appropriate hardware components based on your needs. 3 Secondly, install the motherboard into the chassis and connect the corresponding power cables and data cables. 4 Then, install the processor and memory module to the motherboard and make sure the connections are secure. 5 Next, install the hard drive and optical drive into the chassis, and connect the corresponding data cables and power cables. 6 Further, install the network card and other expansion cards to the motherboard, and connect the corresponding data cables and power cables. 7 Finally, connect external devices such as monitors, keyboards, and mice, and turn on the power. 8 After the server starts, perform the corresponding operating system installation and configuration as needed. 9 After completing the above steps, the server can run normally. 10 When assembling the server, you also need to pay attention to the following points: - Ensure the compatibility of the hardware you choose, such as the motherboard and processor interface matching. - Pay attention to the installation of heat dissipation and fans to ensure that the server maintains an appropriate temperature when running. - When connecting the data cable and power cable, carefully check whether the connection is firm to avoid failure caused by looseness or poor contact. - Before installing the operating system, you can perform BIOS settings and hardware detection to ensure the normal operation of the server. To sum up, assembling a server requires clarifying the hardware configuration, following certain steps for installation and connection, and paying attention to hardware compatibility, heat dissipation, and connection stability. This can ensure the normal operation and stability of the server.
How to assemble a computer?
1. First connect the VGA cable to the monitor, and then fix the two screws at the back. The main reason for fixing is to worry about the connecting wire falling off when moving.
2. Then connect the other end of the VGA cable to the computer host.
3. Next, connect the power cord to the monitor. (Note that you are only connecting to the monitor. Do not connect the other end of the power cord to the socket. Wait until all connections are completed before turning on the power.)
4. Next, connect the mouse to the host.
5. Connect the keyboard as well. (The green one is the mouse, and the purple one is the keyboard. Also note that the internal pins of the mouse and keyboard plugs must be aligned with the pinholes in the interface before they can be inserted.) Connect one end of the network cable to the RJ45 interface of the computer host, and then connect the other end to the switch or router or modem.
6. Next, connect the power cord of the host.
7. Next, you can connect the power plugs of the host and monitor to the sockets to power on the host and monitor. You can start and use it normally.
How to assemble the tablet?
There is zero possibility of assembling a tablet by yourself.
Firstly, tablet computers require very high assembly requirements due to their small components (compared to desktop computers). Secondly, tablet computers are relatively cheap and do not have much market demand. No manufacturer sells accessories for assembling tablet computers. The emergence of "compatible machines" on desktop computers was due to the high price of computers at that time. It was easier to assemble after the accessories were standardized, and computer enthusiasts could find the fun of DIY. Therefore, various accessories were sold specifically for assembling computers.How to assemble a new computer?
Step one: Prepare tools. Tools used to assemble computers include plastic rods, screwdrivers, tin foil, etc.
Step 2: Install the motherboard. First put the motherboard into the computer case, and then secure the screws on the case.
Step 3: Install the processor. Place the processor into the CPU socket on the motherboard and lock the processor.
Step 4: Install memory. Place the memory module into the memory slot on the motherboard, and then secure the memory module in place.
Step 5: Install the graphics card. Insert the graphics card into the PCI slot on the motherboard and secure the graphics card in place.
Step 6: Install the hard drive. Insert the hard drive into the SATA interface on the motherboard, and then secure the hard drive.
Step 7: Install the CD-ROM drive. Insert the optical drive into the IDE interface on the motherboard, and then secure the optical drive.
Step 8: Install the power supply. Plug the power supply into the chassis and secure the power supply in place.
Step 9: Wire the computer. Wire various parts of the computer, including the wiring between the motherboard and the power supply, the wiring between the
graphics card and the power supply, the wiring between the hard disk and the power supply, the wiring between the optical drive and the power supply, etc.
The last step: install the operating system. Install the operating system on the hard disk. Once the installation is complete, the entire process of assembling the computer can be completed.
How to inspect the assembled computer?
1.
is to check the packaging. First of all, the box must be new and not too old. The parameter information on the side of the box must be accurate. Make sure it is the model you want. After all, there are many businesses who like to fish in troubled waters and give machines with lower-level configurations and similar appearances to digital novices. Secondly, the box must have a seal. All laptops I have tested, as long as they are new machines, regardless of brand or price, have seals on the outside of the box. I have never seen one without them. Moreover, some first-line brands have high-tech seals. No matter how you tear them off, they will leave marks on the box body, which cannot be restored or removed. They are difficult to forge and are a very important identification point. Although there are some merchants who will replace the entire set of packaging boxes with new ones to fool digital novices.
2.
is to check the fuselage. After unpacking, please carefully check side A first. This is the easiest place to leave traces of use. If there are scratches on side A, there is probably something wrong with the machine. Then shake it and listen to see if there is any abnormal noise or if any parts fall out. Look at the interface to see if there are any signs of plugging or unplugging. Open and close the screen again to see if there is any creaking sound. If so, please return it on the spot. Because even if it is a new machine, it is defective and has quality issues.
Then, if there are no problems, then check the bottom case screws and laptop screws. As we all know, they are extremely soft. As long as they have been screwed, they will definitely leave traces. For gaming laptops, you can also take a look at the air inlets and heat dissipation fins. Machines that have mined mines are running at high intensity. There will be dust in the air inlets and heat dissipation fins. There will also be traces of oxidation. They are black and can be seen at a glance. Can recognize.
How to choose to assemble a computer?
When choosing to assemble a computer, pay attention to the following parts:
1. Look at the price. Choose a computer that suits your price based on your budget. Be careful not to buy a computer with too low a configuration at an exorbitant price;
2, look at the performance. Buy it at a reasonable price based on the computer performance you need. Be careful not to buy a computer with low specs at an exorbitant price. The complete configuration of the computer is as follows. Host part: 1. CPU. The heart of the computer is responsible for calculations. The more cores, the better the performance; 2. The display core of the graphics card and computer is used to process image data. If you are a gamer or graphics worker, you need a discrete graphics card. If you use it to surf the Internet, you don't need to buy a separate graphics card;
3, memory. Used for CPU and hard disk to exchange data for temporary storage. The more memory you have, the better the performance will be;
4, hard disk. All your computer's files are stored here. The harder the hard disk is, the more files it can store;
5, the motherboard. The various components of the computer are placed on the motherboard and work together;
6, power supply. Provide power to each component;
7, chassis. Used to protect all components inside the chassis. Peripheral part: 1. Monitor. Used to display computer images; 2. Keyboard and mouse. Used to operate computers; 4. Audio. Used to output sound; 5. Camera. Used for photography, video chatting, taking photos, etc.; 6. Microphone. Used for voice input, voice chat, etc. The following is a brief description: 1. Dual-core processor + 2G memory + integrated graphics card + mechanical hard drive. The performance is sufficient for surfing the Internet, watching movies, chatting, working, and playing small games such as chess; 2. Quad-core processor + 4G memory + independent graphics card + mechanical hard drive. The performance is sufficient for surfing the Internet, watching movies, chatting, working, making pictures, playing stand-alone games or online games; 3. Quad-core processor + 4~8G memory + mid-to-high-end independent graphics card + mechanical hard drive or solid-state drive. The performance is sufficient for surfing the Internet, watching movies, chatting, working, making pictures, and playing large-scale stand-alone games or large-scale online games; 4. Six-core processor + 8G or above + high-end independent graphics card + mechanical hard drive or solid-state hard drive. The performance is sufficient for surfing the Internet, watching movies, chatting, working, drawing, and playing large-scale enthusiast-level stand-alone games or large-scale online games.
How to wire the assembled computer?
1 Power Fan Connector (PWR_FAN1)---Power fan socket
2 ATX 12V Power Connector (ATX12V1)---ATX host power socket
3 2 x 240 -pin DDR3 DIMM Slots (DDR3_A1, DDR3_B1)---DDR3 memory slot
4 2 x 240-pin DDR3 DIMM Slots (DDR3_A2, DDR3_B2)---DDR3 memory slot
5 ATX Power Connector (ATXPWR1)
6 USB 3.0 Header (USB3_4_5)---USB3.0 pin
7 SATA3 Connector (SATA3_1)
8 SATA3 Connector ( SATA3_0)
9 SATA3 Connector (SATA3_2)
10 SATA3 Connector (SATA3_4)
11 SATA3 Connector (SATA3_5)
12 SATA3 Connector (SATA3_3) ---7, 8, 9, 10, 11, 12---SATA3 hard disk interface
13 Chassis Fan Connector (CHA_FAN1)---Chassis fan pin-1
14 System Panel Header (PANEL1)
15 Power LED Header (PLED1)---Power LED pin
16 USB 2.0 Header (USB2_3)
17 USB 2.0 Header (USB4_5 )---16, 17---USB2.0 pin
18 Infrared Module Header (IR1)---Infrared module pin
19 Chassis Speaker Header (SPEAKER1)-- -Buzzer pin
20 Clear CMOS Jumper (CLRCMOS1)---CMOS jumper
21 COM Port Header (COM1)---Printer interface
22 SPDIF Out Connector (SPDIF_OUT)---Digital audio device output interface
23 Front Panel Audio Header (HD_AUDIO1)HD audio pin
24 Chassis Fan Connector (CHA_FAN2)---Chassis fan Pin-2
25 CPU Fan Connector (CPU_FAN1)
26 CPU Fan Connector (CPU_FAN2)---25, 26---CPU fan pin
Sockets on the back of the motherboard
1 USB 2.0 Ports (USB01) 8 Microphone (Pink)---1: US:2.0 interface; 8: Microphone interface (pink)
2 D -Sub Port 9 Central / Bass (Orange)---2: D-Sub monitor interface; 9: Subwoofer speaker interface (Orange)
3 LAN RJ-45 Port* 10 USB 3.0 Ports (USB3_23) ---3: Network cable interface; 10: USB3.0 interface
4 Side Speaker (Gray) 11 USB 3.0 Ports (USB3_01)---4: Left and right speaker interface (gray); 11: USB3.0 Interface-01
5 Rear Speaker (Black) 12 DVI-D Port---5. Rear speaker interface; 12: DVI display interface
6 Line In (Light Blue) 13 HDMI Port---6: Line input (light blue) interface; 13: HDMI high-definition multimedia interface
7 Front Speaker (Lime)** 14 PS/2 Keyboard Port---7: Front speaker interface ;14: P/S2 keyboard interface
How to assemble a desktop computer?
1: The first step: Determine your own needs:
1. Determining your own needs is the first step in doing anything. Before buying a machine, think clearly about buying a new machine. Finally, what is the main purpose? Different groups of people use computers for very different purposes. A clerk in a company and a person who mainly plays games have very different needs for computer configuration. While meeting our own needs, we should also It is only right to choose according to the most suitable budget.
2. For example, as an optional computer for general office use (except for professional software office needs), the Pentium G4560 without independent graphics is enough for daily office work, but if you have graphic design software such as PS and need it, a larger computer will be needed. Memory and gaming requirements require a better graphics card, so before you start choosing a computer, it is most important to determine your own needs.
2: Step 2: Determine the CPU
1. The first choice for all computer accessories must be the CPU. The order of selection should be to select the CPU first, then determine the motherboard, and then Determine the memory module (memory modules are so expensive now!), then select the graphics card, cooling, hard disk, etc., calculate the power consumption, and finally select the power supply and chassis.
2. If you are not a garbage person, it is recommended to buy new rather than old CPUs first. Although CPUs will not wear out, there are no new motherboards equipped with old CPUs. Old motherboards are very It's easy to have all kinds of problems, and if you're a novice and can't get a good motherboard, it's easy to fall over. Of course, it doesn't matter if you're a trash guy.
3. You can actually choose either AMD or Intel platform. After all, AMD has successfully turned around with Ryzen and is not inferior to Intel in all aspects. If I have to give a recommendation, then this is enough. For those who use it (watching movies, playing LOL games, browsing the web, and those who do light work), just choose Intel’s Pentium processor. For those who play games, choose Intel Core processor with a higher single-core frequency (in fact, i3 is enough Because games require more graphics cards), professional practitioners who need a lot of video rendering design and so on choose AMD's Ryzen platform.
Three: Step 3: Determine the motherboard
1. After determining the CPU, the pins are determined, and then there is a rough range of motherboards with the same number of pins, and then take a look at yourself Do you have any special needs, such as whether you need overclocking, how expandable the memory module is, whether you need an m.2 interface, whether all the required interfaces are complete, etc. As long as they are met, the rest is worth every penny. The products are distributed, just choose a motherboard you like.
2. Many people have two extreme attitudes towards motherboards. One type of people prefers to use the lowest-end graphics card, while the other type of people have a very large budget for motherboards. The author Then you feel that you should choose a motherboard that can meet your needs, i.e.
How to assemble a computer chair?
1
First install the casters one by one on the chair legs. After installing the chair legs, place the air pressure rod vertically into the center of the chair legs
2
Then fix the chassis to the seat with screws
3
Then connect the chair back and seat, and insert the base vertically on the air pressure rod
4
Finally install the armrests and headrests and you’re done
How to assemble the nsa server by yourself?
Hello, to assemble an NSA server yourself, you can follow the steps below:
1. Determine the purpose and configuration requirements of the server, such as running specific applications or storing large amounts of data.
2. Select appropriate hardware components, including motherboard, CPU, memory, hard disk, power supply, etc. Compatibility and performance matching between components need to be considered.
3. Assemble the hardware, follow the instructions in the motherboard manual to connect each hardware component and fix it inside the chassis.
4. Install the operating system. You can choose Windows, Linux or other operating systems. Select the version and installation method as needed.
5. Configure network and security settings, including IP address, firewall, user permissions, and more.
6. Install required software and applications such as databases, web servers, mail servers, etc.
7. Carry out testing and optimization to ensure that the stability and performance of the server meet the requirements.
It should be noted that assembling the server requires certain knowledge of hardware and software. If you have no experience, it is recommended to consult a professional or purchase a pre-installed server. At the same time, you also need to pay attention to security issues, such as selecting reliable hardware components and operating systems, and setting up appropriate security measures.
The above is the detailed content of How to assemble the server? How to assemble a computer?. For more information, please follow other related articles on the PHP Chinese website!

Hot AI Tools

Undresser.AI Undress
AI-powered app for creating realistic nude photos

AI Clothes Remover
Online AI tool for removing clothes from photos.

Undress AI Tool
Undress images for free

Clothoff.io
AI clothes remover

AI Hentai Generator
Generate AI Hentai for free.

Hot Article
Hot Tools

Notepad++7.3.1
Easy-to-use and free code editor

SublimeText3 Chinese version
Chinese version, very easy to use

Zend Studio 13.0.1
Powerful PHP integrated development environment

Dreamweaver CS6
Visual web development tools

SublimeText3 Mac version
God-level code editing software (SublimeText3)
Hot Topics


 R.E.P.O. Save File Location: Where Is It & How to Protect It?
Mar 06, 2025 pm 10:41 PM
R.E.P.O. Save File Location: Where Is It & How to Protect It?
Mar 06, 2025 pm 10:41 PM
Are you hooked on R.E.P.O.? Curious where your game progress is stored? This guide reveals the location of your R.E.P.O. save files and shows you how to protect them. Losing your game progress is frustrating, so let's ensure your hard work is safe
 How to fix Microsoft Teams error 9hehw in Windows?
Mar 07, 2025 am 12:00 AM
How to fix Microsoft Teams error 9hehw in Windows?
Mar 07, 2025 am 12:00 AM
Understanding Microsoft Teams error tag 9hehw on Windows Microsoft Teams is a crucial communication and collaboration application by which users are able to joi
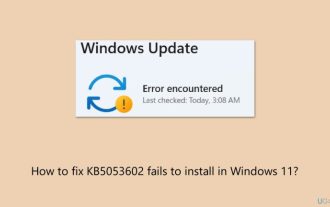 How to fix KB5053602 fails to install in Windows 11?
Mar 13, 2025 am 10:00 AM
How to fix KB5053602 fails to install in Windows 11?
Mar 13, 2025 am 10:00 AM
The KB5053602 patch, released on March 11, 2025, targets Windows 11 editions 22H2 and 23H2, elevating the OS to OS Builds 22621.5039 and 22631.5039, respectivel
 Spotlight on KB5053606 Not Installing for Windows 10, Exact Steps
Mar 13, 2025 pm 08:02 PM
Spotlight on KB5053606 Not Installing for Windows 10, Exact Steps
Mar 13, 2025 pm 08:02 PM
Windows 10 KB5053606 Update installation failed? This guide provides effective solutions! Many users are having problems trying to install the Windows 10 KB5053606 update released on Tuesday of Microsoft's March 2025 patch, such as SSH connection interruption, Dwm.exe unresponsiveness, or input method editor (IME) issues. Updates may be stuck during downloading or installation, or error codes may appear, such as 0x800f0922, 0xd000034, 0x80070437 and 0x80072efe. KB5053606 installation failure is usually caused by a variety of reasons, including Windows update component failure, system file corruption, and disk
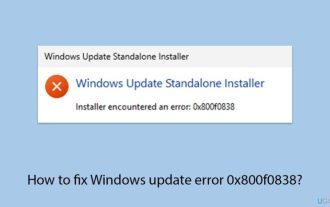 How to fix Windows update error 0x800f0838?
Mar 11, 2025 am 12:00 AM
How to fix Windows update error 0x800f0838?
Mar 11, 2025 am 12:00 AM
Windows updates are essential components delivered by Microsoft to enhance the functionality, security, and stability of the Windows operating system. These upd
 R.E.P.O. Crashing & Freezing on PC? Result-Driven Fixes
Mar 07, 2025 pm 08:02 PM
R.E.P.O. Crashing & Freezing on PC? Result-Driven Fixes
Mar 07, 2025 pm 08:02 PM
Troubleshooting R.E.P.O. Game Crashes: A Comprehensive Guide Experiencing frustrating game crashes, especially in a team-based game like R.E.P.O., can be incredibly disruptive. This guide offers several solutions to resolve R.E.P.O. crashes, freezes
 Grand Theft Auto V Enhanced Save File Location, A Roadmap Here
Mar 06, 2025 pm 10:34 PM
Grand Theft Auto V Enhanced Save File Location, A Roadmap Here
Mar 06, 2025 pm 10:34 PM
This MiniTool guide shows you how to locate and back up your Grand Theft Auto V Enhanced save files on your Windows PC. Rockstar Games' enhanced edition boasts impressive visuals (ray-traced shadows, AMD FSR1 & 3, NVIDIA DLSS 3), improved audio,
 What if KB5053598 Fails to Install on Windows 11? Fixes Here
Mar 13, 2025 pm 08:03 PM
What if KB5053598 Fails to Install on Windows 11? Fixes Here
Mar 13, 2025 pm 08:03 PM
Microsoft's March 11, 2025 update, KB5053598, is a crucial patch for Windows 11 24H2 (OS Build 26100.3476). This MiniTool guide covers everything you need to know, including troubleshooting installation problems. What's New in KB5053598? Released on
