Confused about how to draw arrows using Photoshop? do not worry! PHP editor Yuzai brings you three simple and practical methods, covering using shape tools, custom brushes and mixing different techniques. Read on for our detailed guide to discover the method that best suits your needs and solve your arrow drawing woes with ease.
1. First of all, the editor will talk about the simplest method-the custom shape tool. We open PS and create a new blank document.

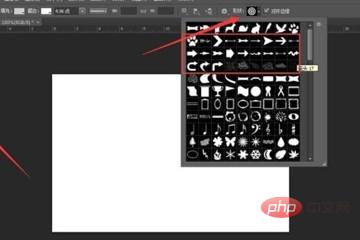
#2. Select the custom shape tool as shown in the icon and find the arrow shape tool.
3. Set the shape you want to draw (it can also be a pixel or path), click the left mouse button on the canvas and drag to draw an arrow.
Similarly open PS and create a new canvas. This time we select the straight line tool.
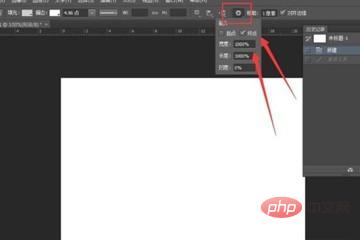
Click on the gear selected by the editor, check the starting point or end point of the straight line and add an arrow in the drop-down menu, and set the length-to-width ratio of the arrow.

Hold down the shift key, hold down the left mouse button and drag on the canvas to draw a straight arrow as shown in the picture below.
Think the straight line is too thin? We can set the thickness and color of the straight line in the settings bar to draw the arrow you are satisfied with.
Next, the editor introduces a method of quickly drawing arrows with a brush. Select the brush tool on the new canvas and set your favorite brush style, color, diameter, etc.
Hold down the shift key and drag the left mouse button on the canvas to draw a straight line.

Continue to hold down the shift key and click on the area selected by the icon to draw one side of the arrow.
Hold down the shift key, click the end point of the arrow, return the brush to the end point of the arrow, and repeat step 3 to draw the arrow. The numbers marked in the figure below are the brush movement directions.
The above is the detailed content of How to draw arrows in Photoshop_Three methods for you to choose. For more information, please follow other related articles on the PHP Chinese website!
 Blue screen code 0x000009c
 A collection of common computer commands
 You need permission from admin to make changes to this file
 Tutorial on turning off Windows 11 Security Center
 How to set up a domain name that automatically jumps
 What are the virtual currencies that may surge in 2024?
 The reason why header function returns 404 failure
 How to use js code


