
What should I do if the network latency in win11 is high? If you're experiencing high network latency when using Windows 11, you may want to try the following solutions. PHP editor Apple will introduce these methods to you one by one to help you optimize network latency and improve your network experience. You can make precise adjustments to your Windows 11 network configuration by going into the Local Group Policy Editor and setting it up. Additionally, you can identify and disable applications that consume large amounts of network bandwidth, freeing up bandwidth and reducing latency. In the following details, we will guide you step by step on how to perform these operations to solve the problem of high network latency in Win11. Read on to optimize your internet connection and enjoy a smooth internet experience.
Win11 network high latency optimization method
Method 1: Local Group Policy Editor settings
1. Press the Win + X key combination, or right-click the bottom Click the Start icon on the taskbar, and in the menu item that opens, select Run to open.
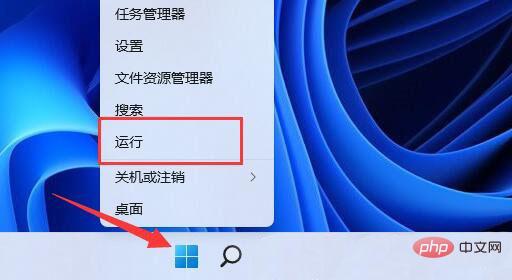
#2. Run the window, enter the gpedit.msc command, and press OK or Enter to open the Local Group Policy Editor.

#3. In the Local Group Policy Editor window, expand Administrative Templates under Computer Configuration.
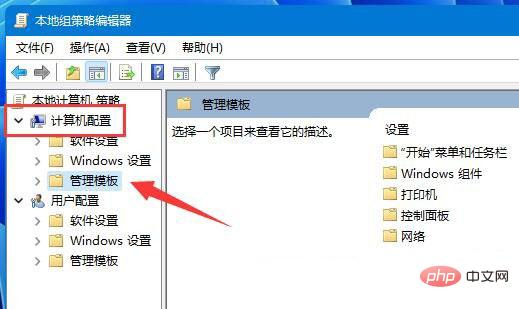
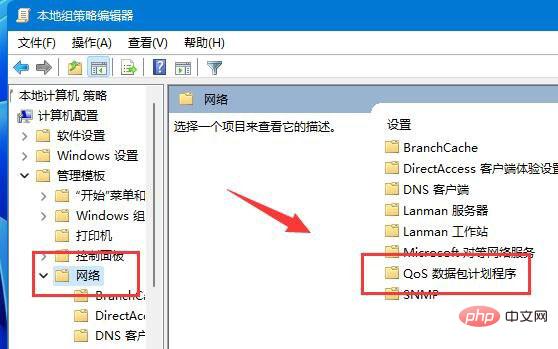
#4. Click Network on the left, find and double-click QoS Packet Scheduler on the right.
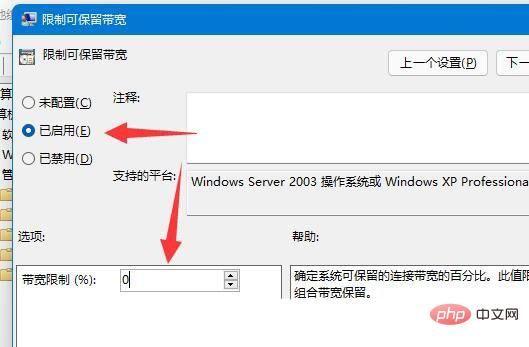
5. In the Limit Reservable Bandwidth window, select Enabled, change the bandwidth limit below to 0, and finally click OK to save.
Method 2: Disable networking applications that consume network speed
Press the Win + S key combination, or click the search icon of the start icon on the taskbar. In the Windows search that opens, enter Control Panel in the search box, and then click to open the best matching Control Panel application given by the system.

#2. Switch all control panel item windows to large icon viewing mode.

#3. Then, find and click to open Windows Defender Firewall.
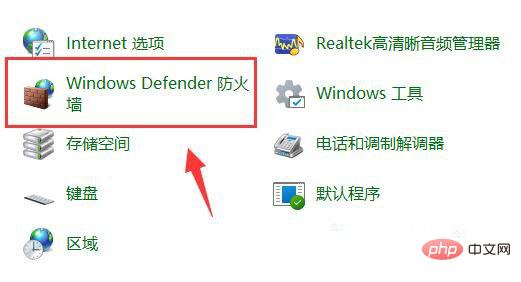
4. After Windows Defender Firewall is opened, click Advanced Settings in the left sidebar.
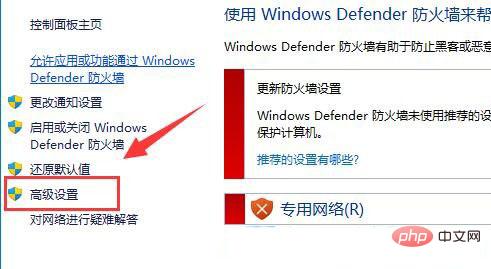
5. In the Windows Defender Firewall with Advanced Security window, click Outbound Rules on the left, and then click New Rule on the far right.

#6. Next, select the program (the rule that controls program connection) and click Next.

#7. Under this program path, click Browse to find the software you want to ban the Internet.

8. Next, select Block the connection and click Next.
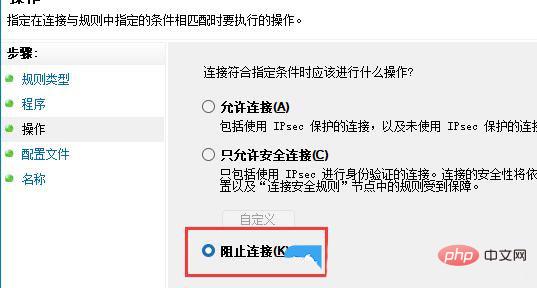
#9. The remaining settings can be kept as default. Finally, enter a name and click Finish to disable the application from connecting to the Internet.

The above is the detailed content of How to solve the problem of high network latency in win11? How to optimize high latency in win11 network. For more information, please follow other related articles on the PHP Chinese website!


