

How to install htc vive vr?

Are you worried about HTC Vive VR installation? PHP editor Yuzai will help you solve your doubts easily! This article will guide you step-by-step through the installation process, from setting up the VR headset to connecting the controller and base station, ensuring your VR experience is smooth and worry-free.

First step
The first is the space problem. Players need to prepare an activity space of at least 2m×1.5m. This area can only It meets the most basic standing games. If possible, it is recommended that you arrange a larger space to better experience HTC Vive.
Step Two
After preparing the game space, we can start installing accessories. Players disassemble the equipment and sort out all the equipment that needs to be installed. First, let’s understand the entire HTC Vive What equipment and accessories are included in the box.
A is the base station Long)
C is the base station power adapter x2 (any electronic equipment requires energy support)
D is the installation tool kit (this is more considerate)
E is the connector ( It is used to connect the headset to the computer)
F is a special patch for the connector (you can stick the connector on the main chassis or the like to fix it)
G is the connector Power adapter (same as C)
H is HDMI cable (connector to computer 1)
I is USB cable (connector to computer 2)
J is Headphones (it is said that the effect is not bad)
K is a cotton pad (it is already on the headset, you don’t need to install it yourself, this is a spare)
L is a wiping cloth
M It’s the manual
N is the head display
O is the controller x 2
P is the Micro USB charger x 2 (used to charge the controller) The most important one The components are A base station, N head display, and O controller.
Through the above introduction, I believe everyone has an understanding of the accessories. Next, we need to install and connect the locator, streaming box and helmet.
Step Three
First install the locator, which we usually call a base station. The base station has a 120° visual range, so players need to set up the two base stations at high altitudes on both sides of the diagonal. The location is such that the base station can scan the game space without blocking each other.
The interfaces at the back end of the base station only need to be connected to the power supply when in use, and the remaining interfaces are only used for connection processing when they need to be updated or when synchronization problems occur.
After the installation is complete, connect the power supply. If you see the green light on the indicator light, it means that the base station is working normally. If the indicator light flashes, it means that there is displacement and the base station position needs to be readjusted.
Step 4
The next step is to connect the streaming box. This step is actually very simple. You only need to plug the included USB data cable, HDMI cable and power cable into the corresponding interfaces on the streaming box, and connect the other end to the corresponding interface on the computer host.
Finally, there are three orange interfaces on the other end of the streaming box, which are used to connect the three-in-one data cable on the helmet. Similarly, connect the cable ends to the corresponding interfaces and the computer will automatically start to install the driver.
Step 5
HTC’s controller is configured wirelessly, so after installing the system, press the button at the bottom of the controller. After you hear a beep and feel a vibration, you can successfully turn on the controller. , the upper indicator light is always on, indicating that the handle is running.
At this point, the entire installation is over. Compared to the complicated instructions, this tutorial is simpler and easier to understand. We have also prepared a video of the installation tutorial for your reference.
After everything is installed, we will proceed to the next step of software installation and settings on the computer.
First we need to go to the HTC official website to download a Vive program installation, which includes the Vive Port app store PC client, Vive virtual reality homepage and SteamVR.
After downloading and installing, let’s first introduce the Viveport registration process.
The first time you open Vive, the login page will pop up. We choose registration below. Of course, players can also choose QQ or Weibo to log in.
The second step is to fill in the relevant information such as email, password and other information, and finally click "Create Account"
The third step is to create an account and the email verification interface will pop up. At this time we need to register Verify the information in your email.
The fourth step is to open the received email in the registered mailbox and click "Verify my email"
Finally, when the successfully created page appears, it means that the account registration is completed, return to the software login You can purchase the game.
Step 5: After successfully logging in, we will enter the VIVE homepage. We need to select the location, which is the country. Just select OK here.
The sixth step is to enter the VIVE game interface, which contains a variety of paid and free games for players to experience.
Step 7 Select a game and click to enter
Step 8 Select the green logo with the amount written in the upper right corner
Jump out of the purchase interface and click to continue
After selecting the payment method and entering the account password, you can purchase the game. After the purchase is successful, you can proceed to download. After completion, players can start to experience it.
This is the registration and purchase guide for HTC’s own store. In addition, it also supports steam game content. Next, we will introduce the steam VR setup guide.
The first step is to open the installed steam VR. After running, the setting screen will appear, confirm the size of the space you are in.
The second step is to place the controller and helmet in a position visible to the locator for identification.
The third step is to stand in the middle of the space, point the controller at the computer monitor and hold down the trigger to check the equipment.
The fourth step is to place the two controllers on the floor in the space, make sure they are within the visible range of the locator, and then perform ground calibration.
The fifth step is to use the handle to draw the scope of the space in the game space you planned, ensuring that there are no obstructions above and below the drawn area.
After the settings are completed, click "Next" to enter steam VR and start the experience.
SteamVR games need to be purchased in the store, so you also need to register a steam account. We can register in the software or go to the official website. Let’s briefly talk about the official website registration method.
Enter the official website and click Login in the upper right corner
After jumping out of the login page, select "Join Steam" in the middle
Then fill in the relevant information in the account creation, and finally verify it in the email The operation is completed, and then players can enter the steam store to select and purchase the game.
Regarding the settings of Steam VR, we have also prepared a video tutorial to allow everyone to understand the setting process more intuitively and quickly.
Finally, after all preparations are completed, players can enter the steam store to purchase and download the games they want to play, and enjoy the magical and exciting VR journey in HTC Vive. I wish you all a happy game.
The above is the detailed content of How to install htc vive vr?. For more information, please follow other related articles on the PHP Chinese website!

Hot AI Tools

Undresser.AI Undress
AI-powered app for creating realistic nude photos

AI Clothes Remover
Online AI tool for removing clothes from photos.

Undress AI Tool
Undress images for free

Clothoff.io
AI clothes remover

AI Hentai Generator
Generate AI Hentai for free.

Hot Article
Hot Tools

Notepad++7.3.1
Easy-to-use and free code editor

SublimeText3 Chinese version
Chinese version, very easy to use

Zend Studio 13.0.1
Powerful PHP integrated development environment

Dreamweaver CS6
Visual web development tools

SublimeText3 Mac version
God-level code editing software (SublimeText3)
Hot Topics


 R.E.P.O. Save File Location: Where Is It & How to Protect It?
Mar 06, 2025 pm 10:41 PM
R.E.P.O. Save File Location: Where Is It & How to Protect It?
Mar 06, 2025 pm 10:41 PM
Are you hooked on R.E.P.O.? Curious where your game progress is stored? This guide reveals the location of your R.E.P.O. save files and shows you how to protect them. Losing your game progress is frustrating, so let's ensure your hard work is safe
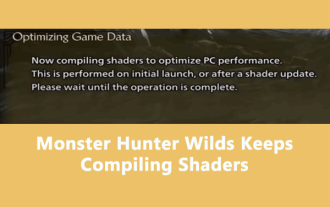 Easily Fixed - Monster Hunter Wilds Keeps Compiling Shaders
Mar 04, 2025 pm 08:05 PM
Easily Fixed - Monster Hunter Wilds Keeps Compiling Shaders
Mar 04, 2025 pm 08:05 PM
Monster Hunter Wilds Shader Compilation Fix: A Comprehensive Guide Many players are encountering an issue where Monster Hunter Wilds gets stuck endlessly compiling shaders. This guide provides effective solutions to resolve this frustrating problem a
 Monster Hunter Wilds Communication Error on PC, Quick Fix
Mar 03, 2025 pm 08:02 PM
Monster Hunter Wilds Communication Error on PC, Quick Fix
Mar 03, 2025 pm 08:02 PM
Encountering the Monster Hunter Wilds communication error S9052-TAD-W79J? This frustrating issue affects many players, but several solutions have proven effective. This guide compiles these fixes to help you get back to hunting. Monster Hunter Wilds
 Find Monster Hunter Wilds Save File Location & Back up Data
Mar 03, 2025 pm 08:01 PM
Find Monster Hunter Wilds Save File Location & Back up Data
Mar 03, 2025 pm 08:01 PM
To secure your Monster Hunter Wilds game progress, you'll need to know where the save files are located and how to back them up. This guide provides step-by-step instructions for both tasks. Monster Hunter Wilds, available on multiple platforms, requ
 How to fix Microsoft Teams error 9hehw in Windows?
Mar 07, 2025 am 12:00 AM
How to fix Microsoft Teams error 9hehw in Windows?
Mar 07, 2025 am 12:00 AM
Understanding Microsoft Teams error tag 9hehw on Windows Microsoft Teams is a crucial communication and collaboration application by which users are able to joi
 Spotlight on KB5053606 Not Installing for Windows 10, Exact Steps
Mar 13, 2025 pm 08:02 PM
Spotlight on KB5053606 Not Installing for Windows 10, Exact Steps
Mar 13, 2025 pm 08:02 PM
Windows 10 KB5053606 Update installation failed? This guide provides effective solutions! Many users are having problems trying to install the Windows 10 KB5053606 update released on Tuesday of Microsoft's March 2025 patch, such as SSH connection interruption, Dwm.exe unresponsiveness, or input method editor (IME) issues. Updates may be stuck during downloading or installation, or error codes may appear, such as 0x800f0922, 0xd000034, 0x80070437 and 0x80072efe. KB5053606 installation failure is usually caused by a variety of reasons, including Windows update component failure, system file corruption, and disk
 R.E.P.O. Crashing & Freezing on PC? Result-Driven Fixes
Mar 07, 2025 pm 08:02 PM
R.E.P.O. Crashing & Freezing on PC? Result-Driven Fixes
Mar 07, 2025 pm 08:02 PM
Troubleshooting R.E.P.O. Game Crashes: A Comprehensive Guide Experiencing frustrating game crashes, especially in a team-based game like R.E.P.O., can be incredibly disruptive. This guide offers several solutions to resolve R.E.P.O. crashes, freezes
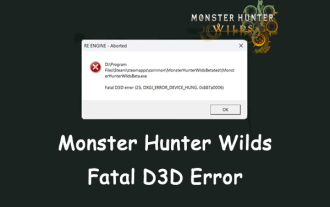 All Fixes for Monster Hunter Wilds Fatal D3D Error on PC
Mar 05, 2025 pm 06:01 PM
All Fixes for Monster Hunter Wilds Fatal D3D Error on PC
Mar 05, 2025 pm 06:01 PM
Monster Hunter Wilds players are encountering frustrating crashes due to Fatal D3D or RE Engine Aborted errors. This guide provides solutions to resolve these issues and get you back to hunting. Understanding the Problem Monster Hunter Wilds uses Cap
