How to display the current time in LabVIEW 2018? In the LabVIEW 2018 tutorial, PHP editor Zimo will introduce you in detail how to easily display the current time in LabVIEW 2018. If you want to use a real-time clock in your own application, read on for a step-by-step guide and sample code.
First, open LabVIEW 2018 and create a new VI—select the New VI command in the menu bar to pop up the New VI window.

Save VI——Select the File-Save command in the menu bar, then the dialog box to save the file will pop up, then select the appropriate path, enter the file name [display the current time], and save VI.

Select the control palette in the front panel, [New Style] - [Numeric] - [Time Stamp Input Control], and place the control in the front panel.


Click the time button to open the setting time and date dialog box. Click [Set as current time] and the control will display the current time.


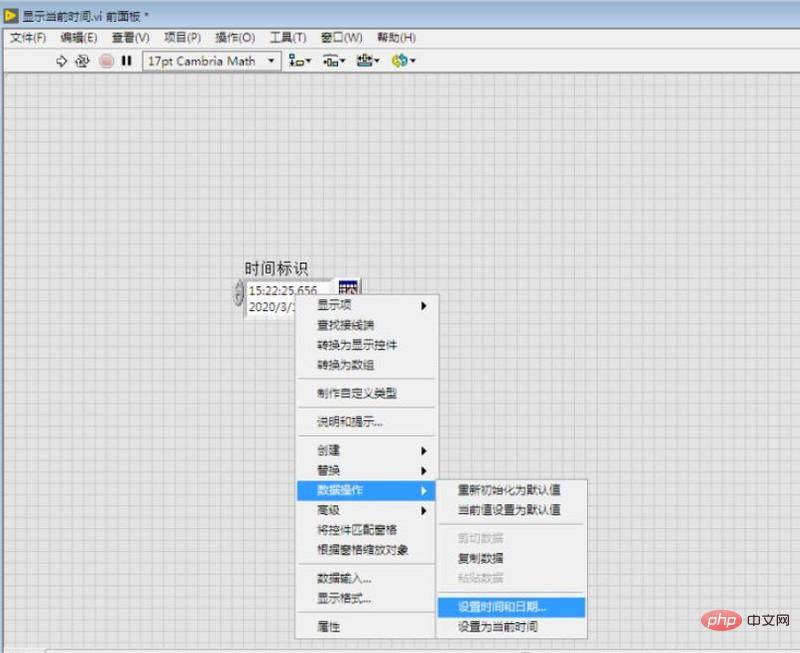
Right-click the control and select the [Data Operation]-[Set Time and Date] command from the pop-up menu to open the setting time and date.


Right-click the control and select the [Data Operation]-[Set as Current Time] command from the pop-up menu to display the current time and date.


The above is the detailed content of How to display the current time in LabVIEW 2018 LabVIEW 2018 Tutorial. For more information, please follow other related articles on the PHP Chinese website!


