How to protect Excel tables from arbitrary modification or filling in? At work, have you ever encountered the need to share an Excel spreadsheet with others, but were worried about the content of the spreadsheet being modified at will? PHP editor Xiaoxin provides you with 3 practical methods to help you easily protect Excel tables to prevent unauthorized modifications or only allow filling in specific areas. Through the following content, you will learn how to effectively protect the data security of Excel sheets by locking cells, protecting worksheets, and protecting spreadsheets.
If you want to lock some cells so that they cannot be changed, you can follow the steps below:
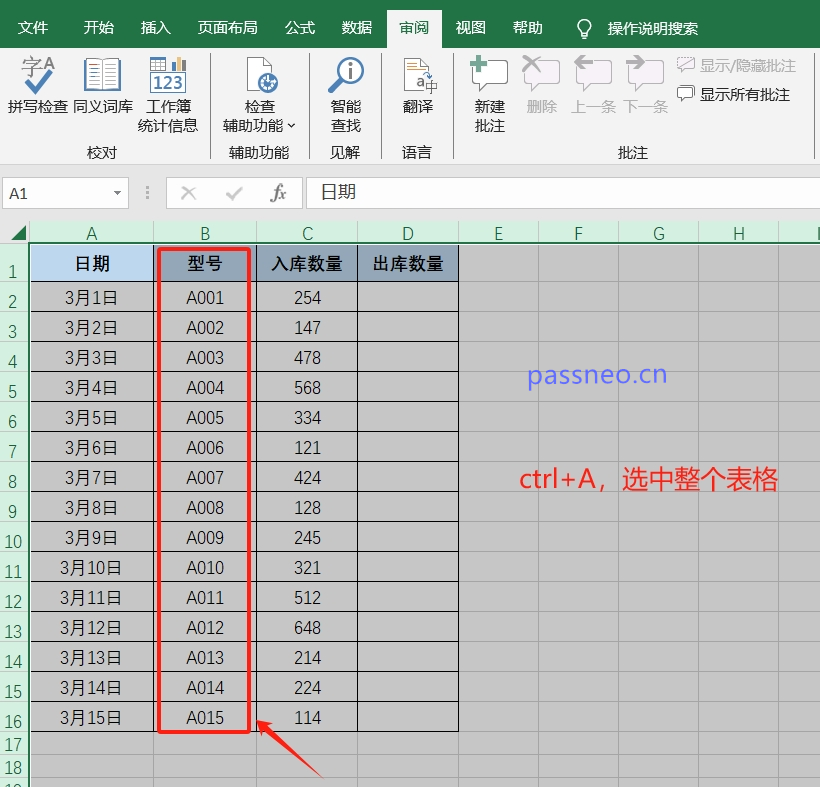
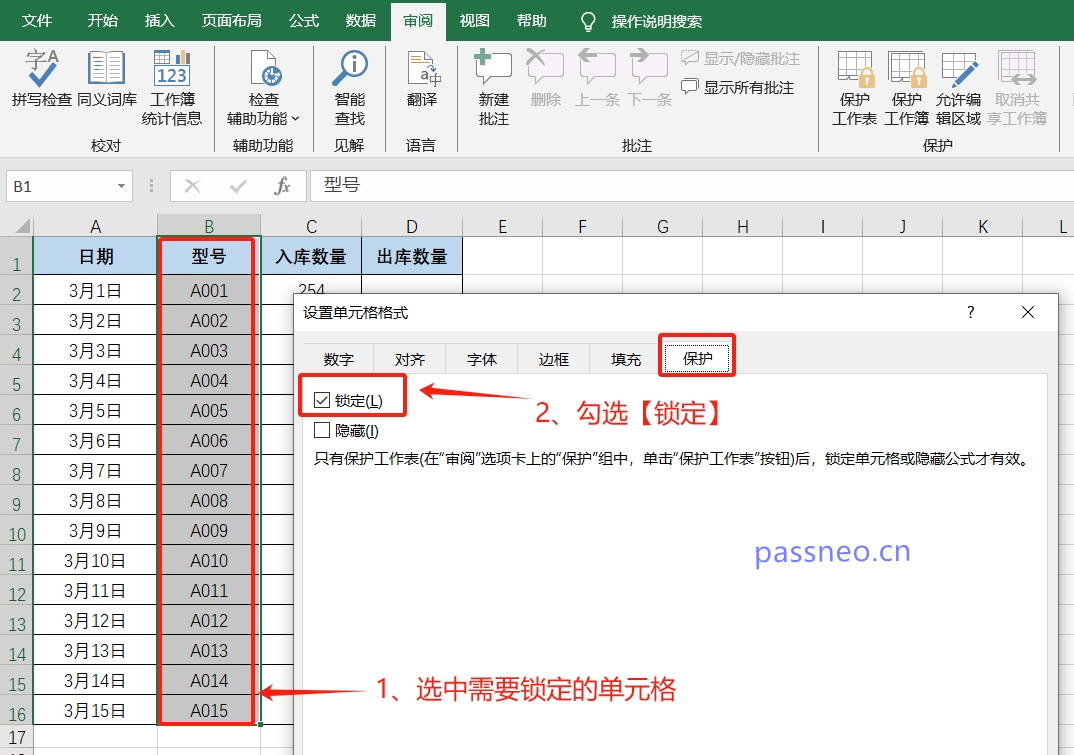
If you need to lock the "Model" column data in the table below, other areas can be edited. We first select the entire table through the shortcut key "Ctrl+A". Then select the "Model" column that needs to be locked, right-click and select "Format Cells", select the "Protect" tab in the pop-up window, check the "Lock Cells" checkbox, and finally click "OK" "That's it.

2. After selecting the entire table, right-click the mouse and select the [Format Cells] option.

3. After the [Format Cells] dialog box pops up, in the [Protect] interface, remove the "check" in front of [Lock], and then click [OK].

4. Return to the table, select the area that needs to be locked for editing, then right-click the mouse and select [Format Cells]. After the dialog box pops up, in the [Protect] interface, check the [Lock] option, and then click 【Sure】.

5. Return to the menu tab, click [Protect Worksheet] in the [Review] list, when the dialog box pops up, check [Protect worksheet and locked cell contents], and then enter the settings you want in the password field. Password, click [OK] and re-enter it again. The selected cells will be locked and cannot be edited.

If only blank cells can be edited and other areas must be locked, you can set lock constant cells. The steps are as follows:
1. According to the operation of "Method 1", first select the entire table through the shortcut key "Ctrl+A", then right-click the mouse and select the [Format Cells] option; after the dialog box pops up, in the [Protect] interface , remove the "check mark" in front of [Lock], and then click [OK].

2. Return to the form, use the shortcut key "Ctrl+G" to bring up the [Positioning] dialog box, and then click [Positioning Conditions].

3. In the [Location Dialog Box], select the [Constant] option, and then click [OK].

4. After the third step, all constants will be automatically selected;
Then, just like steps 4 and 5 in "Method 1", right-click the mouse and select [Format Cells]. After the dialog box pops up, in the [Protect] interface, check the [Lock] option. Click [OK];
Return to the menu tab and click [Protect Worksheet] in the [Review] list. After the dialog box pops up, enter the password you want to set and the setting is complete. In this way, except for blank cells, all constant cells in the Excel table will be locked.

If you want to lock the entire table from editable changes, just click [Protect Worksheet] in the [Review] list of the menu tab. After the dialog box pops up, check [Protect worksheet and locked cell contents], and then enter the password you want to set in the password field to lock the entire Excel table.

The above 3 methods of locking the Excel table, if you no longer need to lock it later, you can unblock it according to the following methods:
In the menu tab, click [Cancel Worksheet Protection] in the [Review] list. After the dialog box pops up, enter the originally set password in the password field. After clicking [OK], the "Lock" setting of Excel will be released. .

It should be noted that when setting up to lock the Excel table, you must remember the password. If you accidentally forget the password, you cannot unlock it in Excel. Locked".
In this case, we need the help of other tools.
Taking the Pepsi Niu Excel password recovery tool as an example, you can directly remove the "lock password" set by Excel without a password.
You only need to select the [Unrestriction] module in the tool, and then import the Excel table into the tool to lift it with one click.

That’s it for today’s sharing, I hope it will be helpful to everyone!
The above is the detailed content of How to lock an Excel table so that others cannot change it?. For more information, please follow other related articles on the PHP Chinese website!


