

How to Disable or Remove Hyper-V in Windows 11

Hyper-V comes pre-installed on Windows 11 computers. While this virtualization tool is not available out of the box on the Home edition of the OS, you can install it with a batch script.
Unfortunately, Hyper-V can conflict with third-party apps on your PC, including other virtualization tools such as VMWare Workstation, VirtualBox, and emulators. As a result, you may encounter the Hyper-V detected error when trying to launch an app, PC games, or hardware tuning utilities.
Luckily, you can disable Hyper-V in Windows 11 with the help of the classic Windows Features dialog, Command Prompt, and PowerShell.
Why You May Need to Disable Hyper-V
By design, only one virtualization tool can use the integrated virtualization extension, such as Intel VT-x and AMD-V, available on your processor. If you need to use third-party virtualization software, including VMware WorkStation and Virtual Box, you must disable the Hyper-V Hypervisor.
You may also need to disable other hypervisor-dependent features, including Device Guard, Credential Guard, and memory integrity feature part of Core Isolation in Windows Security.
How to Check if Hyper-V Is Running on Windows 11

You can access the System Information app to determine if the Hyper-V virtualization is running. This is useful if you need to verify the Hyper-V hypervisor status after or before disabling it.
To check the Hyper-V hypervisor status on your computer:
- Press Win + R to open Run.
- Type msinfo32.exe and click OK to open the apps.
- Next, check if the following entry is available at the bottom of the details tab:
<code class="hljs ">A hypervisor has been detected. Features required for Hyper-V will not be displayed.</code>
Copy after login - If yes, you'll need to disable Hyper-V, Memory integrity, and the Credential Guard feature, as discussed below, to use other virtualization tools without any error.
1. How to Disable Hyper-V via Windows Optional Features
The Windows Features dialog lets you add additional features disabled by default in Windows 11. You can also use it to disable some advanced features, including Hyper-V.
Note that to fix the Hyper-V detected error, you must disable the Virtual Machine Platform and Windows Hypervisor Platform feature in addition to Hyper-V.
To disable Hyper-V using the Windows Features dialog:
- Press the Win + R key to open the Run dialog.
- Type control and click OK to open the Control Panel.
- In the Control Panel, click on Programs.

- Next, click on Programs and Features.
- In the left pane, click on Turn Windows features on or off.


- In the Windows Features dialog, locate Hyper-V.
- Uncheck the Hyper-V option to disable the feature.
- Next, scroll down and locate the Virtual Machine Platform and Windows Hypervisor Platform options.
- Unselect both options and click OK.
- Windows will uninstall Hyper-V and other features from your system.
- Once done, restart your PC to apply the changes.


2. How to Disable Hyper-V Using BCDEDIT

You can disable Hyper-V in boot configuration using the BCDEdit tool. This is useful if you only want to deactivate Hyper-V and not uninstall it completely.
To disable Hyper-V using BCDEdit:
- Press the Win key and type cmd.
- Right-click on the Command Prompt and select Run as administrator.
- In the Command Prompt window, type the following command and press Enter:
<code class="hljs sql">bcdedit /set hypervisorlaunchtype off</code>
Copy after login - When the success message appears, close the Command Prompt and restart your PC to apply the changes.
- If you need to activate Hyper-V again, use the following command:
<code class="hljs sql">bcdedit /set hypervisorlaunchtype auto</code>
Copy after login - Make sure to restart your PC to apply the changes.
Additionally, you can use the BCDEdit tool to perform other advanced tasks, such as deleting the old boot menu options and adding a safe mode shortcut to the Windows 11 boot menu.
3. How to Uninstall Hyper-V Using the Command Prompt

If the Windows Features dialog fails to remove Hyper-V, you can use the Command Prompt to disable the hypervisor. Here's how to do it:
- Open Command Prompt as administrator.
- In the Command Prompt window, type the following command and press Enter:
<code class="hljs bash">dism /online /disable-feature /featurename:Microsoft-hyper-v-all</code>
Copy after login - Upon execution, the DISM tool will disable Hyper-V and show the operation completed successfully message to indicate successful execution.
- Type exit, press Enter to close the Command Prompt, and restart your PC.
After the restart, you can run your games and other hypervisors without the error. If not, open the Windows Features dialog, disable the Virtual Machine Platform and Windows Hypervisor Platform options, and restart your PC to turn off Hyper-V Hypervisor.
4. How to Disable Hyper-V Using PowerShell

If you prefer PowerShell, use the WindowsOptionalFeature cmdlet to disable Hyper-V in Windows 11. To do this, launch PowerShell with admin privileges and execute the command. Here's how to do it:
- Press the Win key and type powershell.
- Right-click on PowerShell and select Run as administrator.
- Click Yes when prompted by User Account Control.
- In the PowerShell window, copy and paste the command below and press Enter:
<code class="hljs ">Disable-WindowsOptionalFeature -Online -FeatureName Microsoft-Hyper-V-All</code>
Copy after login - Wait for the process to complete. Once done, close PowerShell and restart your PC to apply the changes.
How to Uninstall the Hyper-V Virtual Network Adapter
During the restart following the uninstallation of Hyper-V, you may frequently encounter the message, "We couldn't complete the updates, undoing changes." To resolve this issue, ensure the Hyper-V virtual network adapters are deleted from your PC. You can delete the virtual network adapter from Device Manager.
To delete Hyper-V's virtual network adapters:
- Press Win + R to open Run.
- Type dvmgmt.msc and click OK to open Device Manager.
- In Device Manager, expand the Network Adapters section to locate the Hyper-V Virtual network adapters.
- If no virtual adapters associated with Hyper-V are listed, click View and select Show hidden devices.
- Right-click on the Hyper-V Virtual Ethernet Adapter and select Uninstall device.
Do not remove the Microsoft Wi-Fi Direct Virtual Adapter.
- Click Uninstall to confirm the action.
- Repeat the steps to delete all the virtual network adapters associated with Hyper-V.
- Once done, close Device Manager and restart your PC. Next, uninstall Hyper-V and check for any improvements.


How to Turn Off Virtualization-Based Security (Memory Integrity)
If you encounter the Hyper-V detected issue even after you disable Hyper-V, try to disable the Memory integrity feature in Windows Security. The Memory integrity feature is part of Core Isolation. It helps prevent hackers from accessing and infecting high-security processes using malicious code.
By default, Windows disables the Memory integrity feature to avoid conflict with apps and device drivers due to incompatibility issues. This can also cause issues with third-party virtualization tools and programs needing access to your system's virtualization hardware.
To turn off Memory integrity in Windows Security:
- Press Win + I to open the Settings app.
- In the left pane, click on the Privacy & security tab.
- Next, click on Windows Security.
- Under the Protection areas section, click on Device security.
- Next, click on Core isolation details under the Core isolation section.
- Toggle the switch under Memory integrity to turn it Off.
- Restart your PC to apply the changes.


How to Disable Device Guard and Credential Guard
Device Guard and Credential Guard don't play well with other virtualization software, including VMware Workstation. You may encounter an error saying Device Guard/Credential Guard is enabled when trying to power on the VMware Workstation.
Since you intend to use third-party virtualization software, you can safely disable Device Guard and Credential Guard using the Registry Editor.
That said, modifying the Windows Registry involves risk. We recommend you create a restore point and take a registry backup before attempting any modifications.
To disable Device Guard and Credential Guard:
- Press Win + R to open Run.
- Type regedit and click OK to open Registry Editor.
- In Registry Editor, navigate to the following location:
<code class="hljs ">HKEY_LOCAL_MACHINE\SYSTEM\CurrentControlSet\Control\Lsa</code>
Copy after login - In the right pane, locate the LsaCfgFlagsDWORD value. You'll need to create a new key if no such value exists.
- To create a new key, right-click the Lsa subkey in the left pane and select New < DWORD (32-bit)value. Rename the value as LsaCfgFlags.

- Next, double-click on LsaCfgFlags and type 0 in the Value data field.
- Click OK to save the changes.
- Next, in Registry Editor, navigate to the following location:
<code class="hljs ">HKEY_LOCAL_MACHINE\SYSTEM\CurrentControlSet\Control\DeviceGuard</code>
Copy after login - In the right pane, check if the EnableVirtualizationBasedSecurity value exists. If not, right-click the DeviceGuard subkey and select New > DWORD (32-bit) Value.
- Next, rename the key as EnableVirtualizationBasedSecurity and set its value to 0.
- Click OK to save the changes.


Restart your computer to apply the changes and disable Device Guard and Credential Guard. If you ever need to enable these features, modify the value data and change it to 1.
Disable Hyper-V in Windows 11 to Run Third-Party Virtualization Tools and Apps
Hyper-V is an excellent utility if you want an out-of-the-box virtualization solution. However, you must disable Hyper-V to use third-party virtualization software, including VirtualBox and WMware Workstation.
Fortunately, you can easily disable the Hyper-V Hypervisor and other Virtualization-based Security solutions to use third-party hypervisors without errors.
The above is the detailed content of How to Disable or Remove Hyper-V in Windows 11. For more information, please follow other related articles on the PHP Chinese website!

Hot AI Tools

Undresser.AI Undress
AI-powered app for creating realistic nude photos

AI Clothes Remover
Online AI tool for removing clothes from photos.

Undress AI Tool
Undress images for free

Clothoff.io
AI clothes remover

Video Face Swap
Swap faces in any video effortlessly with our completely free AI face swap tool!

Hot Article
Hot Tools

Notepad++7.3.1
Easy-to-use and free code editor

SublimeText3 Chinese version
Chinese version, very easy to use

Zend Studio 13.0.1
Powerful PHP integrated development environment

Dreamweaver CS6
Visual web development tools

SublimeText3 Mac version
God-level code editing software (SublimeText3)
Hot Topics
 1664
1664
 14
1423
52
1317
25
1268
29
1242
24
14
1423
52
1317
25
1268
29
1242
24

 Windows kb5054979 update information Update content list
Apr 15, 2025 pm 05:36 PM
Windows kb5054979 update information Update content list
Apr 15, 2025 pm 05:36 PM
KB5054979 is a cumulative security update released on March 27, 2025, for Windows 11 version 24H2. It targets .NET Framework versions 3.5 and 4.8.1, enhancing security and overall stability. Notably, the update addresses an issue with file and directory operations on UNC shares using System.IO APIs. Two installation methods are provided: one through Windows Settings by checking for updates under Windows Update, and the other via a manual download from the Microsoft Update Catalog.
 Nanoleaf Wants to Change How You Charge Your Tech
Apr 17, 2025 am 01:03 AM
Nanoleaf Wants to Change How You Charge Your Tech
Apr 17, 2025 am 01:03 AM
Nanoleaf's Pegboard Desk Dock: A Stylish and Functional Desk Organizer Tired of the same old charging setup? Nanoleaf's new Pegboard Desk Dock offers a stylish and functional alternative. This multifunctional desk accessory boasts 32 full-color RGB
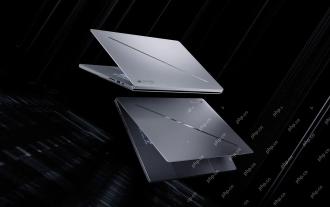 ASUS' ROG Zephyrus G14 OLED Gaming Laptop Is $300 Off
Apr 16, 2025 am 03:01 AM
ASUS' ROG Zephyrus G14 OLED Gaming Laptop Is $300 Off
Apr 16, 2025 am 03:01 AM
ASUS ROG Zephyrus G14 Esports Laptop Special Offer! Buy ASUS ROG Zephyrus G14 Esports Laptop now and enjoy a $300 offer! Original price is $1999, current price is only $1699! Enjoy immersive gaming experience anytime, anywhere, or use it as a reliable portable workstation. Best Buy currently offers offers on this 2024 14-inch ASUS ROG Zephyrus G14 e-sports laptop. Its powerful configuration and performance are impressive. This ASUS ROG Zephyrus G14 e-sports laptop costs 16 on Best Buy
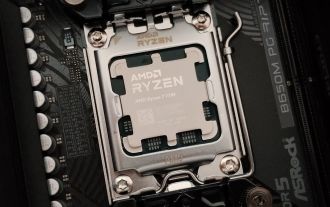 Got an AMD CPU and Aren't Using PBO? You're Missing Out
Apr 12, 2025 pm 09:02 PM
Got an AMD CPU and Aren't Using PBO? You're Missing Out
Apr 12, 2025 pm 09:02 PM
Unlocking Ryzen's Potential: A Simple Guide to Precision Boost Overdrive (PBO) Overclocking your new PC can seem daunting. While performance gains might feel elusive, leaving potential untapped is even less appealing. Fortunately, AMD Ryzen processo
 How to Use Windows 11 as a Bluetooth Audio Receiver
Apr 15, 2025 am 03:01 AM
How to Use Windows 11 as a Bluetooth Audio Receiver
Apr 15, 2025 am 03:01 AM
Turn your Windows 11 PC into a Bluetooth speaker and enjoy your favorite music from your phone! This guide shows you how to easily connect your iPhone or Android device to your computer for audio playback. Step 1: Pair Your Bluetooth Device First, pa
 5 Hidden Windows Features You Should Be Using
Apr 16, 2025 am 12:57 AM
5 Hidden Windows Features You Should Be Using
Apr 16, 2025 am 12:57 AM
Unlock Hidden Windows Features for a Smoother Experience! Discover surprisingly useful Windows functionalities that can significantly enhance your computing experience. Even seasoned Windows users might find some new tricks here. Dynamic Lock: Auto
 Microsoft Might Finally Fix Windows 11's Start Menu
Apr 10, 2025 pm 12:07 PM
Microsoft Might Finally Fix Windows 11's Start Menu
Apr 10, 2025 pm 12:07 PM
Windows 11's Start Menu Gets a Much-Needed Overhaul Microsoft's Windows 11 Start menu, initially criticized for its less-than-intuitive app access, is undergoing a significant redesign. Early testing reveals a vastly improved user experience. The up
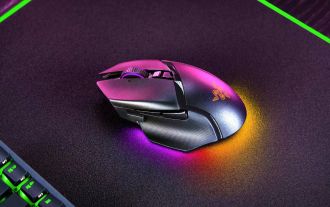 You Can Get The Razer Basilisk V3 Pro Mouse for 39% off
Apr 09, 2025 am 03:01 AM
You Can Get The Razer Basilisk V3 Pro Mouse for 39% off
Apr 09, 2025 am 03:01 AM
##### Razer Basilisk V3 Pro: High-performance wireless gaming mouse The Razer Basilisk V3 Pro is a high-performance wireless gaming mouse with high customization (11 programmable buttons, Chroma RGB) and versatile connectivity. It has excellent sensors, durable switches and extra long battery life. If you are a gamer looking for a high-quality wireless mouse and need excellent customization options, now is a great time to buy the Razer Basilisk V3 Pro. The promotion cuts prices by 39% and has limited promotion periods. This mouse is larger, 5.11 inches long and 2 inches wide
