
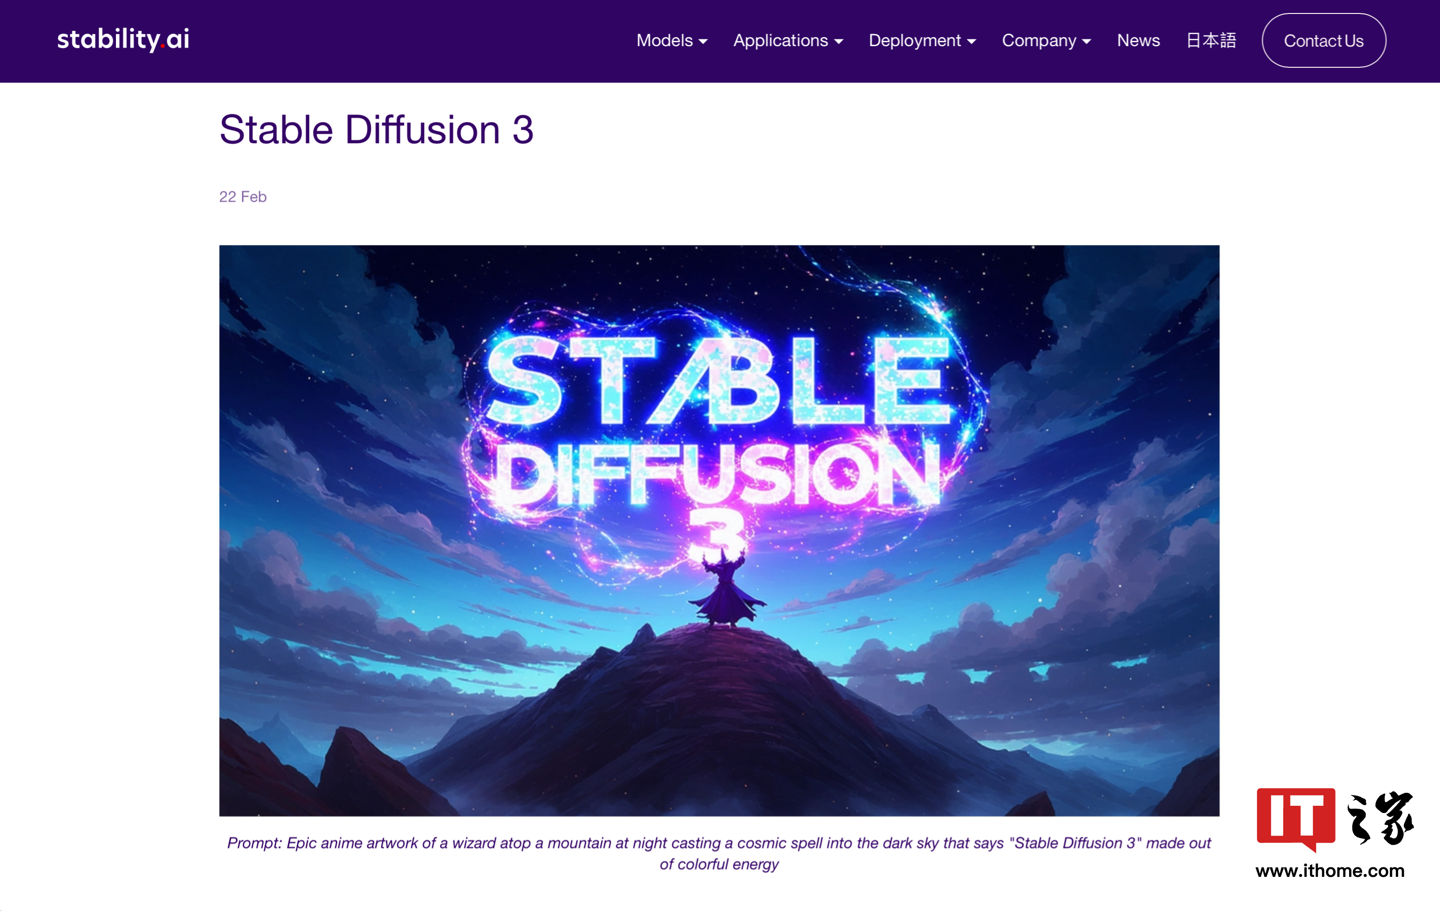
As the latest version of the AI image generation model, Stable Diffusion 3 is here with great expectations. I believe that many friends must have used the image generation model more or less in their work and life, so we will share it below. Let’s take a look at the local construction process of Stable diffusion 3. Without further ado, let’s get down to the practical stuff.
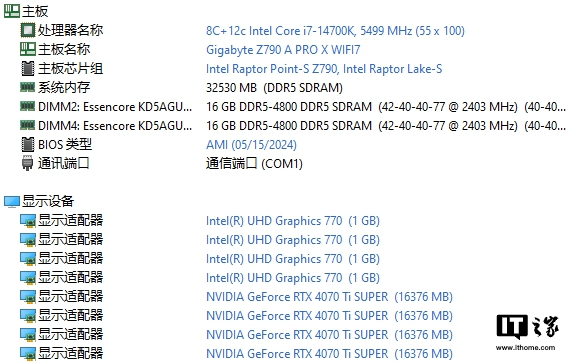
 The platform configuration used in this build is as follows:
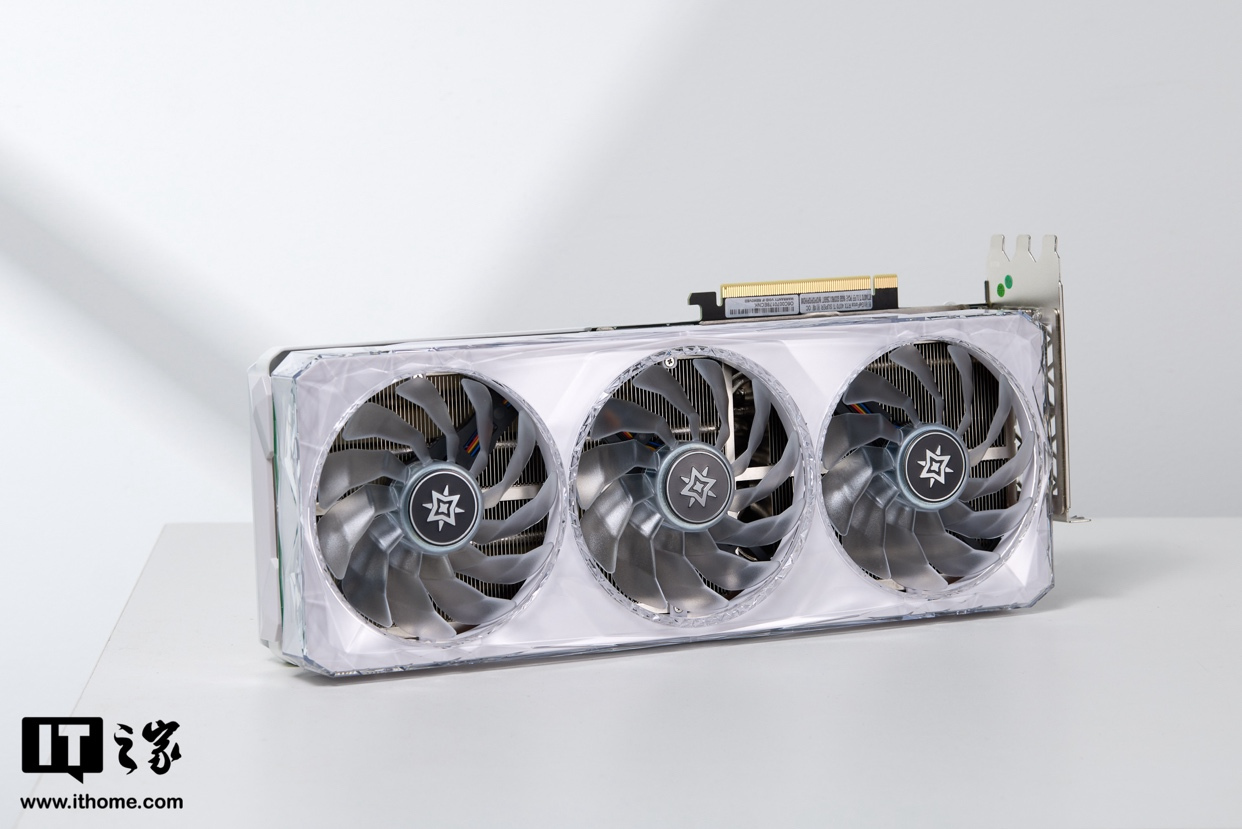
  Considering the strong demand for computing power when running Stable diffusion 3 locally, we chose the GALAXY GeForce RTX 4070 Ti SUPER OC graphics card this time. GEFORCE RTX 4070 Ti SUPER is built based on the AD103 core, which is also the biggest change of this graphics card. It contains 8448 CUDA cores internally, which is an increase of more than 10% compared to the 7680 cores of the RTX 4070 Ti. The memory bit width has been increased to 256bit compared to the RTX 4070 Ti, and the memory specifications have also been increased to 16GB GDDR6X, whether for games or AI. Creation helps.
 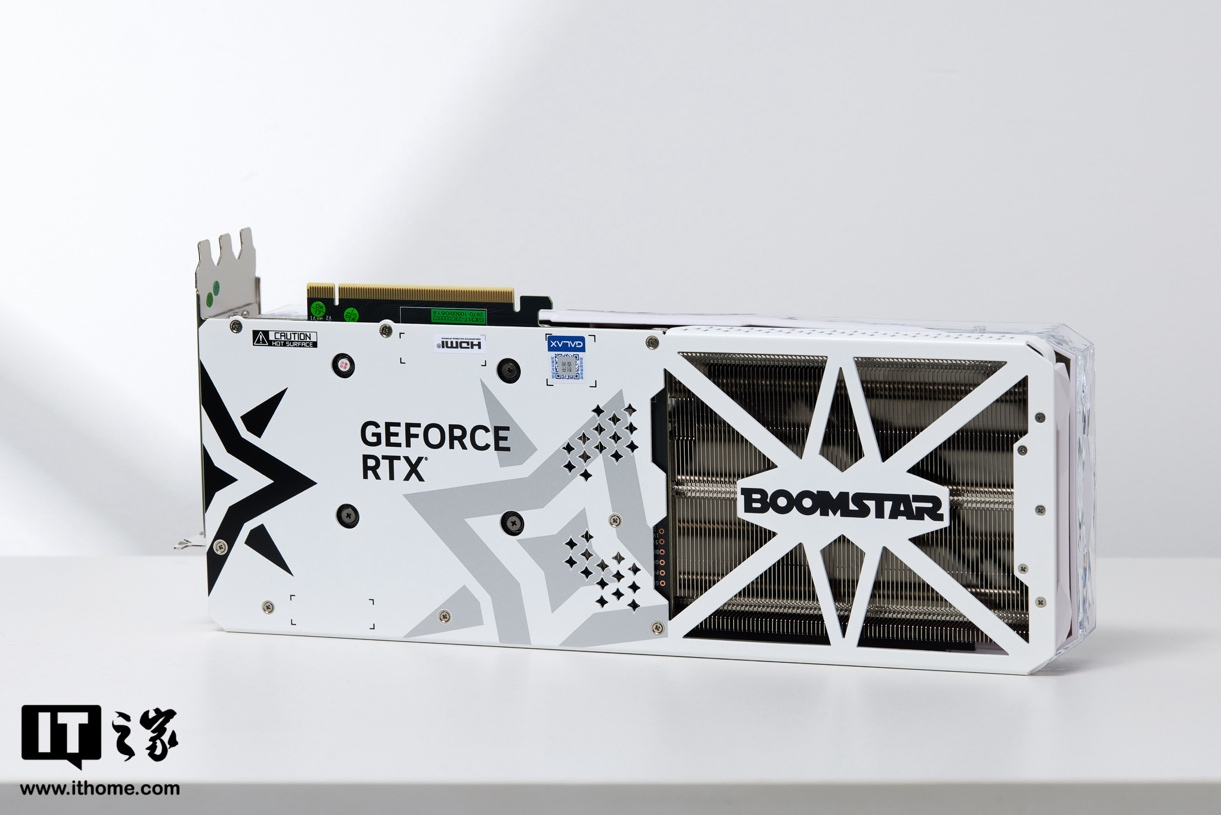 Choosing this graphics card is a balance between price and performance. This graphics card is equipped with 16GB GDDR6x video memory, with a memory width of 192bit and a length of 35.4cm.
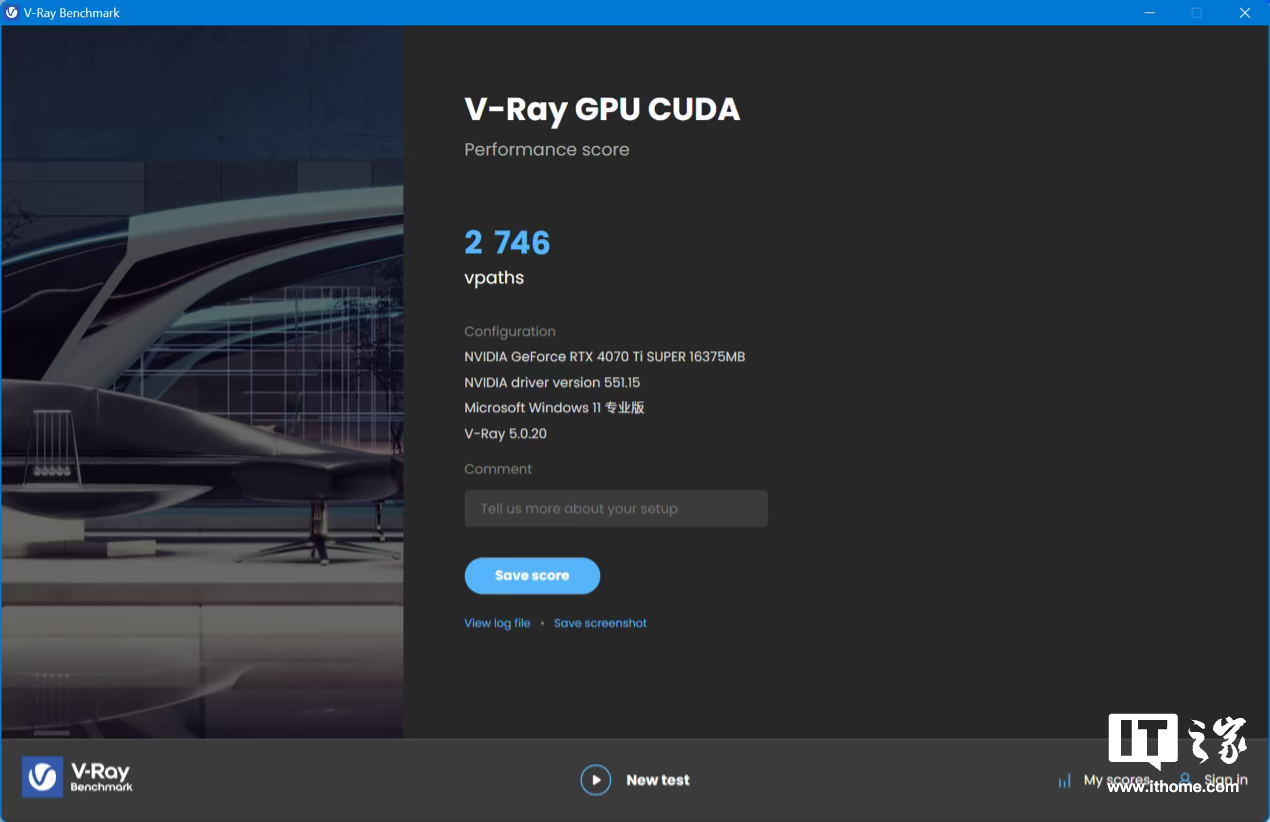
  In order to ensure that this graphics card is qualified for the construction of Stable diffusion 3, some tests were conducted on the computing performance of this graphics card in advance. The 8448 CUDA cores of GeForce RTX 4070 Ti SUPER can provide hardware acceleration, making work more efficient be improved. Almost all modeling software is optimized for NVIDIA GPUs, so it can take into account efficiency, stability, and compatibility. We tested the performance of V-Ray Benchmark. The GPU CUDA test project score is 2746 points.
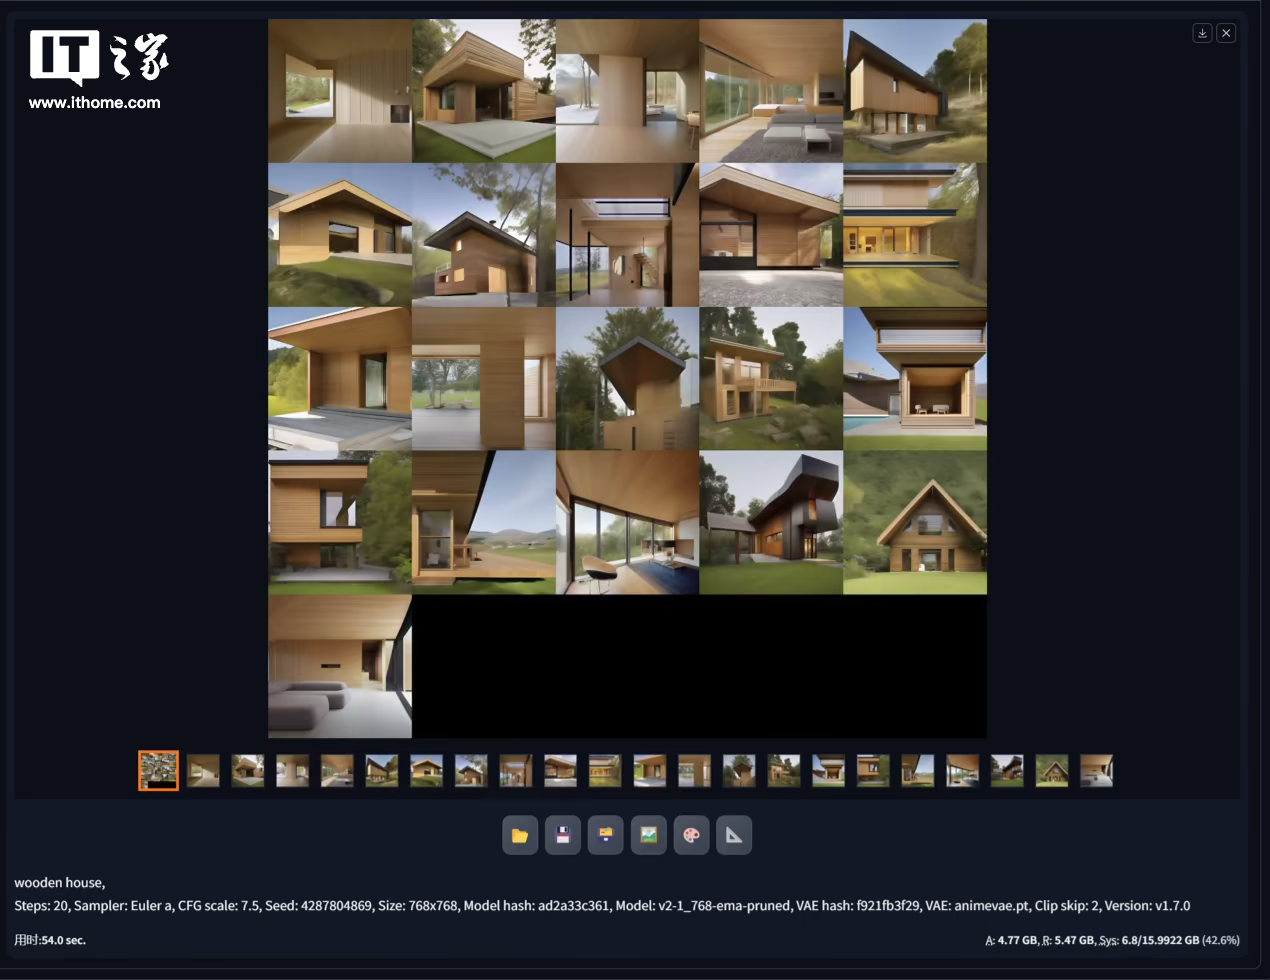
  In the test of Stable Diffusion 1.7, by selecting the model v2-1_768-ema-pruned.ckpt, 21 images of cabins were drawn in the form of Vincentian diagrams. The image resolution was 768*768, and it finally took 54 seconds. Finish. After turning on the TensorRT Engines function, the speed is reduced by half again, and it can be completed in 27 seconds.
  So after a series of tests, we have determined that this graphics card is fully capable of building Stable Diffusion 3. Let’s roll up our sleeves and get started!
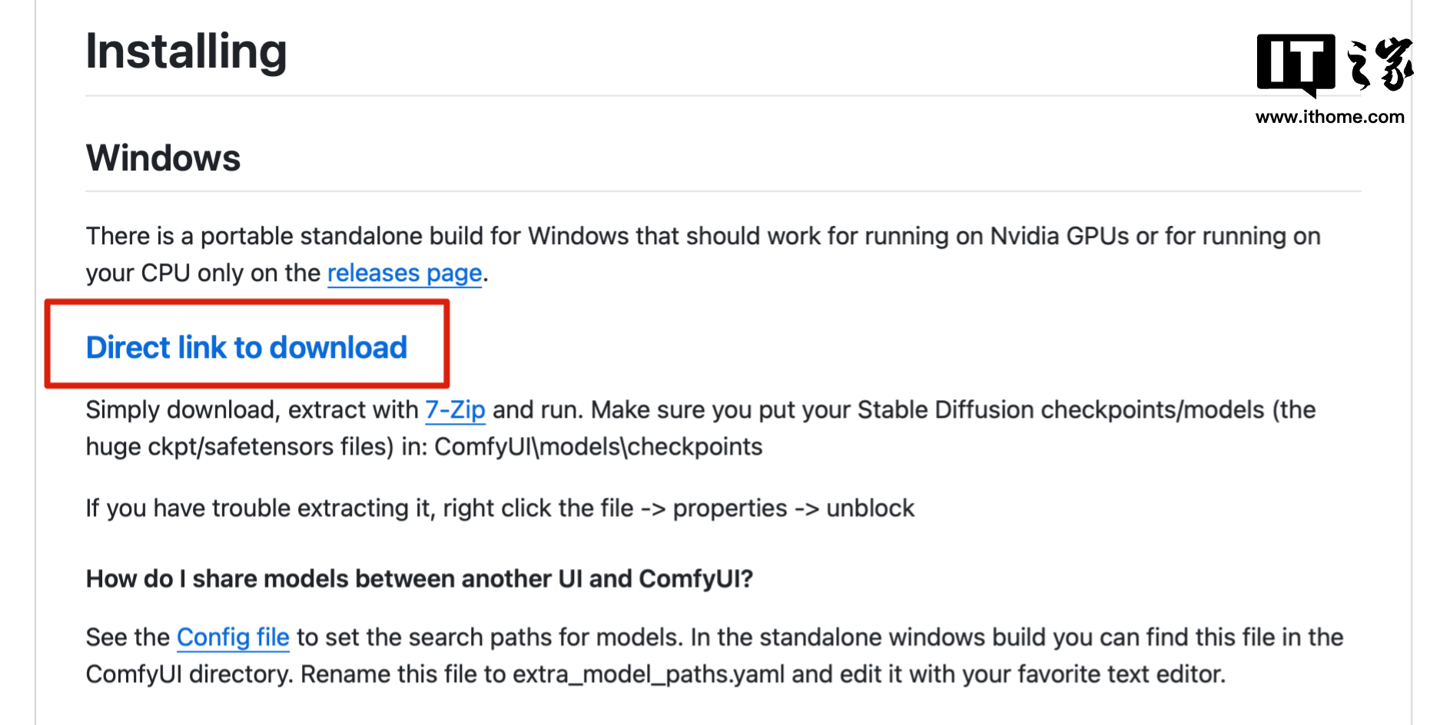
 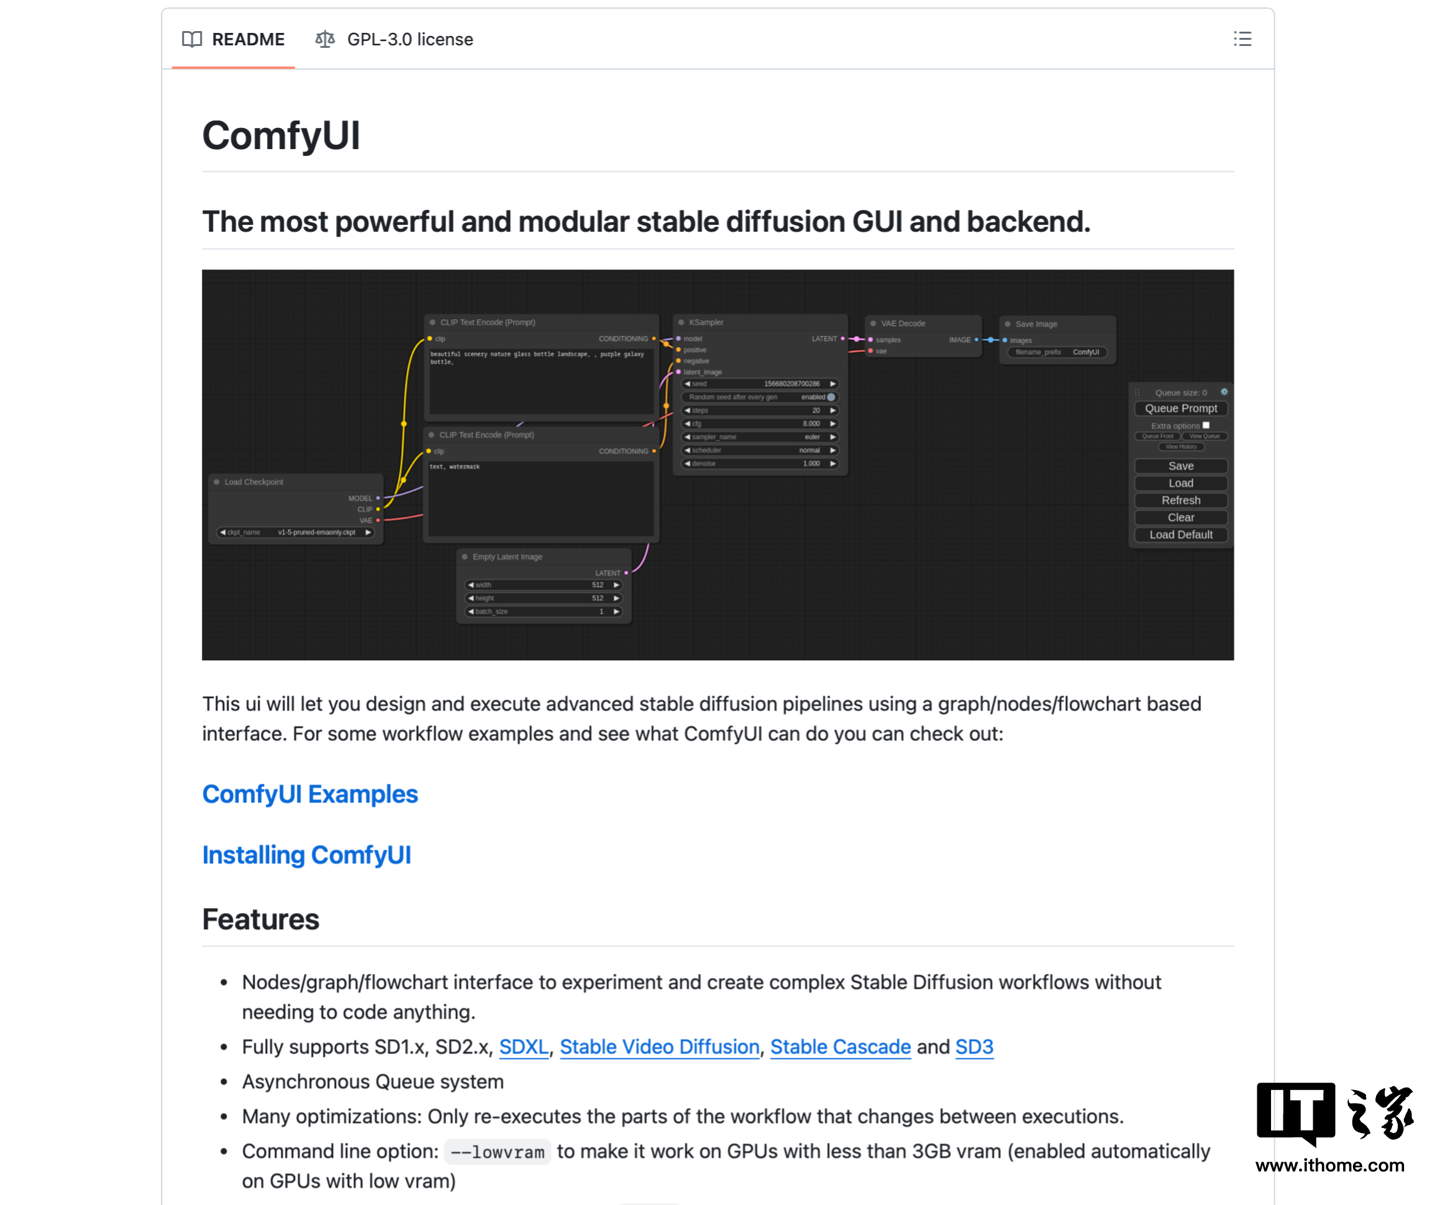 Scroll down to find the download link and click to download.
  UI is downloading first, let’s download the heavy Stable Diffusion 3 model file. The URL is as follows: https://huggingface.co/stabilityai/stable-diffusion-3-medium/tree/main (This URL is redirected from the official link, there is no need to question the authority.)
 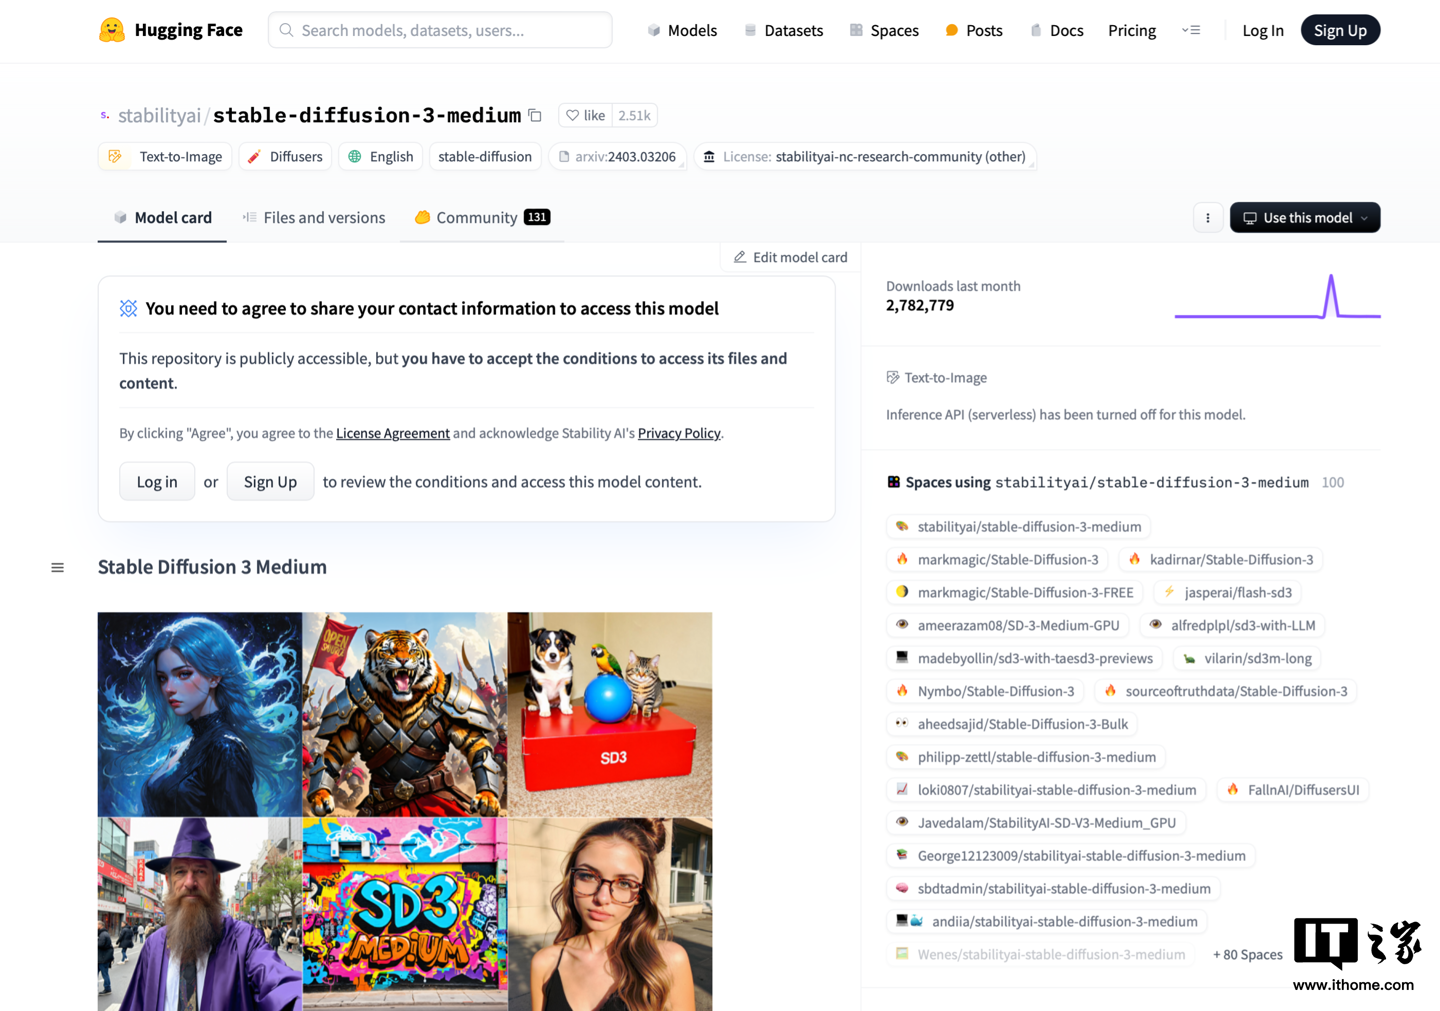 Required to download the model file Log in to the website first. Friends who do not have an account can register. The registration process is relatively routine. After registration, you can see the following model file. Just download the three model files marked in the picture first.
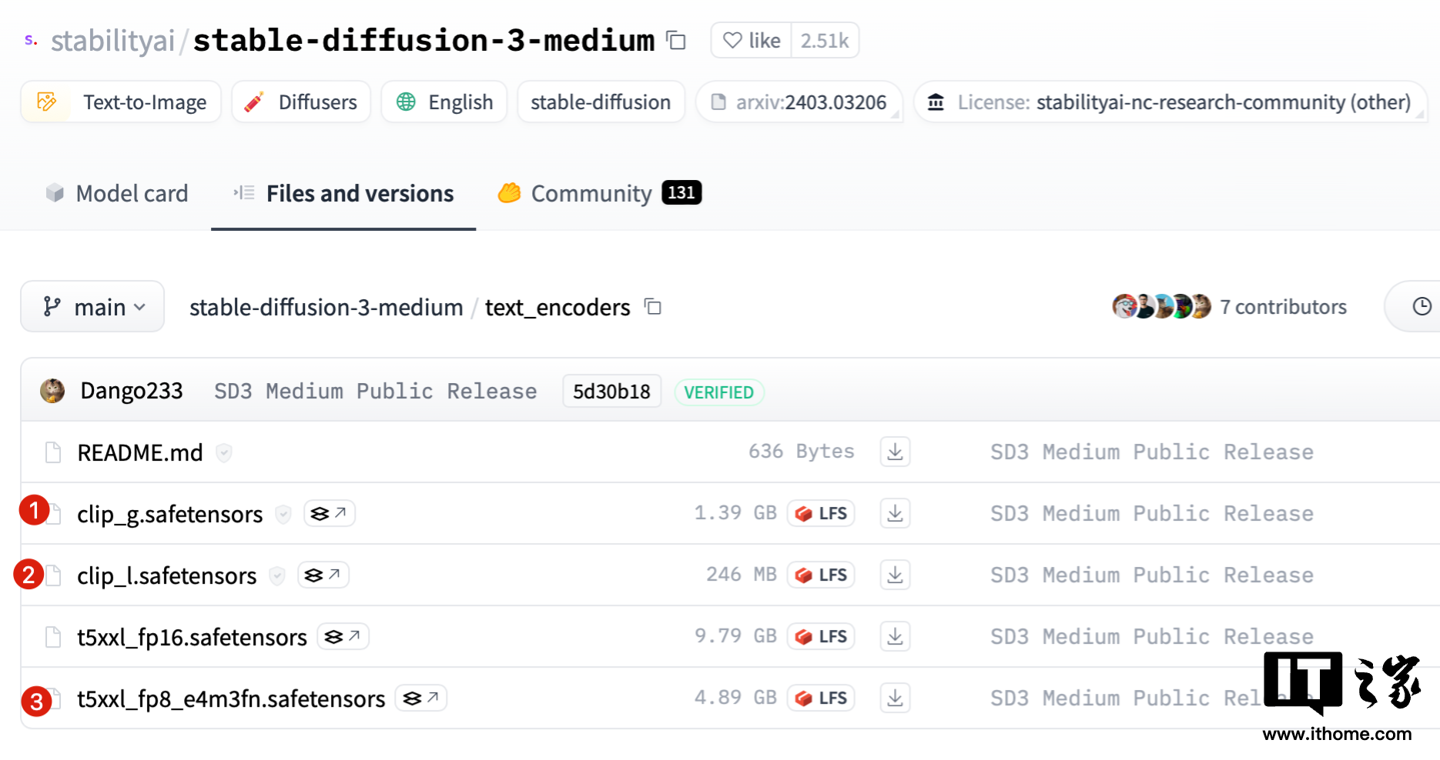
 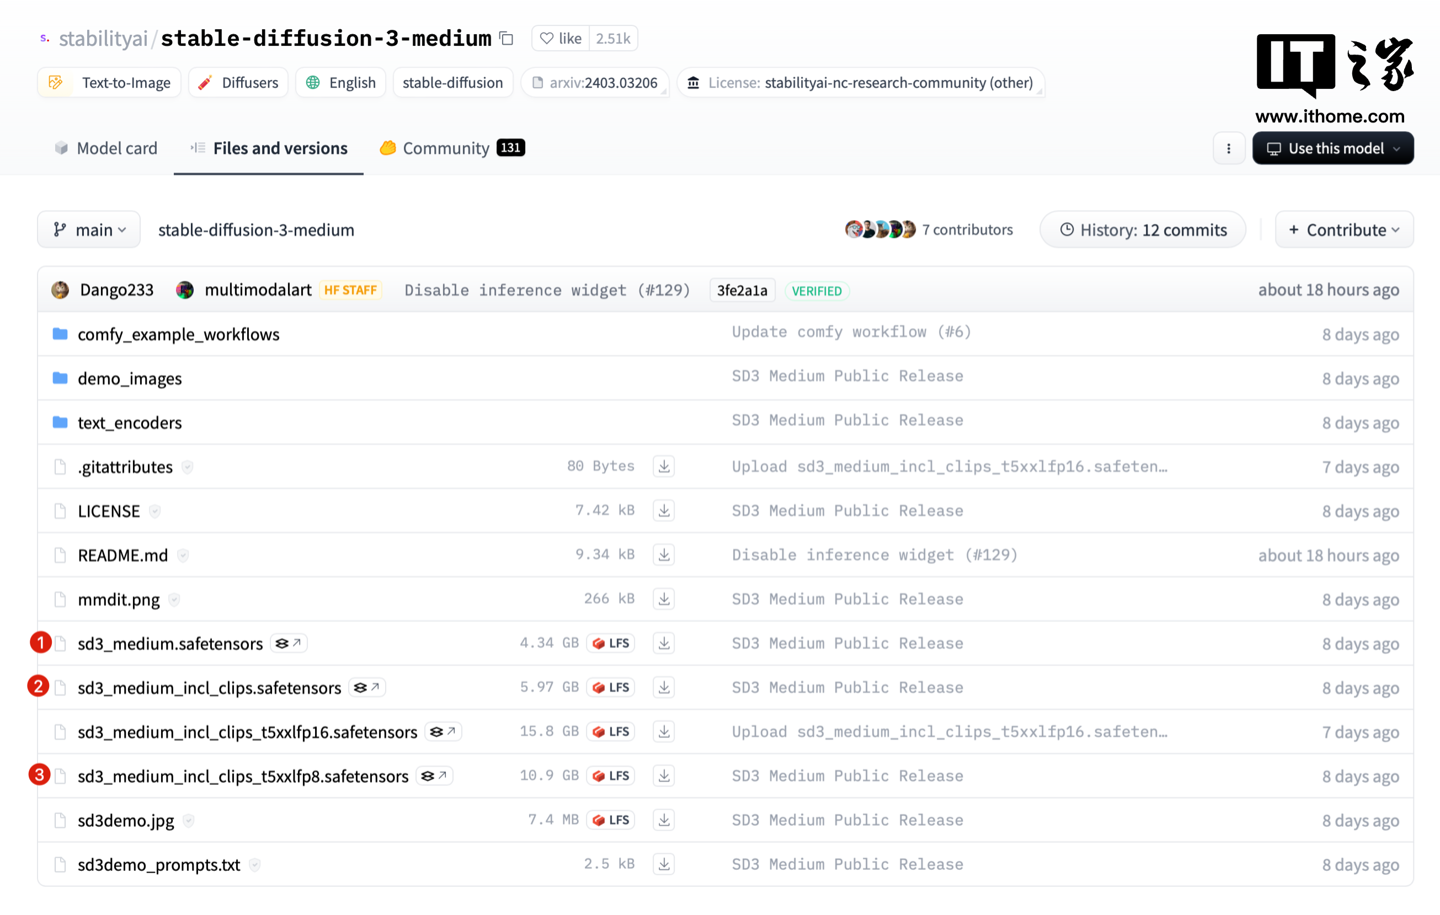 In addition, some files in these two folders need to be downloaded.
  These three files need to be downloaded in the text_encoders folder.
  The three files in the comfy_example_workflows folder are relatively small in size and are officially provided example workflows. Download them here for subsequent demonstrations. You don’t need to download them if you don’t need them.
  If everything goes well, after downloading the following files, our construction work can officially begin.
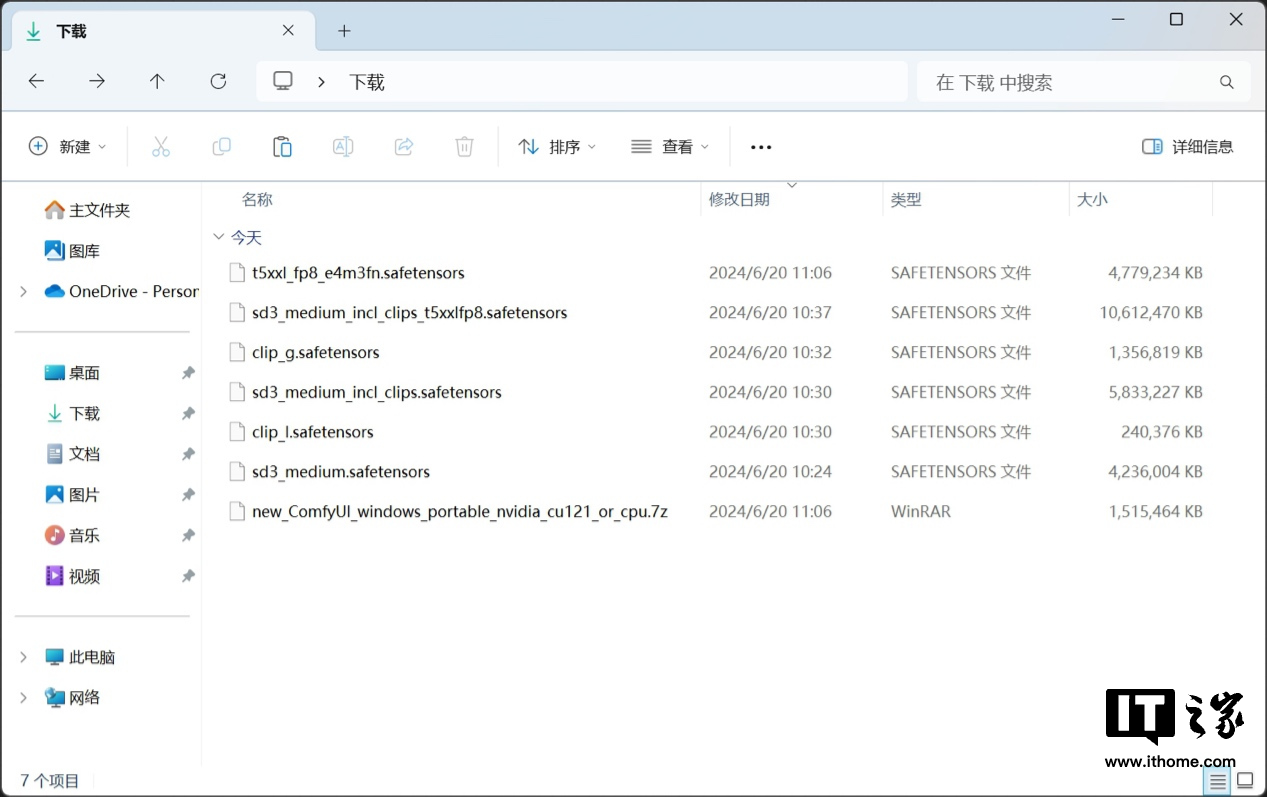
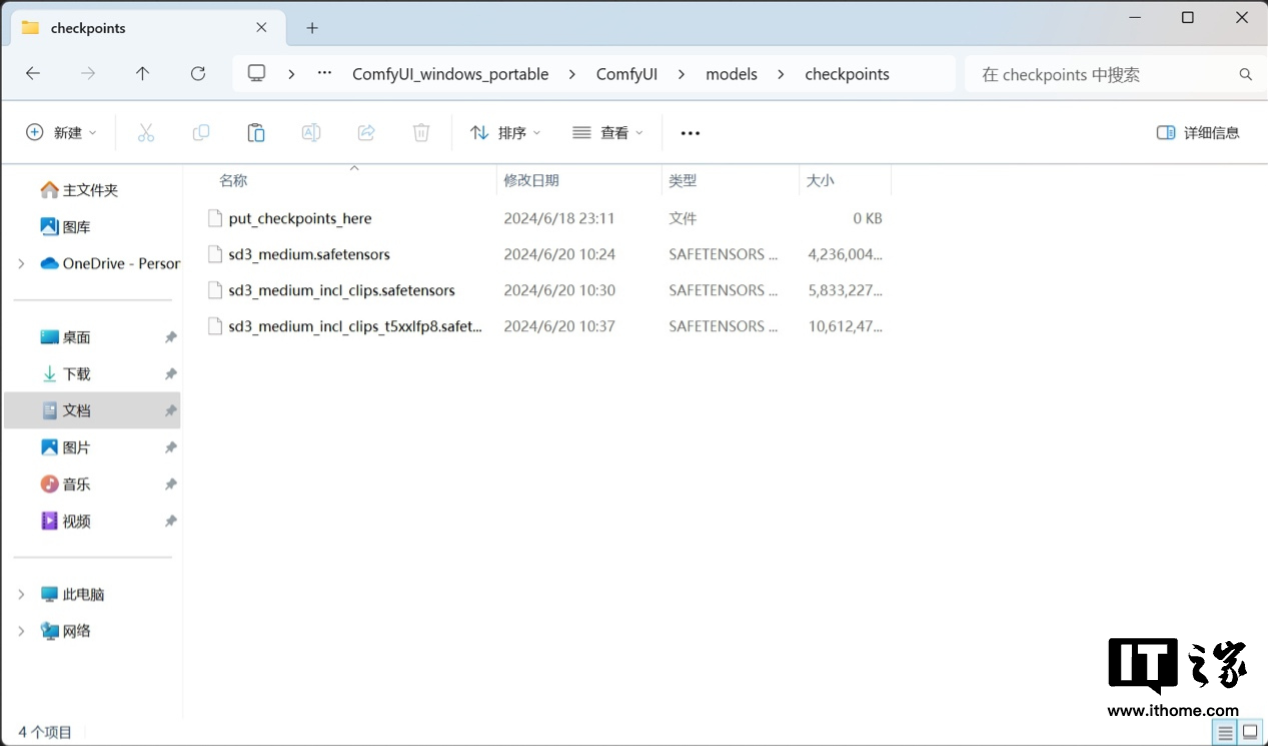
 Next, navigate to the...ComfyUI_windows_portable/ComfyUI/models/checkpoints folder, and move the three files starting with "sd3" from the files we downloaded earlier here.
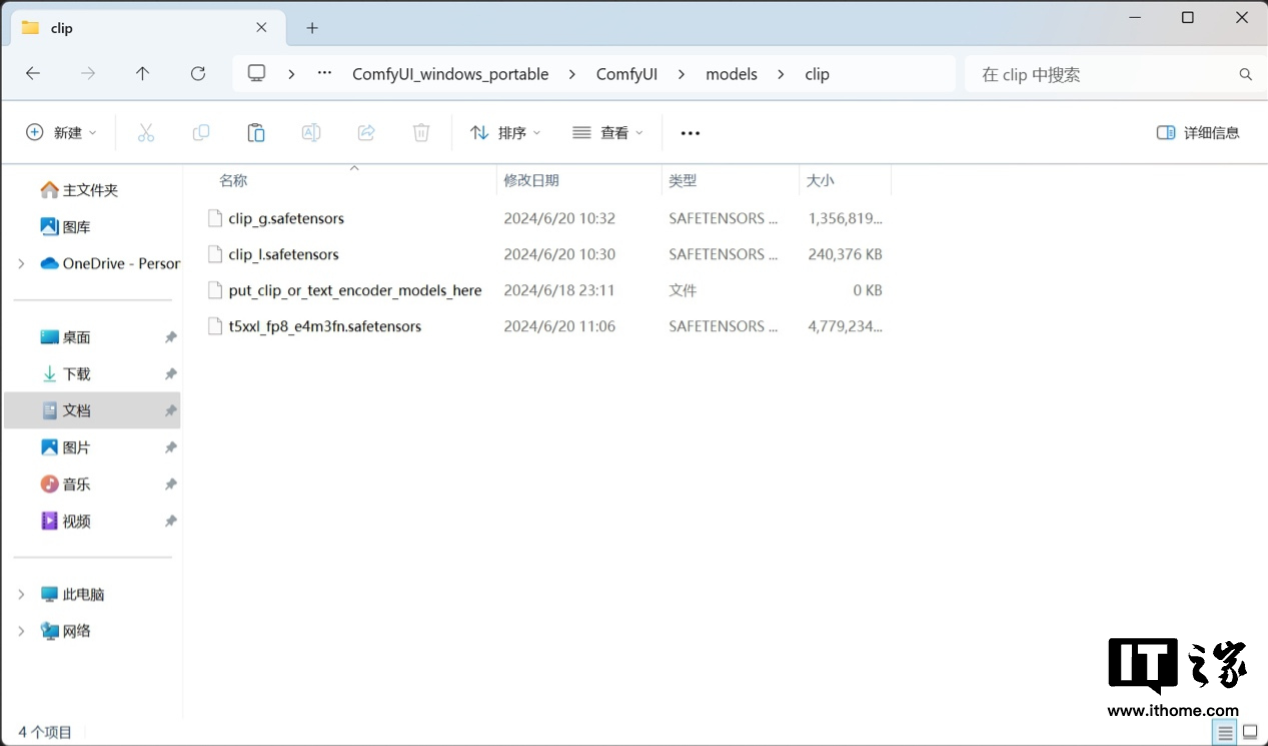
  Then navigate to the...ComfyUI_windows_portable/ComfyUI/models/clip folder and move the three files starting with "clip" and "t5xxl" here.
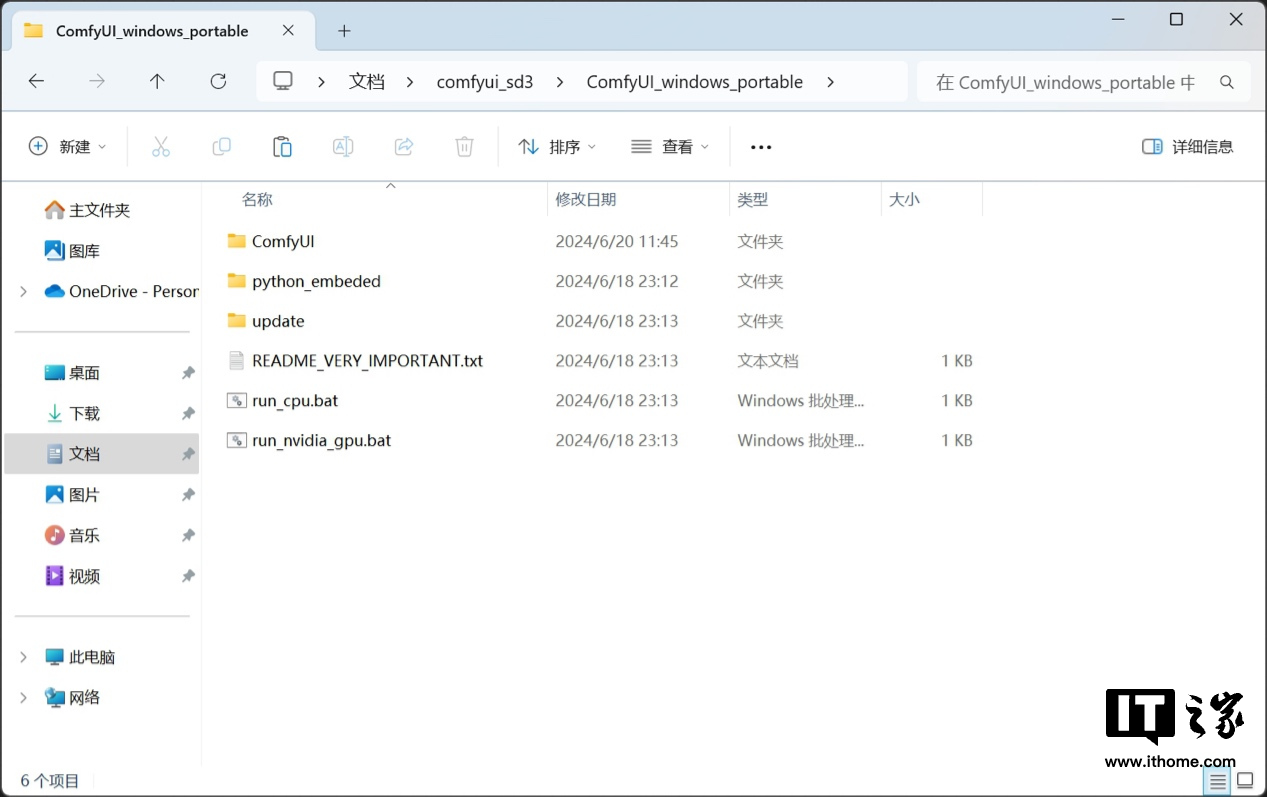
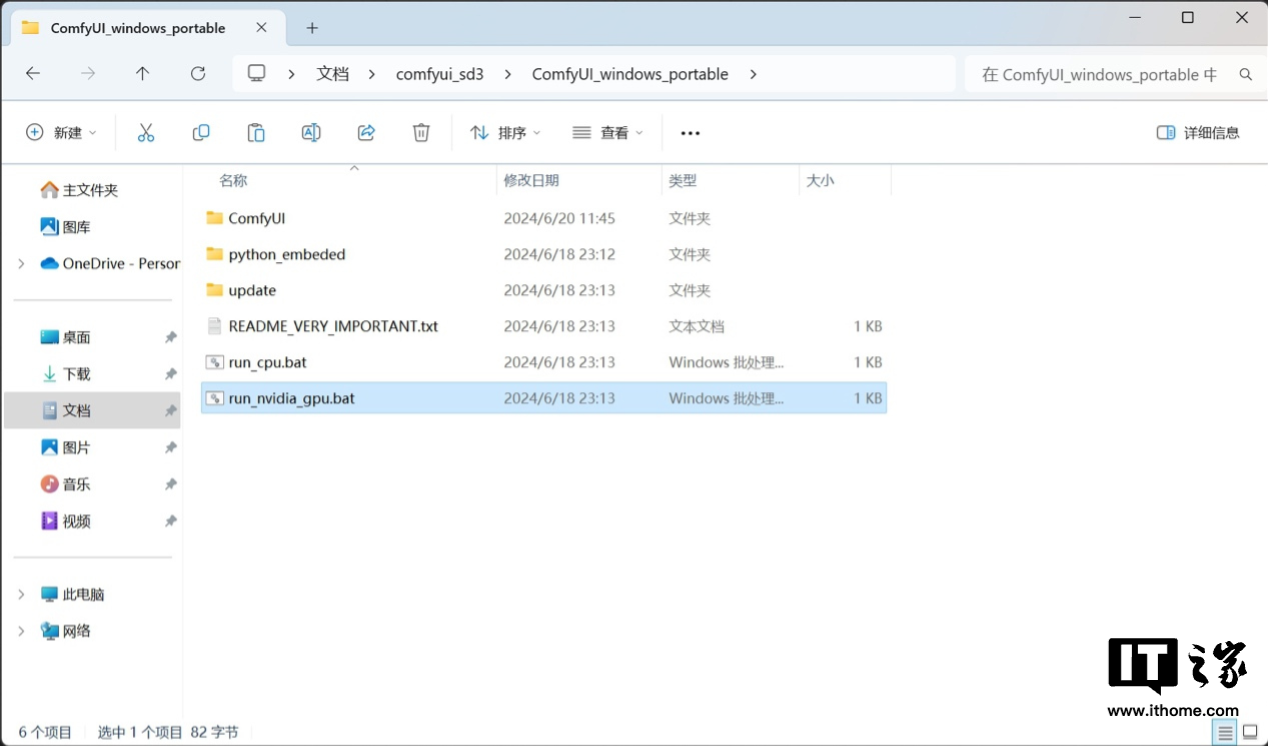
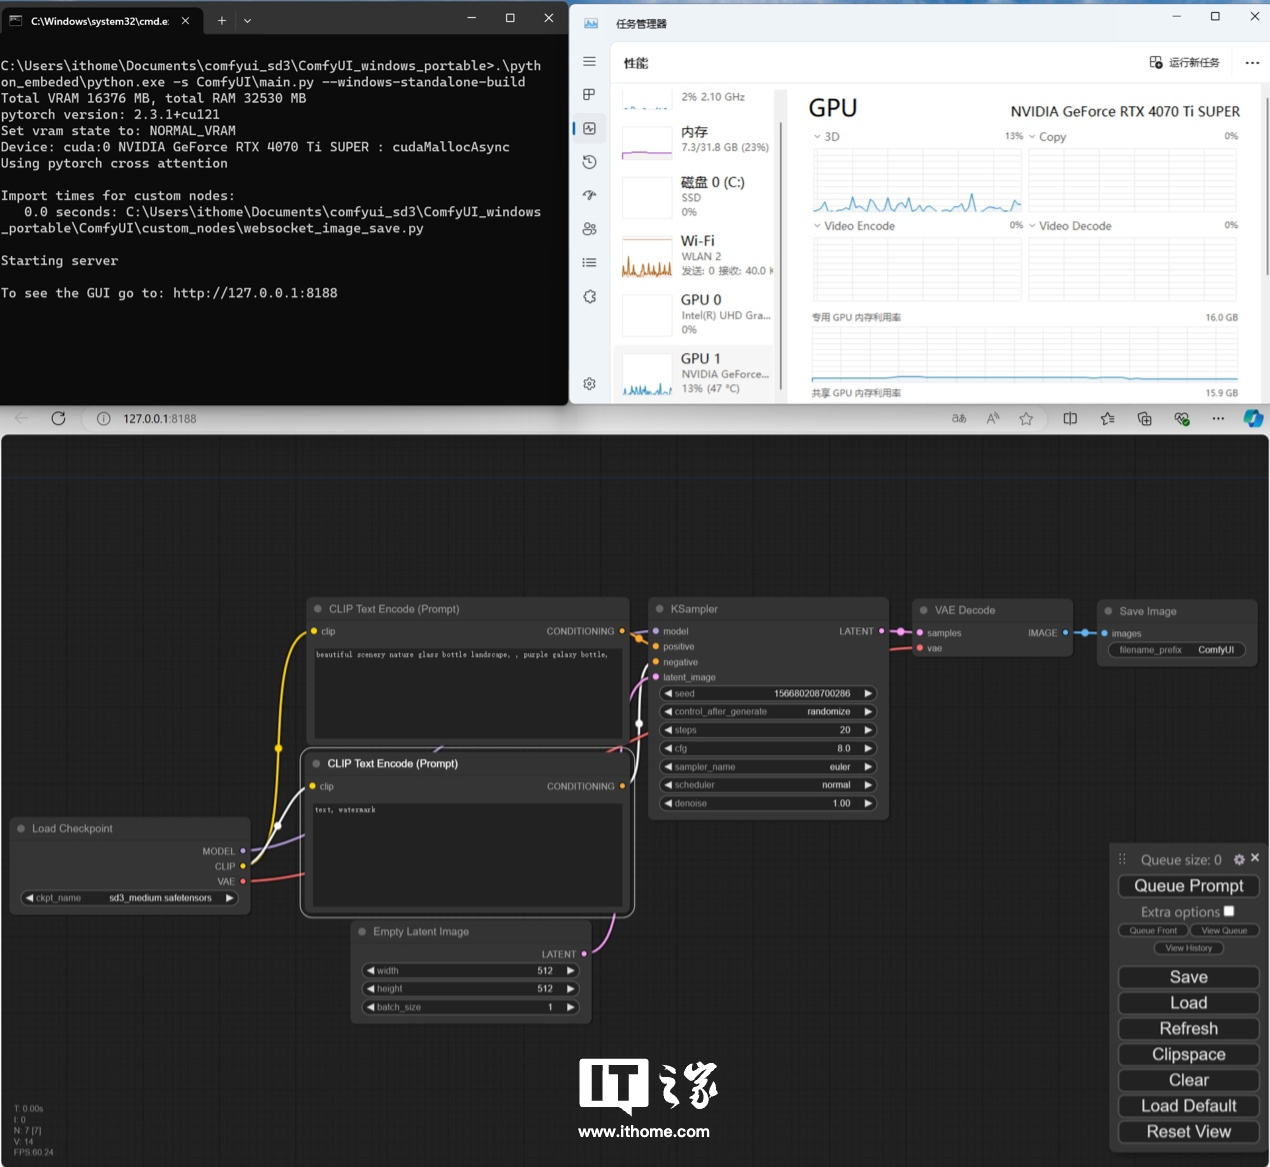
  Go back to the.../ComfyUI_windows_portable/ folder. Since we mainly rely on the computing power of the GALAXY GeForce RTX 4070 Ti SUPER OC graphics card, we double-click here to run run_nvidia_gpu.bat.
  If there are no accidents, you will see the following interface after opening it. Congratulations, the construction process of Stable Diffusion 3 based on ComlfyUI has been initially completed.
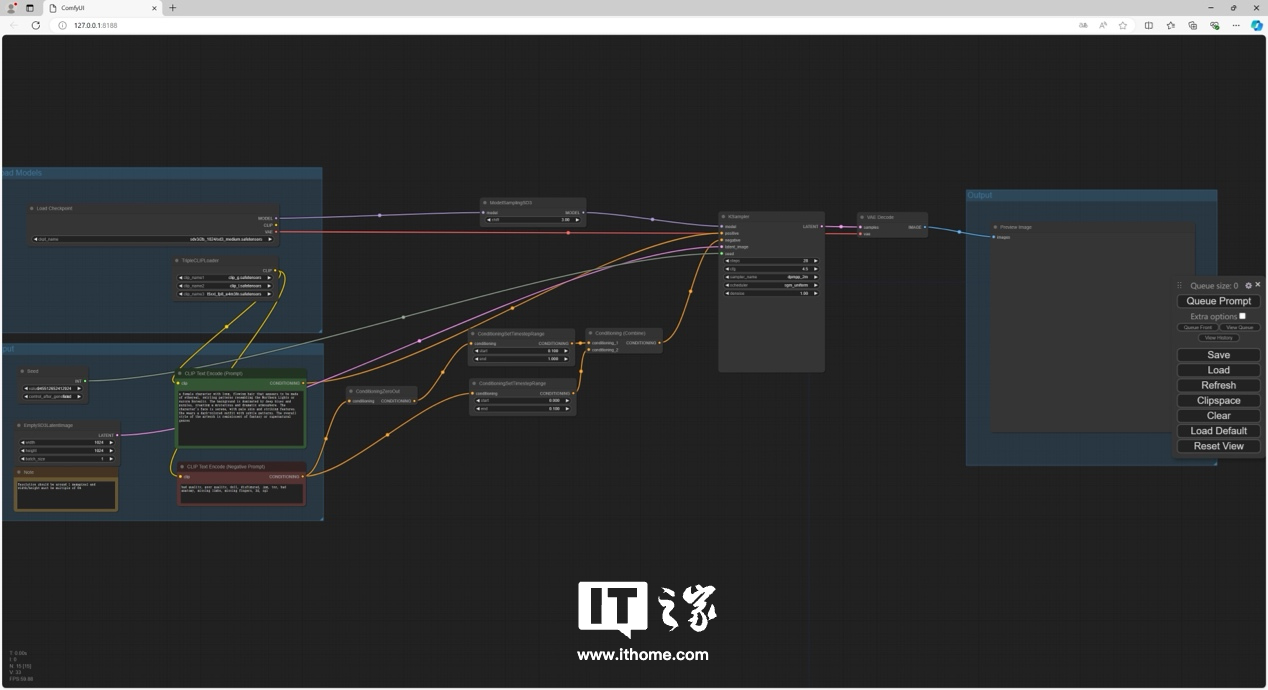
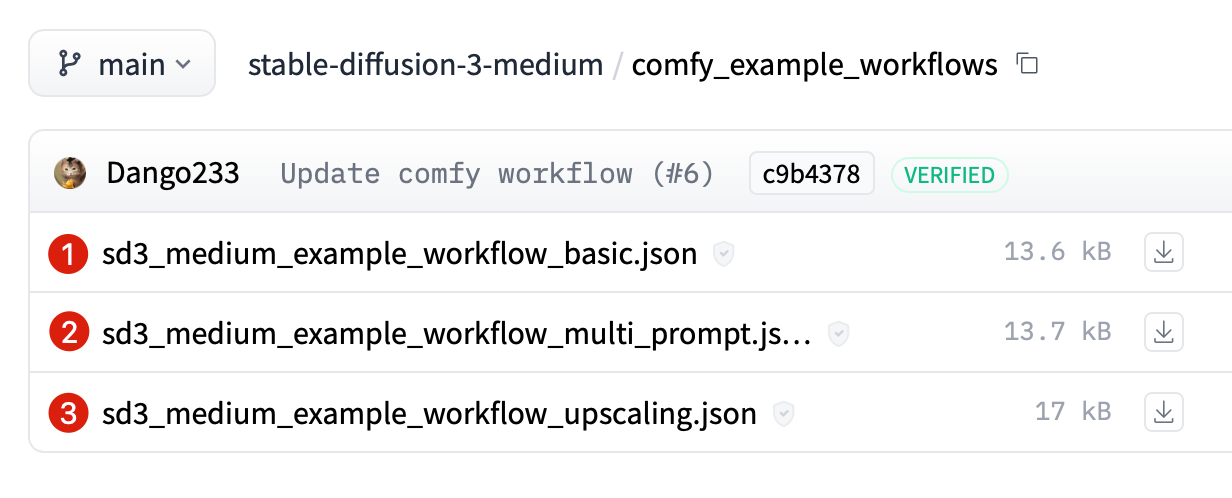 Drag the first downloaded .json file directly into the ComfyUI interface, and you can see that the workflow has changed.
  If you run it directly at this time, an error will be reported. You need to re-specify the file location of the model. Here in the model, according to the original model name, select the model file we put in before.
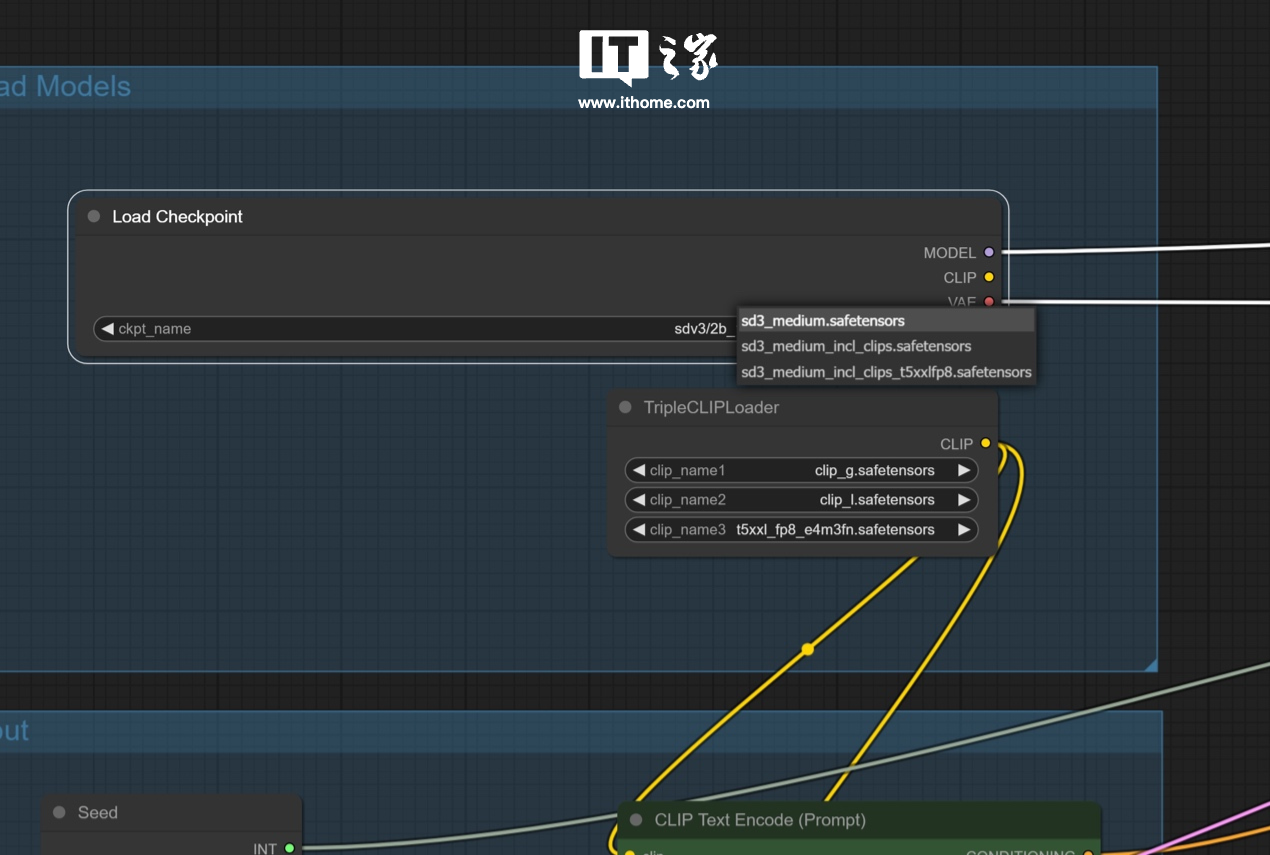
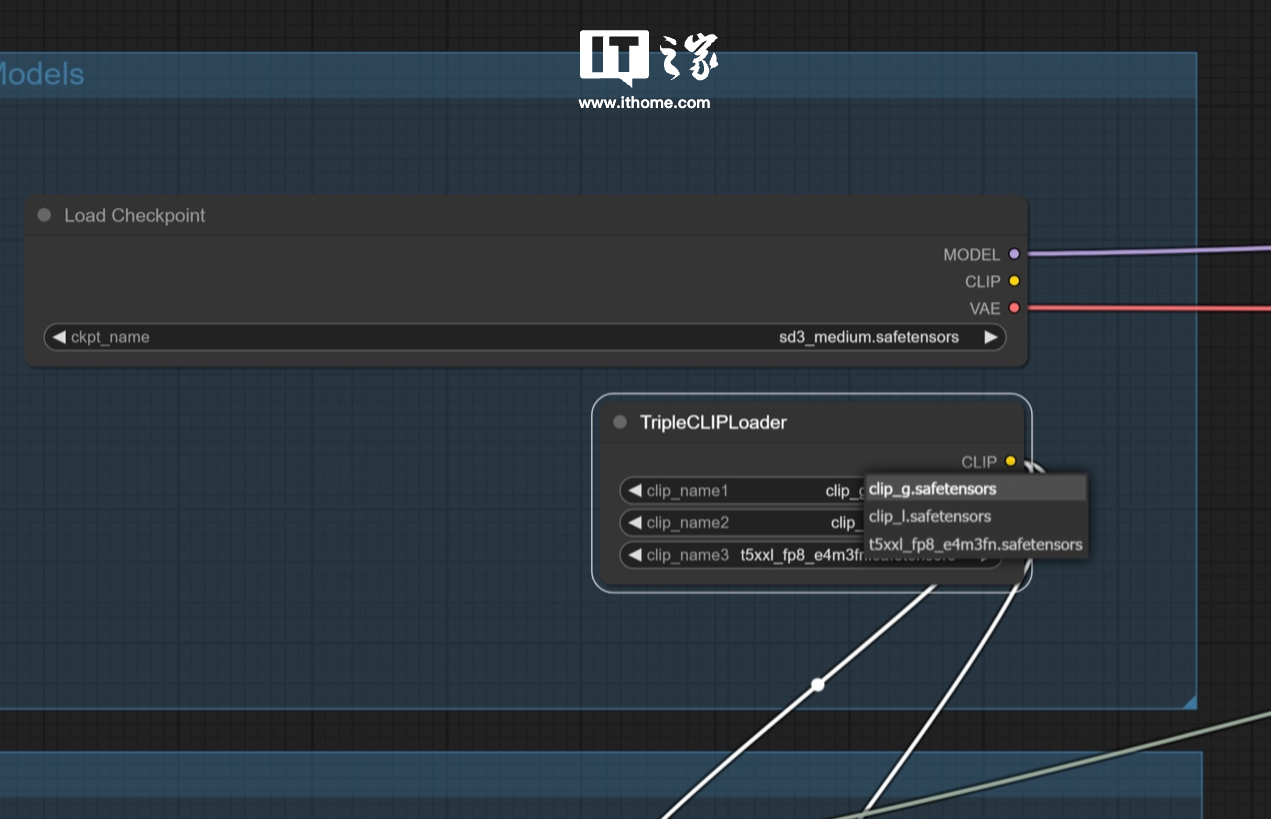 After all are selected, you can start running. The official prompt is
 a female character with long, flowing hair that appears to be made of ethereal, swirling patterns resembling the Northern Lights or Aurora Borealis. The background is dominated by deep blues and purples, creating a mysterious and dramatic atmosphere. The character's face is serene, with pale skin and striking features. She wears a dark-colored outfit with subtle patterns. The overall style of the artwork is reminiscent of fantasy or supernatural genres.translates to
a female character with long flowing hair, It appears to be made with a swirling pattern similar to the Aurora Borealis or Aurora Borealis. The background is dominated by dark blue and purple, creating a mysterious and dramatic atmosphere. The character's face is calm, with pale skin and delicate features. She wears dark clothes with subtle patterns on them. The general style of the painting is reminiscent of the fantasy or supernatural genre.
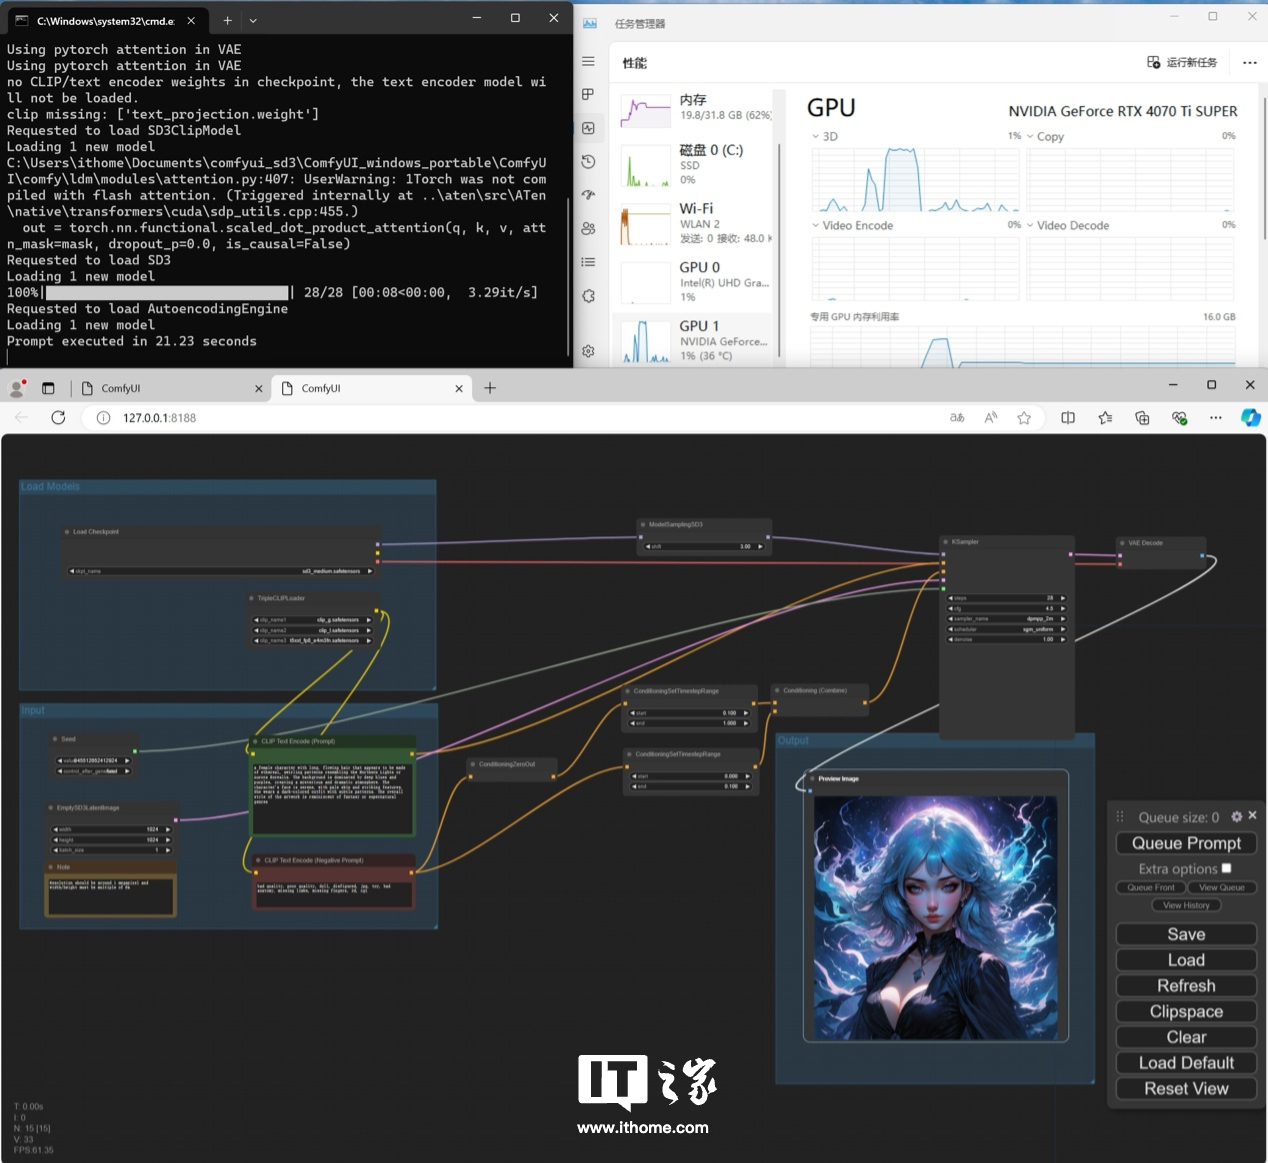 In the workflow above, the green text box is the input area for forward prompt words, and the red text box is the input area for reverse prompt words. The image generated after running is as follows. We use GALAXY GeForce RTX 4070 Ti SUPER star YaoOC generated this 1024*1024 pixel image in only 21.23 seconds, and the experience is very smooth. It can be seen that when running the model, the GPU load is instantly full, which shows that the model's demand for GPU computing power is quite terrifying.
  At this point, the official basic workflow has been run through. The editor tried again using "A SpongeBob SquarePants eating ice cream" as a positive prompt word to generate, and the resulting picture is as follows ( (above), the overall situation is quite harmonious. For comparison, you can take a look at the picture (below) generated by the editor using Stable Diffusion 1.7 using the same prompt words.
 The first workflow is successful, so let’s try the second workflow. Similar to the first one, drag the official .json file into the interface to get a workflow similar to just now.
 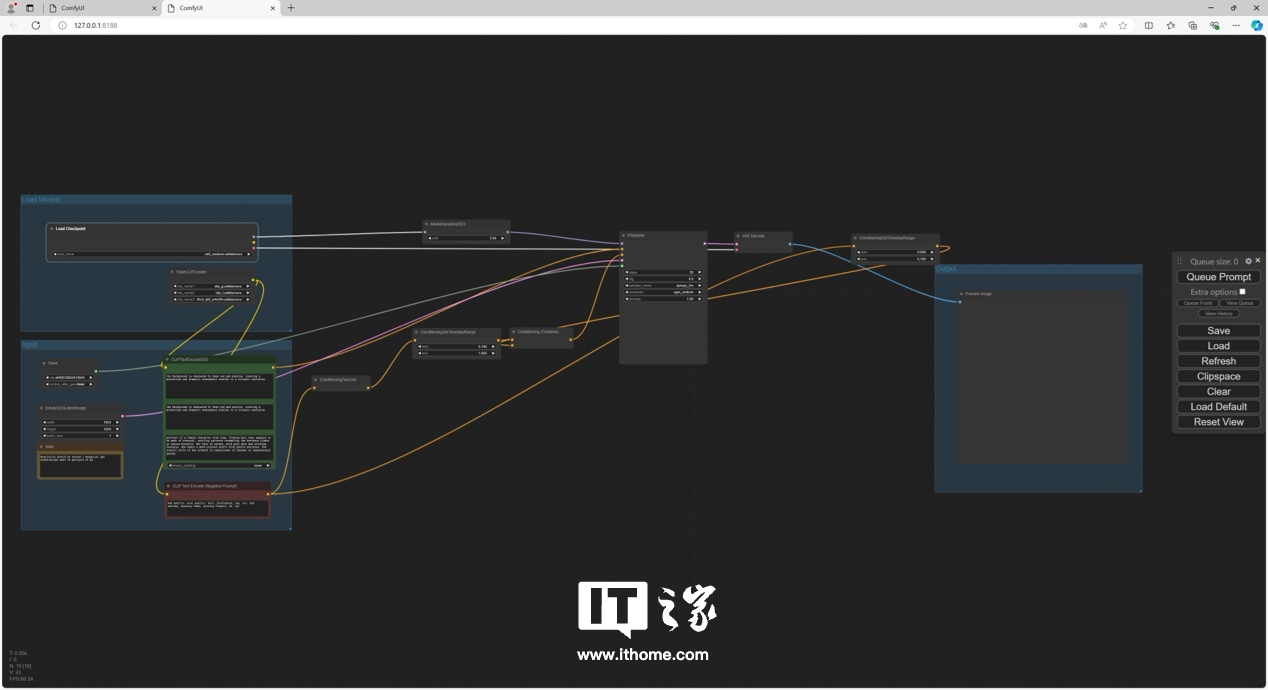 The model file location still needs to be configured.
 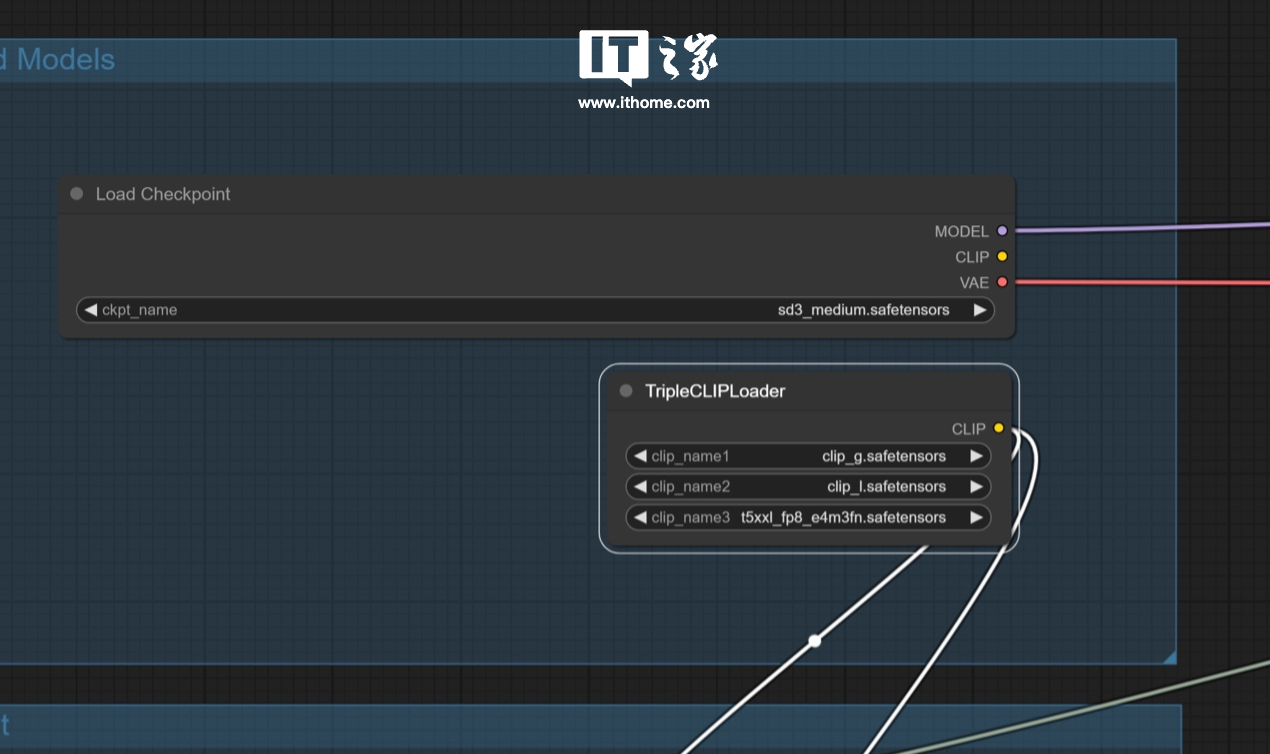 After configuration, you can run the workflow normally. GALAXY GeForce RTX 4070 Ti SUPER Xingyao OC took 14.92s to run this model, which is much shorter than the previous one. However, when running the model, the GPU load is still full instantly.
 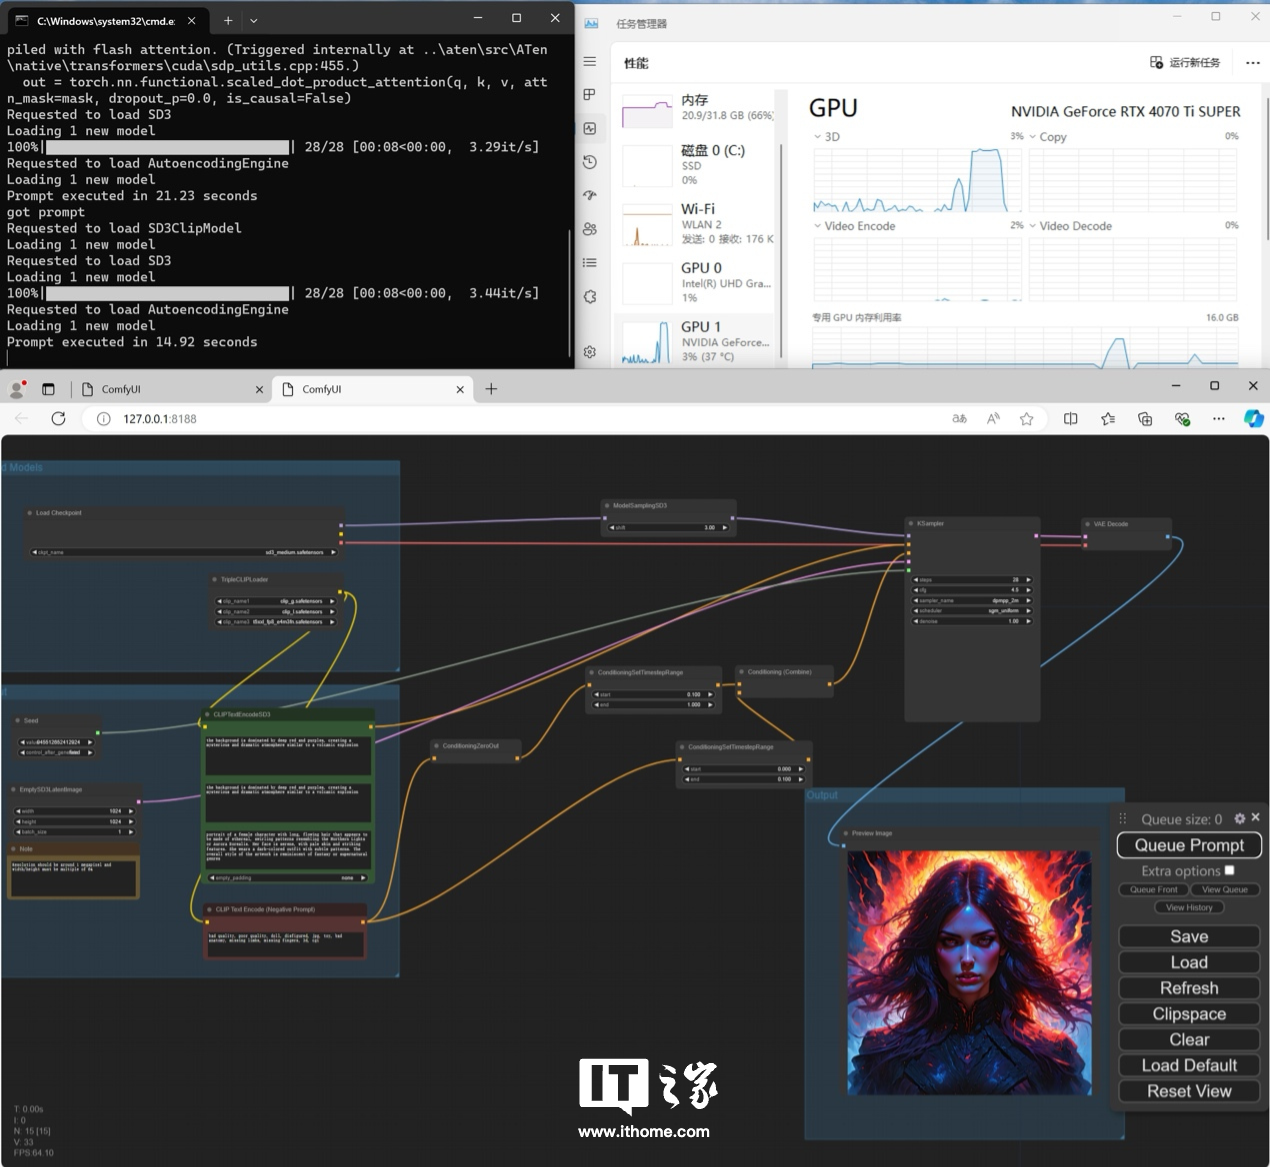 The overall deployment ideas of the first two workflows are similar. The selection mainly depends on your daily use needs. After running through, the parameters can be further adjusted and optimized based on personal needs, which will not be discussed here. Let’s talk about this third workflow next. Follow the same example and drag the .json file in, and you will see an error, which probably means that the relevant model file is missing.
 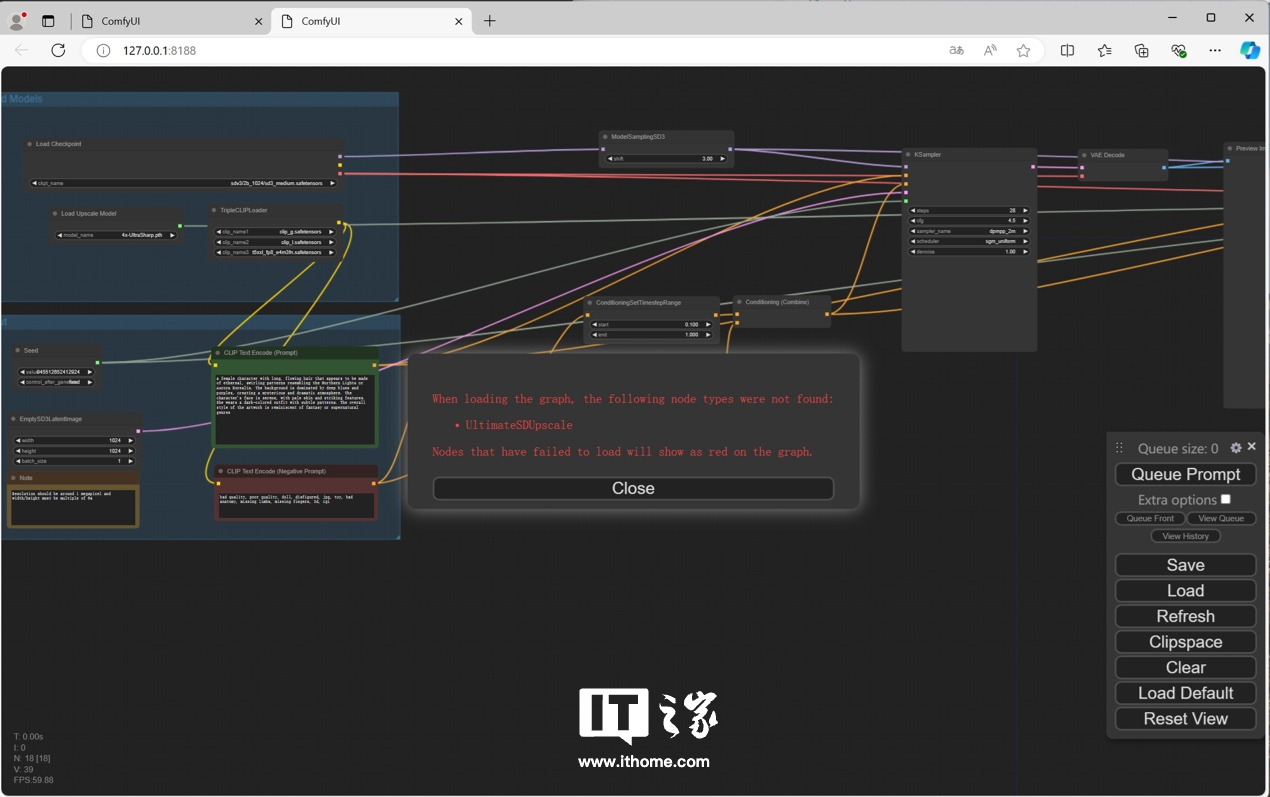 Turn off the error reporting, you can see that there is a process box in red, which is caused by the lack of the model required to improve the image resolution.
 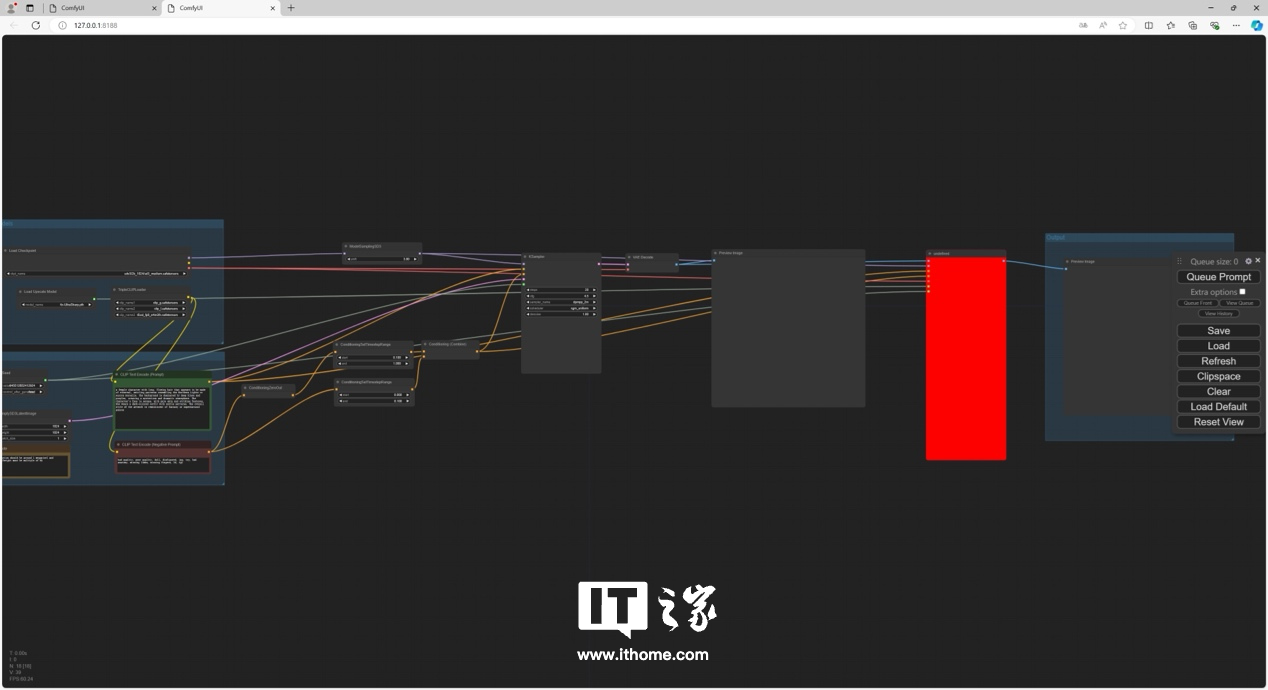 The idea to solve similar problems once and for all is to install a ComfyUI plug-in - ComfyUI Manager, which can detect, download and supplement the missing models and plug-ins in the current workflow. The plug-in URL is as follows: https://github.com/ltdrdata/ComfyUI-Manager
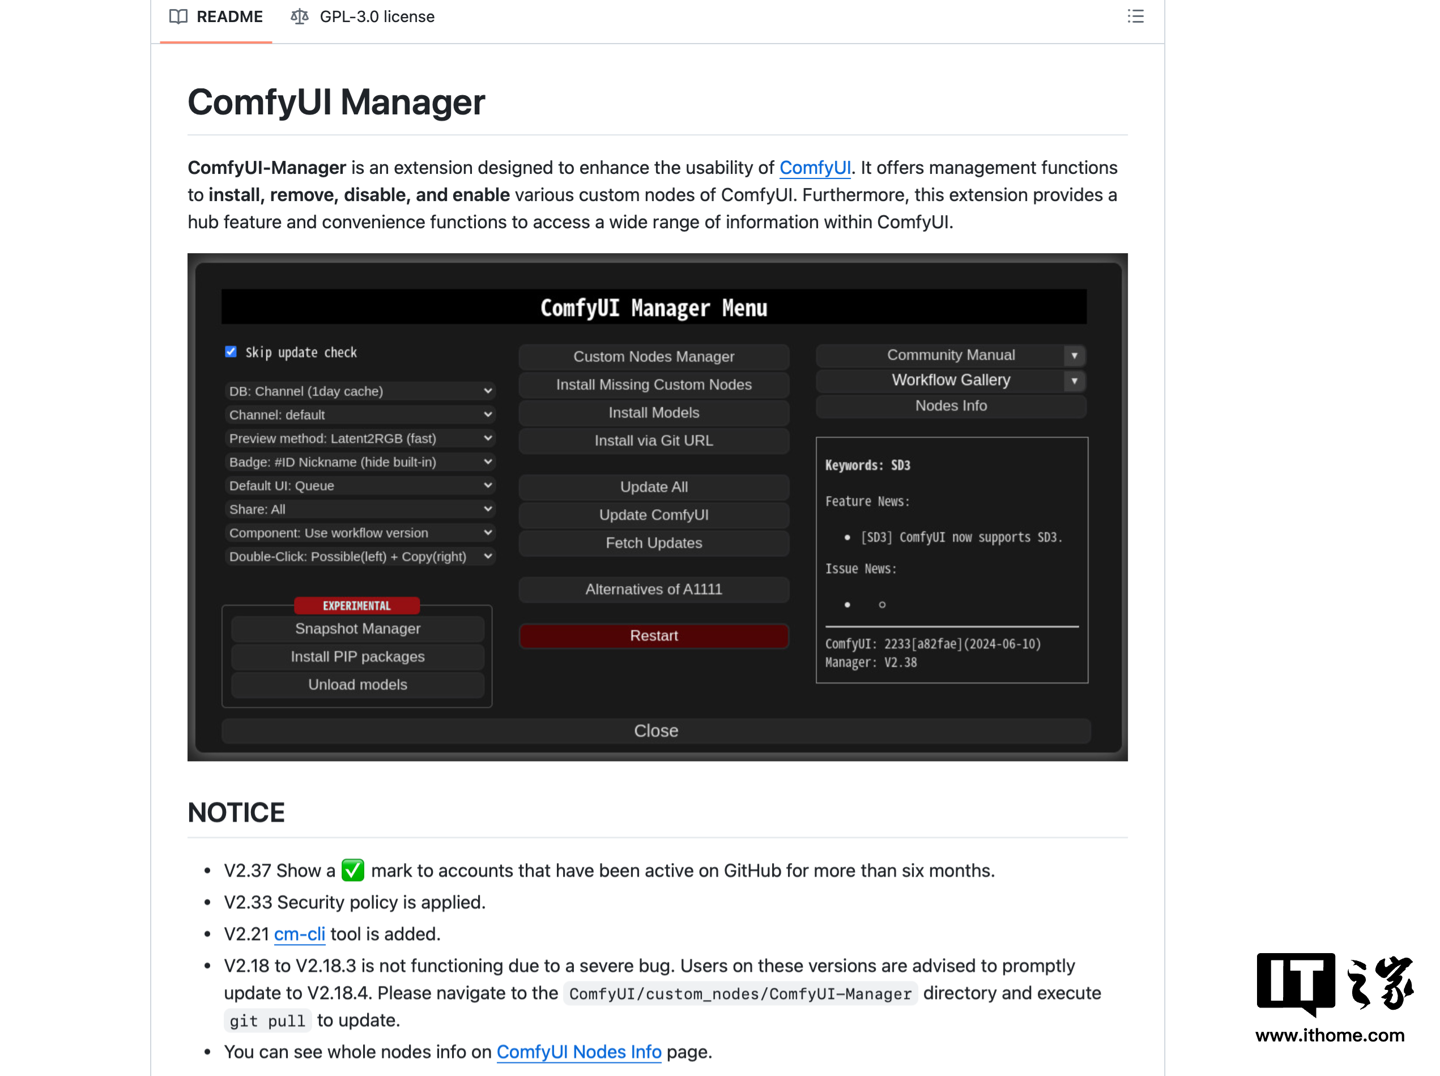 The official provides a variety of installation methods. Interested friends can study it by themselves. We choose the first method for installation here. Close the ComfyUI interface before installation.
  Although it is not officially mentioned, if you use the first method to install, you must first download and install git. Here we download and install the 64-bit Standalone Installer.
  After the installation is complete, open the terminal and run the following three commands in sequence. cdCUsersithomeDocumentscomfyui_sd3ComfyUI_windows_portableComfyUIcdcustom_nodesgitclonehttps://github.com/ltdrdata/ComfyUI-Manager.gitThe folder address in the first command needs to be modified according to the location where ComfyUI is installed.
 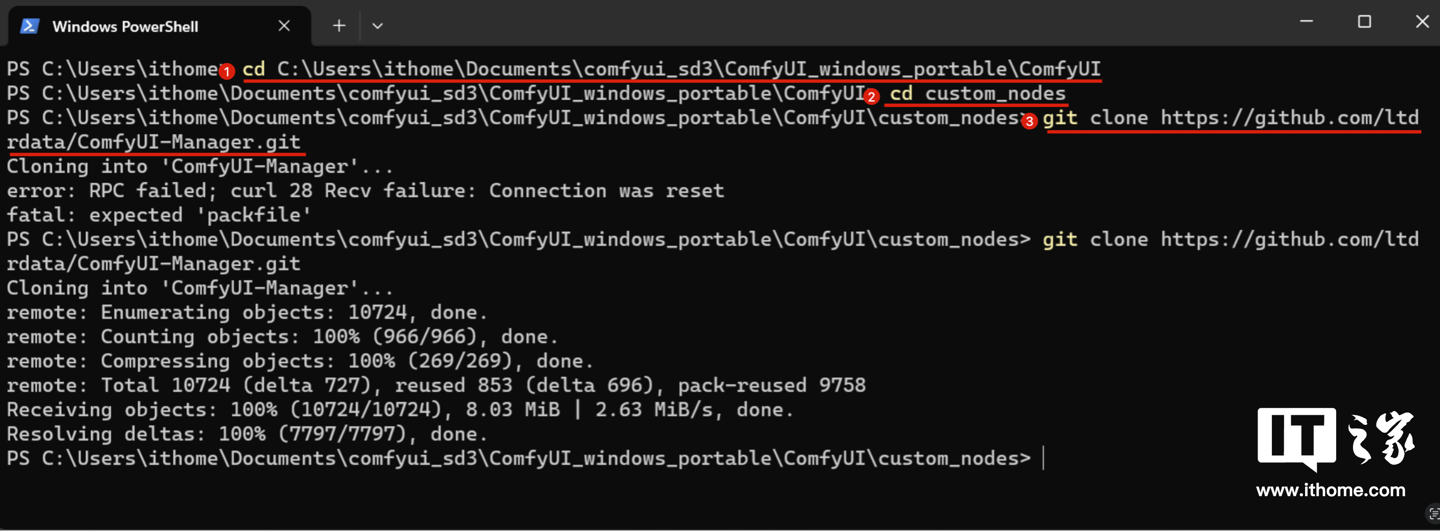 The network requirements here are relatively high. If the network is not good, an error may be reported. Just try a few times. After success, you will see the download completion command. Now open ComfyUI, you can see two more buttons in the lower right corner.
 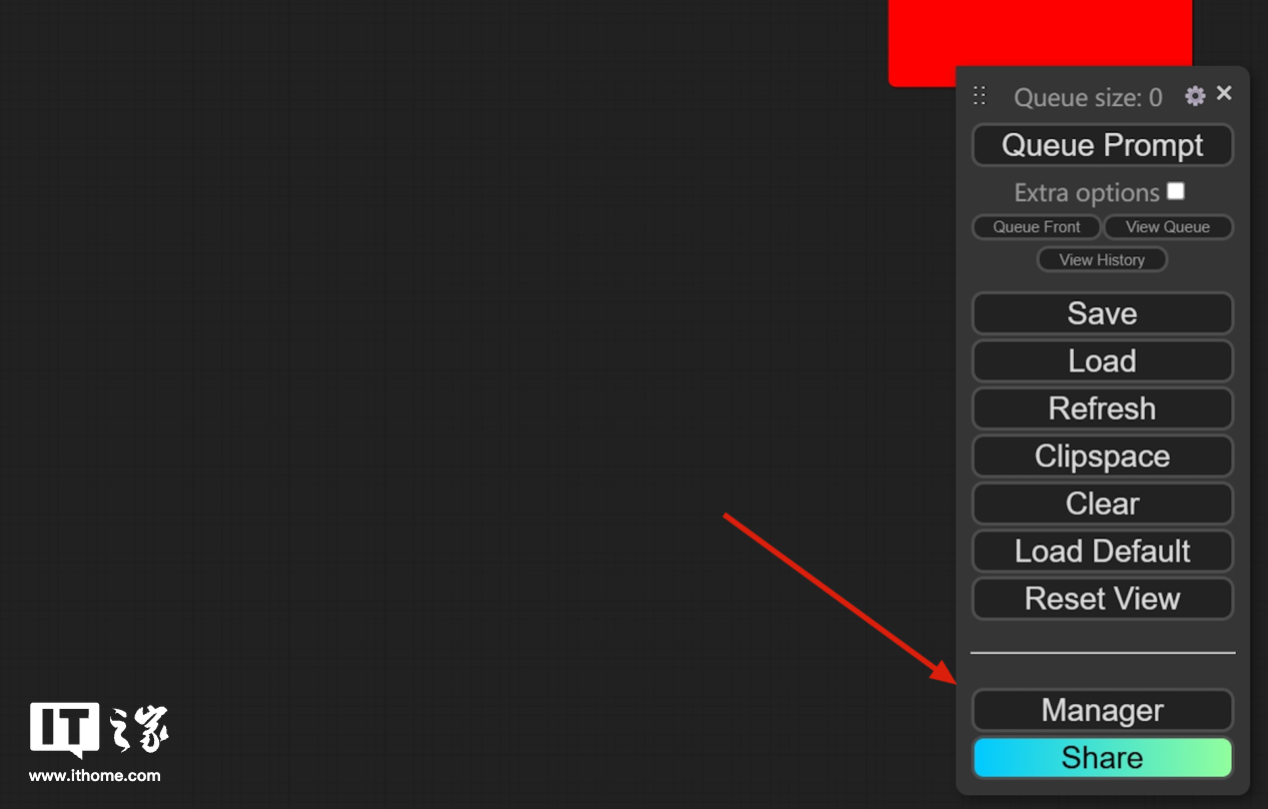 Click Manager and you can see a wealth of setting items. We mainly use the two items in the red box here.
 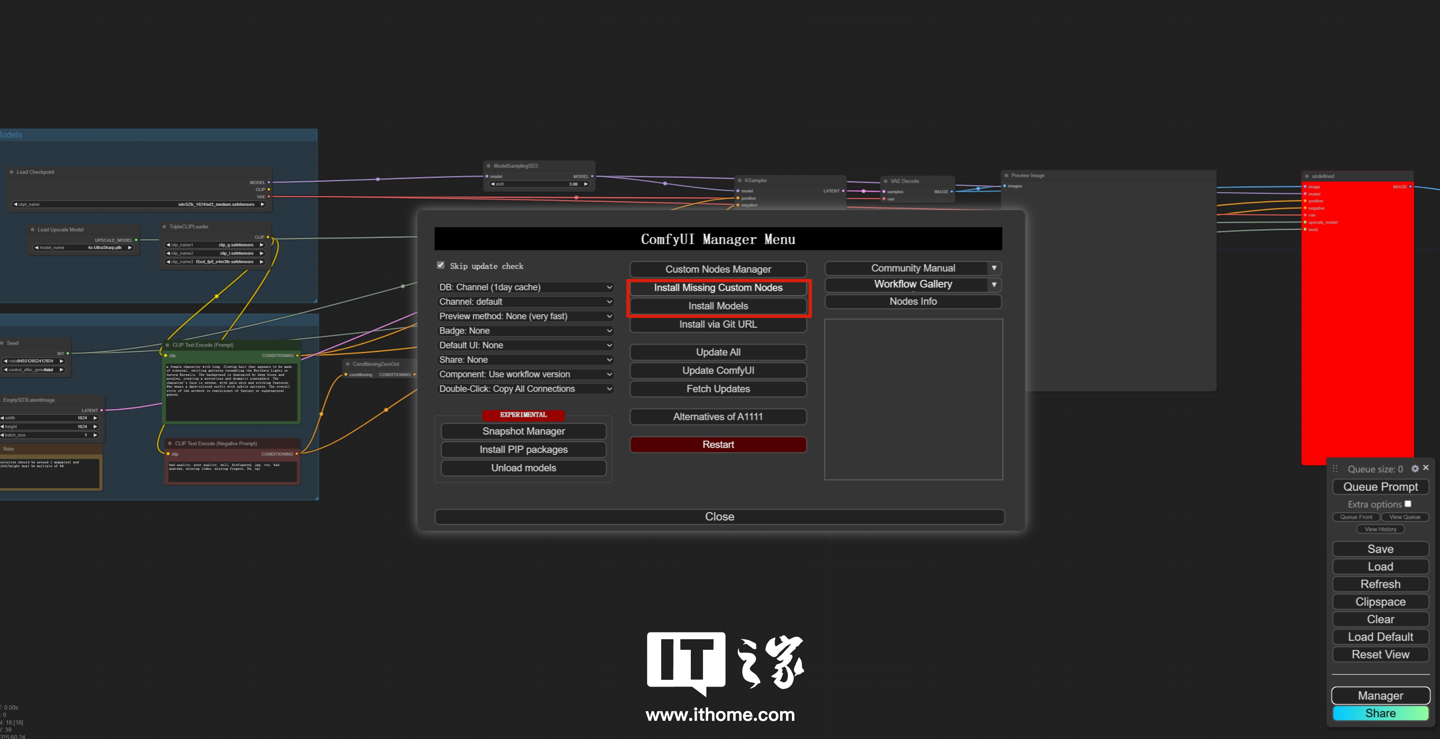 First click install Missing Custom Nodes. You can see that the missing plug-ins have been detected. Click to install.
 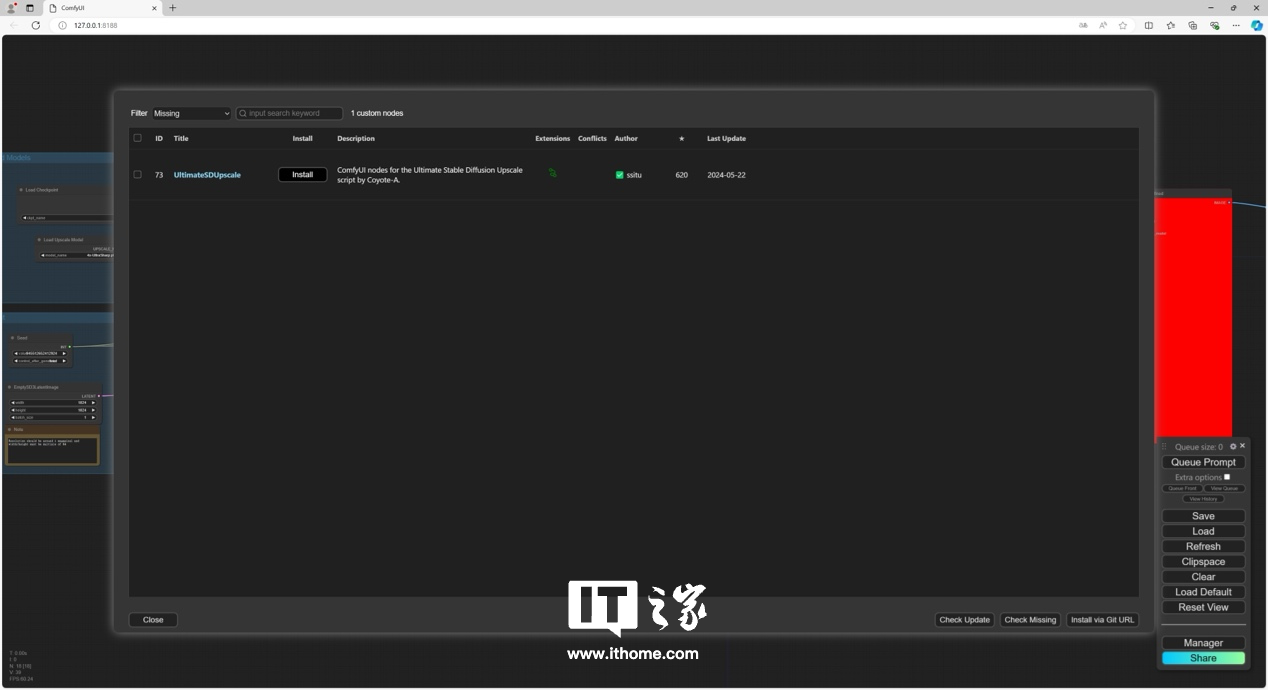 After installation, you can see that the red square in the workflow has returned to normal.
 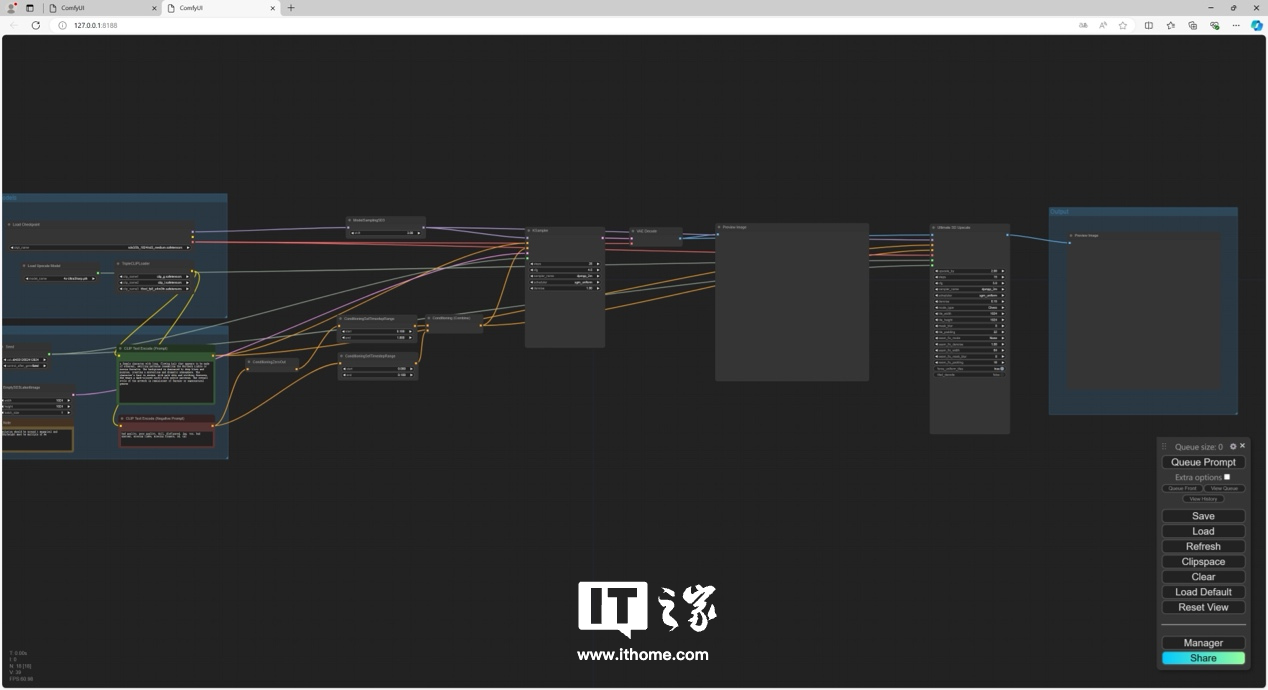 However, if you run the model again at this time, you will find that it can only run to the same steps as the first official model, and the subsequent resolution improvement will stop running. This is because we haven't installed the 4x-UltraSharp.pth model yet.
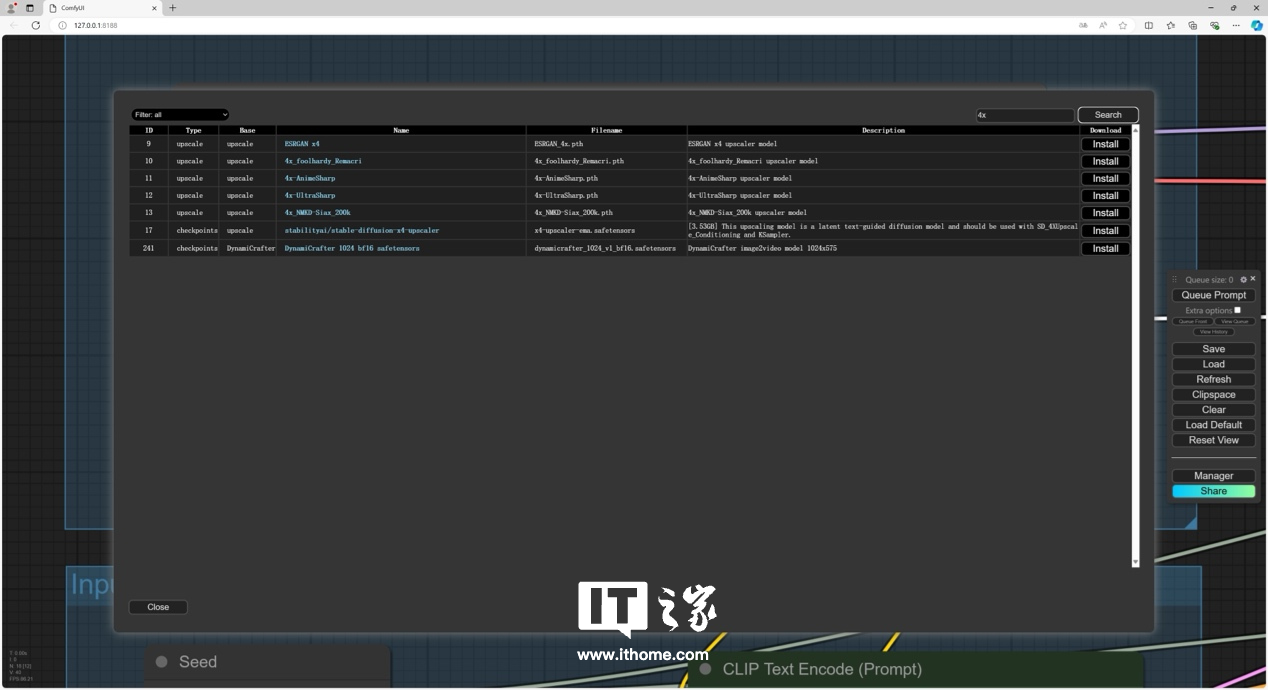
 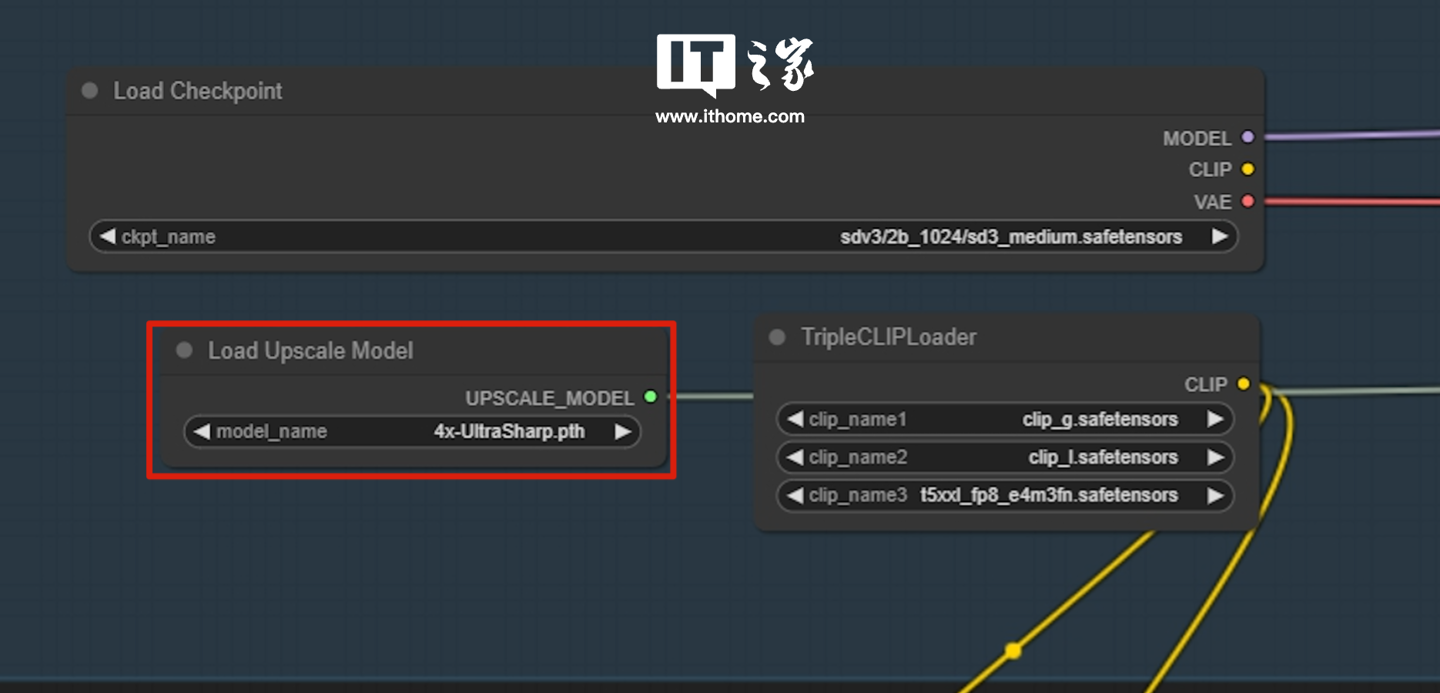 Open Install Models in Manager, search for 4x-UltraSharp, you can see the relevant models, click Install at the back.
  After the installation is completed, run it again. You can see that after running the Vincent diagram model, there will be 4 model processes with improved resolution. The complete process takes 51.09s. This workflow is quite stressful. GALAXY GeForce The performance of RTX 4070 Ti SUPER Xingyao OC is quite good.
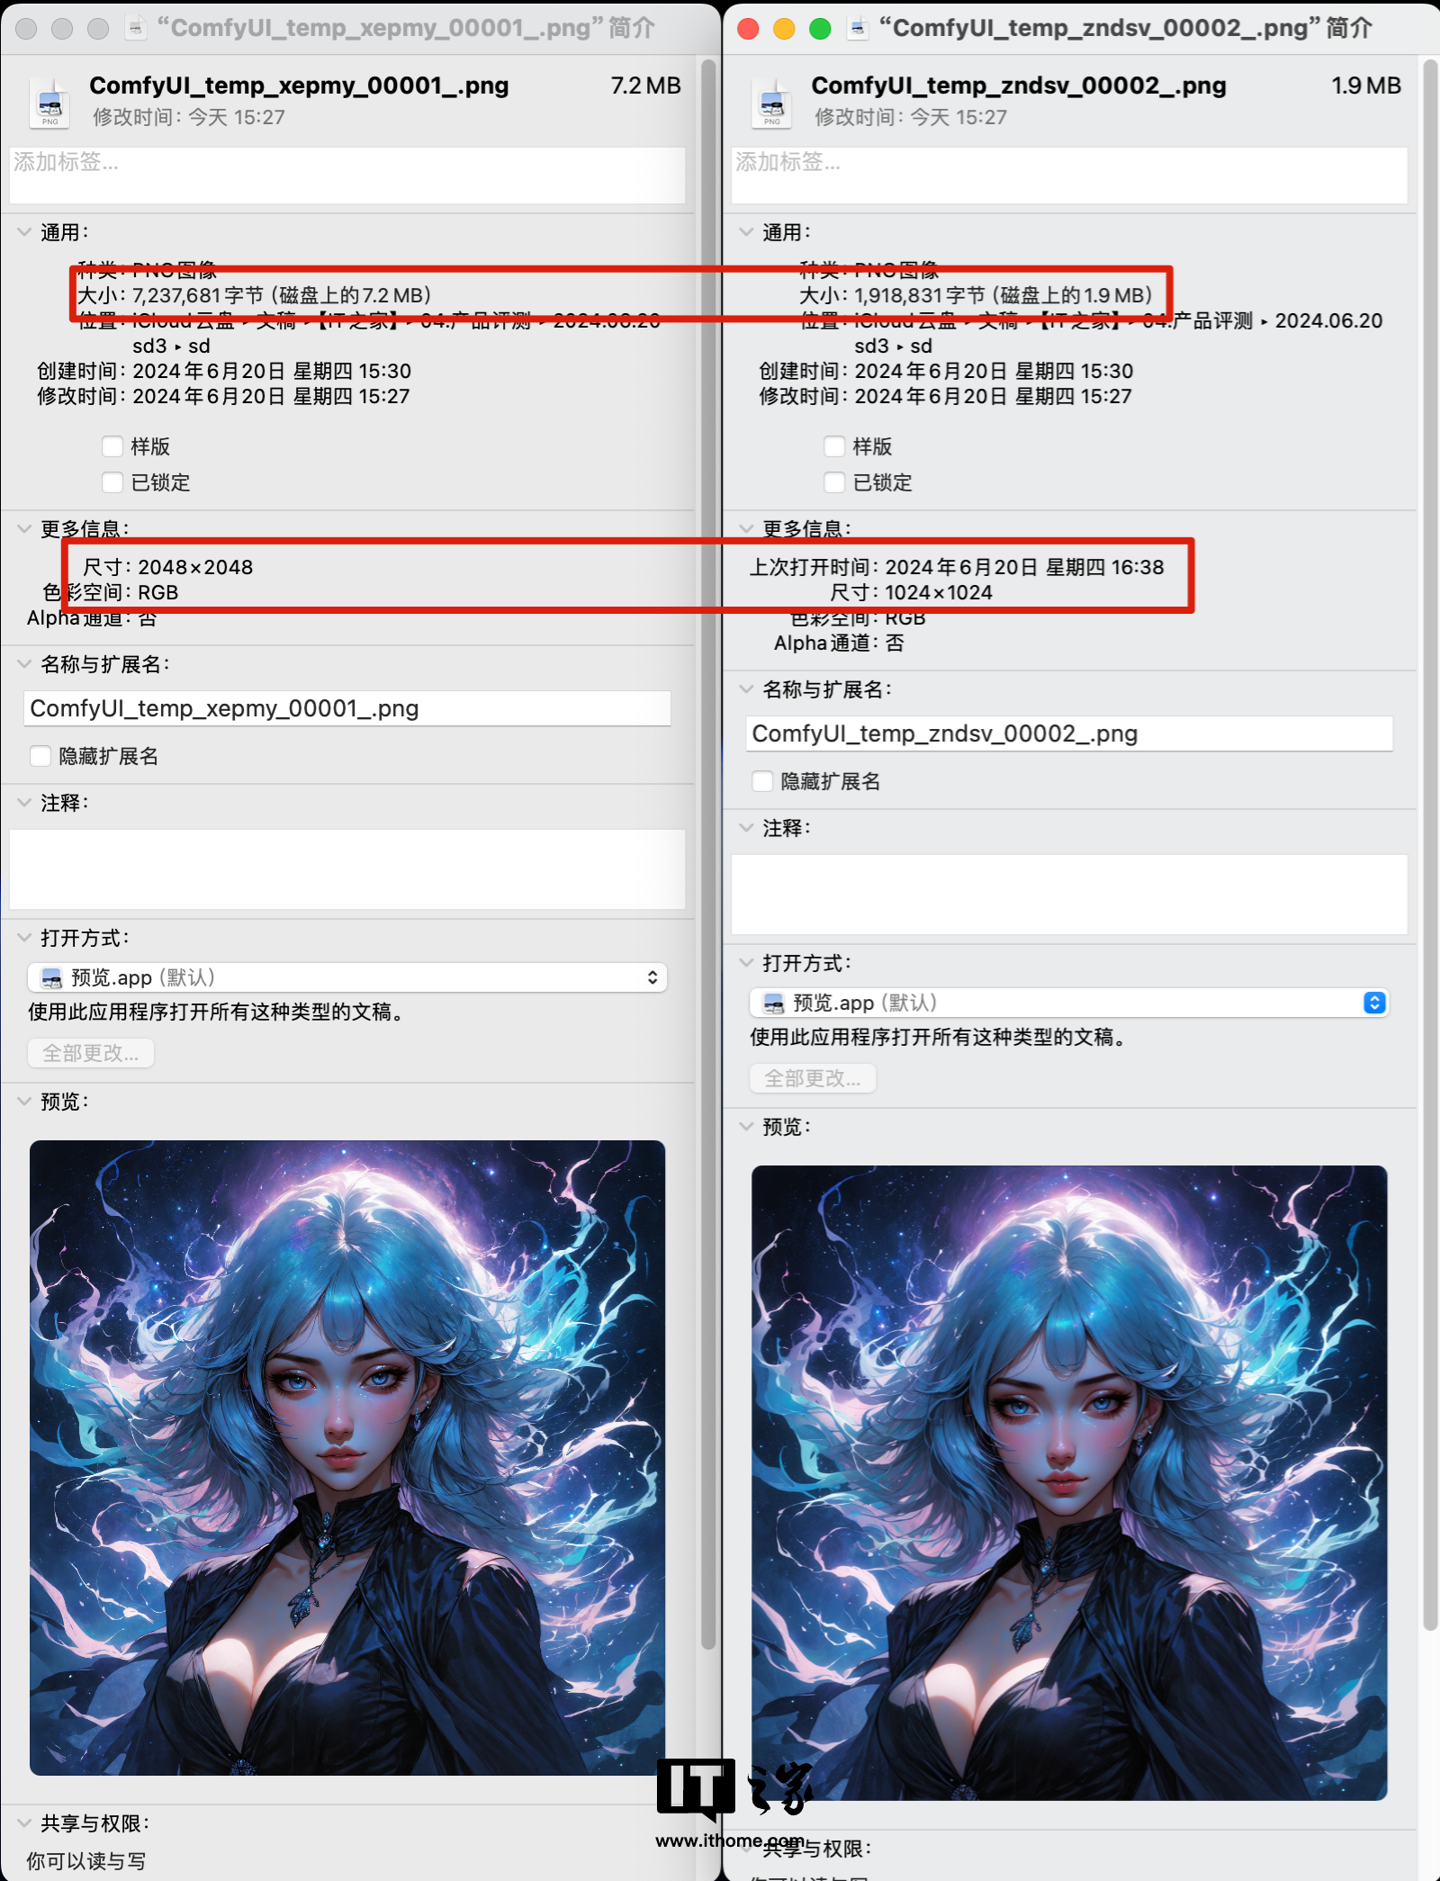
 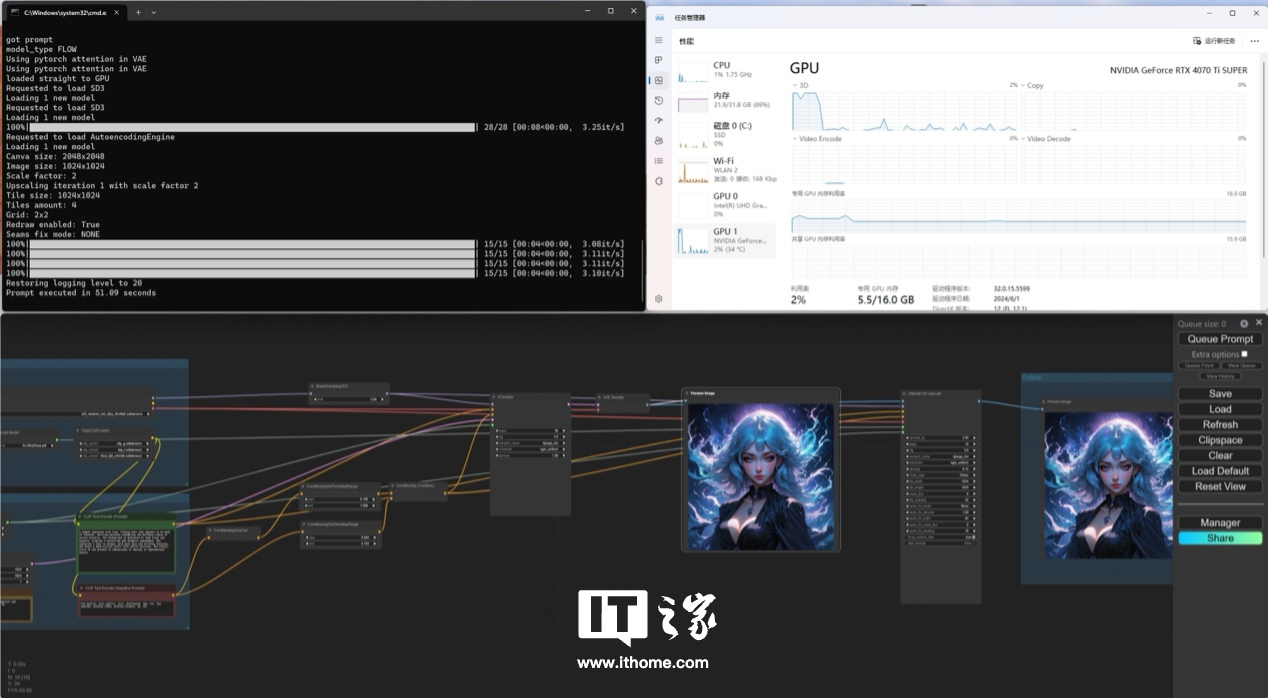 You can see the picture after the resolution is increased
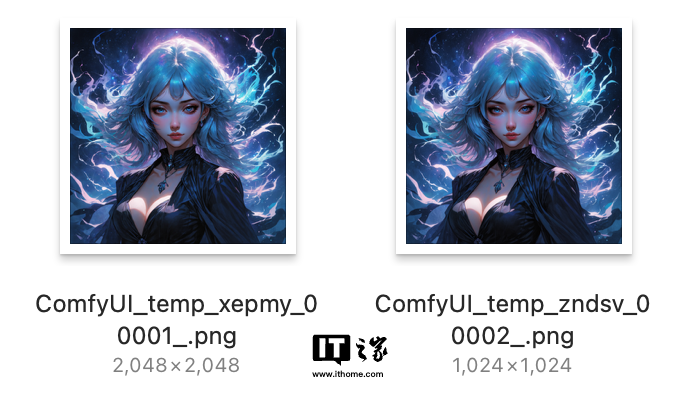 The size of the picture has also increased by about 4 times.
  So here, everyone must have understood the construction process of Stable Diffusion 3 based on ComfyUI. It should be noted that due to differences in network environment, hardware reasons, etc., you may encounter various problems during the construction process. There is no need to worry about accidents. You can share them in the comment area and discuss and solve them together.
 The above is the detailed content of Stable Diffusion 3 construction tutorial and official example demonstration, GALAXY GeForce RTX 4070 Ti SUPER Xingyao OC runs to full speed in an instant. For more information, please follow other related articles on the PHP Chinese website!
 Application of artificial intelligence in life
 What is the basic concept of artificial intelligence
 Reasons why computers often have blue screens
 The speed difference between usb2.0 and 3.0
 Use of jQuery hover() method
 Check the occupied port status in windows
 asp what file
 How to buy and sell Bitcoin in the country

