
 Computer Tutorials
Troubleshooting
What should I do if the start menu cannot be used after win11 update?
Computer Tutorials
Troubleshooting
What should I do if the start menu cannot be used after win11 update?
What should I do if the start menu cannot be used after win11 update?

Question: The Start menu does not work in Windows 11, how to solve it? Recently, many Windows 11 users have reported issues with the Start menu not working properly. This problem caused great distress to users and hindered their daily operations. In order to help everyone solve this problem, PHP editor Strawberry has carefully prepared a detailed solution. In the following content, we will introduce these solutions one by one. Please read it carefully and follow the steps to try it. I believe it will definitely help you restore the normal use of the Start menu.
What to do if the start menu cannot be used after win11 update
Method 1:
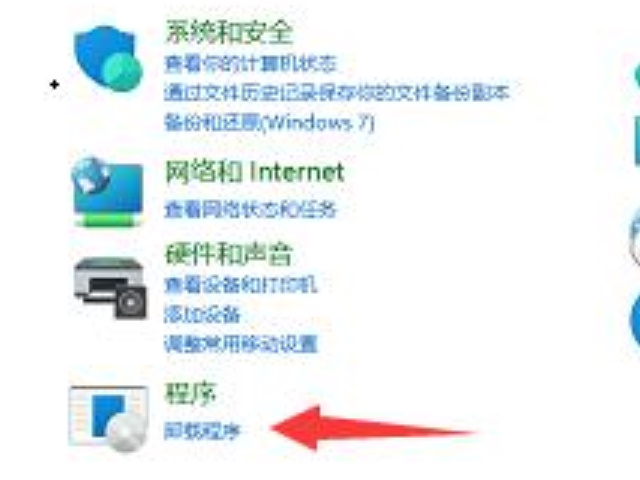
1. First open the control panel;
2. Then click "Program Uninstall" under the program;
3. After entering the uninstall page, click on the upper left "View installed updates" in the corner;
4. After opening it, you can see the update time in the update information center, and uninstall all recent updates;
Method 2:
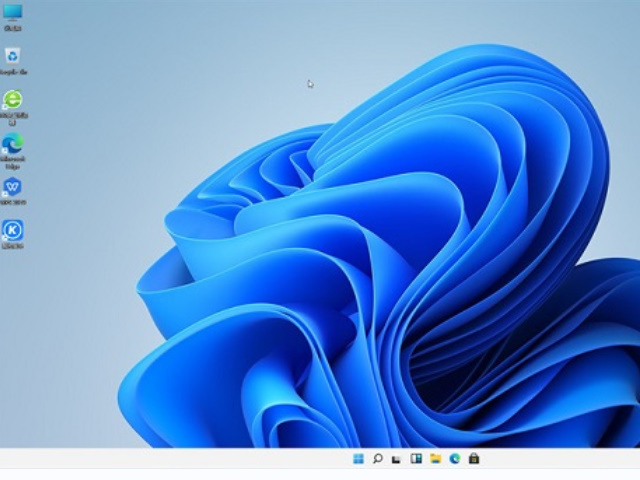
1. You can try downloading other versions win11 system;
2. Find a win11 system that does not have the latest update and reinstall it on the computer to solve the problem;
The above is the detailed content of What should I do if the start menu cannot be used after win11 update?. For more information, please follow other related articles on the PHP Chinese website!

Hot AI Tools

Undresser.AI Undress
AI-powered app for creating realistic nude photos

AI Clothes Remover
Online AI tool for removing clothes from photos.

Undress AI Tool
Undress images for free

Clothoff.io
AI clothes remover

Video Face Swap
Swap faces in any video effortlessly with our completely free AI face swap tool!

Hot Article
Hot Tools

Notepad++7.3.1
Easy-to-use and free code editor

SublimeText3 Chinese version
Chinese version, very easy to use

Zend Studio 13.0.1
Powerful PHP integrated development environment

Dreamweaver CS6
Visual web development tools

SublimeText3 Mac version
God-level code editing software (SublimeText3)
Hot Topics
 1664
1664
 14
1421
52
1315
25
1266
29
1239
24
14
1421
52
1315
25
1266
29
1239
24

 Where is the win11 font folder?
Jul 22, 2024 pm 01:00 PM
Where is the win11 font folder?
Jul 22, 2024 pm 01:00 PM
After we upgrade the computer to Win11, we can install and use the fonts by placing them in the font folder. Many friends do not know the location of the Win11 font folder. Here I will give you a detailed introduction to the location of the Win11 font folder. Interested friends, please come and take a look with the editor. The location of the Win11 font folder: 1. Double-click "This PC" on the desktop to enter, and then click on the system disk C drive. 2. Then find the "Windows" folder and open it. 3. The "Fonts" file below is the Win11 font folder. 4. Double-click to open and you can see all the files installed on your computer.
 How to change system fonts in Windows 11
Jul 31, 2024 pm 12:31 PM
How to change system fonts in Windows 11
Jul 31, 2024 pm 12:31 PM
In addition to the fonts that come with the system by default in Windows 11, fonts in other formats need to be downloaded from the store. Next, the editor will introduce to you how to change the system fonts in Windows 11. I hope it will be helpful to you! Windows 11 system replacement Font method: 1. Right-click the desktop and select "Personalize". 2. Click "Font" in the "Personalization" interface. 3. Click "Get more fonts in Microsoftstore". 4. Find the font you like in the store, then click Get to download and install it.
 How to solve the internal error in Win10 Remote Desktop Connection
Jul 19, 2024 pm 03:03 PM
How to solve the internal error in Win10 Remote Desktop Connection
Jul 19, 2024 pm 03:03 PM
The remote desktop connection function is very convenient and is often used in our daily life and work. Recently, some friends reported that when connecting to the remote desktop, an internal connection error was prompted. What is going on? How should I solve this problem? , the editor below will give you a detailed introduction to the solution to the internal error in the Win10 remote desktop connection. If you are interested, you can take a look. Solution to an internal error in Win10 Remote Desktop Connection: 1. Right-click Start in the taskbar and select "Settings" in the menu option to open. 2. Click the "Network and Internet" option in the interface. 3. Then click on the "Ethernet" option. 4.
 How to open the registry in win11 system
Aug 10, 2024 pm 06:53 PM
How to open the registry in win11 system
Aug 10, 2024 pm 06:53 PM
Sometimes when using the computer, we will use the computer's registry function. So how to open the registry in win11 system? For this reason, the editor brings a simple operation method. Through this method, you can operate it easily, giving you Bringing a simpler and more worry-free way to open the registry. Introduction to how to open the registry in win11 system 1. First, double-click this computer on the opened system desktop. 2. Then select the C drive on your computer to open it. 3. Find the Windows folder and click to enter. 4. Then find regedit.exe and double-click to open it.
 What to do if Win11 Ethernet does not have a valid IP configuration
Aug 16, 2024 pm 12:43 PM
What to do if Win11 Ethernet does not have a valid IP configuration
Aug 16, 2024 pm 12:43 PM
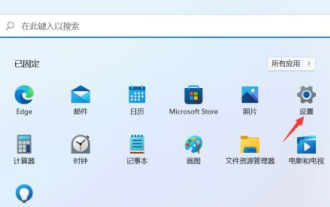
When using the win11 system, I found that the Ethernet does not have a valid configuration. So how to solve it? Many friends still don’t know. For this reason, the editor will provide you with a simple operation solution. Interested friends can read the tutorial. To understand. Win11 Ethernet does not have a valid IP configuration solution 1. Directly click the Start menu function in the taskbar, and then click on the Open page. 2. In the settings page that opens, click Options on the left, and then click in the column on the right. 3. Find the relevant settings, see the function below, and click it. 4. In the opened network connection window, select the network in use and right-click to open the properties function. 5. Then find it on the page that opens and click Properties below. 6. If
 How to enable hardware acceleration gpu plan in Win10
Jul 18, 2024 am 10:20 AM
How to enable hardware acceleration gpu plan in Win10
Jul 18, 2024 am 10:20 AM
Turning on the hardware acceleration function in Win10 system can help computer hardware perform better, but some friends don't know how to turn on the hardware acceleration GPU plan. Here, the editor will give you a detailed introduction to how to turn on the hardware acceleration GPU plan in Win11. , friends in need, please come and take a look. How to open: 1. Click Start in the taskbar in the lower left corner and select "Settings" in the menu list to open. 2. After entering the new interface, click the "Game" option. 3. In the window given, click the "Graphics Settings" option in "Related Settings". 4. Then find the "
 What to do if the hard drive disappears after Win11 system update
Aug 17, 2024 pm 06:48 PM
What to do if the hard drive disappears after Win11 system update
Aug 17, 2024 pm 06:48 PM
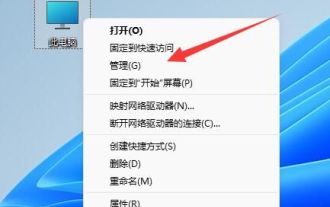
Many friends can’t wait to upgrade their computers to win11 system. Recently, some friends reported that the hard drive disappeared after upgrading to win11. How to solve this problem? Here I will give you a detailed introduction Let’s take a look at the solution to the hard disk display after reinstalling the win11 system. If you are in need, come and take a look. Solution to the problem that the hard disk disappears after reinstalling the Win11 system: 1. Right-click the computer icon on the computer and select "Manage" in the options menu. 2. Click "Disk Management" in the new interface. 3. Then right-click to select the missing hard drive and select "Change drive letter and path". 4. Then click on the small window
 How to open Win11 search index if it is closed
Sep 02, 2024 pm 06:32 PM
How to open Win11 search index if it is closed
Sep 02, 2024 pm 06:32 PM
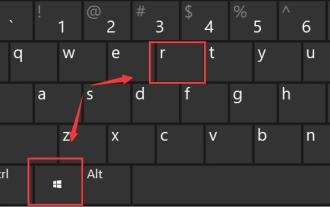
When the system is using search, it is suddenly discovered that the system's search index is closed. Do you know how to open it? For this reason, the editor provides you with a simple tutorial on how to open the Win11 search index that is closed. For those who still don't know how to operate it. Friends, you can open it through the tutorial. Tutorial on how to open Win11 search index is closed 1. Directly use the combination of shortcut keys to open the run function. 2. Then enter it in the search box, click OK, and open the service page. 3. Then find the service in the opened service window and double-click to open it. 4. In the window that opens, change the winning startup type to automatic, click Start below, and then click OK to save the settings. 5. Then return to the search column
