If you long for the old Windows sounds, wishing you could hear them again on Windows 11, you're in luck. We're going to show you how to download the necessary sound packs and create a retro sound scheme.
The first thing you need to do is download a sound pack containing the sounds from an old Windows version. Also, ensure that every sound it contains is in WAV file format.
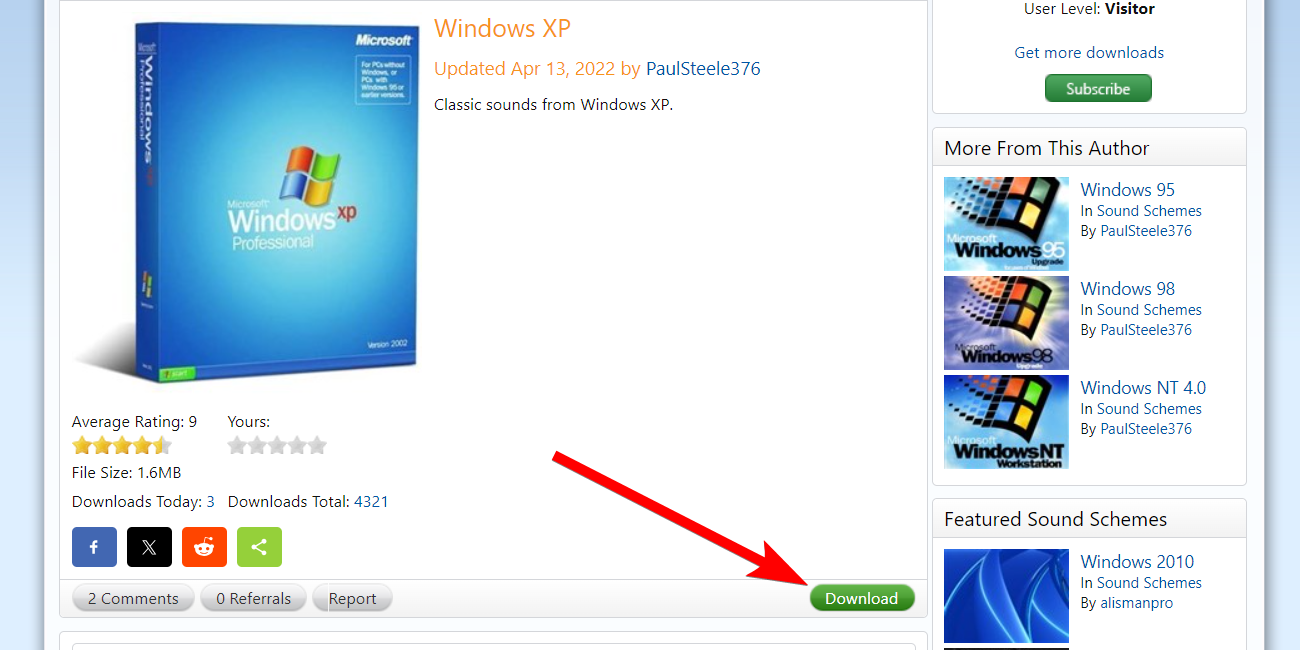
An example of where to find sound packs is the Sound Schemes Gallery page on the WinCustomize website. You can find sounds for Windows XP, Vista, 7, 8, 8.1, 10, and more. Select the one you want and click “Download” to save it to your computer.

The sound pack's file extension will be SOUNDPACK, which Windows will not recognize. You need to change it to a ZIP file just so you can extract the sounds.
If you can't see the file extension, ensure you've enabled the option to see file extensions.
Next, right-click the sound pack and select Show More Options > Rename in the context menu.

Then, delete soundpack from the file name and replace it with zip. Click “Yes” in the prompt to confirm that you want to change the file extension

The sound pack will now be a ZIP folder. Next, extract the zip file to view the contents of the sound pack. You should see several WAV files, so go through them and confirm it has all the sounds you want by listening to them.
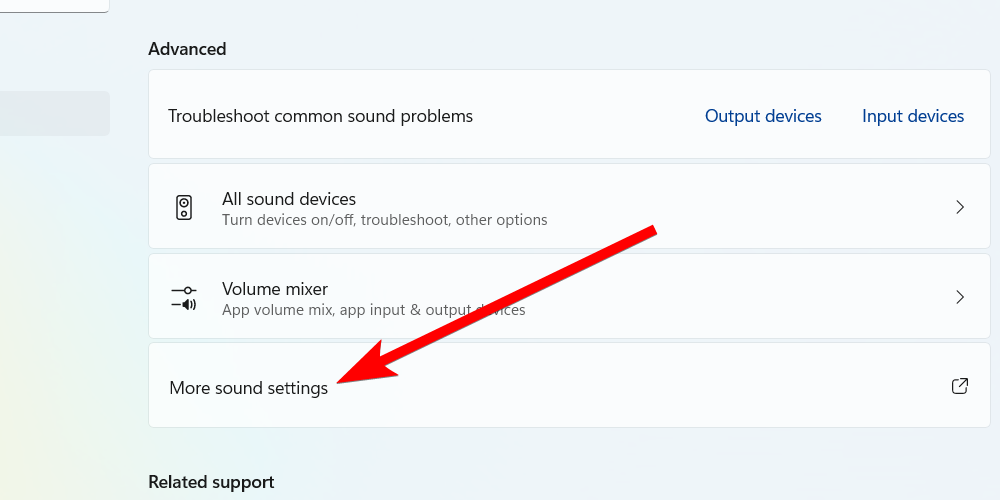
Once the sound pack is downloaded and extracted, it's time to change the system sounds. To do this, go to Settings > System > Sound and click "More Sound Settings" in the Advanced Section.

Next, select the "Sound" tab, and click the "Save As" button. This will allow you to create a new sound scheme so you don't mess up the Windows default (you can revert to it whenever you want). Now, give the new scheme a name, and click the "OK" to save it.

Next, you must change the sounds for various system events in the Program Events section. For example, to change the Windows startup sound, select the "Windows Logon" event. Then, click "Browse" in the Sounds section.

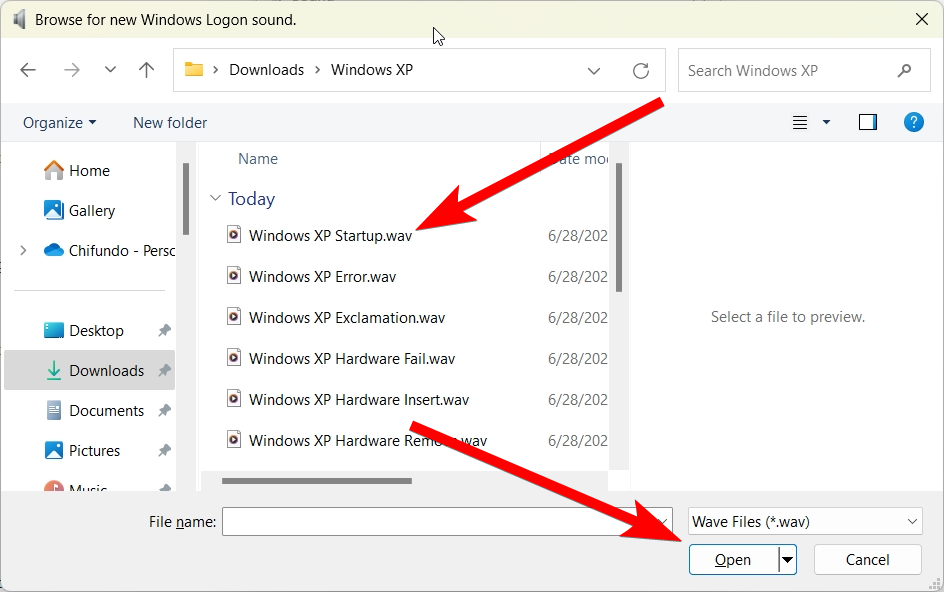
Navigate to where you extracted the sound pack, highlight the logon sound, and click "Open" to select it. For example, in the Windows XP sound pack we downloaded, it was the "Windows XP Startup.wav" file.

You can click "Test" on the left side of the "Browse" button to verify you have selected the right sound. Then, go ahead and change the rest of the sounds. Afterward, click "OK" to close the dialogue box and save the changes.
If you find that the "Windows Logon" and "Windows Logoff" events are missing in the Program Events section, you can unhide them in the Registry Editor.
One important thing to do before you proceed is to create a system restore point. This will back up a copy of the Windows Registry. That way, if you make a mistake, you can use the restore point to undo it.
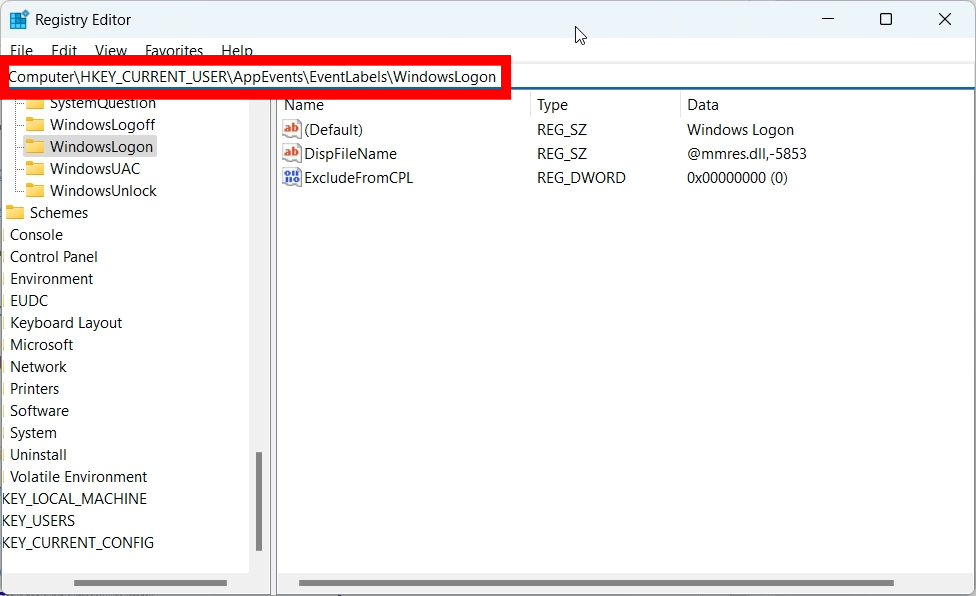
To do this, press Win+R to open the Registry Editor and paste the following file path into the address bar:
ComputerHKEY_CURRENT_USERAppEventsEventLabelsWindowsLogon

Then, double-click the "ExcludeFromCPL" value to edit it. Set "Value Data" to 0 and then click "OK" to save the changes. Afterward, you should be able to see the "Windows Logon" event when changing system sounds.

Do the same for the "ExcludeFromCPL" value at the following file path to unhide the "Windows Logoff" event:
ComputerHKEY_CURRENT_USERAppEventsEventLabelsWindowsLogoff
So, that's how you bring back those nostalgic Windows sounds you miss. You can create as many sound schemes as you need for different Windows versions.
You can take the retro overhaul a step further, beyond sounds. For example, if you're creating a Windows 2000 sound scheme, you can also make Windows 11 look like Windows 2000.
The above is the detailed content of Miss the Old Windows Sounds? Here's How to Bring Them Back in Windows 11. For more information, please follow other related articles on the PHP Chinese website!


