When managing invoices on DingTalk, adding an invoice header is a necessary operation. By adding an invoice header, users can easily enter invoice information so that it can be quickly recalled when needed, eliminating the tedious process of repeated entry. This article will introduce in detail the steps to add an invoice header in DingTalk. If you encounter this problem when managing invoices, you may wish to continue reading this article. I believe that the tutorial provided by PHP editor Apple can help you solve the problem easily.

1. After opening DingTalk on your mobile phone, click "My" in the lower right corner of the page, and then click "Settings and Privacy" on the My page.

2. After coming to the Settings and Privacy page, there is a "Security Center". Once you find it, click on it to open it.

3. Next, enter the Security Center page and click on "Account Settings" from the options below.

4. After the page jumps, find the "Alipay" item and click on it to open it.

5. After entering the wallet page, click "Invoice Folder" under the financial services.

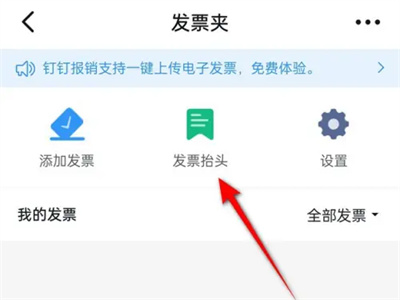
6. Click and select "Invoice Header" on the invoice folder page to enter.

7. Click the "Add Now" button to enter the page to add the invoice header. After entering the company name, taxpayer identification number, phone number, account opening bank and other information according to the prompts, click the "Save" button below. That’s it.

The above is the detailed content of How to add an invoice header on DingTalk. How to add an invoice header on DingTalk.. For more information, please follow other related articles on the PHP Chinese website!
 How to light up Douyin close friends moment
 microsoft project
 What is phased array radar
 How to use fusioncharts.js
 Yiou trading software download
 The latest ranking of the top ten exchanges in the currency circle
 What to do if win8wifi connection is not available
 How to recover files emptied from Recycle Bin


