
 Web Front-end
JS Tutorial
Building a Rick and Morty Character Explorer with HTMX and Express.js
Web Front-end
JS Tutorial
Building a Rick and Morty Character Explorer with HTMX and Express.js
Building a Rick and Morty Character Explorer with HTMX and Express.js

Wubba lubba dub dub, developers! Have you ever wondered what it would be like to explore the vast multiverse of Rick and Morty through the lens of web development? Well, grab your portal guns and get ready, because today we'll do just that – we're going to build a Rick and Morty Character Explorer using HTMX and Express.js. The goal of this tutorial is to show how easy it is to do web dev and implement pagination using HTMX
In this adventure, we'll cover:
- Setting up an Express.js server (our interdimensional travel device)
- Creating a dynamic frontend with EJS and HTMX (our portal viewer)
- Implementing smooth, server-side pagination with HTMX (our method of jumping between dimensions)
Whether you're a rookie programmer or a seasoned dev looking to level up, this guide will help you create a web app that's burp seriously impressive.
Setting Up Your Interdimensional Workbench
Before we can start hopping between dimensions, we need to set up our interdimensional workbench. Think of this as organizing Rick's garage but with fewer death rays and more JavaScript.
- First, ensure you have Node.js installed. If not, you can download it from nodejs.org.
- Next, we'll set up our project directory and install the necessary packages. Open your terminal and run the following commands:
mkdir rick-and-morty-explorer
cd rick-and-morty-explorer
npm init -y
npm install express axios ejs
- Project Structure: Organizing our project is akin to arranging Rick's gadgets. Here's a basic structure:
rick-and-morty-explorer/
├── node_modules/
├── public/
│   └── styles.css
├── views/
│   └── index.ejs
├── package.json
└── server.js
Now that our workbench is set up, let's move on to crafting our cosmic server.
Crafting the Cosmic Server (Express.js Backend)
Now, let's create our Express.js server. This is like building the engine of our portal gun - it's what powers our interdimensional travels.
In this tutorial, we shall be using a fan-made Rick and Morty API that allows us to fetch a list of characters, their locations, and the episodes they appeared in. We will also be using ejs, a popular javascript templating engine, to write out our HTML. ejs is not required but simplifies writing our HTML in a clean and reusable way.
Open up server.js, and let's get coding:
const express = require('express');
const axios = require('axios');
const app = express();

app.use(express.static('public'));
app.set('view engine', 'ejs');

const BASE_URL = 'https://rickandmortyapi.com/api/character';

app.get('/', async (req, res) => {
  const { page = 1, name, status } = req.query;
  let url = `${BASE_URL}?page=${page}`;

  if (name) url += `&name=${name}`;
  if (status) url += `&status=${status}`;

  try {
    const response = await axios.get(url);
    res.render('index', { data: response.data, query: req.query });
  } catch (error) {
    console.error('Error fetching data:', error.message);
    res.status(500).render('error', { message: 'Error fetching data' });
  }
});

app.listen(3000, () => console.log('Server running on port 3000'));
This server setup is like Rick's garage – it's where all the magic happens. We're using Express to create our server and handle routing. The main route (/) is where we'll fetch character data from the Rick and Morty API based on the query parameters.
Notice how we're handling pagination and filters here. The page parameter determines which page of results we're requesting, while name and status allow for filtering characters. This flexibility is crucial for our HTMX pagination implementation.
Designing the Multiverse Viewer (Frontend with EJS and HTMX)
With our cosmic server in place, we need a way to view the multiverse. Enter EJS and HTMX—our multidimensional viewing screen and efficient gadget designs.
HTMX is a new JavaScript library that allows you to access AJAX, CSS Transitions, WebSockets, and Server-Sent Events directly in HTML without writing JavaScript (React, Angular, Vue, etc.). It's like Rick's neural implant—it enhances HTML's capabilities beyond your wildest dreams.
In your views/index.ejs file, add the following code:
<!DOCTYPE html>
<html lang="en">
<head>
    <meta charset="UTF-8">
    <meta name="viewport" content="width=device-width, initial-scale=1.0">
    <title>Rick and Morty Explorer</title>
    <script src="https://unpkg.com/htmx.org@1.9.10"></script>
    <link rel="stylesheet" href="/styles.css">
</head>
<body>
    <h1>Rick and Morty Character Explorer</h1>

     <!-- Filter section will go here -->

        <div id="character-table">
          <% if (data.results && data.results.length > 0) { %>
            <table>
                <thead>
                    <tr>
                        <th>Image</th>
                        <th>Name</th>
                        <th>Status</th>
                        <th>Species</th>
                        <th>Origin</th>
                        <th>Actions</th>
                    </tr>
                </thead>
                <tbody>
                    <% data.results.forEach(character => { %>
                        <tr>
                            <td><img src="<%= character.image %>" alt="<%= character.name %>" width="50"></td>
                            <td><%= character.name %></td>
                            <td><%= character.status %></td>
                            <td><%= character.species %></td>
                            <td><%= character.origin.name %></td>
                            <td><a href="/character/<%= character.id %>" hx-get="/character/<%= character.id %>" hx-target="body" hx-push-url="true">View More</a></td>
                        </tr>
                    <% }); %>
                </tbody>
            </table>

    <!-- Pagination section will go here -->
</body>
</html>
The above code sets up a basic table for our website, we will add pagination and filtering using HTMX in the following section.
Implementing Interdimensional Pagination
Now, let's implement pagination, our app's interdimensional travel mechanism. This is where HTMX really shines, allowing us to implement smooth, server-side pagination without any custom JavaScript.
Add this pagination section to your index.ejs, just after the character table:
<div class="pagination">
    <% const currentPage = parseInt(query.page) || 1; %>
    <% if (data.info.prev) { %>
        <a href="/?page=<%= currentPage - 1 %><%= query.name ? `&name=${query.name}` : '' %><%= query.status ? `&status=${query.status}` : '' %>"
           hx-get="/?page=<%= currentPage - 1 %><%= query.name ? `&name=${query.name}` : '' %><%= query.status ? `&status=${query.status}` : '' %>"
           hx-target="body"
           hx-push-url="true">Previous</a>
    <% } %>
    <span>Page <%= currentPage %> of <%= data.info.pages %></span>
    <% if (data.info.next) { %>
        <a href="/?page=<%= currentPage + 1 %><%= query.name ? `&name=${query.name}` : '' %><%= query.status ? `&status=${query.status}` : '' %>"
           hx-get="/?page=<%= currentPage + 1 %><%= query.name ? `&name=${query.name}` : '' %><%= query.status ? `&status=${query.status}` : '' %>"
           hx-target="body"
           hx-push-url="true">Next</a>
    <% } %>
</div>
This pagination section is the crown jewel of our HTMX implementation. Let's break it down:
- We calculate the current page and check if there are previous or next pages.
- The hx-get attribute on each link tells HTMX to make a GET request to our server with the appropriate page number and any active filters.
- hx-target="body" ensures that the entire page content is updated when navigating.
- hx-push-url="true" updates the URL, allowing users to share or bookmark specific pages.
The beauty of this HTMX pagination is its simplicity and efficiency. We're able to implement smooth, server-side pagination without writing a single line of custom JavaScript. It's as seamless as Rick's portal gun – click a link, and you're instantly transported to the next page of characters.
By leveraging HTMX, we've created a pagination system that's not only easy to implement but also provides a smooth, app-like user experience. It's fast, maintains state across page loads, and uses minimal Javascript.
Crafting the Multiverse Filter
Let's take our interdimensional exploration to the next level by adding filters to our character explorer. Think of this as tuning into different channels on interdimensional cable – you want to find the right show (or character) amidst the multiverse chaos.
Add this filter section to your index.ejs file, right above the character table:
<form id="filter-form" hx-get="/" hx-target="body" hx-push-url="true">
    <input type="text" name="name" placeholder="Name" value="<%= query.name || '' %>">
    <select name="status">
        <option value="">All Statuses</option>
        <option value="alive" <%= query.status === 'alive' ? 'selected' : '' %>>Alive</option>
        <option value="dead" <%= query.status === 'dead' ? 'selected' : '' %>>Dead</option>
        <option value="unknown" <%= query.status === 'unknown' ? 'selected' : '' %>>Unknown</option>
    </select>
    <button type="submit">Filter</button>
</form>
These filters allow users to narrow down their search, just like Rick tuning his interdimensional cable to find the perfect show. Enhanced with the power HTMX, our filter implementation is powerful and intuitive, providing real-time updates without needing custom JavaScript. Our app with both filters and pagination should look like this:

Creating Character Profiles: Adding the Details Screen
Now that our Rick and Morty Character Explorer looks slick and functional, it's time to add another exciting feature: individual character profiles. Imagine diving into a detailed dossier on Morty or Rick, complete with all their vital stats and episode appearances. Let's add a "View More" button to our character table to take users to a detailed character profile page.
Let's add a new route to our server.js file:
// Route to display character details
app.get('/character/:id', async (req, res) => {
  const { id } = req.params;

  try {
    const response = await axios.get(`${BASE_URL}/${id}`);
    res.render('character', { character: response.data });
  } catch (error) {
    console.error('Error fetching character details:', error.message);
    res.status(500).render('error', { message: 'Error fetching character details' });
  }
});
Let's also add a new file views/character.ejs the necessary HTML for our character detail page:
<!DOCTYPE html>
<html lang="en">
<head>
    <meta charset="UTF-8">
    <meta name="viewport" content="width=device-width, initial-scale=1.0">
    <title><%= character.name %> - Details</title>
    <link rel="stylesheet" href="/styles.css">
</head>
<body>
    <h1><%= character.name %> - Details</h1>
    <div class="character-details">
        <img src="<%= character.image %>" alt="<%= character.name %>">
        <ul>
            <li><strong>Status:</strong> <%= character.status %></li>
            <li><strong>Species:</strong> <%= character.species %></li>
            <li><strong>Gender:</strong> <%= character.gender %></li>
            <li><strong>Origin:</strong> <%= character.origin.name %></li>
            <li><strong>Location:</strong> <%= character.location.name %></li>
        </ul>
        <h2>Episodes</h2>
        <ul>
            <% character.episode.forEach(episode => { %>
                <li><a href="<%= episode %>" target="_blank">Episode <%= episode.split('/').pop() %></a></li>
            <% }); %>
        </ul>
    </div>
    <a href="/" hx-get="/" hx-target="body" hx-push-url="true" class="back-link">Back to Character List</a>
</body>
</html>
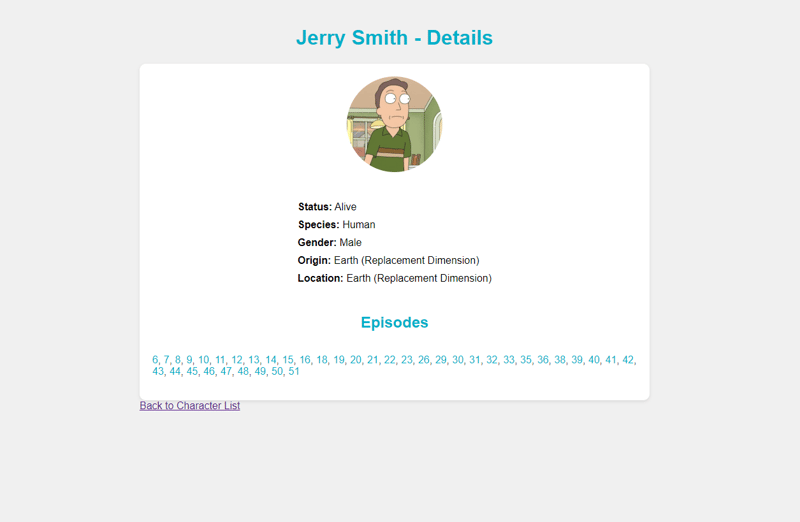
The code above defines a new route on our web server /character/:id. This new route is resolved when the user clicks on the view more option in the characters table. It fetches details for the specific character and returns a neatly rendered HTML page with all the character details. This page will look like this:
Putting It All Together: Your Interdimensional Character Explorer
Now that we've built our interdimensional travel device, it's time to see it in action. Here's a complete overview of our code, bringing together everything we've covered so far and also defining custom CSS styles to make the application look better.
Conclusion: Your Portal to Advanced Web Development
Congratulations—you've just built an interdimensional character explorer! In this adventure, we've covered a lot of ground, from setting up our Express.js server and designing a dynamic frontend with EJS and HTMX to implementing smooth pagination and filters.
This project is a testament to the power of HTMX. It shows how we can create dynamic, server-side rendered applications with minimal JavaScript. It's fast, efficient, and user-friendly—just like Rick's portal gun.
But don't stop here! There's a whole multiverse of possibilities waiting for you. Experiment with new features, add more filters or integrate additional APIs. The only limit is your imagination.
"Post-Credits Scene": Additional Resources and Easter Eggs
Before you go, here are some additional resources to help you on your journey:
- HTMX Documentation
- Express.js Documentation
- Rick and Morty API
And for those who made it to the end, here are a few hidden Rick and Morty references:
- Remember, "Wubba Lubba Dub Dub!" means you're in great pain, but also having a great time coding.
- Lastly, always be like Rick – curious, inventive, and never afraid to break the rules (of JavaScript).
Happy coding, and may your interdimensional travels be filled with endless possibilities!
The above is the detailed content of Building a Rick and Morty Character Explorer with HTMX and Express.js. For more information, please follow other related articles on the PHP Chinese website!

Hot AI Tools

Undresser.AI Undress
AI-powered app for creating realistic nude photos

AI Clothes Remover
Online AI tool for removing clothes from photos.

Undress AI Tool
Undress images for free

Clothoff.io
AI clothes remover

Video Face Swap
Swap faces in any video effortlessly with our completely free AI face swap tool!

Hot Article
Hot Tools

Notepad++7.3.1
Easy-to-use and free code editor

SublimeText3 Chinese version
Chinese version, very easy to use

Zend Studio 13.0.1
Powerful PHP integrated development environment

Dreamweaver CS6
Visual web development tools

SublimeText3 Mac version
God-level code editing software (SublimeText3)
Hot Topics
 1664
1664
 14
1423
52
1318
25
1268
29
1248
24
14
1423
52
1318
25
1268
29
1248
24

 JavaScript Engines: Comparing Implementations
Apr 13, 2025 am 12:05 AM
JavaScript Engines: Comparing Implementations
Apr 13, 2025 am 12:05 AM
Different JavaScript engines have different effects when parsing and executing JavaScript code, because the implementation principles and optimization strategies of each engine differ. 1. Lexical analysis: convert source code into lexical unit. 2. Grammar analysis: Generate an abstract syntax tree. 3. Optimization and compilation: Generate machine code through the JIT compiler. 4. Execute: Run the machine code. V8 engine optimizes through instant compilation and hidden class, SpiderMonkey uses a type inference system, resulting in different performance performance on the same code.
 Python vs. JavaScript: The Learning Curve and Ease of Use
Apr 16, 2025 am 12:12 AM
Python vs. JavaScript: The Learning Curve and Ease of Use
Apr 16, 2025 am 12:12 AM
Python is more suitable for beginners, with a smooth learning curve and concise syntax; JavaScript is suitable for front-end development, with a steep learning curve and flexible syntax. 1. Python syntax is intuitive and suitable for data science and back-end development. 2. JavaScript is flexible and widely used in front-end and server-side programming.
 JavaScript: Exploring the Versatility of a Web Language
Apr 11, 2025 am 12:01 AM
JavaScript: Exploring the Versatility of a Web Language
Apr 11, 2025 am 12:01 AM
JavaScript is the core language of modern web development and is widely used for its diversity and flexibility. 1) Front-end development: build dynamic web pages and single-page applications through DOM operations and modern frameworks (such as React, Vue.js, Angular). 2) Server-side development: Node.js uses a non-blocking I/O model to handle high concurrency and real-time applications. 3) Mobile and desktop application development: cross-platform development is realized through ReactNative and Electron to improve development efficiency.
 How to Build a Multi-Tenant SaaS Application with Next.js (Frontend Integration)
Apr 11, 2025 am 08:22 AM
How to Build a Multi-Tenant SaaS Application with Next.js (Frontend Integration)
Apr 11, 2025 am 08:22 AM
This article demonstrates frontend integration with a backend secured by Permit, building a functional EdTech SaaS application using Next.js. The frontend fetches user permissions to control UI visibility and ensures API requests adhere to role-base
 Building a Multi-Tenant SaaS Application with Next.js (Backend Integration)
Apr 11, 2025 am 08:23 AM
Building a Multi-Tenant SaaS Application with Next.js (Backend Integration)
Apr 11, 2025 am 08:23 AM
I built a functional multi-tenant SaaS application (an EdTech app) with your everyday tech tool and you can do the same. First, what’s a multi-tenant SaaS application? Multi-tenant SaaS applications let you serve multiple customers from a sing
 From C/C to JavaScript: How It All Works
Apr 14, 2025 am 12:05 AM
From C/C to JavaScript: How It All Works
Apr 14, 2025 am 12:05 AM
The shift from C/C to JavaScript requires adapting to dynamic typing, garbage collection and asynchronous programming. 1) C/C is a statically typed language that requires manual memory management, while JavaScript is dynamically typed and garbage collection is automatically processed. 2) C/C needs to be compiled into machine code, while JavaScript is an interpreted language. 3) JavaScript introduces concepts such as closures, prototype chains and Promise, which enhances flexibility and asynchronous programming capabilities.
 JavaScript and the Web: Core Functionality and Use Cases
Apr 18, 2025 am 12:19 AM
JavaScript and the Web: Core Functionality and Use Cases
Apr 18, 2025 am 12:19 AM
The main uses of JavaScript in web development include client interaction, form verification and asynchronous communication. 1) Dynamic content update and user interaction through DOM operations; 2) Client verification is carried out before the user submits data to improve the user experience; 3) Refreshless communication with the server is achieved through AJAX technology.
 JavaScript in Action: Real-World Examples and Projects
Apr 19, 2025 am 12:13 AM
JavaScript in Action: Real-World Examples and Projects
Apr 19, 2025 am 12:13 AM
JavaScript's application in the real world includes front-end and back-end development. 1) Display front-end applications by building a TODO list application, involving DOM operations and event processing. 2) Build RESTfulAPI through Node.js and Express to demonstrate back-end applications.
