Do you often encounter authentication requests when visiting web pages? Google Chrome provides an automatic verification feature that saves you the trouble of frequently entering verification codes. Come and find out how to turn on this convenient feature to make your web browsing smoother! PHP editor Apple has compiled detailed steps, come and find out!

1. After opening Google Chrome, click on the three dots icon on the upper right side, and select the [Settings] option (as shown in the picture).

2. Click on the [Privacy and Security] option on the left side of the page to open it (as shown in the picture).

3. Find the [Website Settings] option on the right page and click to enter (as shown in the picture).

4. On the page, you need to slide the mouse to the bottom position and click on the [More Content Settings] option (as shown in the picture).

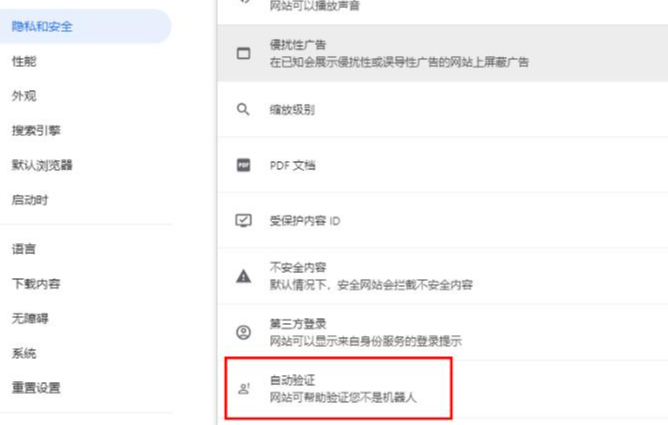
5. Some menu options will pop up. You need to click on the [Automatic Verification] option to open it (as shown in the picture).

6. On the page, click the switch button once to enable the automatic verification function. After enabling it, the URL you visit will automatically verify that you are a real person and not a robot (as shown in the picture).

The above is the detailed content of How to set up the automatic verification function of Google Chrome. For more information, please follow other related articles on the PHP Chinese website!
 Solution to Google Chrome not working
 win10 bluetooth switch is missing
 Cancel WeChat campaign
 How to use group by
 Table average
 The difference between JD.com's self-operated and official flagship stores
 What to do if the remote desktop cannot connect
 How to make gif animation in ps
 vcruntime140.dll cannot be found and code execution cannot continue


