
Lenovo Savior BIOS interface settings U disk boot guide If you need to reinstall the system on the Lenovo Savior laptop, you need to first enter the BIOS interface to set up U disk boot. This guide explains in detail how to do this. To help you fully understand the following steps, we recommend that you read the following carefully. PHP editor Baicao has compiled clear and easy-to-understand instructions for you to ensure that you can easily complete the BIOS interface settings.
1. After the computer is turned on or restarted, press F2 or (FN+F2) continuously to enter the BIOS settings, then switch to Security, select Secure Boot and press Enter to set it to Disabled.
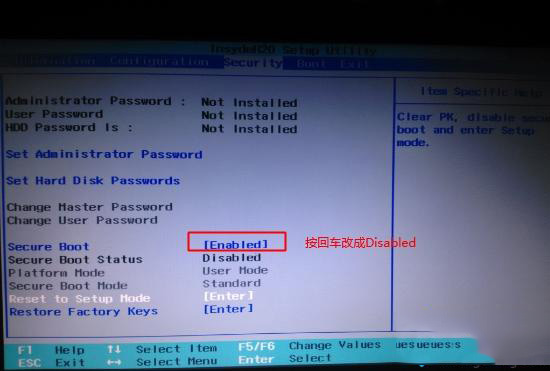
2. Press If there is no Secure Boot option under the Security option, check to see if there is a "clear intel PTT Key" option. If there is, enter and press Enter to select "yes" to clear the ppt key. Otherwise, the system cannot be installed or the system cannot be installed. Boot starts. (Be sure to note)

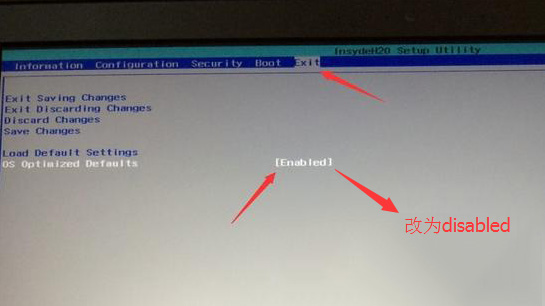
3. Then go to Exit and set OS Optimized Defaults to Disabled or Other OS.
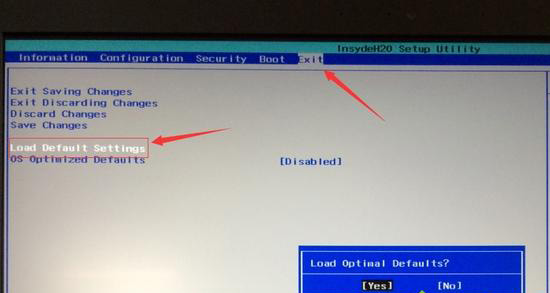
4. Select Load Default Settings and press Enter to load the settings. After loading the default settings, some models need to press F10 to save and restart and then press F2 to enter the BIOS to continue the following settings.
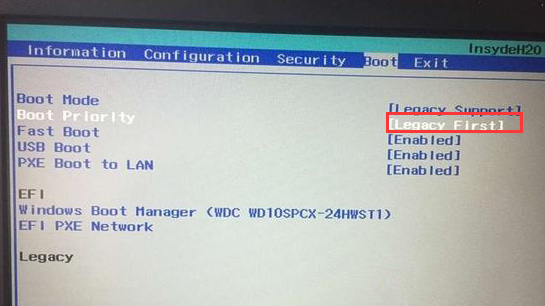
5. Switch to Boot and change the Boot Mode from UEFI to Legacy Support.
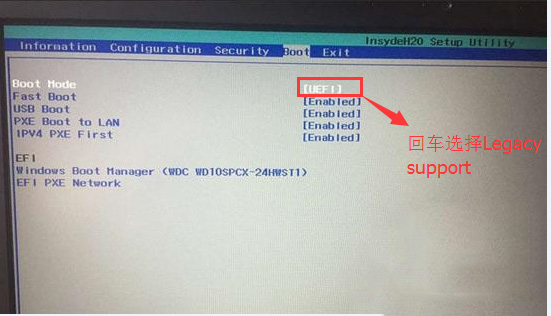
6. Set Boot Priority to Legacy First, press F10 in the pop-up window, select yes and press Enter.
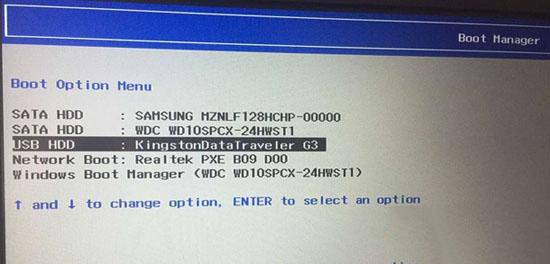
7. Insert the prepared U disk boot disk, restart and press F12 or FN+F12 to bring up the startup management dialog box, select USB HDD to recognize the U disk to boot into PE, and press Enter to confirm.
The above is the detailed content of How to enter the bios of Lenovo Rescuer to set up U disk boot. For more information, please follow other related articles on the PHP Chinese website!


