8 Lesser-Known Evernote Features You Should Be Using
Evernote has many useful features that many users aren't aware of. You can use it to scan documents, get AI assistance, set reminders for deadlines, and record voice notes, among other things. If you use Evernote for note-taking, utilizing these features can help you unlock the app's full potential.
Digitally Scan and Organize Your Handwritten Notes
If you frequently need to scan handwritten notes and rely on other apps for this task, consider using Evernote’s built-in document scanning feature. This allows you to scan documents and import scanned images directly into your notes. The app employs OCR technology to make scanned notes searchable.
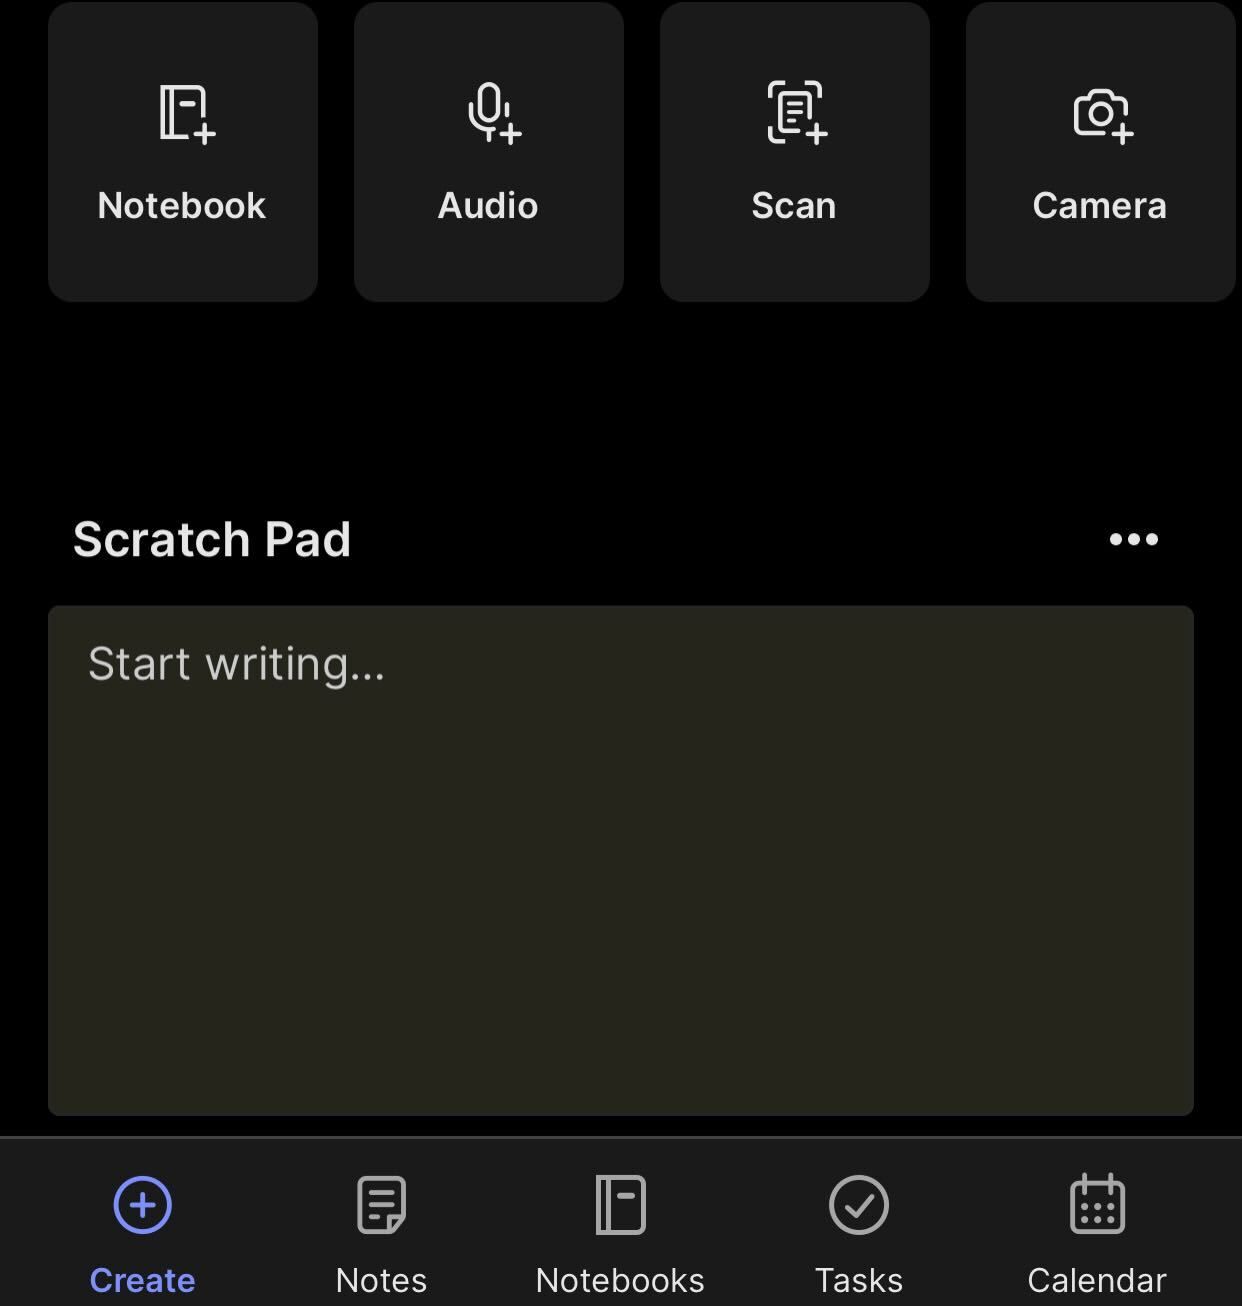
This feature is available only in the smartphone app. To use it, open the Evernote's smartphone app, tap the "Create" button in the bottom-left corner and select "Scan."
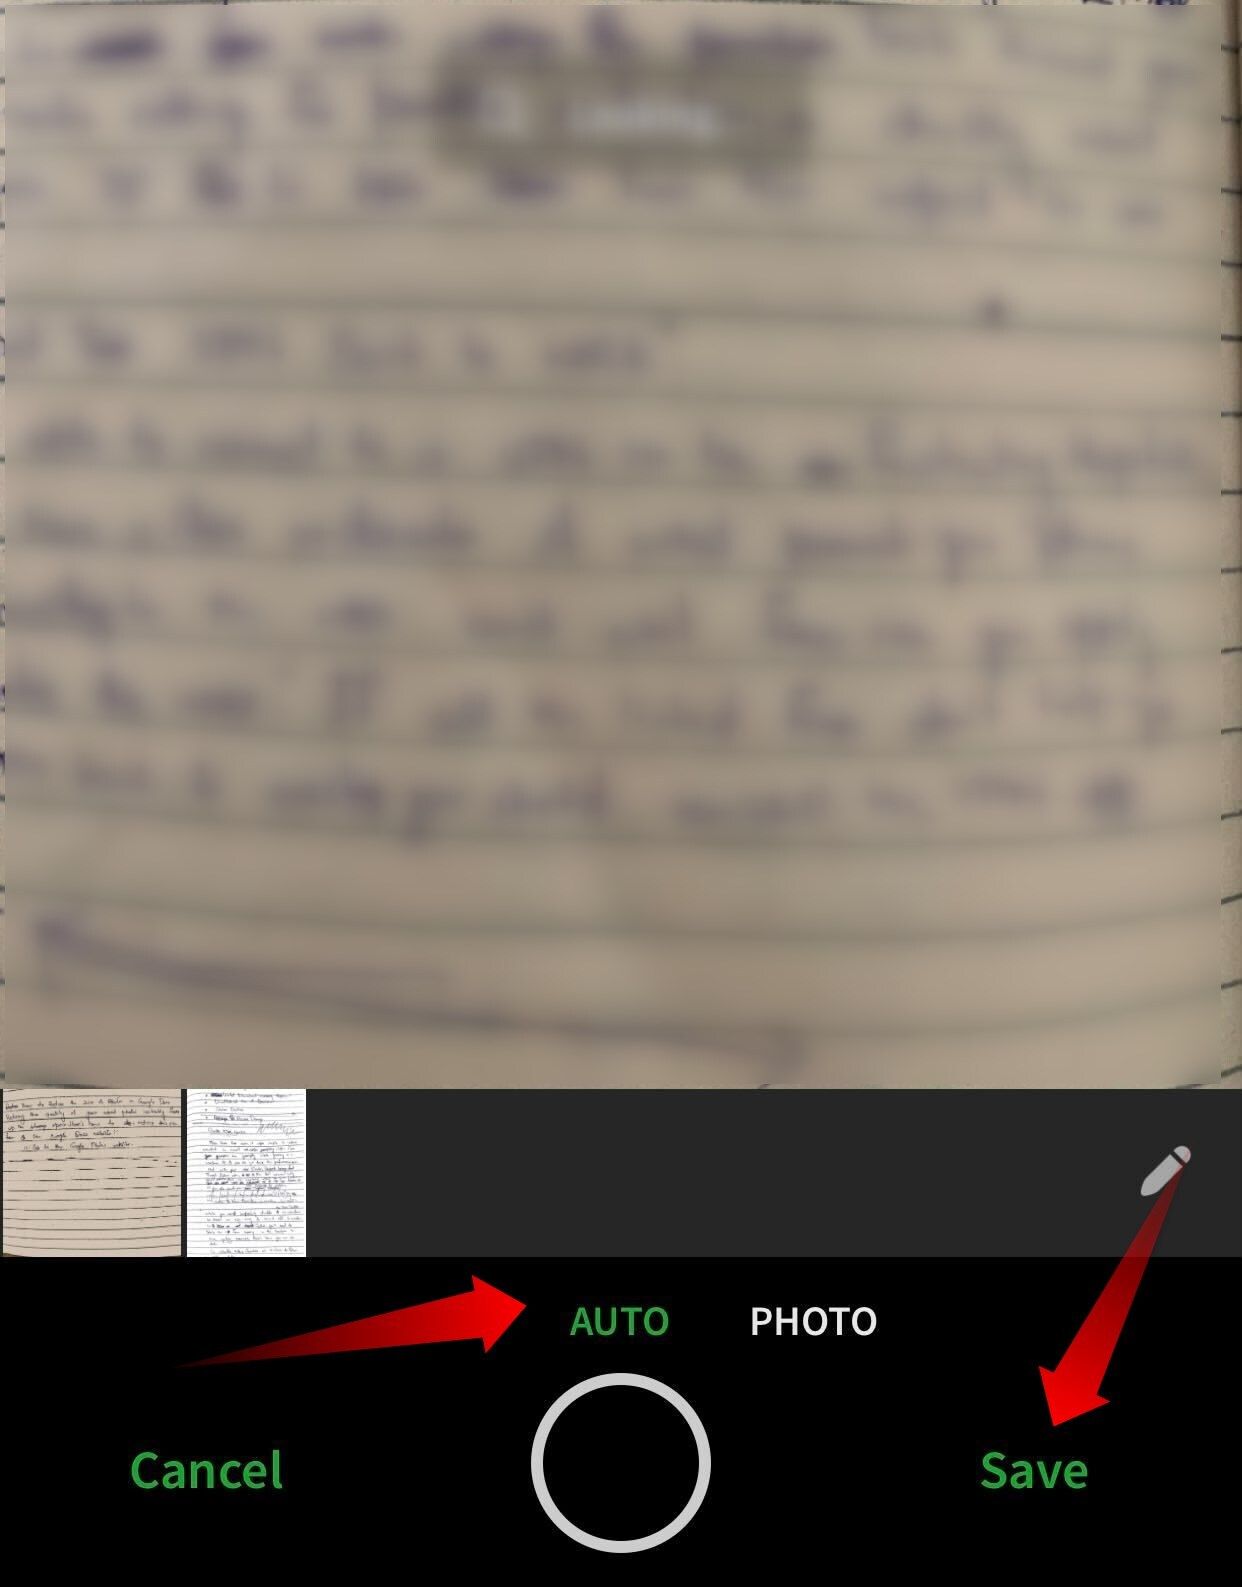
You can either let Evernote automatically scan your notes or manually capture images of the content you want to scan. For scanning multiple pages, use the auto mode to scan each page consecutively. Once you’ve finished, tap “Save” to save the scanned images into one note.
Get AI-Driven Assistance for Refining Your Notes
To keep up with the AI trend, Evernote has introduced an AI assistant in its apps and web client. It can help you write and summarize lengthy notes, fix typos in hastily written notes, translate text between languages, and adjust the tone of your content. To use it, select the text you want to refine, click on the "AI" drop-down menu, and choose the relevant option.

The feature works differently on Evernote's smartphone app. Unlike the desktop app and the web client that allows refining individual sections and paragraphs, it refines your entire document at once. Additionally, it doesn't work on documents with fewer than 100 words or more than 6,000 words.

Record and Store Your Notes as Voice Memos
Evernote's voice memos feature lets you record audio notes directly within the app, making it convenient to quickly capture conversations or ideas without typing. You can later transcribe these recordings into text, making them editable and searchable. Additionally, you can tag and sync them across devices for easy access.
To use this feature on your smartphone, tap the “+” icon in the bottom-left corner and select "Audio" from the options.
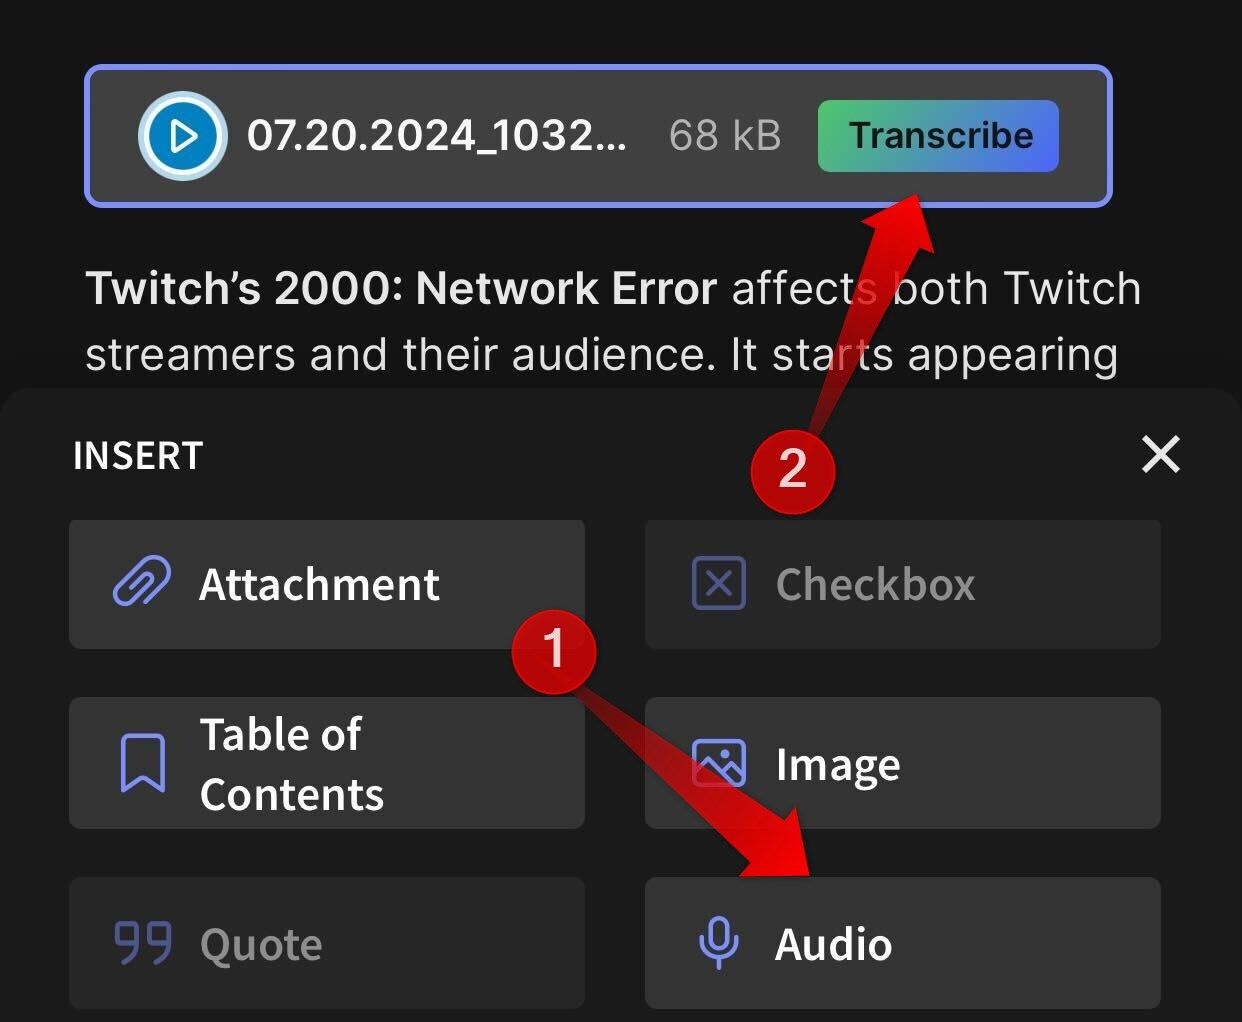
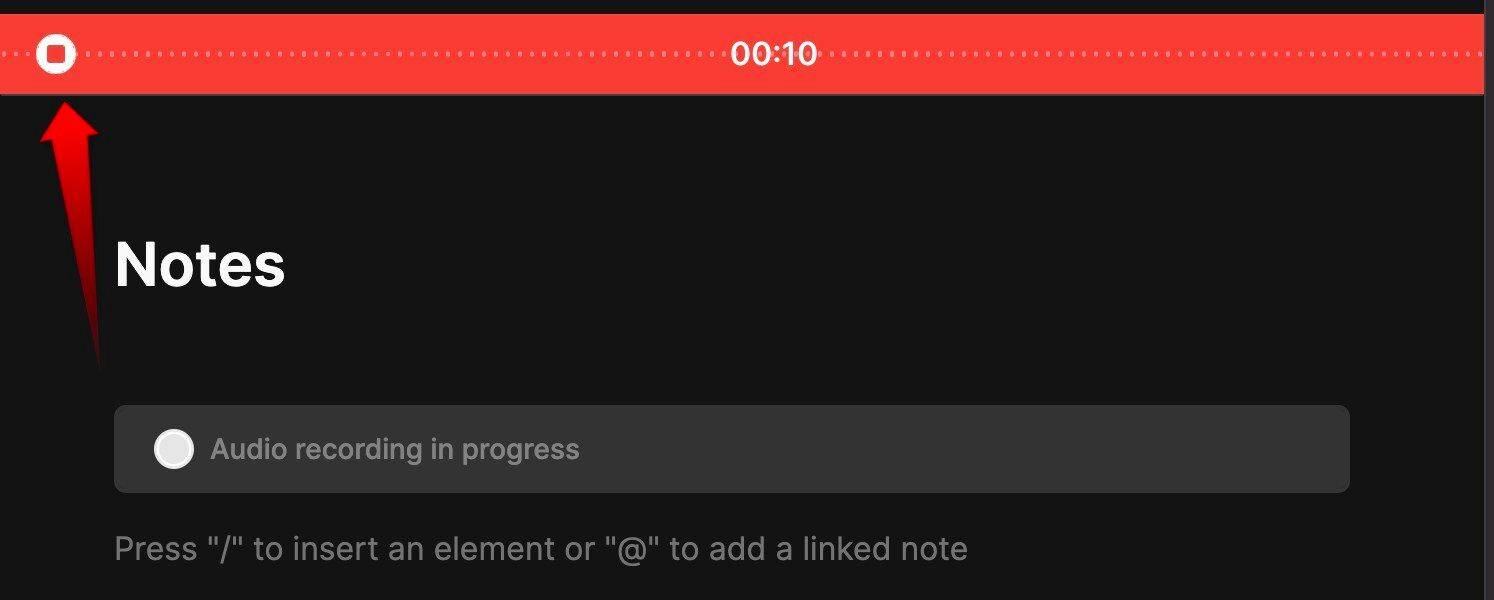
In the desktop app, click the “Insert” menu at the top, then choose "Audio Recording." Allow the app to use your microphone, record your voice memo, and click the red stop icon when done.
The memo will be saved in the same note; you can transcribe it by clicking the "Transcribe" button.

Set Reminders to Keep Track of Deadlines
If you often struggle to submit assignments on time or keep track of deadlines, use Evernote's reminder feature.
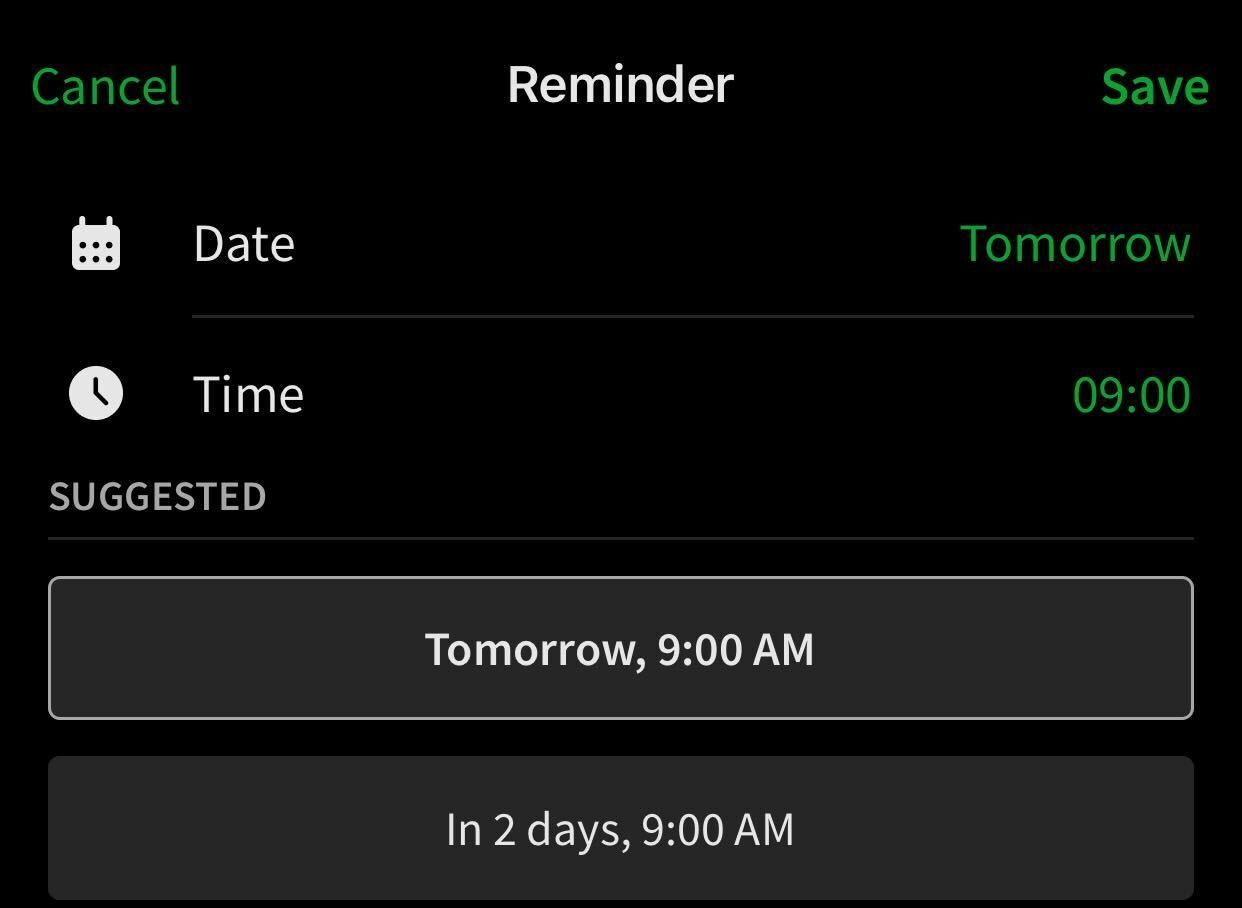
This tool lets you create reminders for individual notes by assigning a due date and time. As the deadline approaches, you’ll receive alerts via push notifications. Also, the reminder syncs across all your devices. Regardless of the device you set the reminder on, you'll get notifications on all your devices.
To set a reminder on Evernote's desktop app, click the bell icon in the bottom-right corner of your note, assign the time and date, and click "Add Reminder."

On a smartphone, tap the three horizontal dots in the top-right corner, select "Add Reminder," set the time and date, and tap "Save."
Use Tags to Find Your Content Quickly
If you struggle to find files in a cluttered library of notes, you should start tagging them for easier retrieval. For example, tag all notes for chapters of a subject, like "Physics Chapter 3." This way, you'll be able to quickly find your related notes. Tags also help organize files more effectively, eliminating the need for numerous folders.
To tag a file, click the tag symbol in the bottom-left corner of your note (desktop app) or top-right corner (smartphone app), type the desired tag, and press Enter.

Save Frequently Used Notes as Shortcuts
Another often overlooked—yet useful—Evernote feature is adding notes to Shortcuts. This lets you add frequently used notes in the quick-access panel on the right, keeping essential notes within easy reach. By eliminating the need to search for files constantly, this feature can boost your productivity.
To add a note to Shortcuts, right-click on it and select "Add to Shortcuts."

Open the note on the smartphone app, click on the three horizontal dots in the top-right corner, and select "Add to Shortcuts."
Manage Tasks Efficiently With To-Do Lists
While Evernote's task management feature is primarily designed for managing project tasks by setting deadlines, reminders, and assigning tasks to team members, you can also use it to create effective to-do lists. You can set deadlines to allocate time for each task and use reminders to ensure timely completion, replacing the need for separate to-do list apps.
To create a to-do list, open a new note, click on the checkmark icon in the top-left corner, enter the name of your first task, and assign a deadline, reminder, and members if needed. Once done, press Enter to create the next task. When you finish a task, check the circle to strike it through. Alternatively, you can use the To-do list template.
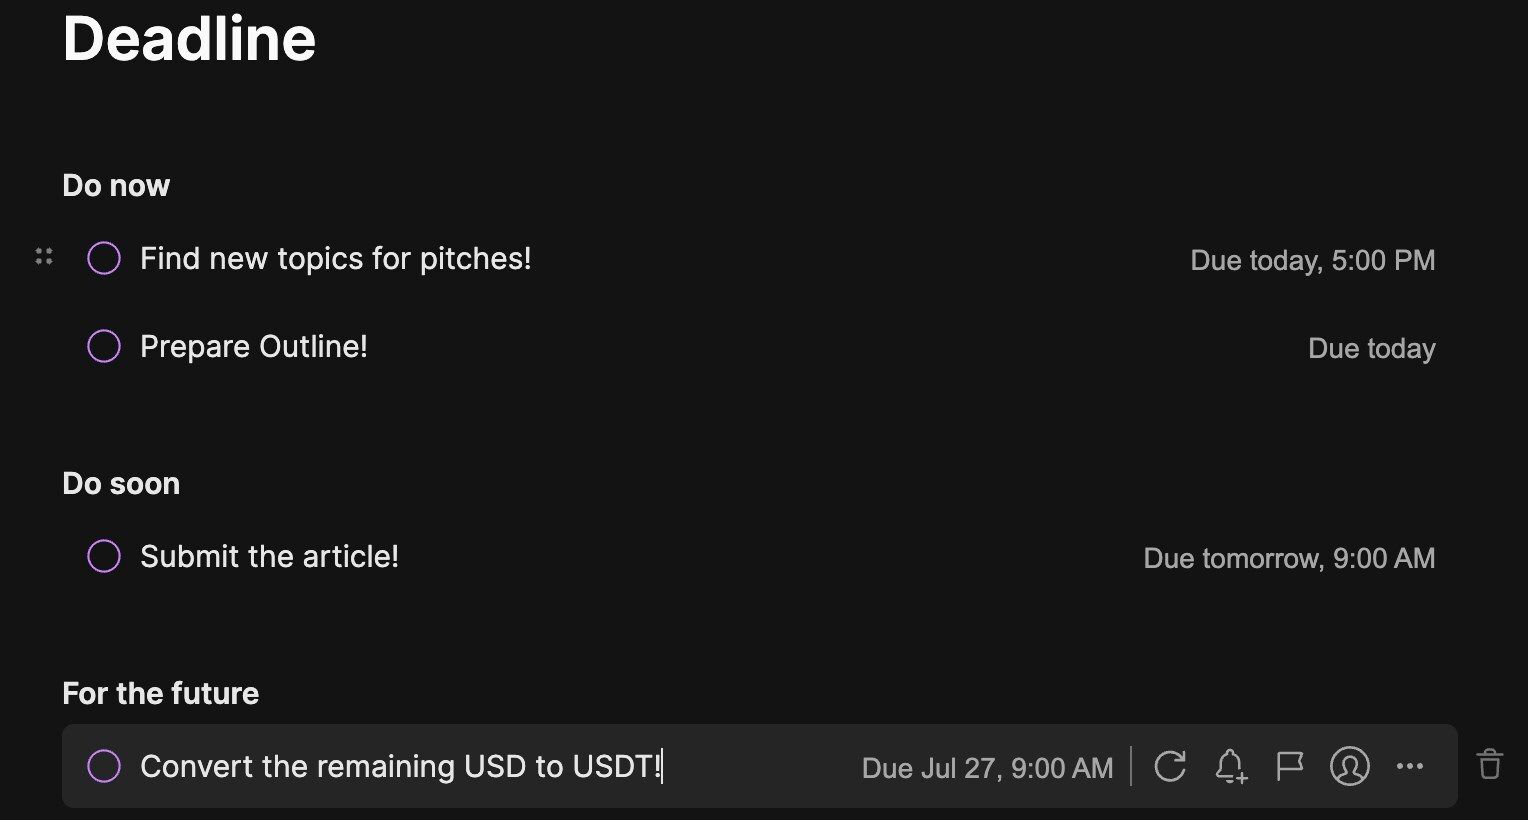
Remember to delete your daily to-do list at the end of the day to keep your task management organized within the app.
Review Changes Over Time With Note History
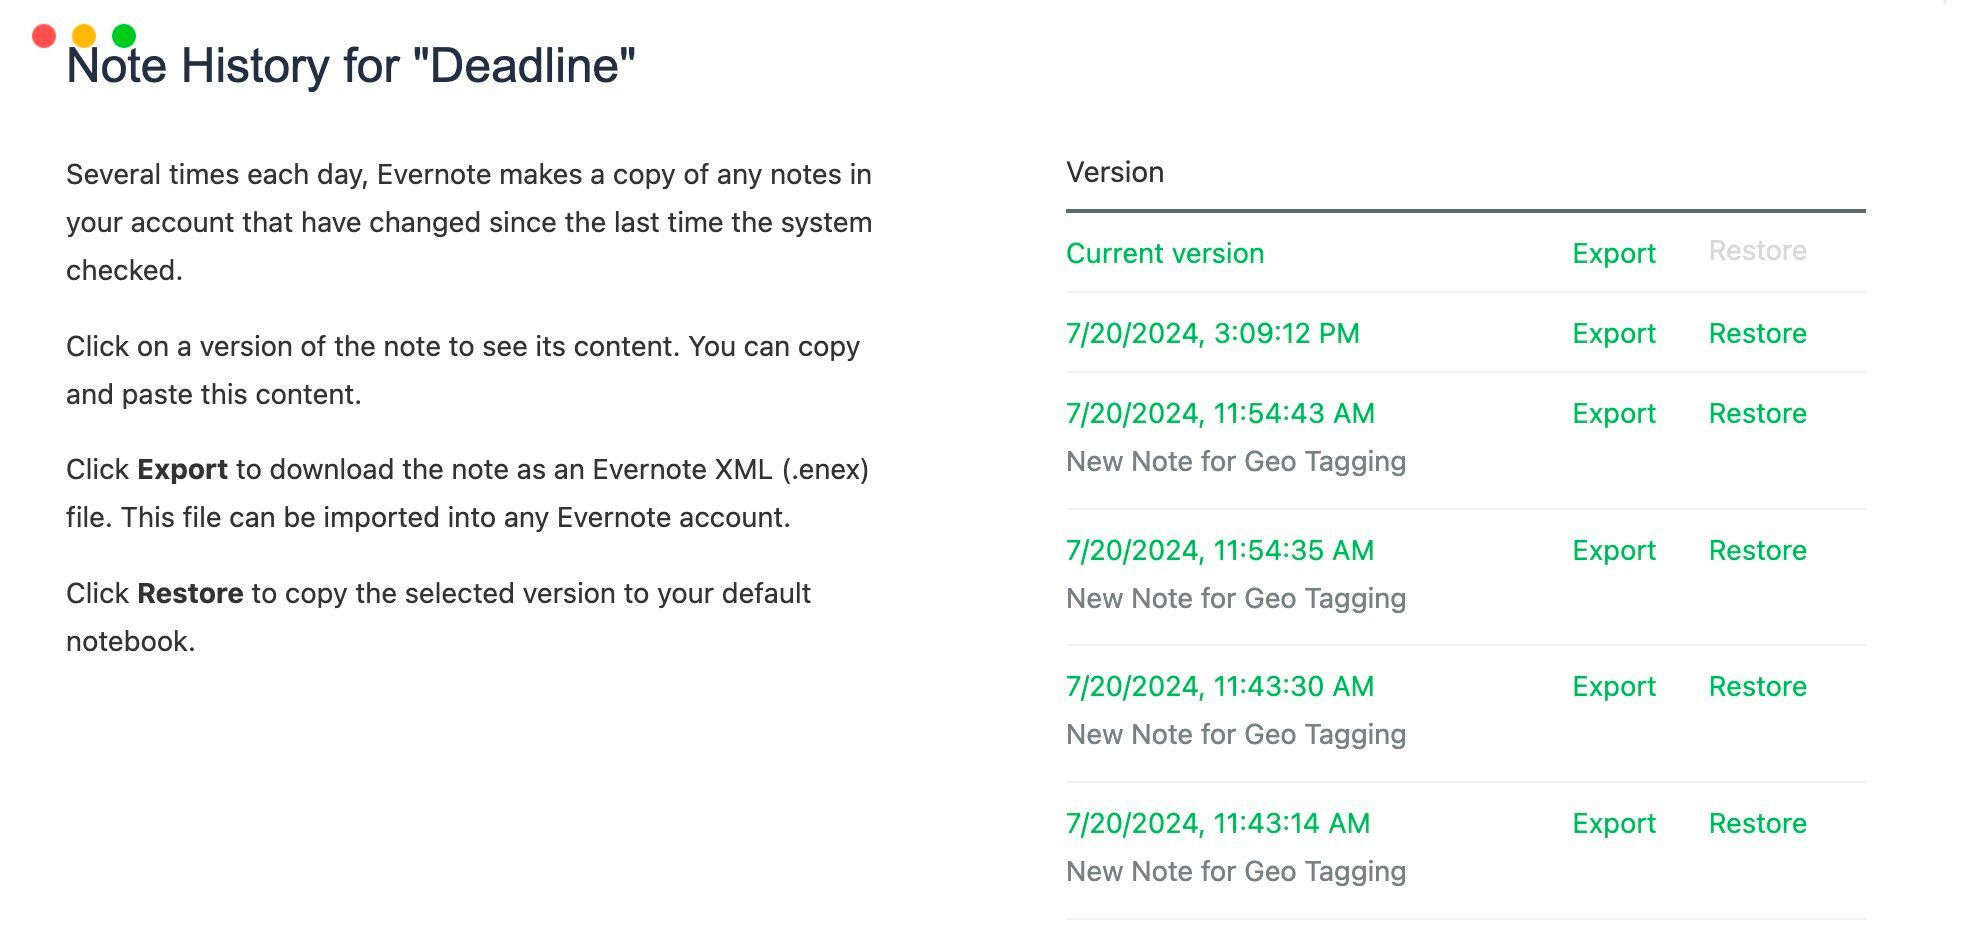
Like other note-taking apps, Evernote maintains a record of previous versions of your notes. This feature is helpful if you make unintentional changes and want to undo them or want to track changes over time. However, note history is only accessible on the web and desktop versions of Evernote; it is not available on the smartphone app.
To view previous versions of a note, click on the three horizontal dots in the top-right corner and select "Note History." This will display all earlier versions of the note and their respective dates and times. To view an older version, click "Export" to save it. If you want to revert your current note to a previous version, click "Restore."
Evernote is a great note-taking app, and leveraging the above features can further streamline your note-taking process. Use these features to enhance your workflow and productivity, share your favorite ones with friends and family, and continue exploring the other lesser-known features Evernote offers.
The above is the detailed content of 8 Lesser-Known Evernote Features You Should Be Using. For more information, please follow other related articles on the PHP Chinese website!

Hot AI Tools

Undresser.AI Undress
AI-powered app for creating realistic nude photos

AI Clothes Remover
Online AI tool for removing clothes from photos.

Undress AI Tool
Undress images for free

Clothoff.io
AI clothes remover

Video Face Swap
Swap faces in any video effortlessly with our completely free AI face swap tool!

Hot Article

Hot Tools

Notepad++7.3.1
Easy-to-use and free code editor

SublimeText3 Chinese version
Chinese version, very easy to use

Zend Studio 13.0.1
Powerful PHP integrated development environment

Dreamweaver CS6
Visual web development tools

SublimeText3 Mac version
God-level code editing software (SublimeText3)

Hot Topics
 1663
1663
 14
14
 1420
1420
 52
52
 1315
1315
 25
25
 1266
1266
 29
29
 1239
1239
 24
24
 Windows kb5054979 update information Update content list
Apr 15, 2025 pm 05:36 PM
KB5054979 is a cumulative security update released on March 27, 2025, for Windows 11 version 24H2. It targets .NET Framework versions 3.5 and 4.8.1, enhancing security and overall stability. Notably, the update addresses an issue with file and directory operations on UNC shares using System.IO APIs. Two installation methods are provided: one through Windows Settings by checking for updates under Windows Update, and the other via a manual download from the Microsoft Update Catalog.
 Nanoleaf Wants to Change How You Charge Your Tech
Apr 17, 2025 am 01:03 AM
Nanoleaf's Pegboard Desk Dock: A Stylish and Functional Desk Organizer Tired of the same old charging setup? Nanoleaf's new Pegboard Desk Dock offers a stylish and functional alternative. This multifunctional desk accessory boasts 32 full-color RGB
 Got an AMD CPU and Aren't Using PBO? You're Missing Out
Apr 12, 2025 pm 09:02 PM
Unlocking Ryzen's Potential: A Simple Guide to Precision Boost Overdrive (PBO) Overclocking your new PC can seem daunting. While performance gains might feel elusive, leaving potential untapped is even less appealing. Fortunately, AMD Ryzen processo
 How to Use Windows 11 as a Bluetooth Audio Receiver
Apr 15, 2025 am 03:01 AM
Turn your Windows 11 PC into a Bluetooth speaker and enjoy your favorite music from your phone! This guide shows you how to easily connect your iPhone or Android device to your computer for audio playback. Step 1: Pair Your Bluetooth Device First, pa
 Alienware 27 4K QD-OLED (AW2725Q) Review: A New Standard for Pixel Density
Apr 08, 2025 am 06:04 AM
The Alienware 27 4K QD-OLED (AW2725Q): A Stunning, High-Density Display The $899.99 price tag for a 27-inch monitor might seem steep, but the Alienware AW2725Q's exceptional pixel density delivers a transformative experience for both gaming and every
 ASUS' ROG Zephyrus G14 OLED Gaming Laptop Is $300 Off
Apr 16, 2025 am 03:01 AM
ASUS ROG Zephyrus G14 Esports Laptop Special Offer! Buy ASUS ROG Zephyrus G14 Esports Laptop now and enjoy a $300 offer! Original price is $1999, current price is only $1699! Enjoy immersive gaming experience anytime, anywhere, or use it as a reliable portable workstation. Best Buy currently offers offers on this 2024 14-inch ASUS ROG Zephyrus G14 e-sports laptop. Its powerful configuration and performance are impressive. This ASUS ROG Zephyrus G14 e-sports laptop costs 16 on Best Buy
 5 Hidden Windows Features You Should Be Using
Apr 16, 2025 am 12:57 AM
Unlock Hidden Windows Features for a Smoother Experience! Discover surprisingly useful Windows functionalities that can significantly enhance your computing experience. Even seasoned Windows users might find some new tricks here. Dynamic Lock: Auto
 You Can Get The Razer Basilisk V3 Pro Mouse for 39% off
Apr 09, 2025 am 03:01 AM
##### Razer Basilisk V3 Pro: High-performance wireless gaming mouse The Razer Basilisk V3 Pro is a high-performance wireless gaming mouse with high customization (11 programmable buttons, Chroma RGB) and versatile connectivity. It has excellent sensors, durable switches and extra long battery life. If you are a gamer looking for a high-quality wireless mouse and need excellent customization options, now is a great time to buy the Razer Basilisk V3 Pro. The promotion cuts prices by 39% and has limited promotion periods. This mouse is larger, 5.11 inches long and 2 inches wide


