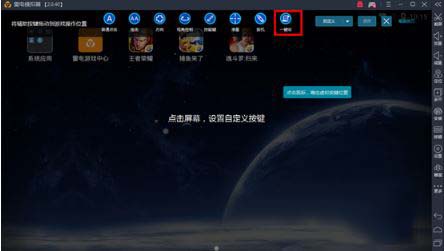
Today’s article explains about the lightning simulator. Do you know how to set one-click macro on the lightning simulator? The following article explains to you how to set one-click macros on the lightning simulator. Interested users can go and learn below. How to set one-click macro in lightning simulator? How to set one-click macro in the lightning simulator. First, we need to find the one-click macro button. It is above the key interface. You need to add it yourself:

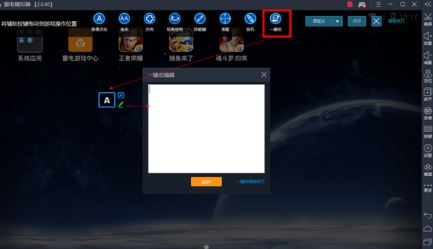
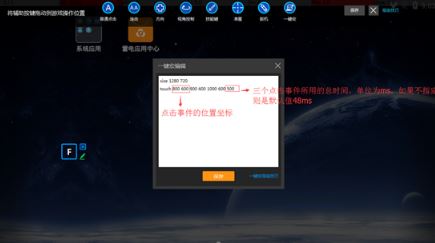
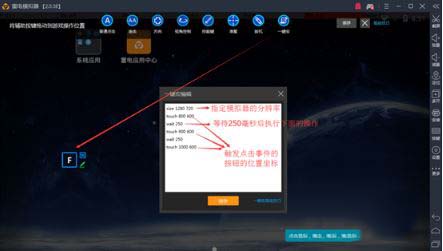
Add a one-click macro button: Then the system pops up an editing window. At this time, We need to enter the corresponding instructions.

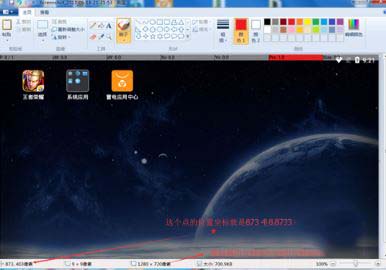
First use the screenshot function of the simulator to take a screenshot of the simulator, and then use the "Paint" software that comes with the computer to open the screenshot. Move the mouse to the corresponding point in the screen, and the pixel coordinates will be displayed in the lower left corner. You can easily get the position coordinates of each point in the simulator.

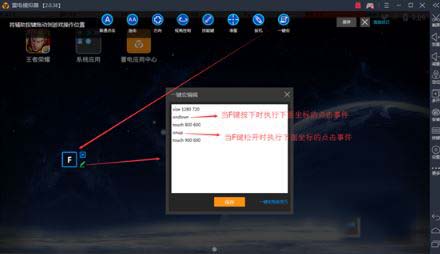
Then there is the function of triggering two commands with one click. The specific operation is: set the resolution, set ondown (press) + touch (touch) pixel coordinates, and set onup (release) + touch (pixel coordinates) again ) has completed the function of

triggering two commands with one click. The specific operations are: set the resolution, set ondown (press) + touch (touch) pixel coordinates, and set onup (release) + touch ( pixel coordinates) is complete.

Loop command, as long as you hold down the button, you can continue to cycle the operations under the command.

The above is the detailed content of How to set one-click macro on lightning simulator How to set one-click macro on lightning simulator. For more information, please follow other related articles on the PHP Chinese website!

