
 Computer Tutorials
Computer Knowledge
How to set green eye protection mode in win11? Tutorial to enable win11 green eye protection mode
Computer Tutorials
Computer Knowledge
How to set green eye protection mode in win11? Tutorial to enable win11 green eye protection mode
How to set green eye protection mode in win11? Tutorial to enable win11 green eye protection mode

Visual fatigue can become a problem when you use electronic devices for a long time. For Windows 11 users, turning on green eye protection mode can effectively relieve this fatigue. The following article is carefully compiled by PHP editor Yuzai, and details the specific steps to set the green eye protection mode in win11, allowing you to say goodbye to visual fatigue easily.
How to set green eye protection mode in win11
1. Press and hold [windows+R] to open [Run], enter [regedit] in the interface and click [OK].
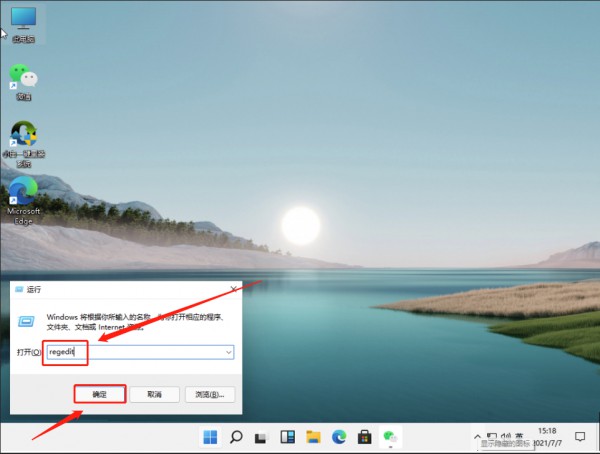
2. In the opened [Registry Editor] interface, expand the [HKEY_CURRENT_USER] option, and then find the [colors] option under [Control Panel].

3. Then find the [windows] option in the right interface of [colors], double-click to open it, set [numeric data] to [202 234 206], and then click [OK] to save the changes.
Note: Users can set the green eye protection mode data according to their own needs.

4. After the final settings are completed, open the start menu and click [Restart].

The above is the detailed content of How to set green eye protection mode in win11? Tutorial to enable win11 green eye protection mode. For more information, please follow other related articles on the PHP Chinese website!

Hot AI Tools

Undresser.AI Undress
AI-powered app for creating realistic nude photos

AI Clothes Remover
Online AI tool for removing clothes from photos.

Undress AI Tool
Undress images for free

Clothoff.io
AI clothes remover

Video Face Swap
Swap faces in any video effortlessly with our completely free AI face swap tool!

Hot Article
Hot Tools

Notepad++7.3.1
Easy-to-use and free code editor

SublimeText3 Chinese version
Chinese version, very easy to use

Zend Studio 13.0.1
Powerful PHP integrated development environment

Dreamweaver CS6
Visual web development tools

SublimeText3 Mac version
God-level code editing software (SublimeText3)
Hot Topics
 1664
1664
 14
1423
52
1317
25
1268
29
1242
24
14
1423
52
1317
25
1268
29
1242
24

 Fixdisk Windows 7: Check Your Hard Disk for Errors on Windows 7
Apr 14, 2025 am 12:40 AM
Fixdisk Windows 7: Check Your Hard Disk for Errors on Windows 7
Apr 14, 2025 am 12:40 AM
If you suspect your hard drive encounters issues, you can check the drive for errors on Windows 7. This php.cn post talks about fixdisk Windows 7. You can follow the guide to check the hard drive for errors on Windows 7.
 Is Core Isolation Blocked by ew_usbccgpfilter.sys? Here Are Fixes!
Apr 13, 2025 am 12:47 AM
Is Core Isolation Blocked by ew_usbccgpfilter.sys? Here Are Fixes!
Apr 13, 2025 am 12:47 AM
Many SurfaceBook users report that they meet the “core isolation blocked by ew_usbccgpfilter.sys” issue on Windows 11/10. This post from php.cn helps to fix the annoying issue. Keep on your reading.
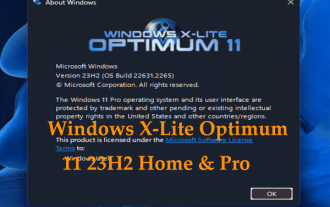 How to Install Windows X-Lite Optimum 11 23H2 Home/Pro via ISO
Apr 09, 2025 am 12:49 AM
How to Install Windows X-Lite Optimum 11 23H2 Home/Pro via ISO
Apr 09, 2025 am 12:49 AM
Windows X-Lite Optimum 11 23H2 Home or Optimum 11 Pro could be your option if you need a custom lite system based on Windows 11 23H2. Go on reading and php.cn will show you how to download Optimum 11 23H2 ISO and install Pro or Home on your PC.
 Effortles Fixes for Black Screen After Installing a Graphics Driver
Apr 15, 2025 am 12:11 AM
Effortles Fixes for Black Screen After Installing a Graphics Driver
Apr 15, 2025 am 12:11 AM
Have you ever encountered a black screen after installing a graphics driver like an Nvidia driver in Windows 10/11? Now in this post from php.cn, you can find a couple of worth trying solutions to the Nvidia driver update black screen.
 KB2267602 Fails to Install: Here Is How to Fix It!
Apr 15, 2025 am 12:48 AM
KB2267602 Fails to Install: Here Is How to Fix It!
Apr 15, 2025 am 12:48 AM
KB2267602 is a protection or definition update for Windows Defender designed to fix vulnerabilities and threats in Windows. Some users reported that they were unable to install KB2267602. This post from php.cn introduces how to fix the “KB2267602 fai
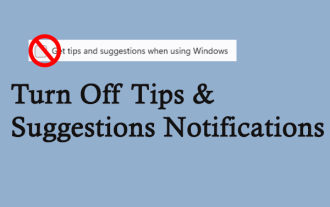 How to Turn Off Tips and Suggestions Notifications in Windows?
Apr 09, 2025 am 12:46 AM
How to Turn Off Tips and Suggestions Notifications in Windows?
Apr 09, 2025 am 12:46 AM
Tips and Suggestions Notifications is a new design of Windows 11. It will give you suggestions and tips on some new features. But some of you may be bothered by the popup tips. You can read this post from php.cn to learn how to turn off tips and sugg
 Advanced Tips for Windows P Not Working on Windows
Apr 11, 2025 am 12:49 AM
Advanced Tips for Windows P Not Working on Windows
Apr 11, 2025 am 12:49 AM
You must be familiar with the Windows P shortcut if you have more than one monitor. However, the Windows P not working properly might happen occasionally. If you are facing this problem, this post from php.cn can help you indeed.
 Difference Between RAID Recovery and Hard Drive Recovery
Apr 17, 2025 am 12:50 AM
Difference Between RAID Recovery and Hard Drive Recovery
Apr 17, 2025 am 12:50 AM
Data recovery is always a heated topic. To successfully restore data from your device, you should know how it stores data. You can learn the difference between RAID recovery and hard drive recovery from this php.cn post.
