
 Mobile Tutorial
Android Phone
How to correctly install and debug a Toshiba TV (step by step to teach you to easily enjoy the fun of a Toshiba TV)
Mobile Tutorial
Android Phone
How to correctly install and debug a Toshiba TV (step by step to teach you to easily enjoy the fun of a Toshiba TV)
How to correctly install and debug a Toshiba TV (step by step to teach you to easily enjoy the fun of a Toshiba TV)

Toshiba TV is a high-quality TV product with rich functions and excellent picture quality. However, in order to fully enjoy the fun of this TV, correct installation and commissioning is very critical. This article will focus on the installation and debugging methods of Toshiba TVs, introducing detailed steps and precautions to help readers get started quickly.

Are you troubled by the choice of where to install your TV? Before deciding on the location of your television, it is necessary to consider a variety of factors to ensure the best viewing experience. PHP editor Yu Zai will tell you in detail, from viewing angles to avoiding direct sunlight, to ensuring ventilation, analyzing the precautions for TV installation to help you create a comfortable home environment. Stay tuned below to discover the secrets to creating the perfect movie-watching space.
Two: Prepare necessary tools
During the installation process, we need to prepare some necessary tools, such as screwdrivers, electric drills, levels, etc. These tools will help us better install and debug.
Three: Fix the TV base
According to the instructions in the instruction manual, use a screwdriver to fix the TV base to the screw hole on the back of the TV. Make sure the base is securely mounted to prevent the TV from tilting or shaking.
Four: Place the TV on the stand
According to the design of the stand and the shape of the TV base, gently place the TV on the stand and make sure it is stable. Be careful not to use excessive force to avoid damage.
Five: Turn on the power and plug in the signal source
Plug the power cord of the TV into the power socket, and plug the signal source cord into the corresponding interface, such as HDMI interface or AV interface. Make sure the plug is tightly connected to the connector to avoid loosening.
Six: Turn on the TV and perform basic settings
Press the power switch of the TV and wait for the TV to start. Follow the on-screen guidance to complete basic settings, such as selecting language, time zone, wireless network connection, etc.
Seven: Adjust the brightness and color of the picture
Enter the settings menu of the TV, find the picture-related options, and adjust the brightness, contrast, color saturation and other parameters according to personal preferences to obtain a viewing effect that is more suitable for you.
Eight: Set the audio output mode
In the settings menu, find the audio-related options and select the appropriate audio output mode, such as stereo, surround sound, etc. Depending on your audio equipment, choose the appropriate settings for a better sound experience.
Nine: Connect to the network and other peripherals
If you need to connect to a wireless network, enter the network settings menu and follow the instructions to connect. At the same time, if there are other peripherals that need to be connected, such as game consoles, speakers, etc., they can also be connected through the HDMI interface or other interfaces.
Ten: Detect and adjust the signal source
In the settings menu of the TV, find the options related to the signal source to detect and adjust the signal source. Make sure all sources are displaying properly and make adjustments as needed.
Eleven: Install the wall-mounting bracket (optional)
If you plan to hang the TV on the wall, you can purchase the corresponding wall-mounting bracket and install it according to the instructions in the instruction manual. This saves space and enhances the viewing experience.
Twelve: Pair the remote control
Pair the remote control that comes with the TV with the TV according to the instructions in the manual. Make sure the remote control can operate all functions of the TV properly.
Thirteen: Update the system and software
Enter the system settings menu, find options about system updates, and update the system and software. This ensures that the TV has the latest features and bug fixes.
Fourteen: Adjust other functions and settings
Further adjust other functions and settings of the TV according to personal needs and preferences, such as home mode, sleep timer, automatic shutdown, etc. These features provide a more personalized and convenient experience.
Fifteen:
Through the introduction of this article, we understand how to correctly install and debug a Toshiba TV. From choosing the appropriate installation location to debugging various functions, we can easily enjoy the high-quality picture quality and rich functions brought by Toshiba TVs. Hope this article helps you!
The above is the detailed content of How to correctly install and debug a Toshiba TV (step by step to teach you to easily enjoy the fun of a Toshiba TV). For more information, please follow other related articles on the PHP Chinese website!

Hot AI Tools

Undresser.AI Undress
AI-powered app for creating realistic nude photos

AI Clothes Remover
Online AI tool for removing clothes from photos.

Undress AI Tool
Undress images for free

Clothoff.io
AI clothes remover

Video Face Swap
Swap faces in any video effortlessly with our completely free AI face swap tool!

Hot Article
Hot Tools

Notepad++7.3.1
Easy-to-use and free code editor

SublimeText3 Chinese version
Chinese version, very easy to use

Zend Studio 13.0.1
Powerful PHP integrated development environment

Dreamweaver CS6
Visual web development tools

SublimeText3 Mac version
God-level code editing software (SublimeText3)
Hot Topics
 1664
1664
 14
1422
52
1316
25
1267
29
1239
24
14
1422
52
1316
25
1267
29
1239
24

 How to restore the original appearance of mobile phone desktop icons (easily solve the problem of mobile phone desktop icon confusion)
Sep 02, 2024 pm 03:05 PM
How to restore the original appearance of mobile phone desktop icons (easily solve the problem of mobile phone desktop icon confusion)
Sep 02, 2024 pm 03:05 PM
In the process of daily use of mobile phones, we often encounter the situation where the mobile phone desktop icons are messed up, which bothers us. However, with some simple operations, we can easily restore the original appearance of the mobile phone desktop icons. This article will introduce some effective methods to solve this problem. Back up desktop layout Before restoring mobile phone desktop icons, we first need to back up the current desktop layout. Open the phone settings, find the "Desktop and Wallpaper" option, then click the "Backup and Restore" button, select "Backup Desktop Layout", and the phone will automatically save the current desktop layout. Use the icon manager that comes with the system. Most mobile phone systems provide the icon manager function, which can help us restore mobile phone desktop icons. Open your phone settings and find "Apps & Notifications"
 How to deactivate the safety mode of oppo mobile phones (quickly and easily deactivate the safety mode of oppo mobile phones)
Sep 02, 2024 pm 03:38 PM
How to deactivate the safety mode of oppo mobile phones (quickly and easily deactivate the safety mode of oppo mobile phones)
Sep 02, 2024 pm 03:38 PM
In some cases, your Oppo phone may enter safe mode, resulting in the inability to use the phone's functions normally. In this situation, you may feel confused and anxious. However, don't worry! This article will introduce you to some quick and easy methods to disable the safe mode of your Oppo phone and let you use your phone again. 1. Check the battery power If the battery power of your OPPO phone is too low, it may cause the phone to automatically enter safe mode. Please make sure your phone is fully charged and try restarting your phone. Press and hold the power button In some cases, OPPO phones can exit safe mode by long pressing the power button. Try holding down the power button for a few seconds to see if you can exit safe mode. Check the volume keys Sometimes, pressing the wrong combination of volume keys will also
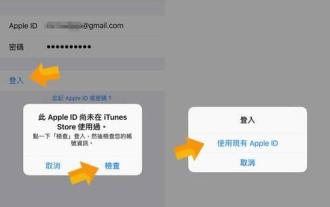 Steps and precautions for registering a Hong Kong Apple ID (enjoy the unique advantages of the Hong Kong Apple Store)
Sep 02, 2024 pm 03:47 PM
Steps and precautions for registering a Hong Kong Apple ID (enjoy the unique advantages of the Hong Kong Apple Store)
Sep 02, 2024 pm 03:47 PM
Apple's products and services have always been loved by users around the world. Registering a Hong Kong Apple ID will bring more convenience and privileges to users. Let’s take a look at the steps to register a Hong Kong Apple ID and what you need to pay attention to. How to register a Hong Kong Apple ID When using Apple devices, many applications and functions require using Apple ID to log in. If you want to download applications from Hong Kong or enjoy the preferential content of the Hong Kong AppStore, it is very necessary to register a Hong Kong Apple ID. This article will detail the steps on how to register a Hong Kong Apple ID and what you need to pay attention to. Steps: Select language and region: Find the "Settings" option on your Apple device and enter
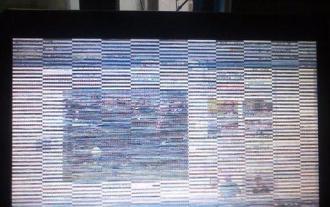 Solution to the problem of blurry screen on Samsung monitor (how to deal with the phenomenon of blurry screen on Samsung monitor)
Sep 04, 2024 pm 01:32 PM
Solution to the problem of blurry screen on Samsung monitor (how to deal with the phenomenon of blurry screen on Samsung monitor)
Sep 04, 2024 pm 01:32 PM
With the continuous development of technology, monitors have become an indispensable part of people's daily life and work. However, sometimes we may encounter some problems, such as screen blur on Samsung monitors. This article will introduce some common solutions to help you better deal with this problem. 1. Check whether the connection cable is secure - make sure the VGA, DVI or HDMI cables are intact and firmly connected to the monitor and computer or other devices. - Check whether the interface of the connecting cable is loose or dirty, and clean or replace it if necessary. 2. Adjust resolution and refresh rate - Adjust the resolution and refresh rate of the monitor on your computer system to ensure it matches the monitor's default settings. - Try different settings to see if they can resolve the blurry screen issue.
 How to identify genuine and fake shoe boxes of Nike shoes (master one trick to easily identify them)
Sep 02, 2024 pm 04:11 PM
How to identify genuine and fake shoe boxes of Nike shoes (master one trick to easily identify them)
Sep 02, 2024 pm 04:11 PM
As a world-renowned sports brand, Nike's shoes have attracted much attention. However, there are also a large number of counterfeit products on the market, including fake Nike shoe boxes. Distinguishing genuine shoe boxes from fake ones is crucial to protecting the rights and interests of consumers. This article will provide you with some simple and effective methods to help you distinguish between real and fake shoe boxes. 1: Outer packaging title By observing the outer packaging of Nike shoe boxes, you can find many subtle differences. Genuine Nike shoe boxes usually have high-quality paper materials that are smooth to the touch and have no obvious pungent smell. The fonts and logos on authentic shoe boxes are usually clear and detailed, and there are no blurs or color inconsistencies. 2: LOGO hot stamping title. The LOGO on Nike shoe boxes is usually hot stamping. The hot stamping part on the genuine shoe box will show
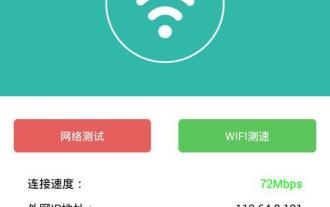 How to check WiFi password on Android phone (simple operation allows you to easily obtain the password of the connected WiFi)
Sep 02, 2024 pm 05:10 PM
How to check WiFi password on Android phone (simple operation allows you to easily obtain the password of the connected WiFi)
Sep 02, 2024 pm 05:10 PM
With the popularity of wireless networks, we often connect to different WiFi networks, but sometimes we forget the password of a certain WiFi network. This article will introduce how to check the password of the connected WiFi on an Android phone, so that you can easily obtain and record it. Paragraph 1. Enter the WiFi settings page through system settings. Enter the WiFi settings page by clicking the "WiFi" option in the phone settings. 2. Select the connected WiFi network. In the WiFi settings page, find and click the name of the connected WiFi network. 3. Enter the WiFi network details page. In the pop-up window, click "Network Details" or similar options to enter the WiFi network details page. 4. Display the high speed of the connected WiFi
 Choose the best video player software (compare the pros and cons of different video player software)
Sep 02, 2024 pm 03:03 PM
Choose the best video player software (compare the pros and cons of different video player software)
Sep 02, 2024 pm 03:03 PM
With the popularity of the Internet and smart devices, video has become an indispensable part of people's daily lives. When choosing a video player software, we hope that it can provide a good user experience, stable playback performance, and support a variety of common video formats. This article will introduce several well-known video player software currently on the market, and evaluate them based on their functions and features, so that readers can choose the software that best suits their needs. 1. Introduction and comparison of popular video player software Windows Media Player: easy to use, comes with Windows system, supports common formats, limited functions VLC Media Player: powerful decoding capabilities, widely supports various formats, simple interface PotPlayer: highly customizable Support multiple formats
 How to clean colored silicone mobile phone cases (simple and practical cleaning tips and precautions)
Sep 02, 2024 pm 04:09 PM
How to clean colored silicone mobile phone cases (simple and practical cleaning tips and precautions)
Sep 02, 2024 pm 04:09 PM
Colored silicone phone cases are one of the common accessories for modern mobile phone enthusiasts. However, after a period of use, dirt and dust will inevitably accumulate on the phone case, affecting its appearance and hygiene. How to properly clean colored silicone phone cases is something every mobile phone user should know. This article will introduce you to some simple and practical cleaning tips and precautions to help you clean colored silicone phone cases easily. 1. Preparation before cleaning Before cleaning, first make sure that the phone is turned off and separate the phone from the phone case. Then prepare the following tools: a soft-bristled brush, mild detergent, warm water, and a clean towel. 2. Use a soft-bristled brush to remove most of the dust. Use a soft-bristled brush to gently brush off most of the dust on the surface of the colored silicone phone case. You can place the phone case on a paper towel to prevent the dust from scattering. want
