

how to setup copilot

This article provides a comprehensive guide to setting up and configuring the Copilot extension for effective use. It discusses key settings such as tab size, indentation style, function signature format, and comment style, explaining how to optimize
How do I set up Copilot for the first time?
To set up Copilot for the first time, you'll need to install the Copilot extension from the Visual Studio Marketplace. Once installed, you'll need to sign in with your GitHub account and grant Copilot access to your private repositories. Once you've done that, Copilot will be ready to use.
What settings do I need to configure for Copilot to work effectively?
There are a few settings that you can configure to help Copilot work more effectively for you. These settings include:
- Tab Size: Copilot will default to using the same tab size as your editor. However, you can change this setting to match your personal preferences.
- Indentation Style: Copilot will also default to using the same indentation style as your editor. However, you can change this setting to match your personal preferences.
- Function Signature Format: Copilot can generate function signatures in a variety of formats. You can change this setting to match the format that you prefer.
- Comment Style: Copilot can generate comments in a variety of styles. You can change this setting to match the style that you prefer.
Can I use Copilot with other extensions or plugins?
Yes, you can use Copilot with other extensions or plugins. However, some extensions or plugins may not be compatible with Copilot. If you're unsure whether an extension or plugin is compatible with Copilot, you can consult the extension or plugin's documentation or ask the extension or plugin's author.
The above is the detailed content of how to setup copilot. For more information, please follow other related articles on the PHP Chinese website!

Hot AI Tools

Undresser.AI Undress
AI-powered app for creating realistic nude photos

AI Clothes Remover
Online AI tool for removing clothes from photos.

Undress AI Tool
Undress images for free

Clothoff.io
AI clothes remover

Video Face Swap
Swap faces in any video effortlessly with our completely free AI face swap tool!

Hot Article
Hot Tools

Notepad++7.3.1
Easy-to-use and free code editor

SublimeText3 Chinese version
Chinese version, very easy to use

Zend Studio 13.0.1
Powerful PHP integrated development environment

Dreamweaver CS6
Visual web development tools

SublimeText3 Mac version
God-level code editing software (SublimeText3)
Hot Topics
 1664
1664
 14
1423
52
1317
25
1268
29
1243
24
14
1423
52
1317
25
1268
29
1243
24

 Getting Started With Meta Llama 3.2 - Analytics Vidhya
Apr 11, 2025 pm 12:04 PM
Getting Started With Meta Llama 3.2 - Analytics Vidhya
Apr 11, 2025 pm 12:04 PM
Meta's Llama 3.2: A Leap Forward in Multimodal and Mobile AI Meta recently unveiled Llama 3.2, a significant advancement in AI featuring powerful vision capabilities and lightweight text models optimized for mobile devices. Building on the success o
 10 Generative AI Coding Extensions in VS Code You Must Explore
Apr 13, 2025 am 01:14 AM
10 Generative AI Coding Extensions in VS Code You Must Explore
Apr 13, 2025 am 01:14 AM
Hey there, Coding ninja! What coding-related tasks do you have planned for the day? Before you dive further into this blog, I want you to think about all your coding-related woes—better list those down. Done? – Let’
 AV Bytes: Meta's Llama 3.2, Google's Gemini 1.5, and More
Apr 11, 2025 pm 12:01 PM
AV Bytes: Meta's Llama 3.2, Google's Gemini 1.5, and More
Apr 11, 2025 pm 12:01 PM
This week's AI landscape: A whirlwind of advancements, ethical considerations, and regulatory debates. Major players like OpenAI, Google, Meta, and Microsoft have unleashed a torrent of updates, from groundbreaking new models to crucial shifts in le
 Selling AI Strategy To Employees: Shopify CEO's Manifesto
Apr 10, 2025 am 11:19 AM
Selling AI Strategy To Employees: Shopify CEO's Manifesto
Apr 10, 2025 am 11:19 AM
Shopify CEO Tobi Lütke's recent memo boldly declares AI proficiency a fundamental expectation for every employee, marking a significant cultural shift within the company. This isn't a fleeting trend; it's a new operational paradigm integrated into p
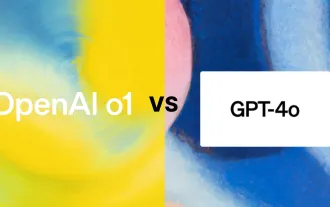 GPT-4o vs OpenAI o1: Is the New OpenAI Model Worth the Hype?
Apr 13, 2025 am 10:18 AM
GPT-4o vs OpenAI o1: Is the New OpenAI Model Worth the Hype?
Apr 13, 2025 am 10:18 AM
Introduction OpenAI has released its new model based on the much-anticipated “strawberry” architecture. This innovative model, known as o1, enhances reasoning capabilities, allowing it to think through problems mor
 A Comprehensive Guide to Vision Language Models (VLMs)
Apr 12, 2025 am 11:58 AM
A Comprehensive Guide to Vision Language Models (VLMs)
Apr 12, 2025 am 11:58 AM
Introduction Imagine walking through an art gallery, surrounded by vivid paintings and sculptures. Now, what if you could ask each piece a question and get a meaningful answer? You might ask, “What story are you telling?
 3 Methods to Run Llama 3.2 - Analytics Vidhya
Apr 11, 2025 am 11:56 AM
3 Methods to Run Llama 3.2 - Analytics Vidhya
Apr 11, 2025 am 11:56 AM
Meta's Llama 3.2: A Multimodal AI Powerhouse Meta's latest multimodal model, Llama 3.2, represents a significant advancement in AI, boasting enhanced language comprehension, improved accuracy, and superior text generation capabilities. Its ability t
 Newest Annual Compilation Of The Best Prompt Engineering Techniques
Apr 10, 2025 am 11:22 AM
Newest Annual Compilation Of The Best Prompt Engineering Techniques
Apr 10, 2025 am 11:22 AM
For those of you who might be new to my column, I broadly explore the latest advances in AI across the board, including topics such as embodied AI, AI reasoning, high-tech breakthroughs in AI, prompt engineering, training of AI, fielding of AI, AI re
