

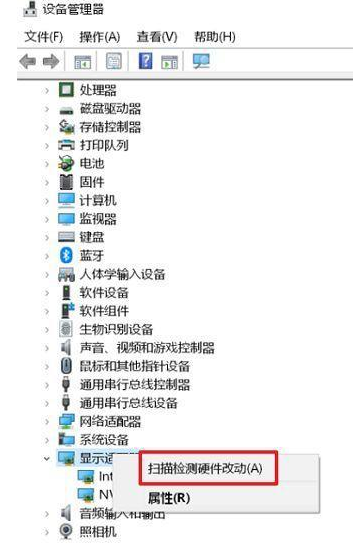
What should I do if the Nvidia control panel cannot be started? Recently, a user asked this question. He wanted to adjust the graphics card settings, but found that the Nvidia control panel could not be opened or started. What happened? In response to this problem, this article brings a detailed solution. The operation is simple and easy to use. I would like to share it with you. If you are interested, please continue reading. Solution to Nvidia control panel failure to open: 1. Confirm whether the Nvidia graphics card device has been recognized normally. 1. Please go to [Device Manager] - [Display Adapter] - to check whether there is an Nvidia graphics card device. 2. If not, please right-click and select [Scan for hardware changes] to scan again.
Question: How to check the driver Version? Knowing driver versions is crucial to keeping your device running smoothly and troubleshooting issues. This guide will detail how to check driver versions on different systems (Windows, macOS, Linux). Instructions: Read on for step-by-step instructions on how to easily check the driver version on your system. PHP editor Xinyi is here to provide you with detailed guidance to ensure you master the knowledge you need.
Visit the ASUS official website to find the driver version of the graphics card for this model
https://www.nvidia.com/Download/index.aspx?lang=cn
2. If downloaded from
Nvidia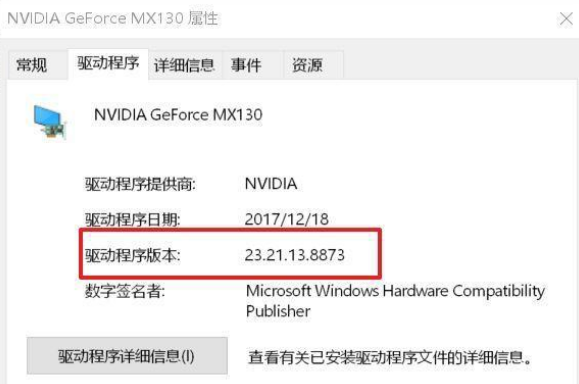 official website#🎜🎜 #DCH
NVIDIA Control Panel, or update to the latest automatic installation through Windows Update. 3. Please confirm whether the integrated graphics card has been disabled
 If the integrated graphics card is disabled, right-click on
 In this case, please right-click [This PC] on the desktop--[Management]--[Services and Applications]--[Services]. (Or enter [Administrative Tools]--[Services] in the Windows search box), double-click the Nvidia Display display service.
The above is the detailed content of What should I do if the Nvidia control panel cannot be started? What should I do if the Nvidia control panel cannot be opened?. For more information, please follow other related articles on the PHP Chinese website!


![[Web front-end] Node.js quick start](https://img.php.cn/upload/course/000/000/067/662b5d34ba7c0227.png)


