
 Web Front-end
JS Tutorial
Effortless Payments with Lemon Squeezy | Next.js Integration Made Simple
Web Front-end
JS Tutorial
Effortless Payments with Lemon Squeezy | Next.js Integration Made Simple
Effortless Payments with Lemon Squeezy | Next.js Integration Made Simple

Introduction
For many entrepreneurs, the payment process feels like the ultimate test of patience. Just when you think you've finally untangled it all, another layer of complications pops up, reminding you that smooth sailing is still a distant dream.

You feel the same? Lemon Squeezy is your aspirin!
This magical payment potion simplifies everything, so you can ditch the payment drama and focus on the fun stuff. No more coding contortions needed. It's like having a payment unicorn on your team.
Why LemonSqueezy?
Well, imagine running your SaaS business without needing a PhD in tax compliance or an endless supply of aspirin for payment headaches. LemonSqueezy streamlines it all, from payments and subscriptions to global tax compliance and fraud prevention.
Plus, it’s got your back with multi-currency support and a storefront ready for all kinds of digital products. It’s like having a tech-savvy business partner who handles all the boring stuff so you can focus on what you do best—creating! Perfect for digital creators, entrepreneurs, and anyone who prefers clicking buttons to coding solutions.
Project Setup
Before we dive in, I just want to say that you can find the full code in my GitHub repo and catch the demo on my Instagram. Now, about this project on GitHub—it’s got two payment options: first, the classic one-time payment; second, the ever-fancy subscription model.
But for this tutorial, we’re going all-in on once time payment. Oh, and for my example, I’m using a monthly house cleaning service as the case study. It might sound a tad absurd, but hey, it’s all part of our coding workout! ?
1. Setup LemonSqueezy
In order to get started you should have created a store in Lemon Squeezy as well as some products and variants.
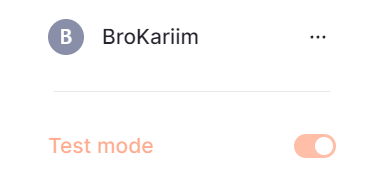
Make sure you have test mode ON. On publishing the store, it will turn OFF; check on the bottom left side.
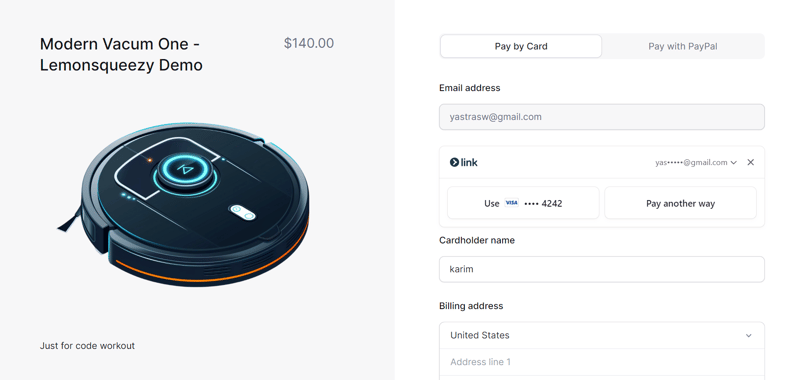
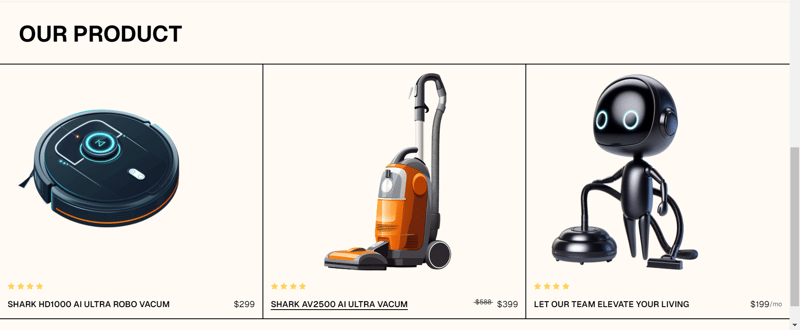
Here's how my product look like
Next, let's generate an API Key at https://app.lemonsqueezy.com/settings/api to connect to our store:
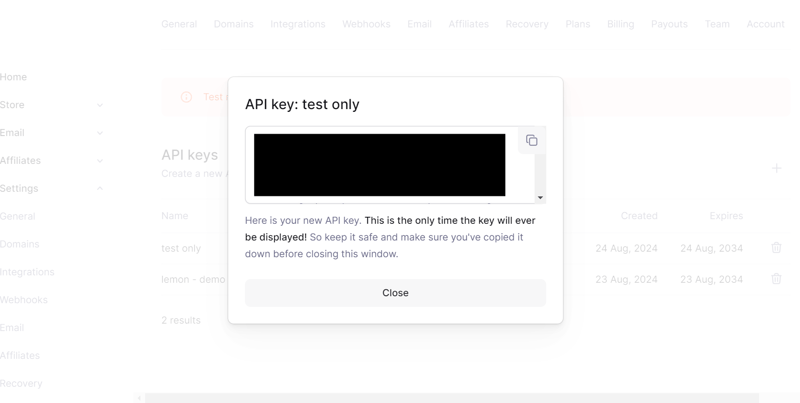
Add this as an environment variable to your Next.js project:
LEMONSQUEEZY_API_KEY="[YOUR API KEY]"
2. Setuup the route handler
Next, create an API route to handle the payment procces, In this part, the final result we want is to obtain a checkoutUrl which we will later pass to the Frontend section.
export const dynamic = "force-dynamic";

export async function POST(req: NextRequest) {
  try {

    const reqData = await req.json();

    if (!reqData.productId) {
      console.error("Product ID is missing");
      return NextResponse.json({ message: "Product ID is required" }, { status: 400 });
    }


    const response = await lemonSqueezyApiInstance.post("/checkouts", {
      data: {
        type: "checkouts",
        attributes: {
          checkout_data: {
            custom: {
              user_id: "123",
            },
          },
        },
        relationships: {
          store: {
            data: {
              type: "stores",
              id: process.env.LEMON_SQUEEZY_STORE_ID?.toString(),
            },
          },
          variant: {
            data: {
              type: "variants",
              id: reqData.productId.toString(),
            },
          },
        },
      },
    });

    const checkoutUrl = response.data.data.attributes.url;
    console.log(response.data);
    return NextResponse.json({ checkoutUrl });
  } catch (error) {
    console.error("Error in POST /api/lemonsqueezy:", error);
    return NextResponse.json({ message: "An error occured" }, { status: 500 });
  }
}
Here's a simple explanation for this code :
- firs we ensures that the page is always dynamically rendered, which is important for real-time data by using export const dynamic = "force-dynamic";
- Define async function that handles POST requests to this API route, The function first checks if a product ID is provided. If not, it returns an error message.
- Next we do Api Call to lemonsqueezy to creates a new checkout session , including details like the store ID and product variant.
- To get storeId, Go to settings for that

- After the Api call , it extracts the checkout URL from the response:
const checkoutUrl = response.data.data.attributes.url;
- Finally, it returns this URL in the response:
return NextResponse.json({ checkoutUrl });
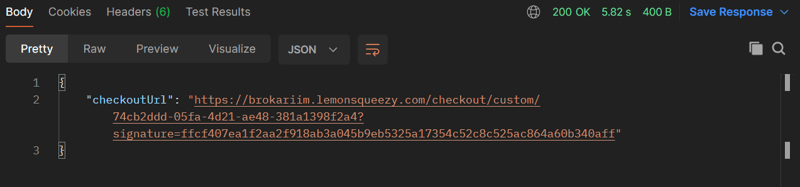
To make sure our API is working correctly, we need to test it. I use a tool called Postman for this. Before we start,we need the variantId of our product You can find this in your LemonSqueezy dashboard.
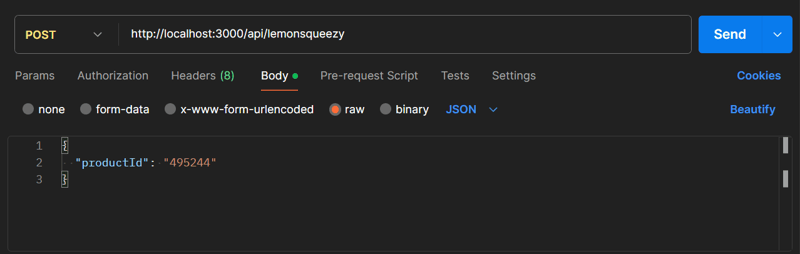
If everything is working correctly, you should get a response that includes a checkoutUrl
3. CreatIng the UI & Call the item data
Now that we've laid the groundwork, our next step is time to make the frontend look good, I am a huge fan of TailwindCSS so i make the pricing card with them
the code is availale here
Next lets set up an async function that calls the API route we just created. The function will send a POST request with the productId and, in return, get the checkout URL. Once you have the URL, open it in a new tab to send the user to the payment page.
 const buyProcut1 = async () => {
    try {
      const response = await axios.post("../api/lemonsqueezy", {
        productId: "495244",
      });

      console.log(response.data);
      window.open(response.data.checkoutUrl, "_blank");
    } catch (error) {
      console.error(error);
      alert("Failed to buy product #1");
    }
  };
That code is about
- Defines an asynchronous function called buyProduct1
- Next send a request to your server with a specific productId, If success opens a new browser tab with the checkout URL
- If anything goes wrong during the process, it catches the problem, logs it, and shows an alert to the user saying the purchase failed.
4. Setup Webhook
Last but not least, we're setting up webhooks to keep track of orders. Head back to your LemonSqueezy dashboard and set up a webhook.
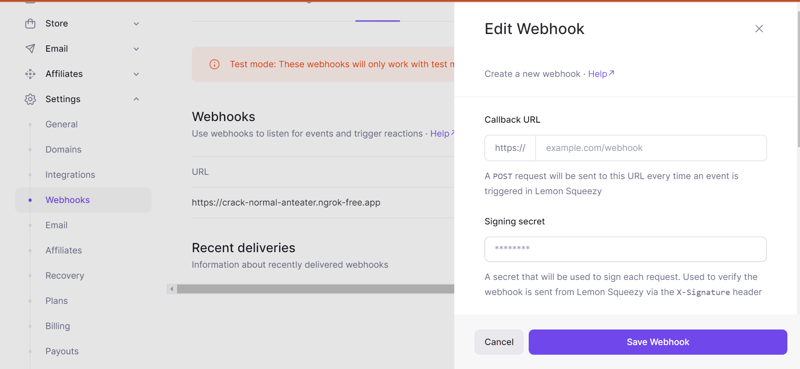
For the URL, you’ll need something publicly accessible, which is tricky during local development. This is where ngrok comes in handy.
ngrok will give you a temporary public URL that forwards to your local machine, You can check this link to setup ngrok in your device :
https://dashboard.ngrok.com/get-started/setup/
Just like before, the code to handle the webhook is already done for you. All you need to do is set it up in your route handler and enjoy the sweet
Let's stay in touch on Instagram, Twitter, and GitHub—where the real magic happens.
Thanks for sticking around! ?

The above is the detailed content of Effortless Payments with Lemon Squeezy | Next.js Integration Made Simple. For more information, please follow other related articles on the PHP Chinese website!

Hot AI Tools

Undresser.AI Undress
AI-powered app for creating realistic nude photos

AI Clothes Remover
Online AI tool for removing clothes from photos.

Undress AI Tool
Undress images for free

Clothoff.io
AI clothes remover

Video Face Swap
Swap faces in any video effortlessly with our completely free AI face swap tool!

Hot Article
Hot Tools

Notepad++7.3.1
Easy-to-use and free code editor

SublimeText3 Chinese version
Chinese version, very easy to use

Zend Studio 13.0.1
Powerful PHP integrated development environment

Dreamweaver CS6
Visual web development tools

SublimeText3 Mac version
God-level code editing software (SublimeText3)
Hot Topics
 1663
1663
 14
1419
52
1313
25
1263
29
1237
24
14
1419
52
1313
25
1263
29
1237
24

 Demystifying JavaScript: What It Does and Why It Matters
Apr 09, 2025 am 12:07 AM
Demystifying JavaScript: What It Does and Why It Matters
Apr 09, 2025 am 12:07 AM
JavaScript is the cornerstone of modern web development, and its main functions include event-driven programming, dynamic content generation and asynchronous programming. 1) Event-driven programming allows web pages to change dynamically according to user operations. 2) Dynamic content generation allows page content to be adjusted according to conditions. 3) Asynchronous programming ensures that the user interface is not blocked. JavaScript is widely used in web interaction, single-page application and server-side development, greatly improving the flexibility of user experience and cross-platform development.
 The Evolution of JavaScript: Current Trends and Future Prospects
Apr 10, 2025 am 09:33 AM
The Evolution of JavaScript: Current Trends and Future Prospects
Apr 10, 2025 am 09:33 AM
The latest trends in JavaScript include the rise of TypeScript, the popularity of modern frameworks and libraries, and the application of WebAssembly. Future prospects cover more powerful type systems, the development of server-side JavaScript, the expansion of artificial intelligence and machine learning, and the potential of IoT and edge computing.
 JavaScript Engines: Comparing Implementations
Apr 13, 2025 am 12:05 AM
JavaScript Engines: Comparing Implementations
Apr 13, 2025 am 12:05 AM
Different JavaScript engines have different effects when parsing and executing JavaScript code, because the implementation principles and optimization strategies of each engine differ. 1. Lexical analysis: convert source code into lexical unit. 2. Grammar analysis: Generate an abstract syntax tree. 3. Optimization and compilation: Generate machine code through the JIT compiler. 4. Execute: Run the machine code. V8 engine optimizes through instant compilation and hidden class, SpiderMonkey uses a type inference system, resulting in different performance performance on the same code.
 JavaScript: Exploring the Versatility of a Web Language
Apr 11, 2025 am 12:01 AM
JavaScript: Exploring the Versatility of a Web Language
Apr 11, 2025 am 12:01 AM
JavaScript is the core language of modern web development and is widely used for its diversity and flexibility. 1) Front-end development: build dynamic web pages and single-page applications through DOM operations and modern frameworks (such as React, Vue.js, Angular). 2) Server-side development: Node.js uses a non-blocking I/O model to handle high concurrency and real-time applications. 3) Mobile and desktop application development: cross-platform development is realized through ReactNative and Electron to improve development efficiency.
 Python vs. JavaScript: The Learning Curve and Ease of Use
Apr 16, 2025 am 12:12 AM
Python vs. JavaScript: The Learning Curve and Ease of Use
Apr 16, 2025 am 12:12 AM
Python is more suitable for beginners, with a smooth learning curve and concise syntax; JavaScript is suitable for front-end development, with a steep learning curve and flexible syntax. 1. Python syntax is intuitive and suitable for data science and back-end development. 2. JavaScript is flexible and widely used in front-end and server-side programming.
 How to Build a Multi-Tenant SaaS Application with Next.js (Frontend Integration)
Apr 11, 2025 am 08:22 AM
How to Build a Multi-Tenant SaaS Application with Next.js (Frontend Integration)
Apr 11, 2025 am 08:22 AM
This article demonstrates frontend integration with a backend secured by Permit, building a functional EdTech SaaS application using Next.js. The frontend fetches user permissions to control UI visibility and ensures API requests adhere to role-base
 From C/C to JavaScript: How It All Works
Apr 14, 2025 am 12:05 AM
From C/C to JavaScript: How It All Works
Apr 14, 2025 am 12:05 AM
The shift from C/C to JavaScript requires adapting to dynamic typing, garbage collection and asynchronous programming. 1) C/C is a statically typed language that requires manual memory management, while JavaScript is dynamically typed and garbage collection is automatically processed. 2) C/C needs to be compiled into machine code, while JavaScript is an interpreted language. 3) JavaScript introduces concepts such as closures, prototype chains and Promise, which enhances flexibility and asynchronous programming capabilities.
 Building a Multi-Tenant SaaS Application with Next.js (Backend Integration)
Apr 11, 2025 am 08:23 AM
Building a Multi-Tenant SaaS Application with Next.js (Backend Integration)
Apr 11, 2025 am 08:23 AM
I built a functional multi-tenant SaaS application (an EdTech app) with your everyday tech tool and you can do the same. First, what’s a multi-tenant SaaS application? Multi-tenant SaaS applications let you serve multiple customers from a sing
