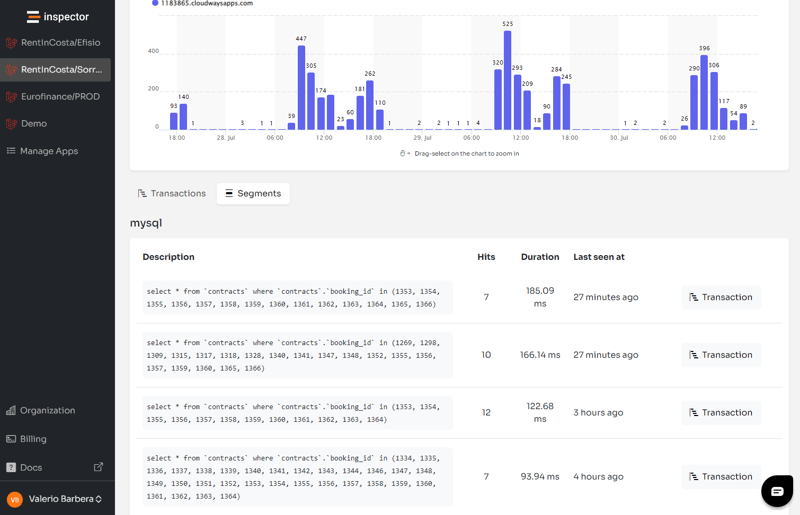
To create a statistical query to build a histogram chart with MySQL, you can use the COUNT() function along with GROUP BY to count occurrences of values within a specified range or category created by the grouping constraint.
Especially for time series data there are a lot of use cases for histograms like monitoring the number of users registered on a daily interval in the last 30 days. We use these queries in our administration backend to monitor some important KPIs.
Unfortunately SQL databases have never had native support for representing histograms, but they are among the most used charts for tracking metrics of all kinds.
In this article I'll show you how to create queries for this purpose and overcome some limitations. Let’s say you have a table named sales with a column named sale_date containing the date and time of each sale. You want to create a histogram chart showing the distribution of sales over monthly intervals.
SELECT
    DATE_FORMAT(sale_date, '%Y-%m') AS sales_month,
    COUNT(*) AS count
FROM
    sales
GROUP BY
    DATE_FORMAT(sale_date, '%Y-%m');
n this query:
This query will give you the count of sales occurrences within each monthly interval, allowing you to create a histogram chart to visualize the distribution of sales over time.
How to fill gaps in the histogram query
Running this query you will probably see some missing months in the resultset, probably because in certain months you have no sales, so the GROUP BY function can’t generate data for these intervals.
How can the query be adjusted to fill these gaps with a default zero value? Otherwise the histogram remains incomplete.
To fill the gaps in the result set and ensure that all months are represented, even if there are no sales in certain months, you can dynamically generate the months for the selected calendar interval using a recursive common table expression (CTE).
It generates a sequence of dates covering the desired time range. Then, you can LEFT JOIN this sequence of dates with your sales data to include all months in the result set.
WITH RECURSIVE DateRange AS (
    SELECT
        DATE_FORMAT(DATE_SUB(DATE_FORMAT(NOW(), '%Y-%m-01'), INTERVAL 11 MONTH), '%Y-%m-01') AS min_date,
        DATE_FORMAT(NOW(), '%Y-%m-01') AS max_date
    UNION ALL
    SELECT
        DATE_FORMAT(DATE_ADD(min_date, INTERVAL 1 MONTH), '%Y-%m-01'),
        max_date
    FROM
        DateRange
    WHERE
        DATE_ADD(min_date, INTERVAL 1 MONTH) <= max_date
)
SELECT
    DATE_FORMAT(DateRange.min_date, '%Y-%m') AS sales_month,
    COUNT(sales.sale_date) AS count
FROM
    DateRange
LEFT JOIN
    sales ON DATE_FORMAT(DateRange.min_date, '%Y-%m') = DATE_FORMAT(sales.sale_date, '%Y-%m')
GROUP BY
    sales_month
ORDER BY
    sales_month;
The DateRange CTE (common table expression) recursively generates a sequence of months covering the time range between the minimum and maximum sale dates in your sales table.
This query dynamically generates the months for the selected calendar interval based on the minimum and maximum sale dates in your sales table, ensuring that all months are represented in the result set.
The SQL solution may be a little less comfortable for developers, and also the need for more customizations may lead to preferring a code-based solution.
In this case you can achieve the same result in three simple steps:
Here is the code snippet using Laravel and the Carbon library:
$dates = [];

// Create the array with the time interval of your interests
for(
    $day = now()->subDays(31);
    $day->startOfDay()->lte(now());
    $day->addDay()
) {
    $dates[] = [
        'day' => $day->format('Y-m-d'),
        'total' => 0,
    ];
}

// Get the result from the GROUP BY query
$sales = $product->sales()->select(DB::raw('DATE(sale_at) as day, CAST(SUM(qty) AS UNSIGNED) as total'))
    ->where('sale_at', '>=', now()->subDays(31))
    ->groupBy('day')
    ->get();

// Merge them
return array_map(function ($date) use ($sales) {
    foreach ($sales as $sale) {
        if ($date['day'] === $sale['day']) {
            return $sale;
        }
    }
}, $dates);
If you are interested in reading more posts about database you can check out the articles below:
Inspector is a Code Execution Monitoring tool specifically designed for software developers. You don't need to install anything on the cloud infrastructure, just install the Laravel package and you are ready to go.
Inspector is super easy to use and require zero configurations.
If you are looking for HTTP monitoring, query insights, and the ability to forward alerts and notifications into your preferred messaging environment try Inspector for free. [Register your account+(https://app.inspector.dev/register).
Or learn more on the website: https://inspector.dev

The above is the detailed content of Create Histogram Charts With MySQL – Tutorial. For more information, please follow other related articles on the PHP Chinese website!


