
How to make multiple windows of Edge browser display independently? Have you ever experienced the annoyance of multiple Edge browser windows stacked on top of each other when they are open at the same time? To solve this problem, we have two simple setup methods for you. Continue reading, PHP editor Yuzai will introduce these methods in detail in this article to help you easily achieve independent display of multiple windows in the Edge browser.
Method 1
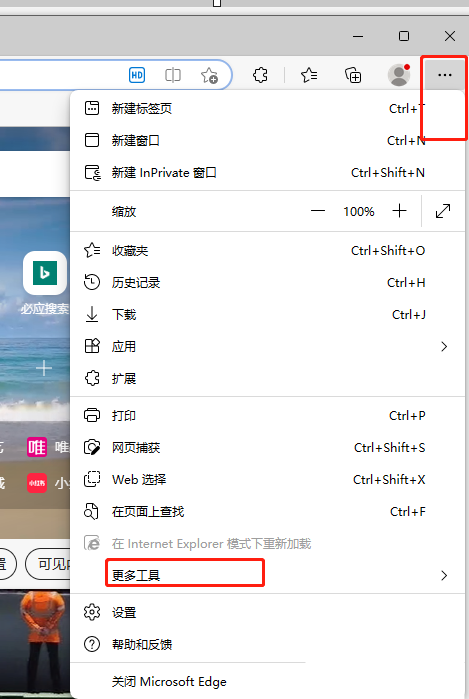
1. The user opens the edge browser software on the computer desktop, enters the home page, clicks on the three-dot icon above, and selects more tool options in the drop-down menu that pops up.
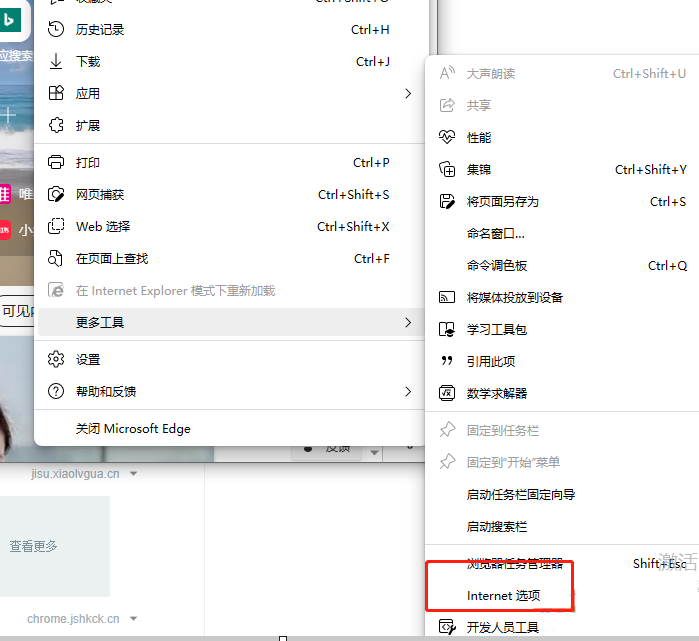
2. Then the relevant tabs will pop up on the right side, and the user can select the internet option.
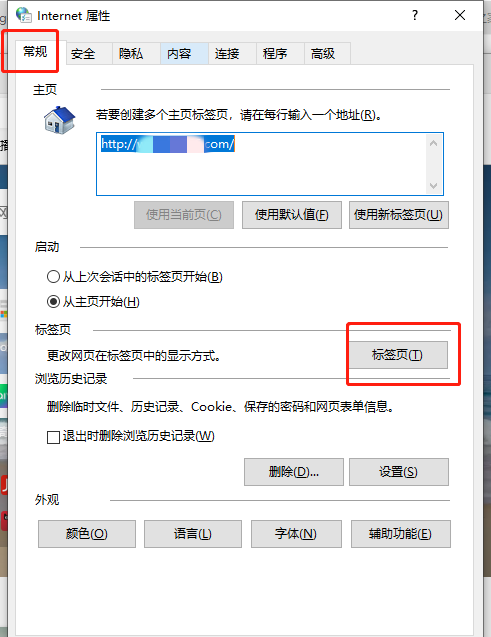
3. In the opened internet options window, the user clicks the tab button in the tab section in the default general tab.
4. Then come to the tab browsing settings window, the user directly checks the Always open pop-up windows in a new tab option in the When encountering a pop-up window section and press the OK button.

5. Return to the internet options window, and the user just presses the apply button in the lower right corner.

Method 2
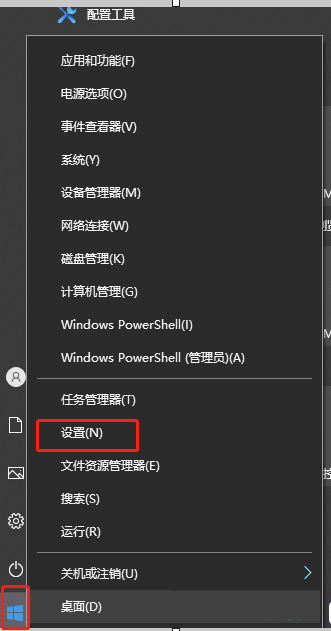
1. The user clicks the start icon on the left side of the computer taskbar, and the relevant tabs will be displayed, and the user can select the setting options.
2. Then come to the windows settings window, the user clicks the system option in the displayed function panel.

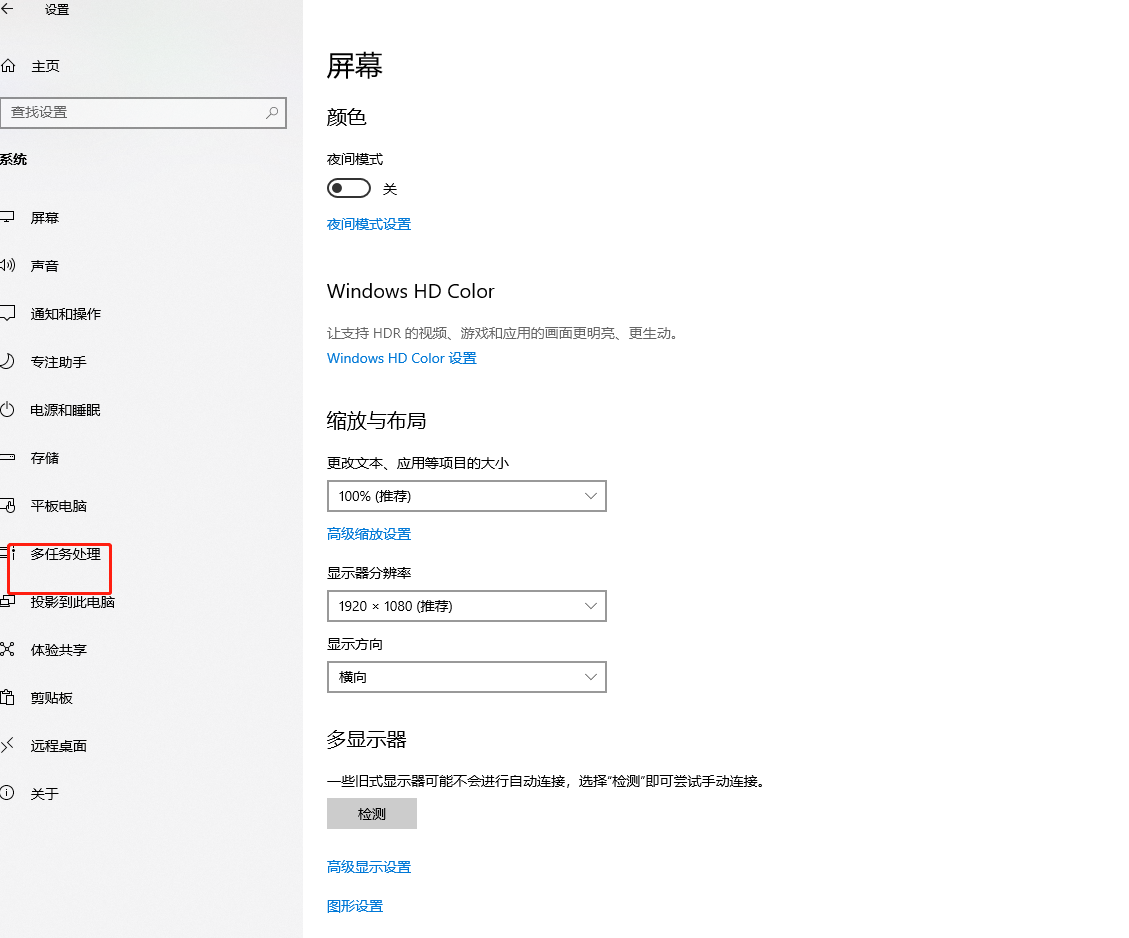
3. In the system settings window that opens, the user switches the tab on the left to the multitasking tab.
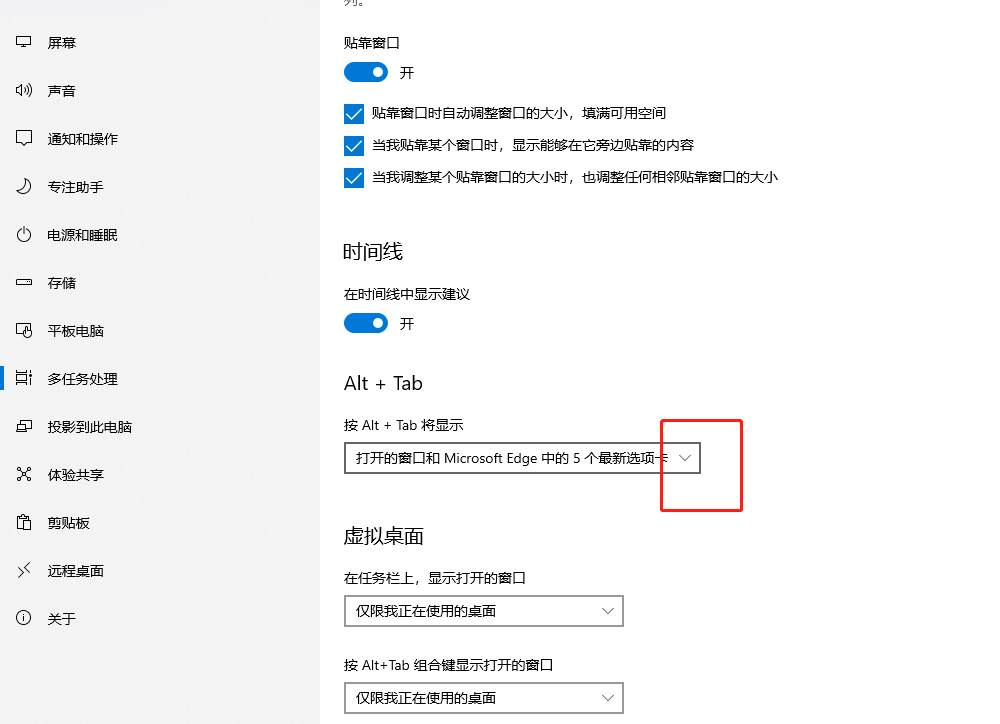
4. At this time, the relevant function options will be displayed on the right page. The user finds the alt+tab section and clicks and presses alt+tab to display the drop-down arrow of the options.
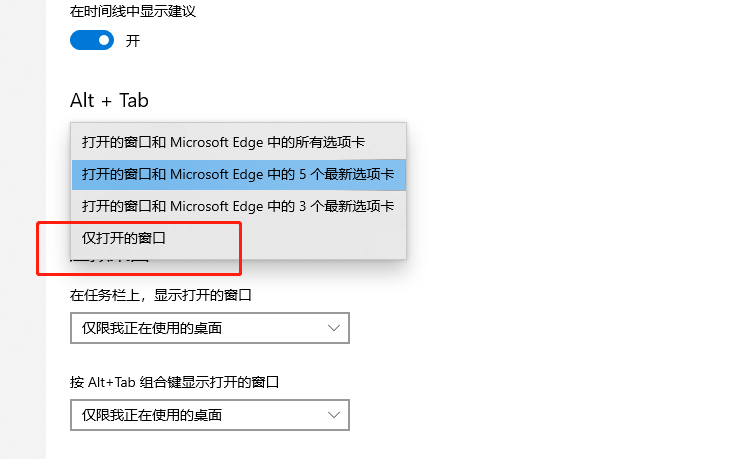
5. In the expanded drop-down options, the user can directly click on only the open window to set it successfully.
The above is the detailed content of How to change multiple windows of edge browser to display independently. Teach you two methods.. For more information, please follow other related articles on the PHP Chinese website!


