

In this guide, we will walk you through the process of integrating passkey authentication into a Python web application using the FastAPI framework. This implementation leverages Corbado's passkey-first web-js package, which streamlines the integration with a passkeys backend. By the end of this tutorial, you will have a working FastAPI app with passkey-based authentication.
Read the full original tutorial here
To follow this tutorial, you should have a basic understanding of Python, FastAPI, HTML, and JavaScript.
Additionally, you will need a Corbado account to use passkey services. Let's get started!
Your FastAPI project will contain several key files. The essential ones include:
├── .env                 # Contains all environment variables
├── main.py              # Contains our webapplication (Handles routes)
└── templates
 ├── index.html       # Login page
 └── profile.html     # Profile page
Before you begin coding, set up a Corbado account. This will allow you to access their passkey services. Follow these steps:
After setting up, you will receive HTML/JavaScript snippets that you'll integrate into your FastAPI project.
Start by creating a main.py file if you haven't already. Install FastAPI and other necessary packages with:
pip install fastapi python-dotenv passkeys
Your main.py will handle the application logic, including setting up routes and managing sessions.
In the root of your project, create a .env file to store your environment variables:
PROJECT_ID=your_project_id
API_SECRET=your_api_secret
Load these variables into your application using python-dotenv:
from dotenv import load_dotenv
import os

load_dotenv()
PROJECT_ID = os.getenv("PROJECT_ID")
API_SECRET = os.getenv("API_SECRET")
Next, set up your HTML templates. In the templates/ directory, create login.html and profile.html. These will include the necessary JavaScript for integrating Corbado's authentication components.
Here is the basic structure for login.html:
<!DOCTYPE html>
<html>
<head>
    <link rel="stylesheet" href="https://unpkg.com/@corbado/web-js@latest/dist/bundle/index.css" />
    <script src="https://unpkg.com/@corbado/web-js@latest/dist/bundle/index.js"></script>
</head>
<body>
    <script>
        (async () => {
            await Corbado.load({
                projectId: "{{ PROJECT_ID }}",
                darkMode: "off",
                setShortSessionCookie: "true",
            });
            Corbado.mountAuthUI(document.getElementById('corbado-auth'), {
                onLoggedIn: () => window.location.href = '/profile',
            });
        })();
    </script>
    <div id="corbado-auth"></div>
</body>
</html>
For the profile.html, include elements to display user data and a logout button:
<!DOCTYPE html>
<html>
  <head>
    <link
      rel="stylesheet"
      href="https://unpkg.com/@corbado/web-js@latest/dist/bundle/index.css"
      />
      <script src="https://unpkg.com/@corbado/web-js@latest/dist/bundle/index.js"></script>
    </head>
    <body>

      <!-- Define passkey-list div and logout button -->
    <h2>:/protected ?</h2>
    <p>User ID: {{USER_ID}}</p>
    <p>Name: {{USER_NAME}}</p>
    <p>Email: {{USER_EMAIL}}</p>
    <div id="passkey-list"></div>
    <button id="logoutButton">Logout</button>


    <!-- Script to load Corbado and mount PasskeyList UI -->
    <script>
 (async () => {
            await Corbado.load({
                projectId: "{{ PROJECT_ID }}",
                darkMode: "off",
                setShortSessionCookie: "true" // set short session cookie automatically
 });

            // Get and mount PasskeyList UI
            const passkeyListElement = document.getElementById("passkey-list"); // Element where you want to render PasskeyList UI
            Corbado.mountPasskeyListUI(passkeyListElement);

            // Get the logout button
            const logoutButton = document.getElementById('logoutButton');
            // Add event listener to logout button
 logoutButton.addEventListener('click', function() {
              Corbado.logout()
 .then(() => {
                        window.location.replace("/");
 })
 .catch(err => {
                        console.error(err);
 });
 });
 })();
    </script>


</body>
</html>
Your controller logic will reside in the main.py file. This file will manage routes for both the login and profile pages. The login route will simply inject the PROJECT_ID into the template, while the profile route will validate the session and fetch user data using Corbado's Python SDK.
Example main.py:
from typing import List
from corbado_python_sdk.entities.session_validation_result import (
    SessionValidationResult,
)
from corbado_python_sdk.generated.models.identifier import Identifier

from fastapi import FastAPI, Request, Response
from fastapi.responses import HTMLResponse
from fastapi.templating import Jinja2Templates
from dotenv import load_dotenv
import os
from corbado_python_sdk import (
    Config,
    CorbadoSDK,
    IdentifierInterface,
    SessionInterface,
)

load_dotenv()

app = FastAPI()

templates = Jinja2Templates(directory="templates")

PROJECT_ID: str = os.getenv("PROJECT_ID", "pro-xxx")
API_SECRET: str = os.getenv("API_SECRET", "corbado1_xxx")

# Session config
short_session_cookie_name = "cbo_short_session"

# Config has a default values for 'short_session_cookie_name' and 'BACKEND_API'
config: Config = Config(
    api_secret=API_SECRET,
    project_id=PROJECT_ID,
)

# Initialize SDK
sdk: CorbadoSDK = CorbadoSDK(config=config)
sessions: SessionInterface = sdk.sessions
identifiers: IdentifierInterface = sdk.identifiers


@app.get("/", response_class=HTMLResponse)
async def get_login(request: Request):
    return templates.TemplateResponse(
        "login.html", {"request": request, "PROJECT_ID": PROJECT_ID}
    )


@app.get("/profile", response_class=HTMLResponse)
async def get_profile(request: Request):
    # Acquire cookies with your preferred method
    token: str = request.cookies.get(config.short_session_cookie_name) or ""
    validation_result: SessionValidationResult = (
        sessions.get_and_validate_short_session_value(short_session=token)
    )
    if validation_result.authenticated:

        emailList: List[Identifier] = identifiers.list_all_emails_by_user_id(
            user_id=validation_result.user_id
            or ""  # at this point user_id should be non empty string since user was authenticated
        )

        context = {
            "request": request,
            "PROJECT_ID": PROJECT_ID,
            "USER_ID": validation_result.user_id,
            "USER_NAME": validation_result.full_name,
            "USER_EMAIL": emailList[0].value,
        }
        return templates.TemplateResponse("profile.html", context)

    else:
        return Response(
            content="You are not authenticated or have not yet confirmed your email.",
            status_code=401,
        )


if __name__ == "__main__":
    import uvicorn

    uvicorn.run(app, host="127.0.0.1", port=8000)
Finally, to run your FastAPI application, install Uvicorn:
pip install 'uvicorn[standard]'
Then, start your server:
uvicorn main:app --reload
Visit http://localhost:8000 in your browser to see the UI component in action.
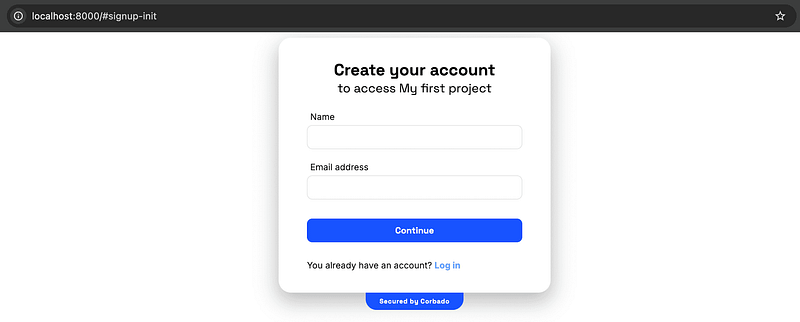
This tutorial demonstrated how to integrate passkey authentication into a FastAPI application using Corbado's web-js package. This setup provides a secure and modern authentication method, while also managing user sessions seamlessly. For more details on extending this implementation or integrating with existing apps, refer to the Corbado documentation.
The above is the detailed content of How to Integrate Passkeys in Python (FastAPI). For more information, please follow other related articles on the PHP Chinese website!
 The difference between Fahrenheit and Celsius
 The role of float() function in python
 Configure Java runtime environment
 What to do if the documents folder pops up when the computer is turned on
 The role of registering a cloud server
 How to buy Ripple in China
 NTSD command usage
 phpstudy database cannot start solution
 Usage of background-image


![[Web front-end] Node.js quick start](https://img.php.cn/upload/course/000/000/067/662b5d34ba7c0227.png)


