How to hide local disk in Win7? Are you eager to protect your important files from prying eyes? PHP editor Xiaoxin provides you with a step-by-step guide detailing how to hide the local disk in Win7. Whether you're worried about privacy or just want to keep your desktop tidy, this tutorial will give you all the information you need to hide your disk drive. Read on to learn the simple steps to follow and ensure your sensitive data stays safe and private.
Principle: Each disk in the Win7 system has a specific drive letter. We can remove the specified drive letter, so as to achieve the purpose of hiding the local disk.
How to hide the local disk drive in Win7:
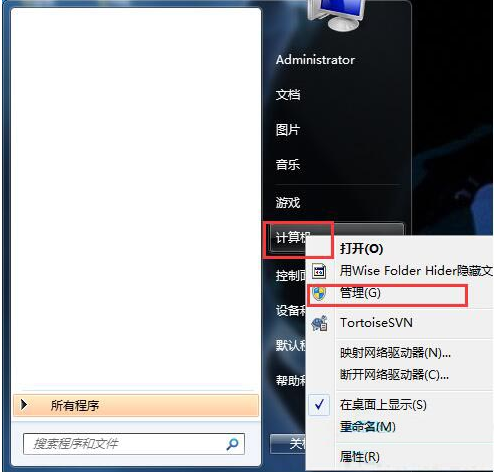
1. Click Start in the taskbar below, select "Computer" in the menu list, right-click and select "Manage" to open.

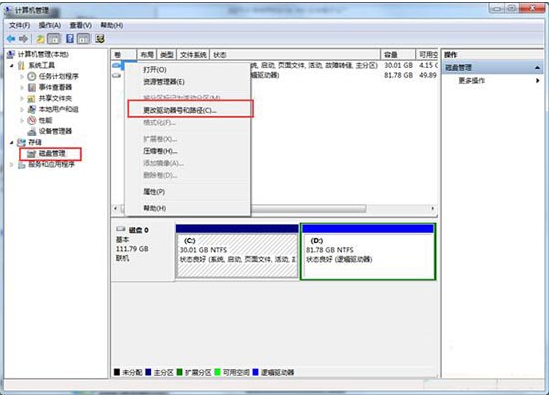
2. In the new interface that opens, click "Disk Management" under the "Storage" option on the left, select the disk you want to hide on the right, right-click and select "Change drive letter and path".

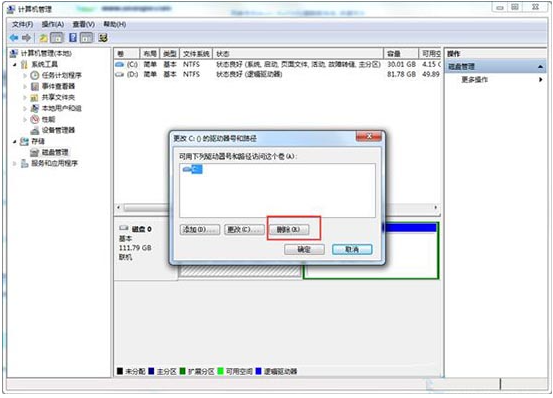
3. Then in the pop-up window, click the "Delete" button.

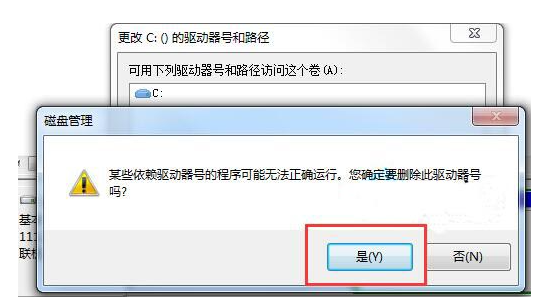
4. Finally, click "Yes" in the pop-up prompt window.

5. In this way, you will no longer be able to view the C drive when you turn on the computer again, but you cannot store files in it now. If you want to display it, go back to disk management. In the interface, just re-set a specified drive letter for the disk without losing files.
The above is the detailed content of How to hide local disk drive in Win7. For more information, please follow other related articles on the PHP Chinese website!
 Blue screen code 0x000009c
 A collection of common computer commands
 You need permission from admin to make changes to this file
 Tutorial on turning off Windows 11 Security Center
 How to set up a domain name that automatically jumps
 What are the virtual currencies that may surge in 2024?
 The reason why header function returns 404 failure
 How to use js code


