Listbox in C#
ListBox in C# is defined as adding a list of elements to the ListBox to operate on single or multiple elements. The difference between the drop-down box and the list box is drop-down box can select only one element at a time, but in the case of the list box, we can select single or multiple elements at a time. The ListBox provides different types of methods, properties, and events. This ListBox is specified under System. Windows.Forms package (namespace).
The ListBox class again contains 3 different types of collections in C#. They are
- ListBox.ObjectCollection: This collection class holds all the elements of the ListBox control.
- ListBox.SelectedObjectCollection: This collection class holds the collection of selected items in the ListBox control.
- ListBox.SelectedIndexCollection: This collection class holds the collection of selected indexes; these elements are a subset of the indexes of the ListBox.ObjectCollection and this specifically selected indexes in the ListBox control.
Types of List Boxes in C#?
- Single Selected ListBox: ListBox can be able to select only a single element from the list.
- Multi Selected ListBox: ListBox can be able to select multiple elements from the list.
Prerequisites for ListBox in C#:
- .Net libraries must be installed on your PC
- Visual Studio set up
How to Create the ListBox in C#?
ListBox can be created in 2 ways:
- Design-Time
- Run-Time
1. Design-Time
It is very easy to create without any code initially. Steps to create a project
Step 1: Open Visual Studio
Click on File=>New=>Project

Select =>Windows Form Application, then
See the below image for a better understanding of the project structure:
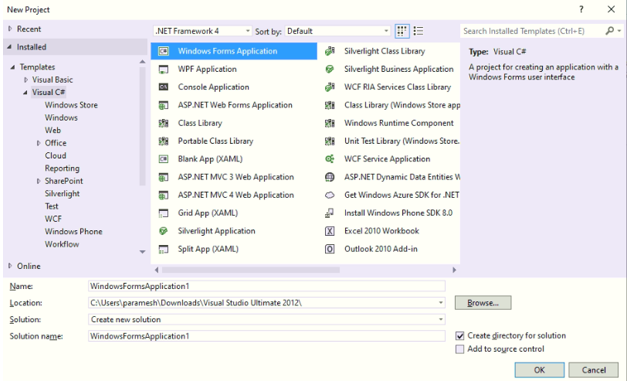
Name the project and click OK then you will get Form1.cs(Design) tab like below
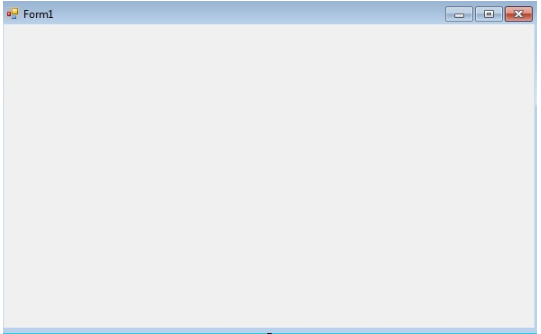
Step 2: Left side of the visual studio or From View, choose Toolbox; next, drag and drop then the required elements onto the Form1.cs(Design) as shown in the above image.
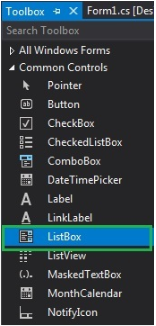
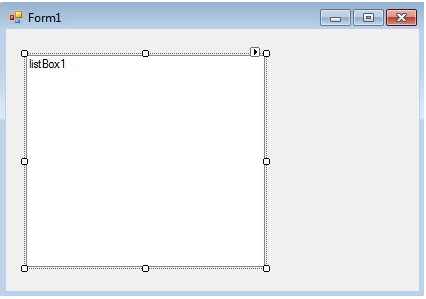
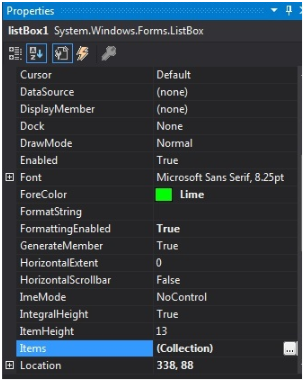
Step 3: After drag and drop select the properties from the right side of the Visual Studio and give some name to the Text property. This is used to write code in the 2nd method Run-Time.
Output:
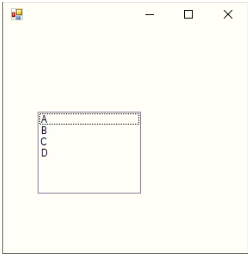
2. Run-Time
This is not directly doing it as per the above method. We have written some programs to create ListBox. This is very simple; first, drag and drop all the required elements like ListBox, Label, TextField, Button, etc. If you double click on any of the dropped elements, we get some C# code that element action methods, we have to write our logic to what we want to do with those elements. Steps to create Run-Time project code to create ListBox
Step 1: Create ListBox control by using ListBox() constructor.
Syntax:
ListBox listBox = new ListBox();
Step 2: After creating the ListBox property, if we want to set the properties of the ListBox like Font, Font.Size, Color to elements, etc.
Syntax:
listBox.Location = new Point(200, 100);
listBox.Size = new Size(100, 90);
listBox.ForeColor = Color.Red;
Step 3: Add the elements to the ListBox.
Syntax:
listBox.Items.Add("A");
listBox.Items.Add("B");
listBox.Items.Add("C");
listBox.Items.Add("D");Step 4: Add this ListBox to the Form.
Syntax:
this.Controls.Add(listBox);
Examples of Listbox in C#
Here are the following examples mentioned below
Example #1 – Creating ListBox and adding elements
Code:
//importing C# required libraries
using System;
using System.Collections.Generic;
using System.ComponentModel;
using System.Data;
using System.Drawing;
using System.Linq;
using System.Text;
using System.Windows.Forms;
//namespace is project name
namespace WindowsFormsApplication26
{
//creating class extends from Form class
public partial class Form1 : Form
{
//constrcutor
public Form1()
{
//initializing components
InitializeComponent();
//Creating list box and add some properties and values to the List Box
listBox2.ForeColor = Color.Red;
listBox2.Items.Add("Java");
listBox2.Items.Add("Python");
listBox2.Items.Add("C++");
listBox2.Items.Add("C");
listBox2.Items.Add("C#");
listBox2.Items.Add("Spring");
listBox2.Items.Add("JavaFX");
listBox2.SelectionMode = SelectionMode.MultiSimple;
}
//method for selectedIndex change operation
private void listBox2_SelectedIndexChanged(object sender, EventArgs e)
{
}
}
}Output:
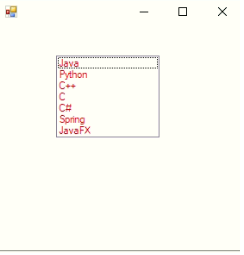
Example #2 – User enters value added it to the list box by clicking the button
Code:
//importing C# required libraries
using System;
using System.Collections.Generic;
using System.ComponentModel;
using System.Data;
using System.Drawing;
using System.Linq;
using System.Text;
using System.Windows.Forms;
//namespace is project name
namespace WindowsFormsApp25
{
//creating class extends from Form class
public partial class Form1 : Form
{
//constrcutor
public Form1()
{
//initializing components
InitializeComponent();
}
//saving the enter values into List box
private void buttonSave_Click(object sender, EventArgs e)
{
//If user enter any values then if block executes
if (this.textBoxName.Text != "")
{
NameList.Items.Add(this.textBoxName.Text);
this.textBoxName.Focus();
this.textBoxName.Clear();
}
//If user did not enter any values then else block executes
else
{
MessageBox.Show("Please enter a name to add..","Error",MessageBoxButtons.OK,MessageBoxIcon.Information);
this.textBoxName.Focus();
}
}
}
}Output:
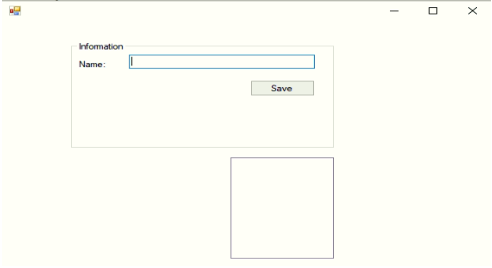
Before entering a value:
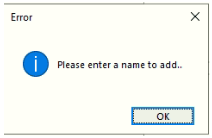
Without entering any value try to click the save button:
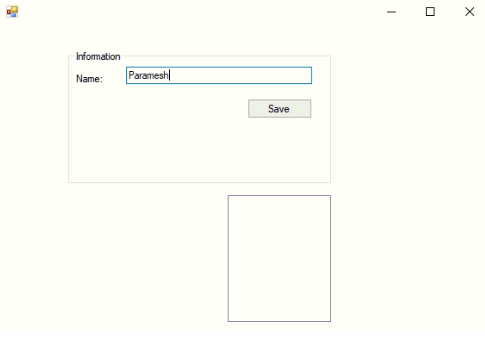
After entering a value:
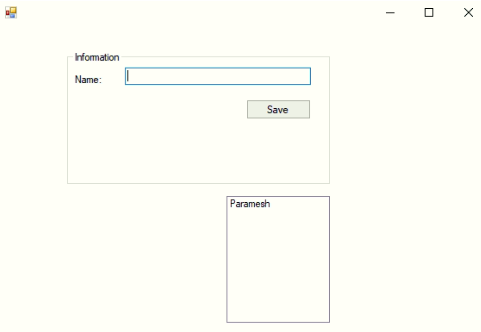
After entering a value and clicking the save button:
Example #3 – Delete, Change the font of List Box values
Code:
//importing C# required libraries
using System;
using System.Collections.Generic;
using System.ComponentModel;
using System.Data;
using System.Drawing;
using System.Linq;
using System.Text;
using System.Windows.Forms;
//namespace is project name
namespace WindowsFormsApp25
{
//creating class extends from Form class
public partial class Form1 : Form
{
//constrcutor
public Form1()
{
//initializing components
InitializeComponent();
}
//saving the enter values into List box
private void buttonSave_Click(object sender, EventArgs e)
{
//If user enter any values then if block executes
if (this.textBoxName.Text != "")
{
NameList.Items.Add(this.textBoxName.Text);
this.textBoxName.Focus();
this.textBoxName.Clear();
}
//If user did not enter any values then else block executes
else
{
MessageBox.Show("Please enter a name to add..","Error",MessageBoxButtons.OK,MessageBoxIcon.Information);
this.textBoxName.Focus();
}
}
//Removing the selected elements
private void button2_Click(object sender, EventArgs e)
{
if (this.NameList.SelectedIndex >= 0)
{
this.NameList.Items.RemoveAt(this.NameList.SelectedIndex);
}
}
//Setting List box selected values font
private void button3_Click(object sender, EventArgs e)
{
if (fontDialog1.ShowDialog() == DialogResult.OK)
{
NameList.Font = fontDialog1.Font;
}
}
}
}Output:
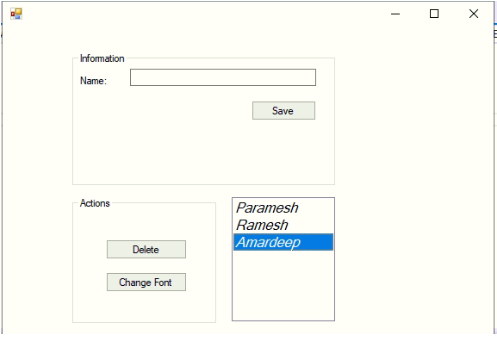
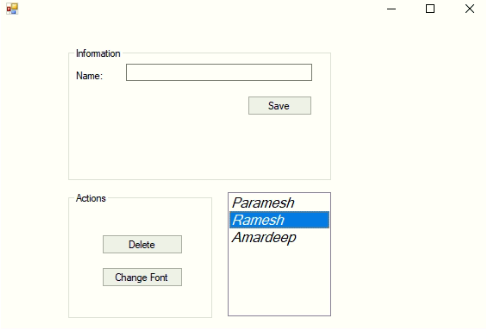
After adding 3 names:
Deleting selected element:
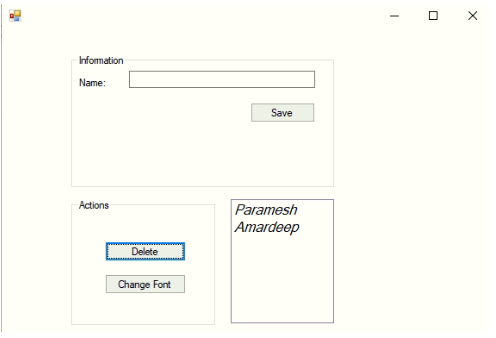
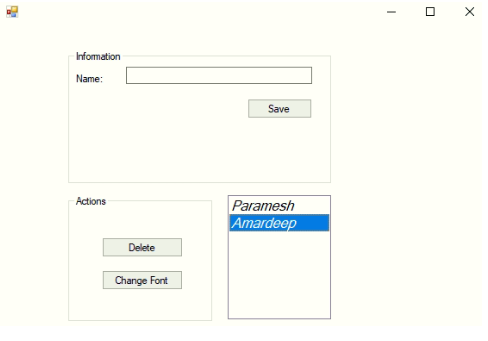
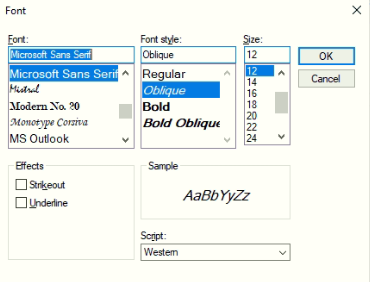
Change the font of the values:
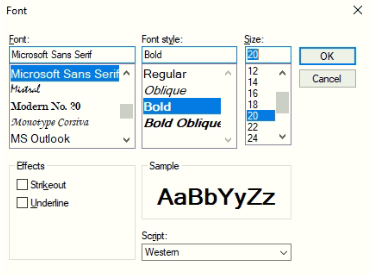
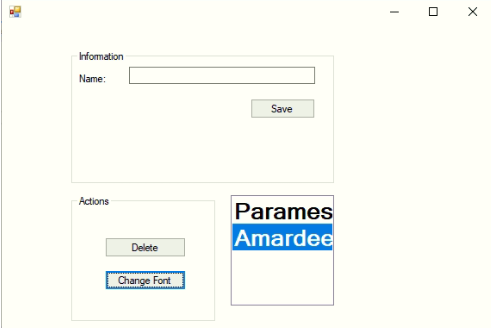
Conclusion
C# List box is used to add multiple elements to perform any specific operation. List Boxes are used to select a single value or multiple values at a time. In C# List Box can be created using Design-Time and Run-Time methods.
The above is the detailed content of Listbox in C#. For more information, please follow other related articles on the PHP Chinese website!

Hot AI Tools

Undresser.AI Undress
AI-powered app for creating realistic nude photos

AI Clothes Remover
Online AI tool for removing clothes from photos.

Undress AI Tool
Undress images for free

Clothoff.io
AI clothes remover

Video Face Swap
Swap faces in any video effortlessly with our completely free AI face swap tool!

Hot Article

Hot Tools

Notepad++7.3.1
Easy-to-use and free code editor

SublimeText3 Chinese version
Chinese version, very easy to use

Zend Studio 13.0.1
Powerful PHP integrated development environment

Dreamweaver CS6
Visual web development tools

SublimeText3 Mac version
God-level code editing software (SublimeText3)

Hot Topics
 Active Directory with C#
Sep 03, 2024 pm 03:33 PM
Guide to Active Directory with C#. Here we discuss the introduction and how Active Directory works in C# along with the syntax and example.
 C# Serialization
Sep 03, 2024 pm 03:30 PM
Guide to C# Serialization. Here we discuss the introduction, steps of C# serialization object, working, and example respectively.
 Random Number Generator in C#
Sep 03, 2024 pm 03:34 PM
Guide to Random Number Generator in C#. Here we discuss how Random Number Generator work, concept of pseudo-random and secure numbers.
 C# Data Grid View
Sep 03, 2024 pm 03:32 PM
Guide to C# Data Grid View. Here we discuss the examples of how a data grid view can be loaded and exported from the SQL database or an excel file.
 Factorial in C#
Sep 03, 2024 pm 03:34 PM
Guide to Factorial in C#. Here we discuss the introduction to factorial in c# along with different examples and code implementation.
 Patterns in C#
Sep 03, 2024 pm 03:33 PM
Guide to Patterns in C#. Here we discuss the introduction and top 3 types of Patterns in C# along with its examples and code implementation.
 The difference between multithreading and asynchronous c#
Apr 03, 2025 pm 02:57 PM
The difference between multithreading and asynchronous is that multithreading executes multiple threads at the same time, while asynchronously performs operations without blocking the current thread. Multithreading is used for compute-intensive tasks, while asynchronously is used for user interaction. The advantage of multi-threading is to improve computing performance, while the advantage of asynchronous is to not block UI threads. Choosing multithreading or asynchronous depends on the nature of the task: Computation-intensive tasks use multithreading, tasks that interact with external resources and need to keep UI responsiveness use asynchronous.
 Prime Numbers in C#
Sep 03, 2024 pm 03:35 PM
Guide to Prime Numbers in C#. Here we discuss the introduction and examples of prime numbers in c# along with code implementation.


