

how to run scrcpy wirelessly

This article describes how to establish a wireless connection using scrcpy, a tool for controlling and mirroring Android devices from a computer. It covers the steps for setting up wireless debugging, using the 'adb tcpip' command, and running scrcpy
How do I wirelessly establish a connection using scrcpy?
To establish a wireless connection using scrcpy, follow these steps:
- Ensure that your device is connected to a Wi-Fi network.
- Install scrcpy on your computer.
- On your Android device, enable USB debugging and wireless debugging.
- Connect your device to your computer using a USB cable.
- Run the following command on your computer:
<code>adb tcpip 5555</code>
- Unplug the USB cable from your device.
- Run the following command on your computer, replacing
[device_ip_address]with the IP address of your device:
<code>scrcpy -s [device_ip_address]</code>
Are there any third-party applications that enable wireless scrcpy functionality?
Yes, there are several third-party applications that enable wireless scrcpy functionality. Some popular options include:
- AirDroid: This application provides a range of features, including wireless screen mirroring and control.
- Vysor: This application is specifically designed for screen mirroring and control of Android devices.
- scrcpy-wireless: This is a modified version of scrcpy that supports wireless connections.
What are the system requirements and configurations necessary for wireless scrcpy operation?
The following system requirements and configurations are necessary for wireless scrcpy operation:
- A computer running a supported operating system (Windows, macOS, or Linux)
- An Android device with USB debugging and wireless debugging enabled
- A Wi-Fi network that both the computer and the device are connected to
The above is the detailed content of how to run scrcpy wirelessly. For more information, please follow other related articles on the PHP Chinese website!

Hot AI Tools

Undresser.AI Undress
AI-powered app for creating realistic nude photos

AI Clothes Remover
Online AI tool for removing clothes from photos.

Undress AI Tool
Undress images for free

Clothoff.io
AI clothes remover

Video Face Swap
Swap faces in any video effortlessly with our completely free AI face swap tool!

Hot Article
Hot Tools

Notepad++7.3.1
Easy-to-use and free code editor

SublimeText3 Chinese version
Chinese version, very easy to use

Zend Studio 13.0.1
Powerful PHP integrated development environment

Dreamweaver CS6
Visual web development tools

SublimeText3 Mac version
God-level code editing software (SublimeText3)
Hot Topics


 How to Take Photos on iOS Without All the Post-Processing Junk
Mar 27, 2025 am 10:40 AM
How to Take Photos on iOS Without All the Post-Processing Junk
Mar 27, 2025 am 10:40 AM
Your iPhone's camera boasts impressive AI-powered features, including selfie relighting and background object removal. However, this processing can sometimes compromise the accuracy of your photos. Fortunately, several alternatives offer greater co
 Trump Just Delayed the TikTok Ban (Again)
Apr 11, 2025 am 10:48 AM
Trump Just Delayed the TikTok Ban (Again)
Apr 11, 2025 am 10:48 AM
TikTok's US ban is again delayed, this time until June 18th. President Trump announced on Truth Social a new executive order extending the deadline by 75 days, allowing more time for ByteDance to find a US buyer. This marks the second delay of the P
 Why is Google Maps full of ads?
Apr 09, 2025 am 12:18 AM
Why is Google Maps full of ads?
Apr 09, 2025 am 12:18 AM
The reason why GoogleMaps is full of advertising is that its business model needs to cover operational costs through advertising. 1) Google maintains free services by embedding various forms of ads in -maps. 2) Users can manage ads by identifying results with “sponsored” or “advertising” tags. 3) Tips to improve the user experience include using offline maps and "Explore" functions.
 The Four Best Alternatives to Zelle
Apr 05, 2025 am 10:29 AM
The Four Best Alternatives to Zelle
Apr 05, 2025 am 10:29 AM
Zelle's standalone app is gone, but its peer-to-peer payment functionality lives on within many banking apps. Check if your bank supports Zelle using their search tool; over 2,200 banks already have it integrated. If not, consider these top Zelle a
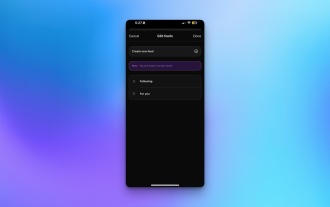 You Can Finally Change Your Default Feed on Threads
Mar 27, 2025 am 10:39 AM
You Can Finally Change Your Default Feed on Threads
Mar 27, 2025 am 10:39 AM
Threads App Update: Choose Your Default Feed and More! Threads finally lets you select a default feed – "Following" or a custom feed – for when you open the app. This means you'll see posts from the accounts you follow, rather than the alg
 Can you get paid to take pictures for Google Maps?
Apr 10, 2025 am 09:36 AM
Can you get paid to take pictures for Google Maps?
Apr 10, 2025 am 09:36 AM
You can make money taking photos for GoogleMaps. Accumulate points by joining the GoogleMaps Local Wizard Program to upload high-quality photos and comments, which can be redeemed for GooglePlay points and other rewards.
 How can I make money on Google Maps?
Apr 02, 2025 pm 04:13 PM
How can I make money on Google Maps?
Apr 02, 2025 pm 04:13 PM
The main ways to make money through GoogleMaps are: 1. Advertising revenue: Serving advertisements through the GoogleAds platform to attract user traffic. 2. API usage fee: Develop applications based on GoogleMaps API and charge users fees. 3. Location data sales: collect and analyze location data and sell it to third parties. Maximize revenue by optimizing advertising, API calls, and data analytics.
 What do Google Maps drivers get paid?
Apr 08, 2025 am 12:14 AM
What do Google Maps drivers get paid?
Apr 08, 2025 am 12:14 AM
Google Maps drivers earn money including base salary and bonuses calculated by kilometers. Their salary structure is based on a contract system, with a base salary of about $3,000 per month, a bonus of $0.1 per kilometer, and additional bonuses can be obtained when driving at night.
