

HTML checkbox Tag

The checkbox is a type of input element available in HTML that allows users to check it or leave it unchecked and allows users to select or deselect the option displayed on the web page. The checkbox enables an application to display input for selection in the form of a box and provides the user access to select or deselect the displayed option. HTML checkbox can be used for user selection in the form of a yes/no statement or agreement kind of statement; depending upon this value, different functionality can be achieved.
Syntax:
Just like for other input type parameters, we will change the type of input to a ‘checkbox’ in the case of a checkbox.
<input type = "checkbox">
Just like other types of input, we can add additional parameters in the syntax.
Function of HTML checkbox Tag
- The HTML checkbox Tag assigns a value as true or false to the input element as the parameter ‘checked.’
- When we click on the checkbox, it modifies the value of this element as true or false, which can be used further for checking.
Examples of HTML checkbox Tag
Given below are the examples of HTML checkbox Tag:
Example #1 – Create a Simple Checkbox.
Code:
<!DOCTYPE html>
<html>
<head>
<title>
Checkbox in HTML
</title>
<style>
.results {
border : green 1px solid;
background-color : aliceblue;
text-align : left;
padding-left : 20px;
height : 150px;
width : 95%;
}
.resultText {
font-size : 20px;
font-style : normal;
color : blue;
}
</style>
</head>
<body>
<div class = "results">
<h2> Check Box Example: </h2>
<!-- Declare input box with type as checkbox, we have also assigned name to this element-->
Checkbox 1 <input type = "checkbox" name = "checkbox1" >
</br>
Checkbox 2 <input type = "checkbox" name = "checkbox2" >
<p id = "result"> </p>
</div>
</body>
</html>Output:
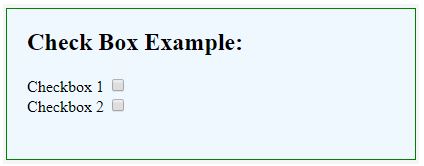
Here, we have declared two input elements as Checkbox 1 and Checkbox 2 on the web page. We have not taken any action on clicking on a checkbox.
Example #2 – Multiple select elements.
Code:
<!DOCTYPE html>
<html>
<head>
<title>
Checkbox in HTML
</title>
<style>
.results {
border : green 1px solid;
background-color : aliceblue;
text-align : left;
padding-left : 20px;
height : 200px;
width : 95%;
}
.resultText {
font-size : 20px;
font-style : normal;
color : blue;
}
</style>
</head>
<body>
<div class = "results">
<h2> Check Box Example: </h2>
<!-- Declare two input boxes with type as checkbox -->
<h4> Choose languages </h4>
<div>
<input type = "checkbox" name = "English">
<label for = "English"> English </label>
</div>
<div>
<input type = "checkbox" name = "Hindi" >
<label for = "Hindi" > Hindi </label>
</div>
<div>
<input type = "checkbox" name = "German" >
<label for = "German" > German </label>
</div>
<div>
<input type = "checkbox" name = "French" >
<label for = "French" > French </label>
</div>
<p id = "result"> </p>
</div>
</body>
</html>Output:

This example shows how we can create multiple checkbox input elements simultaneously. Here, we have created a total of four checkbox elements for choosing the languages. Note that we can select more than one checkbox at a time; this contrasts with radio button input, where only one option can be chosen from all displayed element options.
Example #3 – Checked Attribute.
As observed from the examples until that, the checkbox is unchecked on a web page loading. If we want to display a checkbox with checked as default, we can use the “checked” attribute with the checkbox element.
Code:
<!DOCTYPE html>
<html>
<head>
<title>
Checkbox in HTML
</title>
<style>
.results {
border : green 1px solid;
background-color : aliceblue;
text-align : left;
padding-left : 20px;
height : 200px;
width : 95%;
}
.resultText {
font-size : 20px;
font-style : normal;
color : blue;
}
</style>
</head>
<body>
<div class = "results">
<h2> Check Box Example: </h2>
<!-- Declare two input boxes with type as checkbox -->
<h4> Choose languages </h4>
<div>
<input type = "checkbox" name = "English" checked>
<label for = "English"> English </label>
</div>
<div>
<input type = "checkbox" name = "Hindi" checked>
<label for = "Hindi" > Hindi </label>
</div>
<div>
<input type = "checkbox" name = "German" >
<label for = "German" > German </label>
</div>
<div>
<input type = "checkbox" name = "French" >
<label for = "French" > French </label>
</div>
<p id = "result"> </p>
</div>
</body>
</html>Output:

Here, out of four checkbox elements, we have made two checkboxes to load as checked by default. Note the first two languages are displayed as checked by default.
Example #4 – Checkbox in HTML Form.
Another way of using the checkbox. It will be added in HTML form, and we will see how to identify whether a checkbox is checked.
Code:
<!DOCTYPE html>
<html>
<head>
<title>
Checkbox in HTML
</title>
<style>
.results {
border : green 1px solid;
background-color : aliceblue;
text-align : left;
padding-left : 20px;
height : 200px;
width : 95%;
}
.resultText {
font-size : 20px;
font-style : normal;
color : blue;
}
</style>
</head>
<body>
<div class = "results">
<h2> Check Box Example: </h2>
<form>
<div>
Checkbox 1 <input type = "checkbox" name = "checkbox1" id = "selected" value = "Yes" >
</div>
<br>
<div>
Checkbox 2 <input type = "checkbox" name = "checkbox2" id = "selected" value = "Yes" >
</div>
</br>
<div>
<button type = "submit" > Submit </button>
</div>
</form>
<p id = "result"> </p>
</div>
</body>
</html>Output:

Here, we have included checkbox elements within a form element. This is useful for processing the value of the checkbox on the server. The submission will include the checkbox values when sending the form to the server. The URL value is generated by combining the checkbox name and the value attribute in the checkbox element.
For example, in our case, when both checkboxes are sent as checked, the URL will contain “checkbox1=Yes&checkbox2=Yes” in it.
Conclusion
An input element called a checkbox allows users to choose or unchoose an option presented to them in HTML. In this article, we have seen multiple use cases of the same.
The above is the detailed content of HTML checkbox Tag. For more information, please follow other related articles on the PHP Chinese website!

Hot AI Tools

Undresser.AI Undress
AI-powered app for creating realistic nude photos

AI Clothes Remover
Online AI tool for removing clothes from photos.

Undress AI Tool
Undress images for free

Clothoff.io
AI clothes remover

Video Face Swap
Swap faces in any video effortlessly with our completely free AI face swap tool!

Hot Article
Hot Tools

Notepad++7.3.1
Easy-to-use and free code editor

SublimeText3 Chinese version
Chinese version, very easy to use

Zend Studio 13.0.1
Powerful PHP integrated development environment

Dreamweaver CS6
Visual web development tools

SublimeText3 Mac version
God-level code editing software (SublimeText3)
Hot Topics


 Table Border in HTML
Sep 04, 2024 pm 04:49 PM
Table Border in HTML
Sep 04, 2024 pm 04:49 PM
Guide to Table Border in HTML. Here we discuss multiple ways for defining table-border with examples of the Table Border in HTML.
 Nested Table in HTML
Sep 04, 2024 pm 04:49 PM
Nested Table in HTML
Sep 04, 2024 pm 04:49 PM
This is a guide to Nested Table in HTML. Here we discuss how to create a table within the table along with the respective examples.
 HTML margin-left
Sep 04, 2024 pm 04:48 PM
HTML margin-left
Sep 04, 2024 pm 04:48 PM
Guide to HTML margin-left. Here we discuss a brief overview on HTML margin-left and its Examples along with its Code Implementation.
 HTML Table Layout
Sep 04, 2024 pm 04:54 PM
HTML Table Layout
Sep 04, 2024 pm 04:54 PM
Guide to HTML Table Layout. Here we discuss the Values of HTML Table Layout along with the examples and outputs n detail.
 HTML Input Placeholder
Sep 04, 2024 pm 04:54 PM
HTML Input Placeholder
Sep 04, 2024 pm 04:54 PM
Guide to HTML Input Placeholder. Here we discuss the Examples of HTML Input Placeholder along with the codes and outputs.
 HTML Ordered List
Sep 04, 2024 pm 04:43 PM
HTML Ordered List
Sep 04, 2024 pm 04:43 PM
Guide to the HTML Ordered List. Here we also discuss introduction of HTML Ordered list and types along with their example respectively
 Moving Text in HTML
Sep 04, 2024 pm 04:45 PM
Moving Text in HTML
Sep 04, 2024 pm 04:45 PM
Guide to Moving Text in HTML. Here we discuss an introduction, how marquee tag work with syntax and examples to implement.
 HTML onclick Button
Sep 04, 2024 pm 04:49 PM
HTML onclick Button
Sep 04, 2024 pm 04:49 PM
Guide to HTML onclick Button. Here we discuss their introduction, working, examples and onclick Event in various events respectively.
