

HTML Canvas

This article will see an outline on HTML Canvas; as you already know, HTML is a markup language. To present information to the visitor, you can write HTML with what text to show on display and how it will be shown, i.e. font size, color, orientation, etc. When it comes to adding visuals to a page, you are required to link and embed images to the page, which are stored separately from the HTML file on your host.
But what if you need to draw something on the page?
What is HTML Canvas?
HTML canvas (used via
Syntax:
<canvas id="example" width="200" height="200">
<em>Content here</em>
</canvas>
You can define canvas size via the width and height attribute; an element ID can also be defined in the tag, which makes it possible to use CSS Styles on the canvas element. Following is an example of how you can draw a rectangle using the Canvas element:
Code:
<html>
<head>
<style>
#examplecanvas{border:2px solid green;}
</style>
</head>
<body>
<canvas id = "examplecanvas" width = "500" height = "300"></canvas>
</body>
</html>Output:

Examples of HTML Canvas Drawing
Now that you have seen how you can draw a rectangle using the canvas element let’s take a look at some other objects that can be drawn using the element on a browser output screen.
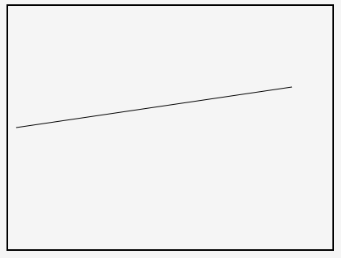
1. Drawing a Line on a Page
moveTo(), stroke() and lineTo() are methods that can be used to draw straight lines on a webpage. As you can guess, moveTo() tells the position of the curser into the element space, and lineTo() is the method that tells the endpoint of the line. The stroke() makes the line visible. Here is the code for your reference:
Code:
<!DOCTYPE html>
<html lang="en">
<head>
<title>Canvas Line Example</title>
<style>
canvas {
border: 2px solid black;
}
</style>
<script>
window.onload = function() {
var canvas = document.getElementById("examplecanvas");
var context = canvas.getContext("2d");
context.moveTo(10, 150);
context.lineTo(350, 100);
context.stroke();
};
</script>
</head>
<body>
<canvas id="examplecanvas" width="400" height="300"></canvas>
</body>
</html>Output:
2. Drawing a Circle on HTML Canvas
Unlike rectangles, there is no particular method in JavaScript to draw a circle. Instead, we can use the arc() method, which is used to draw arcs to draw a circle in the canvas. To get a canvas with a circle on it, you can use the following:
Syntax :
context.arc(centerX, centerY, radius, 0, 2 * Math.PI, false);
Here is an example of a page with a circle:
Code:
<html lang="en">
<head>
<meta charset="utf-8">
<title>Canvas with a circle</title>
<style>
canvas {
border: 3px solid red;
}
</style>
<script>
window.onload = function() {
var canvas = document.getElementById("examplecanvas");
var context = canvas.getContext("2d");
context.arc(250, 150, 90, 0, 2 * Math.PI, false);
context.stroke();
};
</script>
</head>
<body>
<canvas id="examplecanvas" width="500" height="300"></canvas>
</body>
</html>Output:

3. Drawing a Text in HTML Canvas
Text can also be drawn in an HTML Canvas. To get text onto your canvas, you can use the filltext() method. Following is an example of an HTML page that contains text inside a canvas element:
Code:
<html lang="en">
<head>
<meta charset="utf-8">
<title>canvas with text inside the element</title>
<style>
canvas {
border: 3px solid red;
}
</style>
<script>
window.onload = function() {
var canvas = document.getElementById("examplecanvas");
var context = canvas.getContext("2d");
context.font = "bold 28px Arial";
context.fillText("This is text inside a canvas", 60, 100);
};
</script>
</head>
<body>
<canvas id="examplecanvas" width="500" height="200"></canvas>
</body>
</html>Output:

4. Drawing an arc Inside an HTML Canvas
As we discussed with a circle, there is a method called arc() which is used to draw arcs inside HTML Canvas. Here is the syntax of the method where all you have to do is add your variable:
context.arc(centerX, centerY, radiusOfArc, startAngle, endAngle, counterclockwise);
Following is an HTML page that has an arc inside a canvas element:
Code:
<html lang="en">
<head>
<meta charset="utf-8">
<title>Arc inside an HTML Canvas</title>
<style>
canvas {
border: 3px solid red;
}
</style>
<script>
window.onload = function() {
var canvas = document.getElementById("examplecanvas");
var context = canvas.getContext("2d");
context.arc(300, 300, 200, 1.2 * Math.PI, 1.8 * Math.PI, false);
context.stroke();
};
</script>
</head>
<body>
<canvas id="examplecanvas" width="600" height="400"></canvas>
</body>
</html>Output:

5. Drawing Linear or Circular Color Gradient
You can use this method to createLienearGradient() to draw gradients of your choice inside the canvas element. With this method, you will have to use addColorStop() to denote gradient colors.
Syntax:
var gradient = context.createLinearGradient(startX, startY, endX, endY);
Here is a page that has a linear gradient:
Code:
<html>
<body>
<canvas id="examplecanvas" width="400" height="200" style="border:2px solid red;">
If you are seeing this. the browser does not support the HTML5 canvas.</canvas>
<script>
var c = document.getElementById("examplecanvas");
var ctx = c.getContext("2d");
var gradient = ctx.createLinearGradient(0,0,200,0);
gradient.addColorStop(0,"green");
gradient.addColorStop(1,"red");
ctx.fillStyle = gradient;
ctx.fillRect(10,10,300,150);
</script>
</body>
</html>Output:

Similarly, the method of drawing circular gradients is createRadialGradient().
Syntax:
var gradient = context.createRadialGradient(startX, startY, startingRadius, endX, endY, endingRadius);
Code:
<html>
<body>
<canvas id="examplecanvas" width="200" height="100" style="border:2px solid red;">
If you are seeing this. the browser does not support the HTML5 canvas. </canvas>
<script>
var c = document.getElementById("examplecanvas");
var ctx = c.getContext("2d");
var gradient = ctx.createRadialGradient(80,50,10,100,50,90);
gradient.addColorStop(0,"blue");
gradient.addColorStop(1,"yellow");
ctx.fillStyle = gradient;
ctx.fillRect(10,10,150,80);
</script>
</body>
</html>Output:

Conclusion
Now that you are familiar with what it is and how it can be used in web pages, you should feel more confident in your web design skills. While images can be used in some cases, the benefit of HTML canvas is that it is scalable and way lighter in terms of size and processing power.
The above is the detailed content of HTML Canvas. For more information, please follow other related articles on the PHP Chinese website!

Hot AI Tools

Undresser.AI Undress
AI-powered app for creating realistic nude photos

AI Clothes Remover
Online AI tool for removing clothes from photos.

Undress AI Tool
Undress images for free

Clothoff.io
AI clothes remover

Video Face Swap
Swap faces in any video effortlessly with our completely free AI face swap tool!

Hot Article
Hot Tools

Notepad++7.3.1
Easy-to-use and free code editor

SublimeText3 Chinese version
Chinese version, very easy to use

Zend Studio 13.0.1
Powerful PHP integrated development environment

Dreamweaver CS6
Visual web development tools

SublimeText3 Mac version
God-level code editing software (SublimeText3)
Hot Topics


 Table Border in HTML
Sep 04, 2024 pm 04:49 PM
Table Border in HTML
Sep 04, 2024 pm 04:49 PM
Guide to Table Border in HTML. Here we discuss multiple ways for defining table-border with examples of the Table Border in HTML.
 Nested Table in HTML
Sep 04, 2024 pm 04:49 PM
Nested Table in HTML
Sep 04, 2024 pm 04:49 PM
This is a guide to Nested Table in HTML. Here we discuss how to create a table within the table along with the respective examples.
 HTML margin-left
Sep 04, 2024 pm 04:48 PM
HTML margin-left
Sep 04, 2024 pm 04:48 PM
Guide to HTML margin-left. Here we discuss a brief overview on HTML margin-left and its Examples along with its Code Implementation.
 HTML Table Layout
Sep 04, 2024 pm 04:54 PM
HTML Table Layout
Sep 04, 2024 pm 04:54 PM
Guide to HTML Table Layout. Here we discuss the Values of HTML Table Layout along with the examples and outputs n detail.
 HTML Input Placeholder
Sep 04, 2024 pm 04:54 PM
HTML Input Placeholder
Sep 04, 2024 pm 04:54 PM
Guide to HTML Input Placeholder. Here we discuss the Examples of HTML Input Placeholder along with the codes and outputs.
 HTML Ordered List
Sep 04, 2024 pm 04:43 PM
HTML Ordered List
Sep 04, 2024 pm 04:43 PM
Guide to the HTML Ordered List. Here we also discuss introduction of HTML Ordered list and types along with their example respectively
 Moving Text in HTML
Sep 04, 2024 pm 04:45 PM
Moving Text in HTML
Sep 04, 2024 pm 04:45 PM
Guide to Moving Text in HTML. Here we discuss an introduction, how marquee tag work with syntax and examples to implement.
 HTML onclick Button
Sep 04, 2024 pm 04:49 PM
HTML onclick Button
Sep 04, 2024 pm 04:49 PM
Guide to HTML onclick Button. Here we discuss their introduction, working, examples and onclick Event in various events respectively.
